Have you ever wondered what happens to the operating system at the moment when it draws its logo and says "Starting Windows"? And in general, why does it take a long time to load? After all, at the start of the system, no tasks that are complex from a computational point of view are certainly not solved!
What then does loading mean operating system? For the most part, this is the projection of executable modules into memory and the initialization of service data structures. Data structures live in memory, so operations with them, in theory, should be fast. Everything suggests that time is eaten by the process of loading executable modules into memory.
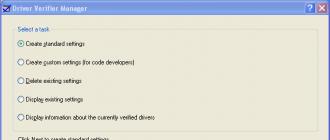
For the sake of interest, let's figure out which modules, in what quantity and in what order are loaded at the start of the OS. To find out, you can, for example, get the system boot log. The experimental OS in my case is Windows 7 Enterprise x64. We will log the boot process using the kernel debugger. There are several options for kernel debuggers, I personally prefer WinDbg. We also need some aids to magically transform the log into something more pleasing to the eye.
Mining and crafting
Debugging setup is well googled, so I will not describe this process in detail. Since we are interested in everything that happens from the moment the system starts, we need to check the "Cycle Initial Break" item, with the help of which the debugger will stop as soon as the kernel debugging subsystem is loaded in the debugged system. Duplicating the output to a file can be done with the ".logopen" and ".logclose" commands, it's simple. Other helpful command- ".cls". It clears the command screen, and yes, only the command screen.The function of interest to us is "MiCreateImageFileMap". This is an internal function of the memory manager that projects an executable file into memory. Memory projection occurs when a section is created, for example, when an executable file is launched. However, keep in mind that if an executable is projected into memory, this is not a guarantee that its code will be executed! This function simply creates a projection, most often "in reserve", so that if someone decides to launch the module for execution, it would be possible to save its loading time. Let's put a logging breakpoint on this function.
If you have enough mana, enter the following command:
bu nt! MiCreateImageFileMap "dt nt! _EPROCESS -d ImageFileName @ $ proc; dt nt! _FILE_OBJECT -d FileName @rcx; g"
The magic line literally means the following:
- bu (Set Unresolved Breakpoint) - set an unresolved breakpoint. It’s not that someone or something didn’t allow it, it’s just that in order to install it, you need to decide at what address to install it. The fact is that it is not known in advance at what address it should be located. When loading any module, the presence in it is checked necessary function, and if such a function is found, the breakpoint is set automatically. This installation method is indispensable when ASLR is enabled - address space randomization, since modules will be loaded at different addresses each time, and a breakpoint set at a fixed address is likely to be out of work.
- nt! MiCreateImageFileMap - the symbol to stop at. WinDbg accepts an entry of the form "module_name! Function_name". In this case, nt is a predefined alias for ntoskrnl.exe.
- what follows is a part of the WinDbg script that will be executed every time you stop at this function. "Dt nt! _EPROCESS -d ImageFileName @ $ proc" in Russian means "display the ImageFileName field of the _EPROCESS structure from the nt module, provided it is displayed at the address defined in the" current process "pseudo-register". Following the separator ";" the command means approximately the same, only the address of the structure is taken from the rcx register, in which the first parameter of the function is passed in the Microsoft x64 ABI. "G" means "go", i.e. continue execution.
A small recommendation for using logging breakpoints: try not to use debugger extensions (commands starting with "!"), Since in this case logging will be an order of magnitude slower.
Go! Release the breakpoint brake and wait. I waited until the desktop was loaded, i.e. I logged in. The resulting "crop" is slightly edited, all unnecessary is cut off for the convenience of further processing and fed to the friend to the python. Let's not focus on parsing the log. We only note that the graph fit into the shape of the Archimedes spiral with further manual correction, since the nodes were superimposed on each other. The resulting graph takes into account the order in which the libraries are loaded. Unfortunately, I had to sacrifice considering the order of loading of executables relative to libraries for the sake of readability of the graph.
Star map

Let's conditionally select several groups of loading.
The OC starts working in the ntoskrnl.exe module, which is the kernel of the OS. And more specifically, with the KiSystemStartup () function. Together with loadable system components, it forms the foundation of the OS: separation of operating modes, basic services for custom applications etc. This group also includes drivers marked for loading at system startup. In a nutshell, this is where Windows is born.

The next node is the session manager. It is represented by the first after the system process starting in Windows - smss.exe. The process is notable for being native Windows process that is, it does not use the Win32 subsystem, which is generally not loaded yet. This process uses only native operating system services through ntdll.dll, which is a user-mode interface for operating system services. Also, this process is a trusted component of the operating system and has exclusive rights, for example, it can create security tokens. But its main purpose is to create sessions and initialize subsystems, both graphical and various executable (Windows, POSIX). This shell rewards everyone according to their needs.

The logon group consists of several processes. In general, they are responsible for initializing sessions. This includes displaying a welcome screen, creating desktops, starting startup processes and initializing the security engine, etc. This broom sweeps away all strangers.

The group of services turned out to be the most massive. It owes much of its volume to the SuperFetch service. This is the one about which they say that it loads in advance on weekends office suite, and at the beginning of the working week - Steam with toys. Superfetch loads a huge number of modules at system startup, so that later "everything will work faster." And besides him, the system has enough service applications and autorun drivers. I think everyone has seen the Services and Applications snap-in. This star of life turns on everything that is needed and not very much in the system.

The last to mention is the beloved explorer.exe. It is noteworthy that by the time it starts up, all the modules it uses are already loaded into memory. The screenshot also includes a certain vcredist_x64.exe - the poor fellow was lying on the desktop of the experimental virtual machine and was loaded into memory by the conductor.

In general, a module has many ways to be loaded into memory. For example, it is enough to request information from the resources of the executable file, including its icon. Specifically, in this example, Explorer checked if the program was an elevated one, i.e. whether it is worth completing the corresponding drawing with a yellow-blue shield to the icon. Once again, I note that loading a module into memory does not mean executing its code!
Personally, I keep the resulting image close by. Dependencies, for example, drivers are well traced on it. Also, paired with the Sysinternals Autoruns utility, you can see at what stage of loading certain modules are pulled up.
The boot graph was built for Windows 7 Enterprise x64 installed on virtual machine VMware. Below are the vector image graph and directly a file in gml format, with which you can play around in any graph editor.
Booting the operating system
The operating system files are located on a disk (hard disk or floppy disk). However, programs can only be executed if they are in random access memory so the operating system files must be loaded into RAM.
When the computer is turned on, it tests its devices and tries to load the OS, the program that controls the computer.
This process is called bootstrap. It runs automatically when the computer is powered on.
After turning on the computer, the operating system is loaded from the system disk into RAM, which must be performed in accordance with the boot program.
The computer contains read-only memory (ROM) containing programs for testing the computer and the first stage of loading the operating system, which are called BIOS ( basic input / output system). The ROM is located on the system board and is powered by a battery, so the programs written in it are not erased when the computer is turned off.
After turning on the computer, these programs begin to run, and information about the progress of this process is displayed on the display screen. First, the hardware is tested and tuned, then the operating system is loaded.
At this stage, the processor accesses the disk and looks in a specific place (1 sector of the disk) for the presence of a very small loader program Master Boot. If the disk is a system disk, then Master Boot is in place, read into memory, and control is transferred to it. In turn, Master Boot looks for the main bootloader on the disk Boot Sector, loads it into memory and transfers control to it. Next, the main loader looks for the rest of the operating system modules and loads them into RAM.
If the drive is not inserted system disk or there is no disk at all, then the following message appears on the monitor screen: Not sуstem disk, and the computer freezes.
After the operating system has finished loading, control is transferred to the command processor. In case of using the interface command line the system prompt appears on the screen, otherwise it loads graphical interface.
All files of the operating system cannot be simultaneously located in the RAM, since the volume of modern operating systems is tens and hundreds of megabytes. For the computer to function, the module that manages the file system, the command processor and the drivers of the connected devices must be in the RAM. Operating system modules providing a graphical interface can be loaded into RAM at the user's request.
 | Self-check questions 1. What is an operating system for? 2. What components are included in the operating system? 3. What is a file called, how is its name assigned? 4. What extensions can be text files? 5. What is the difference between fast and full formatting disk? 6. What is the difference between single-level and hierarchical file structures? 7. What operations with files are possible? 8. What are the main stages of loading the operating system? | ||
| Customization Windows interface Questions to study: 1. Windows desktop. 1.1. Object icons and labels. 1.2. Window. 1.3. Task bar. 1.4. Display panel. 2. The structure of the folder window. 2.1. Title line. 2.2. Window size control buttons. 2.3. System icon. 2.4. Menu bar. 2.5. Toolbar. 2.6. Address bar. 2.7. Working field. 2.8. Status bar. |  | ||
Operating systems of the Windows family are the most versatile. They can be used to work with office programs, for consumer work on the Internet, for educational and entertainment purposes. Like all operating rooms
Many users believe that the computer boots using the operating system, but in fact this is only partially true. In this material, you will learn how the PC actually boots, and you will get acquainted with such important concepts as BIOS, CMOS, UEFI and others.
Introduction
For many people, working with a computer begins after the operating system boots. And this is not surprising, since the vast majority of the time, modern PCs are really used with a convenient graphic Windows shell or any other OS. In this friendly environment for us, we not only run programs, applications or games, but also carry out settings, as well as configure system parameters for our own needs.
But, despite all its multifunctionality, the operating system can not do everything, and in some key points, and is simply powerless. In particular, this concerns the initial boot of the computer, which occurs completely without her participation. Moreover, the launch of the OS itself largely depends on the success of this procedure, which may not happen in the event of problems.
For some, this may be news, but in reality Windows is not responsible for loading the computer "from and to", it only continues it at a certain stage and ends. The key player here is a completely different firmware - BIOS, the purpose and main functions of which we will talk about in this article.
What is BIOS and why is it needed
The key components of any computing device are a bundle of processor and RAM, and for good reason. The processor is rightfully called the heart and brain of any PC, since all the main mathematical operations are entrusted to it. In this case, all commands and data for calculations, the CPU can only take from the RAM. He also sends the results of his work there. The processor does not directly interact with any other information storage, for example, hard disks.
This is where the main problem lies. In order for the processor to start executing operating system commands, they must be in RAM. But when the PC is turned on, the RAM is empty, as it is volatile and cannot store information when the computer is turned off. At the same time, by themselves, without the participation of the system, computer devices cannot put the necessary data into memory. And here we are faced with a paradoxical situation. It turns out that in order to load the OS into memory, the operating system must already be in RAM.
To resolve this situation, even at the dawn of the era of personal computers, IBM engineers suggested using a special small program called BIOS, sometimes called the boot loader.
Word BIOS(BYOS) is an abbreviation of the four English words Basic Input / Output System, which translated into Russian means: "Basic input / output system". This name was given to a set of microprograms responsible for the operation of the basic functions of video adapters, displays, disk drives, disk drives, keyboards, mice and other basic input / output devices.
The main BIOS functions are initial PC startup, testing and initial hardware configuration, resource allocation between devices and activation of the operating system boot procedure.
Where is BIOS stored and what is CMOS
Given that the BIOS is responsible for the very initial stage of booting a computer, regardless of its configuration, this program should be available for basic devices immediately after pressing the PC power button. That is why it is not stored on the hard disk, like most common applications, but is written to a special flash memory chip located on the motherboard. Thus, access to the BIOS and starting the computer is possible even if no storage media are connected to the PC at all.
The earliest computers used chips to store BIOS permanent memory(ROM or ROM), on which the program code itself was recorded once at the factory. Somewhat later, they began to use EPROM and EEROM microcircuits, in which it was possible, if necessary, to rewrite the BIOS, but only with the help of special equipment.
In modern personal BIOS computers is stored in microcircuits created on the basis of flash memory, which can be rewritten using special programs directly on a PC at home. This procedure is usually called flashing and is required to update the firmware to new versions or replace it in case of damage.
Many BIOS chips are not soldered on the motherboard, like all other components, but are installed in a special small connector, which allows you to replace it at any time. Truth, given opportunity it can hardly be useful to you, since cases requiring replacement of the BIOS chip are very rare and practically not found among home users.
Flash memory for BIOS storage can be of different capacities. In the old days, this volume was very small and amounted to no more than 512 KB. Modern versions of the program have become somewhat larger and have a volume of several megabytes. But in any case, in the background modern applications and multimedia files are just minuscule.
In some advanced motherboards, manufacturers can install not one, but two BIOS chips at once - the main and the backup. In this case, if something happens to the main chip, the computer will boot from the backup.
In addition to flash memory, which stores the BIOS itself, there is another type of memory on the motherboard that is provided for storing the configuration settings of this program. It is made using a complementary metal oxide semiconductor or CMOS(Complementary Metal Oxide Semiconductor). It is this abbreviation that is called the specialized memory, which contains the data on starting the computer used by the BIOS.
CMOS memory is powered by a battery installed on the motherboard. This saves all BIOS settings when the computer is unplugged. In older computers, the CMOS memory functions were assigned to a separate microcircuit. In modern PCs, it is part of the chipset.
POST procedure and initial PC boot
Now let's see what the initial boot process looks like and what role the BIOS plays in it.
After pressing the power button of the computer, the power supply starts up first, starting to supply voltage to the motherboard. If it is normal, then the chipset gives a command to reset the internal memory of the central processor and start it up. After that, the processor begins to sequentially read and execute commands written in the system memory, the role of which is played by the BIOS chip.
At the very beginning, the processor receives a command to conduct a self-test of the computer components ( POST- Power-On Self-Test). The POST procedure includes several stages, the passage of most of which you can observe on the PC screen immediately after turning it on. The sequence of what happens before starting to boot the operating system is as follows:
1. First, the main system devices are identified.
3. The third step is to set up the set system logic, or more simply, a chipset.
4. Then there is a search and definition of the video card. If an external (standalone) video adapter is installed in the computer, then it will have its own BIOS, which the main system BIOS will look for in a certain range of memory addresses. If an external graphics adapter is found, the first thing you see on the screen will be an image with the name of the video card, generated by its BIOS.
5. After finding graphics adapter, the integrity check of the BIOS settings and the battery status begins. At this moment, the same mysterious white inscriptions begin to appear on the monitor screen one after another, causing awe among inexperienced users due to a lack of understanding of what is happening. But in fact, nothing supernatural happens at this moment, as you yourself will now see. The first, topmost inscription, as a rule, contains the BIOS developers logo and information about its installed version.

6. Then the test of the central processor starts, after which the display shows data about the installed chip: the name of the manufacturer, the model and its clock frequency.
7. Next begins testing the RAM. If everything goes well, then the total installed amount of RAM is displayed on the screen with the inscription OK.

8. After completing the verification of the main components of the PC, it starts searching for the keyboard and testing other I / O ports. In some cases, at this stage, the computer may stop booting if the system cannot detect the connected keyboard. In this case, a warning will be immediately displayed on the screen.
9. Next, the definition of drives connected to the computer, including optical drives, hard drives and flash drives. Information about the devices found is displayed. In the event that several controllers from different manufacturers are installed on the motherboard, the procedure for their initialization can be displayed on different screens.

Controller definition screenSerialATA having its ownBIOS, with the output of all devices connected to it.
10. At the final stage, resources are allocated between the found internal devices of the PC. In old computers, after that, a summary table with all detected equipment is displayed on the display. V modern cars the table is no longer displayed.
11. Finally, if the POST procedure is successful, the BIOS starts searching the connected drives Main Boot Area(MBR), which contains information about the startup of the operating system and the boot device to which you want to transfer further control.
Depending on the BIOS version installed on the computer, the POST procedure may take place with slight changes from the above-described order, but in general, all the main steps that we have indicated will be performed when each PC boots.
BIOS setup utility
BIOS is a configurable system and has own program setting some parameters of the PC hardware, called BIOS Setup Utility or CMOS Setup Utility... It is called by pressing a special key during the POST self-test procedure. In desktop computers, the Del key is most often used for this purpose, and in laptops F2.
The graphical interface of the hardware configuration utility is very austere and hasn't changed much since the 1980s. All settings here are made using the keyboard only - no mouse operation is provided.

CMOS / BIOS Setup has a lot of settings, but the most demanded ones that may be needed by an ordinary user include: setting the system time and date, choosing the order boot devices, enabling / disabling the additional equipment built into the motherboard (sound, video or network adapters), managing the cooling system and monitoring the temperature of the processor, as well as changing the frequency system bus(overclocking).

For different models of motherboards, the number of configurable BIOS parameters can vary greatly. The widest range of settings is usually found in expensive desktop motherboards, aimed at enthusiasts, hobbyists computer games and overclocking. The most meager arsenal, as a rule, is found in budget boards designed for installation in office computers... They also do not shine with variety BIOS settings overwhelming majority mobile devices... Learn more about different settings BIOS and their impact on the operation of the computer, we will talk in a separate article.
BIOS development and update
As a rule, almost every motherboard model has its own BIOS version, which takes into account its individual technical features: the type of chipset used and the types of soldered peripheral equipment.
BIOS design can be divided into two phases. First, a basic version of the firmware is created, which implements all functions, regardless of the chipset model. Today, such versions are mainly developed by companies American Megatrends(AMIBIOS) and Phoenix Technologies, which acquired the then major player in this market - Award Software (AwardBIOS, Award Modular BIOS, Award WorkstationBIOS).
At the second stage, manufacturers are involved in the development of the BIOS. motherboards... At this point, the basic version is modified and improved for each specific model board, taking into account its features. At the same time, after the motherboard enters the market, work on its BIOS version does not stop. The developers regularly release updates that can fix found bugs, add support for new hardware and expand the functionality of the program. In some cases, updating the BIOS allows you to breathe a second life into a seemingly outdated motherboard, for example, by adding support for a new generation of processors.
What is UEFI BIOS
The basic principles of the system BIOS for desktop computers were formed in the distant 80s of the last century. Over the past decades, the computer industry has developed rapidly, and during this time there were constantly situations when new device models turned out to be incompatible with certain BIOS versions. To solve these problems, developers constantly had to modify the code of the basic I / O system, but in the end, a number of software limitations have remained unchanged since the days of the first home PCs. This situation has led to the fact that the BIOS in its classic version has finally ceased to meet the requirements of modern computer hardware, preventing its distribution in the mass PC sector. It became clear that something needed to be changed.
In 2011, with the launch of motherboards for Intel processors Generation Sandy Bridge, installed in the LGA1155 socket, began the mass introduction of a new software interface for initial computer boot - UEFI.
In fact, the first version of this alternative to the regular BIOS was developed and successfully used by Intel in server systems back in the late 90s. Then, the new interface for bootstrapping a PC was called EFI (Extensible Firmware Interface), but already in 2005 its new specification was called UEFI (Unified Extensible Firmware Interface). Today these two abbreviations are considered synonymous.
As you can see, motherboard manufacturers were in no hurry to move to the new standard, trying to improve the traditional BIOS variations to the last. But the obvious backwardness of this system, including its 16-bit interface, the inability to use more than 1 MB of memory address space, the lack of support for drives with a volume of more than 2 TB and other constant unsolvable compatibility problems with new equipment still became a serious argument for switching to a new software solution. ...
What changes did Intel's new boot interface bring with it, and how does it differ from BIOS? As in the case of the BIOS, the main task of UEFI is to correctly detect the hardware immediately after turning on the PC and transfer control of the computer to the operating system. But at the same time, the changes in UEFI are so profound that it would be simply incorrect to compare it with the BIOS.
BIOS is virtually immutable program code, sewn into a special microcircuit and interacting directly with computer equipment using its own software tools... The procedure for booting a computer using BIOS is simple: immediately after turning on the computer, the hardware is checked and simple universal drivers for basic hardware components. The BIOS then finds the operating system bootloader and activates it. Then the OS is loaded.
The UEFI system can be called a layer between the hardware components of the computer, with their own firmware, firmware, and the operating system, which allows it to also perform the functions of the BIOS. But unlike BIOS, UEFI is a modular programmable interface that includes test, work and boot services, device drivers, communication protocols, functional extensions and its own graphical shell, which makes it look like a very lightweight operating system. At the same time, the user interface in UEFI is modern, supports mouse control and can be localized into several languages, including Russian.

An important advantage of EFI is its cross-platform and processor architecture independence. The specifications of this system allow it to work with almost any combination of chips, be it x86 architecture (Intel, AMD) or ARM. Moreover, UEFI has direct access to all computer hardware and platform independent drivers, which makes it possible to organize, for example, access to the Internet or backup disks.
Unlike BIOS, the UEFI code and all its service information can be stored not only in a special microcircuit, but also on both internal and external partitions. hard drives, as well as network storage. In turn, the fact that boot data can be located on capacious drives allows due to modular architecture give EFI rich functionality. For example, it can be advanced diagnostic tools, or useful utilities, which can be used both at the stage of initial PC boot and after starting the OS.
One more key feature UEFI is the ability to work with hard disks of huge volumes, marked according to the GPT (Guid Partition Table) standard. The latter is not supported by any BIOS modification, since it has 64-bit sector addresses.
Booting a UEFI-based PC, as with the BIOS, begins with initializing the devices. But at the same time, this procedure is much faster, since UEFI can detect several components at once in parallel mode (BIOS initializes all devices in turn). Then, the UEFI system itself is loaded, under the control of which a set of necessary actions are performed (loading drivers, initializing the boot drive, starting boot services, etc.), and only after that the operating system is started.

It may seem that such a multi-step procedure should increase the overall boot time of the PC, but in fact, the opposite is true. With UEFI, the system starts up much faster thanks to built-in drivers and its own bootloader. As a result, before starting, the OS receives comprehensive information about the hardware of the computer, which allows it to start up within a few seconds.
Despite all the progressiveness of UEFI, there are still a number of restrictions that hinder the active development and distribution of this bootloader. The fact is that to implement all the capabilities of the new boot interface, its full support from operating systems is required. To date, only Windows 8 allows full use of UEFI capabilities. 64-bit versions of Windows 7, Vista and Linux with kernel 3.2 and higher have limited support for the new interface. The UEFI capabilities are also used in BootCamp by Apple on their own Mac OS X systems.
Well, how does the computer boot from UEFI if it uses an unsupported operating system (WindowsXP, 32-bit Windows 7) or file markup(MBR)? For such cases, the new boot interface has a built-in compatibility support module(Compatibility Support Module), which is essentially a traditional BIOS. That is why, you can see how many modern computers equipped with motherboards with UEFI, boot in the traditional way in BIOS emulation mode. Most often this happens because their owners continue to use HDD partitions with traditional MBR and do not want to switch to GPT partitioning.
Conclusion
Obviously, unlike traditional BIOS, UEFI is capable of much more than just the boot process. The ability to launch working services and applications, both at the initial stage of PC boot and after launching the operating system, opens up a wide range of new opportunities for both developers and end users.
But at the same time, it is still premature to talk about a complete rejection of the basic I / O system in the near future. First of all, you need to remember that until now most computers are running WindowsXP and 32-bit Windows 7, which are not supported by UEFI. And hard disks marked according to the GPT standard for the most part can be found only in new models of laptops on Windows based 8.
So as long as the majority of users, due to their habits or for some other reason, will be tied to old OS versions and traditional methods of partitioning hard drives, BIOS will remain the main system for starting a computer.
Running from one operating system to another for a long time, if there are two of them installed on the computer, will not work. After carefully studying both, sooner or later you will have to choose only one of them - the main with which work will be carried out mainly. If for the most part only one Windows system is used, its other versions or editions located on other partitions of the disk, does not have to be deleted. Of course, provided that the space hard disk not constrained in size.
The ability to work in the future with other computer systems can be left, but for convenience, simplify the entrance to the main one by removing those temporarily unused from the boot. In this case, starting the computer will be simplified by automatically loading only the required operating system. Another option to make it easier to get started with your computer is not to remove the boot selection window for all systems, but to set the desired version of Windows as the default boot and reduce the time it takes to select other options in the bootloader window.
How to edit the loading process of multiple operating rooms Windows systems installed on one computer - more on that below.
So, in our case, we have a computer with installed versions of Windows 7 and 8.1. When you turn on the computer, we see the bootloader window with a list of systems to choose from.
Every time you boot your computer, get into the desired system you can by making the appropriate choice. Otherwise, after a certain time - and by default it is 30 seconds- Windows will be loaded automatically, the first on the list. In our case it is Windows 7, since it is the last installed on the computer, and it is its bootloader, as we see, that meets us after the computer starts.
Well, let's change that. Let's configure automatic boot of the main system - Windows 8.1. For this, of course, you need to enter it.
We need a settings section, and in Windows 8.1 you can get to it using the context menu on the button.

In the system window, select Extra options.

You can also get to the settings section in Windows 7 using the context menu, but called on the icon "A computer" in the explorer. Among the teams you need to choose.

In Windows 7 we also select Extra options.

Further steps in both systems are identical.
In the appeared system properties window in the tab "Additionally" press the parameters button in last section.

Now you can start editing the boot of multiple systems. Changing the downloaded software Windows default from the options in the drop-down list. In our case, we change the pre-installed Windows 7 to Windows 8.1.

As mentioned, by default the Windows bootloader waits for half a minute so that the user can make the choice of the operating system.

If mainly work is carried out in only one system, it makes no sense to leave half a minute of waiting for its automatic download. The other operating system may not be deprived of the ability to start, but the preset time for selecting boot options may be shortened. In the display of the list of bootable systems, in our case, set 5 second waiting before the main Windows 8.1 system boots automatically. This time will be more than enough to make a choice if you suddenly need to log into Windows 7.

To completely remove another system from the boot list, you must uncheck the option system list display... In this case, only the system selected for boot by default will boot without any time delays.

If the second operating system is ever needed, you can enter it by making this option active again.
After making changes, click "OK" at the bottom of this window, as well as at the bottom of the system properties window.

That's it - the list of loading operating systems has been edited.
Above, we looked at editing the boot of existing operating systems. But often, when starting the computer, we can see a list of operating systems that are already on the computer. No... This is a natural development after the second operating system was removed by the usual formatting of the disk partition or destruction. system files manually, but at the same time the entry about the possibility of loading it in the system configuration was not removed. The bootloader can also display an option to start a non-existent main Windows after the system has been reinstalled... By the way, this is not the main one, but one of the reasons why system specialists advise to implement the so-called clean Windows installation- without saving files previous system and with the formatting of the disk partition.
It is better to remove a non-existent operating system from the boot options altogether so that it does not delay the process of starting the main Windows.
In the main system, we call the command. In Windows 8.1 fast access to it is implemented in the context menu on the button.

We need system configuration section... Enter the value in the command field:
We press "OK".

In Windows 7, it is easier to launch the system configuration window by typing a key query in the search field of the menu.

The system configuration window will appear, go to the tab. We select the entry about loading a non-existent system and delete it.

In our case, the download list contained different versions Windows, and decide on the removed "Seven" it was clearly not difficult for us. But if the download list contains entries about two identical Windows versions, in the orientation with the one to be deleted, the descriptions of the systems will help. Windows, in which we are in fact, will be designated as current.
Save the changes made with the button. After clicking "OK" the system will suggest reboot.

After restarting the computer, we can observe the immediate startup of the main system.
For normal operation of the computer, it is necessary that the main modules of the operating system are in RAM. Therefore, after turning on the computer, an automatic rewriting (loading) of the operating system from the disk into the RAM is organized.
Software works best when it is divided into levels, with each level performing some function and freeing other, higher levels from worrying about the details within their level. Based on this philosophy, the MS-DOS operating system is built on a modular basis and consists of the following components:
Operating system loader;
System files IO.SYS and MSDOS.SYS;
Device drivers.
MS DOS command processor (COMMAND.COM file);
External MS DOS commands.
In addition, MS-DOS, like all other operating systems for the IBM PC, uses built-in computer software called Basic Input / Output System (BIOS).
Let's consider the specified program modules in the order in which they are loaded into the RAM after turning on the PC.
Basic input-output system is the lowest level of control, a kind of interface between the computer's hardware and software. The BIOS directly controls the hardware in the computer and saves other programs from knowing the details of how to do it. BIOS programs are written into the computer's ROM by the manufacturer and carry out:
self-test of the computer when it is turned on (POST program);
initialization, i.e. tincture of computer equipment (determined computer configuration, the necessary values of some registers are set);
execution of service functions and processing of hardware interrupts;
loading the operating system recorded on magnetic disk(BOOT program).
Immediately after turning on the computer, the POST program starts working, checking the operability of the RAM and other computer components. The BIOS then initializes and tries to read from the disk in drive A: the bootloader of the operating system in order to transfer control to it and continue the DOS boot process. If the required files or the floppy disk itself are missing, the search continues to hard drives C :, D :, E: etc. If the boot (or, in other words, the system) disk is not found, a message about this is displayed on the monitor.
Note that after the download is complete, the BIOS service functions (for example, outputting individual bytes to the disk or display screen, reading a character from the keyboard, reading the real-time clock, etc.) are called using interrupts. Interrupt is a hardware mechanism that causes the processor to interrupt the current task and start handling an external event. Such an event can be a signal from external I / O devices, a request for a program, or an error (division by zero, an integer too large, etc.).
Operating system loader is a very short program located in the first sector of each floppy disk and hard disk (hard disk) with the MS DOS operating system. The function of this program is to read from boot disk into the RAM of the DOS system files.
System File IO.SYS is a BIOS extension. This module adjusts the operating system for a specific configuration of the computing complex and allows you to connect new drivers to non-standard input-output devices,
System fileMSDOS.SYS- interrupt handling module. Basically, he maintains the file system and manages the allocation of RAM.
After being read by the bootloader, the system files are permanently located in the computer's RAM, that is, they are resident programs.
If the system files are loaded successfully, the IO.SYS program module sets the required configuration of the computer system. For this purpose, it places drivers of external devices in the computer's RAM.
External drivers devices are separate program files that provide interaction with external devices. The list of plug-in drivers is contained in the CONFIG.SYS configuration file. ...
Command processor completes the boot process of the operating system. After the control of the computer is transferred to the command processor, the latter automatically starts executing a special batch file- AUTOEXEC.BAT (if such a file is present in the root directory of the boot disk). The AUTOEXEC.BAT file specifies the commands and programs that are executed each time the computer is started. Using this file, you can configure the parameters of the operating environment. For example, create a virtual disk, provide a change of print modes, load auxiliary programs, etc.
Files with the .BAT extension play a special role when working in the system environment. They contain a collection of operating system commands or executable file names. After starting the file with the .BAT extension, all the commands recorded in it are executed automatically one after the other.
If the AUTOEXEC.BAT file is not found in the root directory of the disk from which the operating system is loaded, then MS DOS asks the user for the current date and time.
After executing the AUTOEXEC.BAT file, the boot process of the operating system ends. The command processor issues a prompt indicating that MS-DOS is ready to receive commands. The invitation usually looks like A: \> or for example C: \>, if the boot was performed from the hard disk.