Technology Advanced Host Controller Interface (AHCI) is a standard that Intel proposed, it can increase the read / write speed for hard drives connected to a computer via SATA. If your computer has a modern hard drive (ssd for example or a regular hdd sata), and the motherboard supports AHCI mode, you may have thought about how to increase the performance of your PC.
Windows Vista / 7/8 / 8.1 operating systems already have built-in support for the AHCI standard, so if during installation Windows detects that the computer supports AHCI, then the AHCI driver will be installed automatically. Windows XP does not have built-in support for this standard, but it is possible to make friends with them; look for material on this topic separately. In older models of motherboards that have AHCI support at the chipset level, AHCI mode is disabled at the BIOS level. But what about when Windows 7 is already installed? I think many who are faced with this problem know that changing the IDE mode to AHCI in the BIOS, windows simply will not start. And you will most likely get a BSOD (blue screen of death). An option that suggests itself is to change the BIOS mode from IDE to AHCI, then reinstall Windows. BUT! In this case, you lose all the data on the C drive, which can be painful if many applications are installed there and valuable information is stored. The following describes how to switch to AHCI mode without reinstalling the system and data loss on Windows 7. For users. Remember, you carry out all the actions at your own peril and risk, and no one except you bears responsibility for them.
Attention! The following sequence of actions must be performed BEFORE enabling AHCI mode in the BIOS settings. Otherwise, the system will stop loading!
1. Press the key combination Win + R, and in the window that opens, type the command regeditto open the registry editor. To whom it is difficult, you can type regedit directly in the Start menu panel.

2. To the query “Allow the next program to make changes on this computer?” We answer “Yes”.
3. In the registry editor, navigate to the desired branch: HKEY_LOCAL_MACHINE \\ SYSTEM \\ CurrentControlSet \\ services \\ msahci
4. In the right pane, find the parameter Start and edit it ( Edit)

5. Set “ Start”Meaning 0 , and press Ok. Default value (AHCI support is disabled): 3 .

6. Close the registry editor.
7. Restart your computer.
8. During the computer restart, go to the Bios menu and enable AHCI support. Press the F10 key, save the changes and restart the computer again.
9. After loading, Windows 7 will automatically install the AHCI device drivers. After completing their installation, Windows will reboot one more time. ten. That's all! After loading Windows, hard drives will support the AHCI standard, and therefore work faster. Visual performance increase is a very subjective moment! Yes, your computer will become faster, but in addition to the hard drive, the computer has a lot more that can slow it down, so it’s possible that you will not see a clear increase in speed.
That's all. Thanks for reading the article. I hope she was useful to you.
Before you start searching and thoroughly studying information on how to enable AHCI in Windows 10, it is important to understand what AHCI is, why you need to connect this technology, whether all users, regardless of any other circumstances, need to expose their PC to such manipulations.
AHCI allows disk reorganization to improve performance
Do not be lazy and get acquainted with a little theoretical information regarding the appearance in the computer environment of such a new mode as AHCI.
These theoretical knowledge will allow you to correctly make a responsible decision related to the inclusion of this mode on your personal computer.
The focus of new technologies
If you are a vivid representative of PC users who can’t imagine completing work tasks without computer equipment, if you want to find time in the evening to “wander around” the World Wide Web and play the hottest news, play cool games, you’ve certainly heard about the fact that over the past years, developers have focused their efforts on the modernization of disk space.

AHCI mode allows you to increase iron performance
Over time, the hard disk increased in size, so it was very important to find ways to increase the performance of the disk subsystem.
Only after the new interface and the SATA standard appeared, the user was offered three unique technologies.
The first “Hot Plug” technology allows a PC user to immediately act with a drive, including turning it off without turning off the electronic computer itself.
Yes, this technology is useful only to those who have several hard drives installed on their computer. New technology significantly saves time on these tasks.
The second technology, “NCQ,” is responsible for the sequence of tasks. It is she who helps increase the speed of hard drives. This technology is also accelerated by SSDs, which also favors the ability to quickly solve problems associated with the incredibly huge queue of incoming teams.
The third TRIM technology is focused only on modern SSD drives. It contributes to significant acceleration, as well as an increase in the operational life of SSDs.
But specifically, AHCI aims to use the capabilities of SSD, SATA and HDD. In order to experience an incredible increase in speed, it is important that the SATA controller operates in AHCI mode.

Check for AHCI
Having plunged headlong into a theoretical vacuum, making sure that the AHCI mode for Windows 10 is important, many will express a desire to turn it on as soon as possible.
It is important to understand that the new computer equipment on which Windows 7 or 10 is installed is already accompanied not only by the automatic connection of the mode, but also by the automatic installation of drivers. If you still have doubts as to whether the specified mode is supported, whether it is installed on your PC or not, you can use useful tips and find the answer to this question yourself.
Mode Check Algorithm
Checking AHCI mode on Windows 7 or 10 is easy. Initially, you need to open the “Device Manager”, there are two ways to do this.
First of all, click on the "Start" menu, go to the "Control Panel" menu. In the window that opens, in the first rows of the general list there will be such an important “Device Manager”.
You can also open it by writing “Device Manager” in the search bar.
In the opened "Device Manager" it is easy to find the line IDE ATA / ATAPI controllers. Click on it so that this section opens and shows its contents.
If AHCI mode is installed in Windows 7 or 10, and the corresponding drivers are installed with it, in the opened list you can find something resembling one of the entries:
- Standard AHCI1.0 Serial ATA Controller;
- Intel (R) 5 Series6 Port SATA AHCI Controller.

Note that the key to both of these entries is the presence of the word “AHCI” itself. Unfortunately, the absence of the specified word indicates that your mode is disabled, not installed.
In particular, if the word “IDE” flashes in this line, it means that you can confirm that the desired mode is not set for you, you will have to work hard to remove the “IDE” and install AHCI.
If you really want to change everything, then direct your efforts to familiarize yourself with how to enable AHCI mode in Windows 7 or 10.
Enable mode
If Windows is already installed on your smart machine, you will have to make important changes to the registry of the system itself. Following the recommendations of experienced users, you will surely succeed and be crowned with great success.
The main thing is not to make your fantasy adjustments, especially in those cases when you are little familiar with this kind of manipulation.
Mode Connection Algorithm
First of all, you must understand that AHCI mode must be turned on before installing the OS, otherwise the next time you reboot, the operating system simply will not boot.
Run the registry editor, for this you can also type in the search bar the phrase "RegEdit".
In the registry that opens, you will have to carefully review all available branches to find "HKEY_LOCAL_MACHINE \\ SYSTEM \\ CurrentControlSet \\ services \\ msahci".
On the right side of the open window you can find the “Start” key, which you have to edit, respectively, click on the “Modify” parameter.
A new window will open before you, in which you will need to set the numerical parameter. Most often, by default, when the mode is disabled, you can detect the number 3 there, and you should change it to 0.
This completes the work with the registry, close all windows and restart your PC.
When the operating system starts up, call the BIOS. This must be done in order to make some changes that activate AHCI on the motherboard.
It’s easy to figure out how to change the BIOS IDE to AHCI. Immediately after loading the BIOS, go to the “Advanced” tab, and then in the list that opens, find the line “SATA Configuration”, click on it. A small window will pop up immediately, in which there will be only two options: IDE and AHCI. Select the second item.

If you did everything as prescribed by the algorithm, then at startup the operating system will detect new hardware and automatically install drivers.
There are times when the user has to perform the opposite actions, look for ways to disable AHCI in the BIOS.
It is easy to guess that in order to carry out your plan you will have to go the same way as described above, only in the reverse order. It is advisable to start by switching the new mode to IDE in the BIOS, and then making all changes to the registry. So, how to disable AHCI, you can figure it out simply even by yourself.
So, the desire to connect AHCI mode is justified by the emergence of new successful features and technologies. It is not difficult to carry out these actions if you have the patience, attention and the corresponding algorithm, how to do it all.
Advanced Host Controller Interface (AHCI) - the mechanism used to connect information storage devices via the Serial ATA protocol, allowing you to use advanced features such as built-in command sequence (NCQ) and hot swapping.
Designed to replace the outdated classic ATA controller, which supports top-down compatibility with the original IBM PC / AT, and supports direct memory access only as an addition. The main real problems of this controller are the lack of hot-plug support (despite the fact that eSATA equipment supports it) and command queues, on one channel (in the case of SATA, each device has one channel) - only one command can be executed at a time. Thus, using the ATA NCQ feature, even if supported by the drive itself, is not possible on a classic ATA controller.
When you switch, when the Windows OS is already installed, the ATA controller, which is part of the south bridge, to the "AHCI" mode, this will mean, for the installed operating system, using the incompatible logic of the railway controller operation - this action is equivalent to installing an ATA controller board in the system, excellent from the existing, and physical switching of the boot disk to this board.
In this case, Windows will not find the boot disk at boot and will crash with BSOD STOP 0x0000007B, INACCESSIBLE_BOOT_DEVICE.
The text is taken from the free encyclopedia http://wikipedia.org/
So, since you came to my site, it means that we had a common problem that you had after buying a new SSD (For example, in OGO.ru). And by reading the text above, you could understand its root. For some reason, Microsoft still cannot make a free transition from one driver to another. And to do this, users have to work a little with their hands, but in principle quite a bit. To solve the problem, before switching to the BIOS, it is necessary to install the AHCI driver in Windows, or rather, make a small correction in the registry. This manual is for Windows 7, Windows Vista, and Windows Server 2008 R2. For Windows 8, the instruction is slightly different and is available at the link:
I. Manually Switching Windows 7 to AHCI Mode
1) Go to the registry. To do this, use WIN + R and in the window that opens, write regedit:
2) The built-in “Registry Editor” of the Windows system will open. In the left part of the window, go along the path:
HKEY_LOCAL_MACHINE \\ SYSTEM \\ CurrentControlSet \\ services \\ msahci

3) Double-click to open the parameter Start and change the value to 0
(the default value is " 3
"- AHCI is not supported):

4) That's all, close the registry and restart the computer.
5) During boot, go into the BIOS and enable AHCI support. How to do this can be found in the operating instructions for your motherboard. We save the settings and restart the computer.
After starting Windows, it will install the AHCI driver itself and restart again. After a restart, the hard drives will already work in the AHCI standard.
II. Automatic fix for preparing Microsoft WIndows to switch to AHCI or RAID mode
Finally, Misrosoft came in the 21st century and they released an automatic fix to prepare the system for switching to AHCI or RAID mode. Now all that needs to be done is to download a small utility from the official site, launch it, then restart it in the computer to enter the BIOS and set the required mode there (AHCI or RAID). The system after that will start without any problems and install all the necessary drivers. Lovely :) Thanks to Microsoft, now learn to add this fix to the installation image of the system. (You can read more about this fix at http://support.microsoft.com/kb/922976).
That's all. I hope this article was useful to you, click one of the buttons below to tell friends about it. Also subscribe to the site updates by entering your e-mail in the field on the right.
Thanks for attention:)
Enabling AHCI mode allows you to achieve maximum drive speed. This manual details how to do this.
What is better AHCI or IDE
The drives inside your computer have several modes in which they can work. These are AHCI and IDE. Using SATA AHCI has several advantages over SATA IDE ( Integrated drive electronics), so you may be interested in how to enable SATA AHCI in Windows 10.
AHCI (read as " hey-hRsi-ah") Is an abbreviation of" Advanced Host Controller Interface" This term refers to the mechanism that is used to connect your SSD or HDD to the motherboard using the Serial ATA cable (SATA). AHCI is better than IDE in that you can use all the capabilities of your drives, as well as gain access to additional functions, such as the built-in command sequence (NCQ - “ Native Commend Queing” ), DIPM (” Device Initiated Power Management” ) and hot swap drive. For the end user, who is not particularly versed in terms of NCQ, DIPM and so on, it is only important to know that turning on AHCI will allow you to use the maximum speeds that a connected drive is capable of in principle.
In addition, AHCI is best used in laptops, since this mode has a positive effect on the power consumption of the media. Suppose you do not notice a strong increase in the life time from a single charge, but still the disk will consume less computer power.
Important: This instruction must be executed from an account that has Administrator rights. If you do not have one, you will need an administrator password to gain access to certain sections of the system. In this case, we recommend that you read the article that tells.
A warning: act at your own risk. Transferring drives from IDE to AHCI in an already installed system in theory (if they did something wrong) can lead to the fact that Windows will not start at all, and will fall into the bootlap (load, crash, load, crash). Only act if you know how to get everything back or reinstall the system. We described the instructions personally checked on their computers they themselves were convinced of its performance. If you are leisurely and carefully doing everything, nothing will happen to your computer, but just in case, we recall that only you are responsible for your hardware.
Although in this manual we describe how to enable SATA AHCI in Windows 10, these same steps will be relevant for Windows 7 and Windows 8.1.
To check which mode your drives are in, click Win + x and select device Manager. Expand Item IDE ATA / ATAPI Controllers. Check the name of the controllers.
On this computer, the drive is in IDE mode.

And on it already in SATA AHCI mode.
How to upgrade from IDE to AHCI
It is best to activate AHCI mode in the BIOS itself before installing the operating system. The safest option. If there is no opportunity or desire to reinstall the system again, then simply follow the instructions below. They will tell you about three methods to enable AHCI on your computer.
All three methods consist of two parts: changing the parameters in the OS itself and changing the parameters in the BIOS. If you do only one of these parts, the system most likely will not start at all and after a couple of unsuccessful attempts to start, it will go into automatic recovery mode.
How to enable SATA AHCI by editing the registry
A warning: Do not blindly modify or delete registry keys unknown to you. This practice can lead to serious problems with the operating system. If you are not confident in your abilities and you do not have experience, we recommend that you first familiarize yourself with the concept of "", as well as study the article about. They can be useful in case of unforeseen consequences. If you don’t feel like going into the jungle of the Windows registry at all, use the third method, which will tell you how to enable AHCI through the Command Line and Safe Mode.
- Click Win + R and enter regedit. Thus, you start the registry editor built into the system.

- In the line with the address (at the top of the window under the menu), enter the path Computer\\Hkey_LOCAL_MACHINE\\ SYSTEM\\ CurrentControlSet\\ Services\\ storahci.
- In the left part of the window, in the subfolder tree, select the folder Startoververride, right-click on it and select Delete. Confirm removal.

- Now open Notepad ( Win + R – notepad) and paste the following text into it: reg delete "HKEY_LOCAL_MACHINE\\ SYSTEM\\ CurrentControlSet\\ Services\\ storahci\\ "/ v Startoververride / f

- Save the file you created somewhere. On the save window, from the drop-down menu File type select All files and name him AHCI.bat. Thus, you will create a “batch file” with the desired team inside.

- Find the file you just created, right-click on it and select Run as Administrator.

- The Command Prompt window opens, on which you need to click the English letter Y. After that, the command line will automatically close.

- The next part is to configure the BIOS itself. Reboot the computer and go to BIOS / UEFI.
- Now you need to find the section responsible for the operation mode of the hard disk controllers. Since we do not have the ability to take screenshots from all existing BIOSes, here is an example of a UEFI Gigabyte motherboard. Your BIOS most likely looks different, but the essence is the same. Need to find item SATA MODE / Onhip SATA or something like that. If you don’t want to search blindly (which we don’t advise you in order to avoid changing the wrong parameters), refer to the user manual of your motherboard. Just in case, keep an article on hand that talks about.

- When you find the appropriate SATA mode setting item in the BIOS, set it to ACHI Mode or simply AHCI.

- Save the settings and restart the computer. It is likely that after turning on the system, a window appears with the installation of AHCI drivers, after which the computer will ask you to reboot. Do what he asks you. After turning on the system, go to the Device Manager and check if the AHCI controller is displayed in the list.
Another way to enable AHCI through the registry editor
If the first method did not work (unlikely, but still), try the second option.
Read how to determine in what mode the computer controller is working. And, how to activate the AHCI mode of the SATA interface on a computer with Windows already installed. Many people reasonably have a question: why do we need the IDE mode for a SATA drive, if the AHCI mode is "native" for it and it is in this way that the SATA drive will work adequately for its characteristics and purpose. Moreover, many motherboard manufacturers by default set them to PATA compatibility mode - IDE.
The SATA interface can operate in two modes, IDE and AHCI:
- IDE is a compatibility mode with old hardware and software. In fact, the capabilities of SATA in this mode do not differ from the capabilities of its predecessor, the ATA (or PATA) interface;
- AHCI - a new mode of working with storage devices in which the computer uses all the advantages of SATA, the most important of which are: higher speed of hard drives and SSD drives (Native Command Queuing or NCQ technology), as well as the ability to "hot" replace hard drives. Activating AHCI mode helps speed up access to files stored on storage devices and positively affects the overall performance of your computer.
Many people reasonably have a question: why do we need the IDE mode for a SATA drive, if the AHCI mode is "native" for it and it is in this way that the SATA drive will work adequately for its characteristics and purpose. Moreover, many motherboard manufacturers by default set them to PATA compatibility mode - IDE.
The thing is that the operating systems starting with Vista started supporting the controller in AHCI mode. That is, if you connect a disk with Windows XP to the controller whose system is in AHCI mode, the user will receive a BSOD error (“blue screen of death”). And on the other hand, any SATA drive can freely work in IDE mode. Moreover, many users, not knowing about it, do not even feel any difference. Thus, computer manufacturers are trying to avoid possible problems with the compatibility of computer and user software.
Another important difference between IDE and AHCI is working with SSDs. Keep in mind that it is not possible to install the operating system in the IDE mode on an SSD drive, this will definitely require AHCI activation.
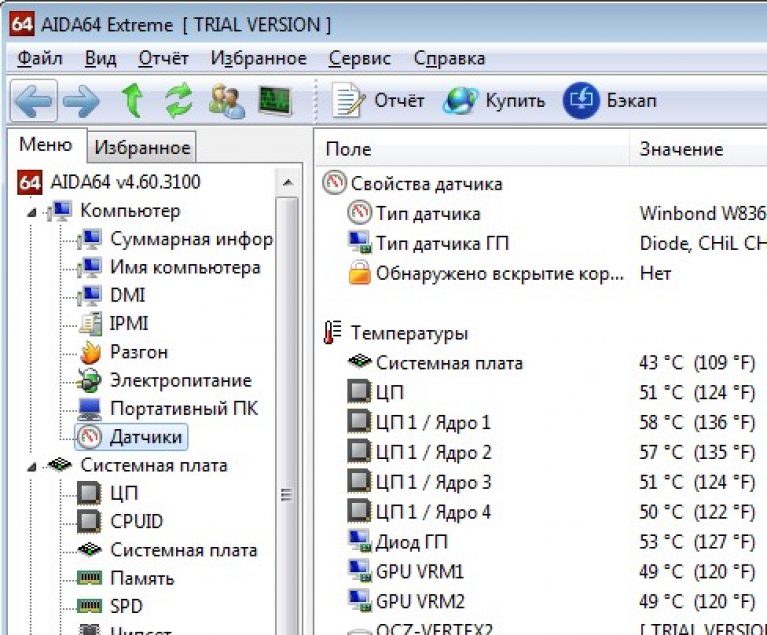
How to determine in what mode the computer controller works?
It is likely that AHCI mode is already activated on your computer. There are several ways to check this:
Method 1
- Go to
- Open section “IDE ATA / ATAPI Controllers”
- If in this section there is a device with the word “AHCI” in the name, as in our case, then the AHCI mode on the computer is already in use.

Method 2

Keep in mind that in the BIOS of some computers there is no possibility of changing the mode to AHCI. In this case, the problem can sometimes be solved by updating (flashing) the BIOS version.
How to activate the AHCI mode of the SATA interface on a computer with Windows already installed?
You can activate the AHCI mode of the SATA interface on a computer with Windows already installed, while maintaining its operability, in several ways:
THE FIRST:

If for some reason the first method did not work, pay attention also to second option. But first, if you encounter errors when starting Windows with AHCI mode, return the IDE mode and turn on the computer.

Thereafter:

As you can see, the described actions in theory can lead to undesirable consequences, such as the inability to start the operating system. Therefore, take care of them only if you know why you are doing this, are able to enter the BIOS or UEFI and are ready to correct unforeseen consequences if necessary. For example, by reinstalling Windows from the very beginning in AHCI mode.