You can use this method if you do not want Windows XP to be your guest system. In this article, I will describe how you can create a virtual machine and install a guest operating system that you plan to manage in Virtual PC.
To create a virtual machine, you can use the Create Virtual Machine Wizard. The wizard will help you configure the virtual machine with basic settings that you can configure as you need to use the virtual machine. For example, you can specify a specific amount of memory that a virtual machine will use. The amount of allocated RAM should be the amount that you would allocate to a physical computer. It is advisable to provide the virtual machine with enough memory so that you can easily manage the operating system and applications installed on it
You should also pay attention to how you will install the guest operating system. For example, to install the operating system, you can use a network server for installation or a physical CD or DVD drive, in which simply place the installation disc with the system. If you are installing a guest operating system supported by Virtual PC, then after installation you will need to install the integration component package.
Creating a virtual machine
- You need to open the virtual machine folder. To do this, go to the menu "Start"choose "Windows Virtual PC". If this item is not immediately in the menu, click on the menu "Start" on "All programs"left click on the folder "Windows Virtual PC"and then select "Windows Virtual PC".
- A folder will open in Windows Explorer "Virtual machines". From the menu area, click on "Create a virtual machine".
Folder "Virtual machines" provides detailed information about all virtual machines created by the current user, and also from this folder you can open shared, create and modify virtual machines and virtual disks.

- The Create Virtual Machines Wizard opens. After going through the wizard dialogs, you select the required settings for installing the guest operating system.
Installation process
Step 1
The first step is to name the new virtual machine and indicate its location.
Step 2
At the second step, the virtual machine creation wizard prompts us to specify the memory settings for the virtual machine.
Step 3
In the third step, you need to specify the disk settings of the virtual machine.
- At the end of the wizard, the virtual machine will be displayed in the list of folder files "Virtual machines".
- Installing a guest operating system. If you are using a network installation server, you can safely skip this step. If you are using a CD or DVD disc, insert it into the drive carriage and proceed to the next installation step. To use an .iso image, you need to do the following:

- Start the virtual machine. In the file list, select the virtual machine and click "Open". Windows Virtual PC will open the system installer for the virtual machine. The virtual machine will look for the installation disk. Installation will begin after a boot disk is found.
- After the installation is completed, you need to install the integration components. Click on the menu "Service" in the virtual machine window and select “Install Integration Components”. If the installation does not start after a few seconds, go to the desktop of the virtual machine and open the CD in it. After that, left-click on the IntegrationComponents.msi file 2 times.


- Complete the installation using the integration component installation wizard.
- Reboot the virtual machine. From the menu "Act" virtual machine windows select Reboot.

Closing a Virtual Machine
Before you begin to perform some actions in a virtual machine, you might want to find out how you can exit a virtual machine. When you close the virtual machine, it can go into hibernation mode, shut down, or shut down. When the virtual machine exits hibernation mode, it does not have a system sequential boot, so this option is much faster than shutting down and shutting down.
Attention!
When you open a virtual machine, Windows Virtual PC provides its memory and processor resources. The length of time that is used to open the virtual machine depends on the method you used to close it at the time of the last session. The amount of memory that you allocated when creating the virtual machine also matters.
By default, when you click on the button Close in the virtual machine window, the Windows XP Mode virtual machine enters hibernation mode and prompts you to select the same action for the rest of the virtual machines. You can change this option yourself.
Changes to the default closing virtual machine action

Shutting down a virtual machine
- In the virtual machine window, click on Ctrl + Alt + Del. Or you can press a key combination CTRL + ALT + END.
- In the appeared window of the guest operating system, click on Close.
- The operating system will be turned off, the resources consumed by it will be returned to the host system.
Attention!
If you want the installed software to be displayed on the desktop of the host operating system, you need to log out of the account and only then you can close the virtual machine.
To have several operating systems with a separate workspace and applications at hand, you do not need to buy a second (third, fourth, etc.) computer. Because all this will fit in your only PC. How? Thanks to virtual machines (VMs) - special programs that create (emulate) inside the main operating system imaginary (virtual) computers.
A virtual PC is almost like a real one. It has its own processor, memory, hard drive, network adapter and everything else. Of course, these are not physical devices, but they are made so that the operating systems consider them to be just that - real.
Several virtual machines can work on one physical computer at the same time. How much depends on hardware resources: the faster the processor, the larger the RAM, the more spacious the drive, the more. A typical Windows 10 mid-range home PC can handle three to five lightweight operating systems simultaneously (for example, Windows XP, Android, and Lubuntu + the main system). Or two or three relatively heavy ones (for example, the main Windows 10 + virtual Windows 7 and Mac OS X). As you already understood, virtual computer emulator applications allow you to install and run a variety of operating systems on them.
General-purpose virtual machines (unlike specialized ones, such as, for example, Java VM), use:
- To run applications that the main system does not support.
- To protect the system from the potential harm of unverified programs.
- As an additional barrier against viruses when visiting dubious web resources.
- To create an isolated environment for studying the activities of malware.
- As a test site for debugging your own developments.
- For the development of networking technologies.
- For double authorization on some game portals and much more.
And of course, virtual machines are universally used to distribute server work resources.
Today we will not concern the industrial use of VMs, but consider only what may be useful to home users of Windows.
Oracle Virtualbox
Consider the process of creating a new virtual machine and the beginning of installing Windows 10 in it.
- Click on the "Create" button in the upper panel.
- In the first window of the VM creation wizard, specify the OS name (it will be displayed in the list of guest systems), its type (Windows, Linux, etc.) and version. In our example, this is Windows 10 32 bit (you can put 64 bit, but it will require more resources). To go to the next step, click Next.

- Next, indicate the size of the RAM of the VM. By default, Windows 10 x86 is allocated 1 GB, but you can increase this amount by moving the slider to the right. If your PC does not have a lot of RAM, do not give the VM more than 2-3 GB, otherwise the main system will slow down due to lack of memory.

- Next we create a virtual hard disk. If you are installing the system for the first time, select the option “Create a new one”.

- The virtual disk type will be left by default.

- The data storage format is an area on the physical drive of your computer that is allocated to the VM. It can have a constant or dynamically expanding volume within the limits that you define further. To save space, choose a dynamic format.

- Next, indicate the name of the volume (virtual drive C) and its size. The default is 32 GB.

- After clicking on the “Create” button in the last window, a new virtual machine will appear in the list. The frame is shown on the right with its parameters.
- To proceed with the installation of Windows, click on the “Run” button in the upper panel.

- In the window that opens after that, the window “Select boot disk” will appear. Click on the folder icon and specify the path to the system distribution. This can be an image in the .iso format or physical media (DVD, flash drive). After selecting the distribution, click Continue.

- The further course of installing the OS in a virtual machine does not differ from installing it on a physical computer.

Some settings of VM and guest system
A click in the virtual machine window captures the mouse cursor (i.e., it will only move within the virtual screen). To return the cursor to the main OS, press Ctrl + Alt.
To access the entire set of functions of the guest OS, you need to install special add-ons. Go to the "Devices" menu, click "Mount the guest OS add-ons disk image" and follow the further instructions.

To connect a folder for exchanging files with the main one to the guest system, click on the “Shared Folders” item in the “Devices” menu. Click on the “folder +” icon in the window that opens and through the “folder path” field, specify it in Explorer (it shows the directories of the main system).
If you want the setting to work continuously, check “Auto-connect” and “Create a permanent folder”. The shared folder will be accessible from the explorer of the virtual machine as network.


To change the polling order of bootable devices (for example, to boot a virtual machine from a DVD), shut down the guest OS, open its settings (in the Virtualbox main window) and go to the first tab of the System section. In the "Order of loading" list, select the required medium and, pressing the arrow buttons, move it up.

VMware Workstation Pro
Some Hyper-V Virtual Machine Options
To take a snapshot of the status of a running guest OS, Open the top menu of its “Action” window and click “Checkpoint”. Or press Ctrl + N.
Access to the settings of an individual virtual machine is opened from its context menu in the list of the main window of the dispatcher and hides behind the "Options" button.
Other features of the program are also very straightforward and mastered without much difficulty.
The Windows operating system allows you to create a virtual machine (VM), which is another computer with a separate virtual disk, OS, system data and software. Simply put, you are connecting another system that can be opened in a separate window. We will describe how to install a virtual machine in this article. Follow the instructions carefully, and after 20-30 minutes BM will appear on the computer
Create a virtual machine on Windows 10
In the "top ten" there is a standard service for creating virtual machines - Hyper-V. By default, the components of this service are disabled - we need to start them. To do this, go to Control Panel, then go to section Programs – Enable or disable components. In the menu that appears, activate the item Hyper vand confirm your action with Ok.After installation, the computer should restart. Now go to the search service Windowsand drive there Hyper-V Manager. It is located in Administration tools. Now we pass to creation of VM:

Done. Having opened Hyper v, you will see VM.

The launch is done by double-clicking on the name of the VM in Hyper-V. In the connection window you need to click on the button Enable. You just have to go through the standard system installation procedure.
Important! It may happen that you have correctly configured and installed everything, but the operating system does not start on the virtual machine. This can be explained by the fact that the technical specifications are not suitable for playing a virtual system. Carefully read the system requirements for installing a particular version of the OS. For example, you can’t put Windows 10 on a weak PC with a processor with two cores and 1 GB of RAM.
Creating a virtual machine on Windows 7
The "seven" has a built-in service for creating VMs, but it allows you to create a virtual machine only for Windows XP. We believe that the lack of choice is bad, so we made instructions for using third-party software to create VMs. The program is called Virtual Box, you can also use it to install a VM on Windows 10, 8 and even XP. Download Virtual Box at this link.
We install the program according to the standard scheme and run it:
- In the main menu, click on the button Create.
- After that, the wizard for creating a new VM will open.
- We select the type of operating system and its version: if you want to install Windows 8, then select it in the list.
- In the next window, set the required amount of RAM for the new OS - 512 MB will be enough for Windows XP, and the tenth version will not work correctly if you do not provide at least 4 GB for it.
Helpful advice! When specifying memory, put at least 515 MB and not more than 50% of all the RAM that is on your computer.
We create a new hard drive for VM by clicking on the corresponding item, and move on. We recommend choosing a fixed option so that the hard drive for the VM does not take up all the space from the main Windows. By setting the size of the virtual HDD, you must specify the path where it will be located.
Now we return to the VM creation menu and press the button Done. Now we need to configure the virtual machine and install the system on it - go to the section The properties. In section Displayneed to enable 2D acceleratorand 3D accelerator.
The next step is to select the media from which the new OS will be installed on the virtual machine:
- If you want to use an image with installation, go to the section Attributesand click on the icon with the image of the folder - the media manager will open - here you need to add your image.
- If the installation will be performed from a DVD-ROM or USB-drive, you should insert it into the computer and go to the section Attributes. After loading, the disk or flash drive you need appears in the list of media.

Now press the button Installand go to the standard installation wizard of the operating system. We recommend that you study the Virtual Box program to configure the virtual machine completely for you.
Helpful advice! To create a VM with Linux, it is better to use the Virtual Box program. You can use the standard Windows 10 wizard, but user reviews suggest that Linux will be unstable.
Installing a virtual machine with Windows XP
We have already examined the example using Virtual Box, now we will study the VMaware Workstation program, with which we will install Windows XP on a virtual machine. You can download the VMaware Workstation application from here.After downloading, run the installation file and perform the program installation according to the standard scheme. Now go to VMaware Workstation and proceed as follows:
- In the application’s dialog menu, select the section for installing the VM. In the English version it is called New virtual machine.
- First of all, the program will ask us to specify a DVD-ROM, Flash-drive or ISO-image. For example, we took a regular DVD with XP. Click on the button Furtherand go into system activation mode - specify the path to the XP activation file.
- Now you need to configure a separate hard drive on which files with Windows XP will be located, and software will also be installed there. We indicate the size: usually 40 GB is enough, but 8 GB is enough for trial use of VMs.
- After that, VMaware Workstation will start the validation and final configuration. Here we can change the amount of RAM for the version of WindowsF, login methods and other parameters. Now the Russian version is available on the VMaware Workstation website, we recommend that you read the description of each setting in the help. If you skip this section, the program will automatically expose RAM.
- After completing the setup, VMaware Workstation will proceed to install the XP system on the virtual machine.
VM video installation
The video is devoted to installing Windows XP on a VM and its subsequent configuration. A novice user will be able to install VM according to this instruction. The video also explains in detail how to use an already installed XP as a virtual operating system.You now have a virtual machine that you can experiment with. If you have long wanted to use "unwanted" software, then it is best to put it on a VM. Using standard services for installing a VM is easier, but third-party software provides more options. It all depends on your requirements - the instruction with Windows 7 is also suitable for other OSs, there is also a link to download a convenient program.
Description of how to install and run the full version Windows XP out of Windows Vista or Windows 7 using the program Oracle VirtualBox. In this case, Windows XP is installed on a virtual machine and runs as a standalone application in Windows Vista, Windows 7, or in any other operating system, including various Linux distributions. Thus, you can solve compatibility problems between various programs and drivers with Windows Vista, Windows 7, or with another operating system.
Small introduction
Probably many of you, my dear readers, have already managed to install and try Windows Vista and Windows 7. It seems like everyone has good systems, but some programs and old games do not start in the new operating system, and the drivers for some devices do not work. What to do in this case? Refuse the delights of the new version of Windows?
There are actually several ways to solve this problem. The most obvious is the installation of Windows XP by the second system with the ability to choose which to include at boot. This method is described in this article:. But here there are inconveniences. For the sake of some kind of program, you need to restart the laptop, turn on Windows XP, work with the program, restart the laptop and turn it on Windows 7, eg. Inconvenient, right? But what if your favorite USB modem works fine only in Windows XP? Reboot the system and turn on Windows XP in order to sit on the Internet?
Fortunately, there is a solution. Windows XP can be installed on a virtual machine and run from under any operating system as a separate program. This principle works Microsoft Windows 7 XP Mode. Good technology, but for it to work, laptop support for virtualization is required, and it only works in Windows 7 Professional, Windows 7 Ultimate and Windows 7 Enterprise. But what if it costs Windows Vista on a laptop?
And then an excellent program comes to the rescue Virtualbox from Sun. It is completely free, it allows you to create virtual machines on a laptop, on which you can install many operating systems. The advantage of this utility compared to Microsoft Windows 7 XP Mode is support for three-dimensional graphics for virtual machines, it does not need to work hardware virtualization, as well as the fact that it can be run on any version of Windows, Linux, etc. .. The downside is that you formally need a licensed Windows XP, although taking into account our realities ... :)
This article will cover the process of installing Windows XP on a virtual machine. The whole process can be divided into the following stages:
If you have any problems or questions about working with the Virtual Box virtual machine, then you should ask for help in this forum topic:.
1. Creating a virtual machine
First of all, you need to install the utility Virtualbox (/). During installation, it is important to note the following options:

System devices will also be installed. Appropriate installation requests must be allowed.
When the installation is completed, run the utility and click on the button Create:

Should start:


Go to the next window. Since we do not have a virtual hard disk, we need to create a new one:


Choose the type of virtual hard disk. I recommend :


That's all. The virtual machine is created. Now you can proceed to configure it.
2. Configure the virtual machine
Before setting up, prepare a disk with Windows XP or an iso image with it, and then select the created virtual machine in the VirtualBox window and click on the button The properties:

Let's start with the tab The main. Optionally, you can place the menu of the virtual machine on top. So convenient:

Go to the tab System:

Here you can change the amount of RAM that is allocated to the virtual machine, change the boot order of virtual devices, enable or disable the IO-APIC option (needed if you plan to use several processor cores for the virtual machine), and enable or disable EFI (needed for some operating systems, e.g. MacOS). Go to the tab CPU:

Here you can specify how many processor cores a virtual machine can use, as well as enable or disable PAE / NX (some operating systems support PAE. This mode allows a 32-bit virtual system to use up to 64 GB of RAM). Go to the tab Acceleration:

On this tab, you can enable or disable hardware virtualization. If you are going to install a 64-bit operating system, you must enable it, and support for virtualization from the side of the laptop is also required. If your laptop does not support this function, then it does not matter. To run 32-bit operating systems in a virtual machine hardware virtualization is not needed.

VirtualBox supports 2D and 3D acceleration (OpenGL / DirectX8 / DirectX9). It should be included. Go to the tab Network:

When installing VirtualBox, another network card appeared in the system, which is virtually connected to the network card of our virtual machine. Configure the virtual network adapter as shown in the figure above and go to the tab USB:

At the beginning of the article, it was said that with the help of virtualization, you can bypass the problem of incompatibility of drivers for USB devices with new operating systems. So here Virtualbox Allows you to redirect so that any USB device that connects to your computer or laptop does not connect to the main operating system, but to a system that runs on a virtual machine. Then, on Windows XP, the drivers for the new USB device are installed on the virtual machine and it fully works under the control of Windows XP. The main system is the device will not see. Since there are a lot of USB devices in the system, so that when you turn on the virtual machine all of them do not disconnect from the main one and do not connect to the virtual one, a filter system was invented. Filters indicate which USB devices should be disconnected from the main operating system and connected to Windows XP on the virtual one when it is turned on.
To add a new filter, click on the plus sign and select the desired USB device from the list. After that, it appears in the list. Go to the tab:

Since there is no sense in Windows XP on a virtual machine without the ability to work with files on the main one, you need to organize shared access to certain folders on the hard drive. To do this, click on the plus sign icon and select the folder on the hard drive of your computer or laptop, which Windows XP will work with on the virtual machine:

Enter its name and click OK. So she appeared on the list:

Now there is still the last very small touch. We need to somehow install Windows XP :) Go to the tab Carriers:

We have two options: install Windows XP from an .iso image or from a regular disk. In the first case, click on the icon with an arrow and click on the button Add:

We specify where the image with Windows XP is located and add it to the list:

We click on the image with Windows XP and click on the button Choose.
If you just have a disk with Windows XP, then put it in the drive and select your drive in the list:

We click OK. Now you can proceed to the installation Windows XP.
3. Install and configure Windows

A typical installation of Windows XP should start:


I will not describe it in detail. The installation is described in detail in this material:. Drivers in this case are not needed. Everything you need is already included with Windows XP.
After installation, we get a working Windows XP in a virtual machine. Now you need to install Guest OS Additions. To do this, select the appropriate menu item Devices:

Important Note:since the keyboard and mouse in a laptop or computer are often one, the main operating system and the operating system that is running in the virtual machine are forced to somehow share it. The capture mechanism is used for this. In other words, if there is a virtual machine in the foreground, then everything that is entered from the keyboard will be addressed to it. You can also manually switch. To do this, the default is right ctrl. When the virtual machine works with a keyboard and mouse, the green arrow in the lower right corner of the window with the virtual machine is on.
The installation of add-ons for the guest OS should begin:

Possible questions:if the installation did not start with you, then manually add the image VBoxGuestAdditions.iso in the folder with VirtualBox in the virtual drive as it was when installing Windows XP, and then run the disk in the virtual machine.


Check the box next to Direct3D Support:

During installation, several warnings will appear:

Push Continue anyway. After installation, it is advisable to reboot the virtual machine:

To expand the virtual machine window, in the menu A machine select item:

Here the frame was removed and it became much more convenient to work:

Now it remains to deal with shared folders. AT Windows XP launch Command line:

We connect the previously created shared folder as a network drive. To do this, enter the command net use x: \\\\ vboxsvr \\ Documents (Documents here is the name of the shared folder):

AT My computer a disk appeared x: \\we just connected:

The contents of this drive correspond to the contents of the shared folder that we previously created.
That's all.
If you have any questions about working with the VirtualBox utility, then we pose them in this forum topic:. All questions that are related to installing Windows XP, please state in this forum thread:
Detailed installation guide Windows XP from a flash drive or from a memory card to any laptop, netbook or computer.
A detailed description of how to solve the problem with the blue screen of death or BSOD for newbies.
Guide how to find and remove all viruses and other malware from a laptop or computer.
Full and detailed description of several installation methods Windows Vista or Windows 7 from a flash drive or memory card to any laptop, netbook or computer.
A detailed guide on how to install Windows Vista on a laptop or computer.
At the time of the release of Windows 7, the bulk of its potential buyers used Windows XP. Among them, very few were those who decided to immediately and unconditionally switch to a new product. Most were in no hurry to send old XP “to retire,” because it turned out that a huge amount of software simply could not work under the new system. What was Microsoft left to do? Losing potential buyers is not an option, so the solution was this: to release an update for Windows 7, which carries a virtualization package - a system function that allows you to run XP directly inside the "seven".
An update called “Virtual PC” and KB958599 was released in 2008. It is a virtual machine - an application that emulates computer hardware and creates an isolated environment inside the operating system where you can install another OS, including a type other than Windows.
Microsoft's Virtual PC is included in the Ultimate, Professional, and Enterprise editions of Windows 7. This virtual machine is specifically designed to install Windows XP Service Pack 3 and solve problems with non-starting software.
How to install virtual pc?
Verify hardware virtualization support
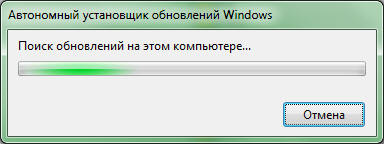
If the Ultimate, Enterprise or Professional Seven is installed on your PC and the automatic update function is enabled, you already have a Virtual PC. Before you start using it, you need to make sure that your processor supports hardware virtualization. To verify this, Microsoft created the Hardware-Assisted Virtualization Detection Tool, which is easy to download and run.
If the utility displays a message, as in the screenshot below, it means that hardware virtualization is supported and you can use Virtual PC without additional settings.

In the absence of such support (message in the window below), you need to make some more changes to the system.

Please note: hardware virtualization is turned on and off in the BIOS, so if it does not work on your PC, try activating it in the BIOS Setup. The option may be called Intel_Virtualization Technology (for Intel processors), AMD-V (respectively, for AMD), Virtualization Extensions, etc.

In this example, the Intel_Virtualization Technology option is disabled (Disabled). To enable it, you need to change the Disabled value to Enabled.
If you cannot use hardware virtualization, Microsoft suggests installing a patch that will still allow you to run Virtual PC on Windows 7. On the download page you need to select the file version according to the bit depth of your system.
Manually installing Virtual PC
Manual installation of a virtual machine in Windows 7 includes the installation of 2 components:
- Windows Virtual PC
- virtual disk Windows XP Mode;
The first to install Virtual PC. For this:
- download the KB958599 update corresponding to the bit depth of your Windows 7 from the official site and run it;

- accept the license agreement;

- wait for the installation to complete;

- close the installer window and restart the PC.

Next you need to put the virtual disk Windows XP Mode:
- run the installer downloaded from the official Microsoft website;

- select a location for the virtual disk;

- wait for the installation to complete;

- check the box “Run Windows XP mode” and click “Finish”.

First launch of Windows XP mode
After installing Windows XP mode, “seven” will further configure it and create a virtual disk.
The first window to open is where you will have to accept the license agreement for using the program and click “Next”.

Next, you will be asked to indicate the folder where the virtual disk will be installed, and create the first user.

Then - enable the protective functions of the created system (optional).

After clicking on the “Start Installation” button, the process of installing a virtual machine with Windows XP will start. It remains to wait for its end.

Creating a new virtual machine on Windows 7
- Through Start or Explorer, open the location of the XP Mode virtual disk.

- Click the “Create Virtual Machine” button in the top menu of the folder.

- After that, the wizard starts and your new virtual machine begins to be created. In the next window indicate her name and location.

- Configure the network settings and the amount of RAM (virtual Windows XP can be satisfied with 512 megabytes of RAM, but more can be allocated).

- Create a virtual hard disk (or use an existing one). Indicate its type (dynamically expandable or fixed volume) and location. Click “Create."

- After that, the newly created one will appear in the list of virtual machines. Click on it with the “right mouse” and select “Open” from the menu.
- In the list of options, click on “DVD drive” and specify the path to the physical laser drive where the Windows XP disc is inserted. If you intend to install the system from an image, find its installation iso-file in the directory - the virtual machine considers the images of the iso format “optical drives”.

After that, the normal installation process of Windows XP starts.

Using Alternative Virtual Machines
 In addition to its own component of Virtual PC, Windows 7 supports third-party virtualization systems. Among them, two are most famous and widespread - Oracle VM VirtualBox and VMWare Workstation. Let's look at the principles of working with them as an example of any one. Take Oracle's VirtualBox and create a new virtual machine on it to install the same "seven".
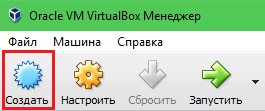
After installing VirtualBox, open its main window - the virtual machine manager. Click on the “Create” button in the upper horizontal menu.

In the next window, write the name of the virtual machine and select its version and capacity from the list. In our example, this is Wibdows 7 32 bit.

Configure the amount of RAM that the virtual (guest) system will use.

Create a hard drive (or select one created earlier).

Specify the type of disk. If you do not know how they differ, leave this option as default (VDI).

Specify the data storage format — a dynamically expanding virtual disk or a fixed-capacity disk.

Moving the slider, set the size of the disk, and also specify its name (if you want it to be different from the name of the “virtual machine”).

After clicking “Create,” the new virtual machine will appear in the list of the main window. On the right side are its settings.
To start installing the operating system, click on the machine’s icon and click on the “Run” button from the top panel.

Following this, another window will open - the one in which you will observe the progress of the OS installation and continue to work. The window of the virtual machine manager (main), can be minimized for now.
Here, as when creating a virtual machine on Virtual PC, you need to specify the path to the installation disk of the "seven" or the iso image.


After the installation of the OS, the virtual machine is ready to work. You need to start it by clicking on the corresponding icon in the left vertical list of the main VirtualBox window. As you can see, creating virtual machines is not at all difficult.
Creating a virtual machine on VMWare Workstation is also intuitive and in many ways resembles the procedure just discussed.