VirtualBox is an intuitive program to use. If you are not interested in theory and want to start practicing right away, then refer to the instructions for using VirtualBox to install and run operating systems in a virtual computer:
- Installing Linux on a virtual computer (using Linux Mint as an example)
In this series of articles, the capabilities of VirtualBox are examined in detail, and a detailed description of its options is given. This material is recommended to you if you want to understand VirtualBox thoroughly, as well as if you have any problems or questions that you cannot solve on your own.
What is virtualization and its usefulness
VirtualBox is a program that allows you to run multiple operating systems on the same computer at the same time. Among these operating systems may be Linux, Windows, Mac and others. VirtualBox itself also works on various systems (it is cross-platform).
This means that using VirtualBox while in Windows, for example, you can boot into Linux, work with any Linux applications as if you have the Linux operating system installed, without restarting the computer and even without installing another OS on the real computer. You can, for example, run other versions of Windows to check settings and programs that you do not want to run on your main operating system.
Virtualization (running operating systems inside virtual computers using VirtualBox) has a number of useful features:
- simultaneous launch of several operating systems - you can get acquainted with new OS without turning off your main system;
- separation of real and virtual computers - when working in a virtual OS, there is no need to be afraid to erase the bootloader, lose files or in any way harm your main operating system, since the virtual system is completely differentiated from your main system. Whatever mistakes you make in the virtual computer, your main OS will always remain untouched. For this reason, a virtual computer is suitable for various tests, including those that can harm the OS; for example, in a virtual computer, you can analyze malware (viruses) without fear for the main system;
- ease of software installation - if you are on Windows and you need to work with a program that runs only on Linux, then instead of the tedious tasks of trying to run the program on a foreign OS, it is very easy to deploy a Linux virtual machine and work with the desired program from there. Or vice versa, while on Linux, you can create a Windows virtual machine to work with Windows programs without having to try to run them on Linux;
- the ability to roll back the changes made - you don’t need to be afraid to do something wrong in the virtual computer, because you can take any number of “snapshots” of the system at any time and return to any of them if you wish;
- infrastructure consolidation - virtualization can significantly reduce the cost of iron and electricity; Today, most of the time computers use only part of their potential capabilities during their work, and on average, system resources are low. A large amount of hardware resources, as well as electricity is wasted. Therefore, instead of starting a large number of physical computers that are only partially used, you can pack many virtual machines on several powerful hosts and balance the loads between them.
VirtualBox Concepts
When it comes to virtualization (as well as to understand further information), it is useful to get acquainted with the terminology, especially the following terms will be often encountered:
Host operating system (host system).
This is the operating system of the physical computer on which VirtualBox was installed. There are versions of VirtualBox for Windows, Mac OS X, Linux, and Solaris.
Guest operating system (guest OS).
It is an operating system that runs inside a virtual machine. Theoretically, VirtualBox can run any x86 operating system (DOS, Windows, OS / 2, FreeBSD, OpenBSD).
Virtual machine (VM).
This is a special environment that VirtualBox creates for your guest operating system while it is running. In other words, you start the guest operating system “in” the virtual machine. Usually the VM will appear as a window on the desktop of your computer, but depending on which of the various VirtualBox interfaces you use, it may be displayed in full screen mode or remotely on another computer.
In a more abstract form, inside VirtualBox thinks of VM as a set of parameters that determine its behavior. They include hardware settings (how much memory a virtual machine should have, what virtual disks VirtualBox should virtualize, through which container files, which disks are mounted, etc.), as well as status information (among them may be: a virtual machine in currently launched, saved, about its pictures, etc.). These options are reflected in the VirtualBox Manager window, as well as in the VBoxManage command-line tool. In other words, the virtual machine is also what you can see in the settings dialog box.
Guest additions.
This applies to special software packages that come with VirtualBox, but are designed to be installed inside a virtual machine to increase guest OS performance and add additional features.
Install VirtualBox on Windows
To download VirtualBox go to the official website https://www.virtualbox.org/wiki/Downloads. Click the link " Windows hosts»To start downloading the installation file. Run the file with a double click - the installation process is similar to any other programs on Windows.
You can choose which components to install, it is recommended to install all VirtualBox components for full support of all options:
You may receive messages about installing unsigned drivers - agree to install them. In order for the program to work correctly, agree to all installer requests.
The following warning informs that network connections will be reset for a short time, i.e. You are temporarily disconnected from the network. We agree, the Internet connection will resume automatically in just a second.

Install VirtualBox on Linux
On Linux, VirtualBox can be installed in several ways:
- from the standard repository
- binary file downloaded from the official site
- from the VirtualBox repository added to application sources (only for Debian based distributions)
Installing VirtualBox on Debian and its derivatives (Ubuntu, Linux Mint, Kali Linux)
For Debian and its derivatives (Ubuntu, Linux Mint, Kali Linux) you can install VirtualBox from standard repositories:
Sudo apt install virtualbox virtualbox-qt linux-headers - "$ (uname -r)" dkms vde2 virtualbox-guest-additions-iso vde2-cryptcab
Install VirtualBox on Arch Linux and derivatives (BlackArch and others)
For Arch Linux and its derivatives (BlackArch and others), you can install VirtualBox from standard repositories:
Sudo pacman -S virtualbox linux-headers virtualbox-host-dkms virtualbox-guest-iso
Information on installing in other distributions, as well as additional details, can be found on the corresponding page: https://www.virtualbox.org/wiki/Linux_Downloads
Installing extension packs VirtualBox
To expand the functionality of the base VirtualBox package, additional extension packages can be downloaded. Oracle currently provides one extension package.
VirtualBox Extension Pack Adds Following Features
- USB 2.0 Virtual Device (EHCI)
- USB 3.0 Virtual Device (xHCI)
- VirtualBox Remote Desktop Protocol Support (VRDP)
- Host Webcam Transfer
- Intel PXE boot ROM
- Experimental PCI transfer support on Linux hosts
- AES disk encryption
VirtualBox extension packs have a file extension .vbox-extpack. To install the extension, simply double-click on the package file and an assistant will appear that guides you through the installation steps.
To view the currently installed extension packages, open the main VirtualBox Manager (main program window), in the menu " File"Select" Settings". In the window that opens, go to the " Plugins", There you will see the currently installed extensions and you can remove the package or add a new one:

You can find the extension pack for the latest version on the download page.
If you are using the latest version of VirtualBox, you can find the extension package by - select the folder with your version number and download, then double-click the file with the extension .vbox-extpack.
Launch VirtualBox
On Windows, VirtualBox can be launched from a menu or from a shortcut on the desktop.

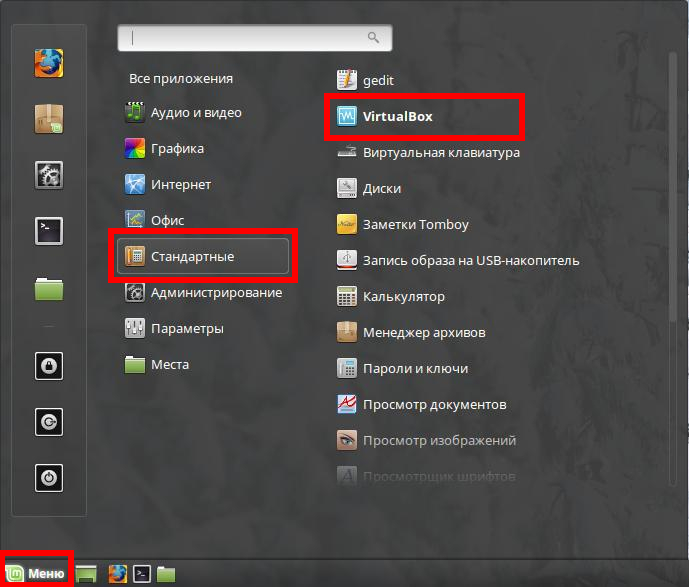
On Linux, you will also find VirtualBox in the menu,
or you can type the command in the terminal:
Virtualbox
The following window will appear:

Or, if you have already created virtual machines:

8. Installing Windows 7 in a VirtualBox virtual machine.
Virtualbox - A special program for creating virtual computers in PC memory. Each virtual computer can contain an arbitrary set of virtual devices and a separate operating system. The scope of virtual computers is very wide - from performing software testing functions to creating entire networks that are easy to scale, load balance and protect. Virtualbox distributed free, open source.
1) Download the latest version of the program Virtualbox from the official website: http://www.virtualbox.org/wiki/Downloads
2) Install it on your computer.
2.1) Run the installer; In the first window, click Next
2.2) Select item I accept the terms in the License Agreement and press Next.
2.3) Click Nextthen again Next
2.4) Click on the button Yes. Attention: In the next step, after clicking the Install button, communication with the network (both local and Internet) will break
2.5) Click Install to continue installation
2.6) In the windows that appear Install software for this device? press the button Install
2.7) In the last window, leave the check box to start creating a virtual machine right away or clear the check box to create a virtual machine later. Press button Finish. If you unchecked the box, use the icon on the desktop to start the program.
3) In the main window of the program, click on the button Create. Will open New Virtual Machine Wizard. Press button Further.
4) Enter the name of the virtual machine, in the Type of OS section, set the values:
Operating System: Microsoft Windows
Version: Windows 7.
5) Enter the size of RAM allocated for the virtual machine.
Note: The memory will be allocated from the physical memory installed in your computer. Do not install memory below 512 megabytes and above 50% of the size of the installed physical memory. Press button Further.
6) Select a bootable virtual hard disk. Set the switch to: Create a new hard drive. Press button Further.

7) Will open Create New Virtual Disk Wizard. Press button Further.
8) Select the type of virtual hard disk. A dynamic image will initially take up little space, and will expand gradually. A fixed image will immediately create a disk of the specified size - this can take a long time. Press button Further.

9) Select a name and location for the file of your virtual disk. By default, the file name corresponds to the name of the virtual machine, and the file itself is located on the same hard drive where the real Windows 7 is installed, in the folder C: \\ Users \\ UserName \\ .VirtualBox.
Select the size of the virtual hard disk. (The default is 20 gigabytes). Press button Further.

10) Click on the button Done and you will return to the previous window, where the parameters of the virtual machine you are creating will be indicated. Click on the button Done in the window Totaland you will create a new virtual machine.
A virtual machine has been created to install Windows 7 on it.

11) Before you start installing Windows 7 on your virtual machine, you must configure it. To configure your virtual machine, click on the button The properties.
12) In the settings section from the list on the left, select Display. Set the size of video memory available for the virtual machine to at least 26 megabytes. Check the box for the settings items. Enable 3D Acceleration and Enable 2D video acceleration.

13) In the settings section from the list on the left, select Carriers.
14) In the settings tree Information carriers select the DVD disc icon.
If you have the Windows 7 installation disc burned to a DVD, insert it into the DVD drive and in the column Attributes opposite element Drive unit select it from the drop-down list. Also check the box for Allow direct access.
If you have a Windows 7 installation disc in the form of an ISO image, then in the column Attributes click on the folder icon to open
15) In the window Virtual media manager press the button Add. Select an image file and click Open. Click on the button Choose

16) Your image will be added to the settings tree Information carriersnext to the virtual hard disk file. Press button Ok.

17) You will find yourself in the main program window. Click on the button Start
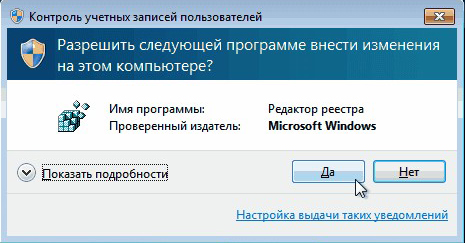
18) If information windows appear, then click the button in them Ok
19) Click inside the virtual machine screen, and in the information window, click on the button To seize
20) Install Windows 7. Installing Windows 7 on a virtual machine is no different from a typical installation on a real machine.
21) After the installation of Windows 7 on the virtual machine is completed, Virtualbox immediately starts you Windows 7 inside the virtual machine.
22) Using the mouse and keyboard in a virtual machine blocks them for use in real (host) Windows. To switch between the virtual machine window and the main Windows window, you have to use the Right Control host key.
In order for the virtual machine not to capture the mouse cursor and keyboard, and you could easily move the mouse cursor between the guest (virtual) and host (main) systems, as well as the clipboard would become common, you need to set Guest OS Additions. To install them, do the following: in the menu of the running virtual machine, select Devices -> Install Guest OS Add-ons

23) In the popup window Autostart Click VBoxWindowsAdditions.exe and install the program.
24) To turn off the virtual machine, in the menu of the running virtual machine, select A machine -> Close -> Turn off the car.
25) To start the installed Windows 7 in the main program window, click on the button Start.
Today, as never before, they are in demand among completely different groups of users of computer systems. Actually, the “OS” of Windows does not lose popularity, which many users want to use on their terminals in parallel with the main OS. Let's see how to install Windows 7 on a virtual machine in the simplest way. We take the WM VirtualBox software package as a basis, which is not only one of the powerful, but also one of the easiest to understand general principles of work.
What is a virtual machine?
If anyone does not know, the software in the form of a virtual machine is nothing more than an emulator of a computer system with hardware installed in it, an operating system and user programs.
In fact, a virtual machine with Windows 7 installed is, as it were, a copy of a real (physically) existing computer with the “seven” on board, but only at the software level, and is no different in its capabilities from a real terminal. In such a virtual system, you can install programs and applications, test equipment, emulate the operation of web servers, etc.
As a rule, all the processes associated with installing the software itself, and then the operating system, do not cause difficulties, however, given the requirements of the Seven, it’s still worthwhile to give some recommendations on the implementation of all steps of this process.
Virtual Machine for Windows 7: WM VirtualBox
So let's get started. As already understood, first we need to have an existing operating system. We proceed from the use of WM VirtualBox package.
Note, in this case the question will not be considered how to install a virtual machine on Windows 7, but how to put the "seven" on the machine. Indeed, why do we emulate its work if it is already installed as the main system?
First we need to download the latest version of the program. You can do this either on the official website or find it on the Internet. In any case, the application is free, so there will be no problems with any cracked versions.

Run the installation file and follow the instructions. Here everything is as usual: we agree with the licensed use and constantly press the “Next” button until we get to the confirmation of the installation. There is one caveat. The fact is that after clicking the Install button for some time, the connection will be disconnected, Internet access will be lost. No need to panic, this is normal.
Next, windows with an offer for some devices will appear. Everywhere we agree. In the last window, a checkbox will be displayed next to the line for creating a virtual machine immediately. If you need to proceed with these actions, we leave everything unchanged. If the virtual machine will be created later, uncheck the box and click the button to finish the installation process (Finish).
How to install Windows 7 on a virtual machine: preliminary selection of options
Everything. The main program is installed. The next step will be the creation of a new machine, on which the Seven will subsequently be placed.

To do this, in the running program, use the corresponding button, after which in the start window of the "Wizard" click the continue button. Now you need to select some basic parameters. We indicate the type of "operating system" Microsoft Windows and select the version of Windows 7.

Now one of the most crucial moments is choosing the amount of RAM. Please note that it will stand out from the total volume installed on the computer, so that when the child OS is running, it will be reduced to the main one. It is not recommended to set the size to less than 512 MB (better than 1 GB or more) and more than half of the total available size, otherwise the main system will not slow down, but may even refuse to work.

The next step is to create. In a similar "Wizard", it is recommended to select a dynamically expandable disk (Dynamically Allocated) and give it a name. The storage location and size will be specified by default, but these parameters can be changed, say, use not a system partition with installed "OSes", but another logical partition. The program suggests using a size of 20 GB. This parameter can be left unchanged, but if you decide to change it, it is not recommended to use a size less than 15 GB (this is due to the requirements of the "seven" itself).
Creating a boot disk (or system image)
If you consider the question of how to install Windows 7 on a virtual machine, you should remember that it must be installed from disk. There are two options: either the original installation disk (or a copy of it) will be used, or the installation will be made from the image.

In principle, with a dynamically expanding disk created at an early stage, it is better to choose a bootable system image. You can create it from the original DVD quite simply in programs like UltraISO, Daemon Tools, Nero, etc. and save directly to the hard drive. There is no point in dwelling on this in detail.
Preset Virtual Machine
Now, before proceeding directly with the installation of the child OS (in our case, Windows 7), the virtual machine needs to be configured.

To do this, use the properties button. In the menu, first set the size of the video memory for the display (at least 26 MB) and enable 2D and 3D acceleration.

Then, in the media section, depending on how the installed “OS” is recorded, select the DVD icon for the optical media with the original (then insert the disk into the drive) or the folder icon to indicate the location of the image. Iso (after that a line appears with reference to the image). The settings for audio, network, COM ports and shared folders can be set unchanged.
Now the main application window appears again, where you should click the "Start" button. If an informational message appears, we agree, and then click on the virtual machine screen and select the “capture” command in the pop-up window.
Installation of the "seven"
Only now we put Windows 7 on the VirtualBox virtual machine. In principle, the installation of the "seven" is absolutely no different about how if this procedure was performed on a real computer. You just need to follow the instructions of the installer. Depending on the configuration created, the process can take up to 20-30 minutes. At the end of the process, we get with the "seven", no different from the usual terminal.
Work with add-ons
Separately, it should be noted that the question of how to install Windows 7 on a virtual machine cannot do without understanding some of the nuances that many users often do not pay attention to. The problem is that the included virtual machine blocks the use of the keyboard and mouse in the main system. In addition, it will not work for the hosting and subsidiary OS at the same time. That is, copying data in the main application running on the main system and pasting it into the program on the virtual machine will be impossible.

To avoid this, you just need to go to the add-ons installation section, after which in the autorun window you need to click on the line VBoxWIndowsAdditions.exe and install the program.
Conclusion
So we figured out how to install and work with the WM VirtualBox virtual machine. As you can see, there is nothing particularly complicated here. In addition, in most cases, the average user does not have to select the parameters manually, since the “Wizard” initially monitors the configuration of the main system and offers optimal settings.
Well, how appropriate and justified is the use of a subsidiary OS in the form of a "seven", it already depends on what tasks the user himself assigns to it. By the way, if you noticed, in this case you can even not include support for virtual technology in the BIOS settings. They are used mainly only when using the "native" Hyper-V hypervisor (for its operation or for choosing a bootable OS). But in our case, this is not required.
Getting started with VirtualBox
(for Dummies)
2014.12.12. |
Recently, in the article “Getting Started with VMware Workstation”, I described the basics of working with a VMware virtual machine, hoping to show that working with virtual machines is simple and useful. VMware is good for everyone, but it has one drawback - it is paid and not cheap. Today I want to talk about a free alternative to VMWare - VirtualBox virtual machine.
As an example, I will use VirtualBox 4.3.20 for Windows and the ubuntu-12.04 guest operating system. And I will install and configure all this in the host operating system Window 7.
1. Install the VirtualBox 4.3.20 for Windows virtual machine.
It is most convenient to download the virtual machine distribution kit from the official website “www.virtualbox.org”, from the page https://www.virtualbox.org/wiki/Downloads. There you will find all the latest versions of the virtual machine for most popular operating systems. I am downloading for the Windows operating system (Figure 1).
The VirtualBox 4.3.20 for Windows distribution package is presented as a single executable file VirtualBox-4.3.20-96997-Win.exe with a capacity of 105 MB.
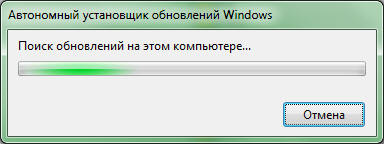
After starting the executable file, a window opens informing about the preparation for the installation of the program (Figure 2).

After a few seconds, the installation assistant window opens. To start the installation, click the "Next" button. Then a window for selecting the volume and installation location will open (Figure 3).

By default, it will be suggested to install all the components of the virtual machine, I do not advise you to disable the installation of any components, if necessary, since they will all be needed even with minimal use of the virtual machine. Also by default it will be offered to install the program in the folder “Programs Files \\ Oracle \\ VirtualBox \\” and here I will not change anything. To proceed to the next installation step, click the “Next” button.
In the window that opens (Figure 4), the basic settings for starting the virtual machine will be offered:
Create a shortcut on the desktop;
- create a shortcut in the quick launch panel;
- register Virtual Box file extensions in the operating system.
Of these settings, I will leave the first and third, but here it is a matter of taste and habit.

To continue the installation, click “Next”, after which a window will open (Figure 5) warning that during the installation the network connection will be disconnected. To avoid data loss, it is advisable to assure the operation of applications using a network connection and wait for the completion of downloading all data from the network.

The network connection will be interrupted for only a few seconds and then automatically restored, so feel free to click the “Yes” button to proceed to the next stage of preparation for installation. In the window that opens (Figure 6), it is reported that all the necessary preparations for installing the program have been made and that you can proceed with the installation. To start the installation, click the “Install” button and a window will open in front of you showing the installation process (Figure 7).


During the installation process, the operating system will ask for confirmation of the permission to install USB-channel controllers for the virtual machine (Figure 8), network adapters (Figure 9) and network services (Figure 10).


For convenient work with a virtual machine, it is desirable to have the ability to access USB controllers and work with a network, therefore we agree with the installation of these components.
After the installation is completed, a window will open on the screen reporting this long-awaited event (Figure 11). Click the Finish button to complete the installation and move on to creating and configuring the virtual machine.

2. Create a virtual machine.
Well, let's start creating a virtual machine. It will be no more difficult than installing VirtualBox. And so, we launch VirtualBox and the main program window opens before us (Figure 12).

To create a virtual machine, press the button or select the menu item: "Machine-\u003e create" or press the key combination Ctrl + N. In the window that opens (Figure 13), we specify the name of the virtual system, the type and version of the guest operating system.

My virtual machine will be called "VM." Since I decided to use ubuntu-12.04 as the guest system, the type of guest system will be Linux, and the version will be Ubuntu (32 bit). After setting the required parameters, click "Next".
In the window that opens (Figure 14), select the size of RAM allocated for the virtual machine.

In most cases, 512 MB of memory offered by default is enough. If you have little RAM, then this size can be reduced, but do not put too little, as this may affect the performance of the virtual machine. If necessary, if you need to run resource-intensive applications in a virtual machine, the amount of allocated RAM can be increased. After selecting the amount of RAM, click "Next".
In the next window (Figure 15), you need to select the virtual hard disk with which the virtual machine will work.

There are two options: choose an existing one or create a new one. Since we are just starting to work with VirtualBox, we don’t have any virtual hard disks already created, so select “Create a new virtual hard disk” and click “Create”.
In the window that opens (Figure 16), first of all, click on the “Hide Details” button. In this version of VirtualBox, there is an error in translating or naming this button, and when you click the Hide Details button, a window with detailed settings of the created virtual hard disk is displayed.

After clicking the “Hide Details” button, a window with advanced settings of the hard disk opens (Figure 17).

First of all, select the type of virtual hard disk. To ensure compatibility with other virtualization programs, it is possible to create several types of virtual hard disks, for example, VMDK hard disks can be used with VMware virtual machines.
Since the purpose of this article is to give basic skills for working with the VirtualBox virtual machine, I will choose the type of virtual disk VDI - the format of the hard disks designed to work with VirtualBox virtual machines.
ATTENTION: make sure that your hard disk has enough space to create a virtual hard disk before starting to create it.
To create a virtual female drive, click "Create." Then a window will open illustrating the process of creating a hard disk (Figure 18). This may take several minutes.

The created virtual disk is an ordinary file in the host operating system with the name you specified and the .vdi extension. This file can be moved, copied, transferred to another computer. For example, if you need to work with the same virtual machine at home and in the office, you can transfer the hard drive file on a flash drive and work at home and in the office with the same virtual machine.
After creating a virtual hard disk, a new virtual machine will appear in the main window of the VirtualBox program, ready for use (Figure 19). It remains only to install a guest operating system on it.

3. Install the guest operating system.
Installation of the guest operating system will start automatically after the first start of the virtual machine. And so, start the virtual machine by pressing the button. After a few seconds, a window will open (Figure 20), in which you will be asked to specify the path to the boot disk or image of the boot disk.

I will install the operating system from the boot disk image (ubuntu-12.04-oem-i386.iso) previously downloaded by RuTracker.org. To select the boot disk image, click the button and in the window that opens (Figure 21) select the ubuntu-12.04-oem-i386.iso file, click the "open" button and click "continue" to start installing the operating system in the window (Figure 20).

Immediately after pressing the button, the virtual machine will start (Figure 22) and after a few seconds the installation of the guest operating system will automatically start. During the installation of the operating system, prompts will appear in front of you to facilitate the work with the virtual machine.

Installation of the guest operating system will occur exactly the same as when installing this operating system on a real computer or on a VMWare virtual machine. Since I already described the process of installing a similar operating system in the article “Getting Started with VMware Workstation”, in the section on installing a guest operating system, I will not repeat it and immediately proceed to the description of the basics of working with a virtual machine.
4. Basic operations with a virtual machine.
4.1. Virtual machine startup
Run the VirtualBox virtualization program. The main program window will open on the screen (Figure 23).

If in the left part of the window that opens, in the list of available virtual machines, you don’t need one, select the menu item:
Machine-\u003e Add
In the file manager that opens, select the virtual machine you need (a file with a resolution of .vbox) and click the "open" button. The selected virtual machine will appear in the list of available virtual machines in the left part of the VirtualBox main window.
In the list of virtual machines in the window (Figure 23), select the one you need. I will select a virtual machine named “VM” and start the selected virtual machine in one of the following ways:
By clicking the button at the top of the window, under the "Edit" menu;
- selecting a menu item: Machine-\u003e Run.
After starting the virtual machine, if its state was saved, the state of the virtual machine will be automatically restored and you can continue to work as if you did not turn off the virtual machine. If the state of the virtual machine was not saved, then the installed guest system will start, similar to starting the operating system when the real computer is turned on.
4.2. Pausing the virtual machine.
It is often necessary to temporarily leave the workplace. If at this moment a certain program is running and you cannot miss any important moment in the process of running this program, then VirtualBox provides the ability to temporarily suspend the virtual machine. To do this, select the menu item: Machine-\u003e Pause, and the virtual machine will pause automatically. To resume work, select the menu item again: Machine-\u003e Pause.
Naturally, you can shut down the virtual machine while maintaining state, and then restart the virtual machine, but this is much longer. If pausing takes fractions of a second, then saving the state may take several tens of seconds. If you often have to be distracted, then it is much more convenient to pause.
4.3. Shutting down the virtual machine.
There are several ways to complete work with a virtual machine:
1. Click the shutdown button in the upper right corner of the window (Figure 24). In the menu that opens (Figure 25), select one of the following items:
- “Save the state of the machine”, while the state of the machine will be saved, and then the virtual machine will shut down. The next time you start, the state of the virtual machine will be automatically restored and work will continue, as if you did not turn off the virtual machine.
- “Send a shutdown signal”, this will open a shutdown window, the appearance of which depends on the operating system used. Using this window, you can regularly shut down the guest operating system, and after the guest operating system finishes, the virtual machine will automatically shut down.
- "Turn off the car." This action is equivalent to de-energizing a real machine.
I would like to draw your attention to the fact that in the version of VirtualBox used in this program, regardless of your choice in the shutdown window of the operating system, a few seconds after selecting "Send a shutdown signal" the virtual machine shuts down.


2. By the standard method provided by the guest operating system, shut down the guest operating system, while the virtual machine will automatically shut down after the guest operating system is finished.
3. Select a menu item: Machine -\u003e Send Ctrl-Alt-Del, while the actions of the virtual machine will be similar to the actions of a real computer when you press the keyboard keys of the same name, i.e. The task manager starts, the appearance of which depends on the operating system you are using. Using the task manager, you can shut down the entire guest operating system or individual threads. After the guest operating system completes, the virtual machine will automatically shut down.
4. Select a menu item: Machine -\u003e Reboot, after which a window will open (Figure 26), warning about the loss of all unsaved data in applications running in the guest operating system if you continue to reboot. If you click the "Restart" button, then the further actions of the virtual machine will be similar to the actions of a personal computer when you click the "Restart" button on the "system".

5. Select the menu item: Machine-\u003e shut down, and a shutdown window will open, the appearance of which depends on the operating system used. Using this window, you can regularly shut down the guest operating system, and after the guest operating system and the system are completed, the virtual machine will automatically shut down.
I draw your attention to the version of VirtualBox used in this program, regardless of your choice in the operating system shutdown window, a few seconds after selecting a menu item "Machine-\u003e shut down", the virtual machine shuts down.
4.4. Connect removable devices to a virtual machine.
Consider connecting removable devices using the example of connecting and disconnecting a USB drive.
To connect a USB drive, select the menu item: Devices-\u003e USB Devices and in the list that opens (Figure 27), select the USB device you need. In my case, the USB drive was identified as “Generic Mass Storage”.

After selecting the “Generic Mass Storage” menu item, the USB drive will be connected, as if you connected a USB flash drive to a real computer, and in the list (Figure 27) the selected device will be checked. Further actions are determined by your operating system. To disconnect the USB drive, uncheck the checkmark in the same menu. As you can see, everything is very simple.
ATTENTION! When a removable device is connected to a virtual machine, it is disconnected in the host operating system, which can lead to the loss of unsaved data. Therefore, before connecting a removable device to a virtual machine, make sure that you do not perform any actions with it in the host operating system.
4.5. Switch between host and guest operating systems.
When working in a virtual machine, the keyboard and mouse are “captured”, that is, all keystrokes or mouse actions are processed by the virtual machine and ignored in the host operating system. In order to switch to work with the host operating system, you must press the "Host" key or a combination of keys. For different versions of virtual machines and depending on their settings, the “Host” key may be different, however, the name of the key is displayed in the lower right corner of the virtual machine window (Figure 28).

When this key is pressed, the processing of all events from the keyboard and mouse will again be processed by the host operating system. In order to return to work with a virtual machine, just click on an arbitrary place in the window of the ritual machine.
This is quite enough to start working with a virtual machine, and in the future, if you like a new tool, and you certainly will like it, you will easily learn all its features, and I will try to help you in one of the following articles.
Good day, readers.
Microsoft operating systems provide all the necessary tools for creating a virtual machine. It is another device that has its own memory, operating system and software. In other words, another system appears, working in a separate window. Later in the article I will tell you how the installation of a virtual machine on Windows 7 proceeds.
Microsoft’s seventh version has a built-in tool to create a VM. True, it is designed only for use with Windows XP. But this state of affairs does not quite suit us. So it’s worth using a third-party application - Virtualbox. The program works with all systems, starting with version XP.
To achieve the goal, you must perform a series of actions:

Now you need to specify all the settings:

VMware Workstation( )

VMware Workstation is another popular OS virtualization program. It is great for administrators who create testing systems that work with different environments. To achieve the goal, you need to do a number of actions:

To turn off the machine, you just need to shut down the OS in the usual way.