Since we all like to experiment, dig into the system settings, run something of our own making, we need to think about a safe place for experiments. Such a place will be for us to be a VirtualBox virtual machine with Windows 7 installed.
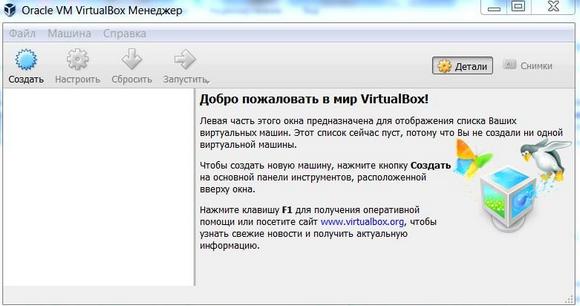
When the VirtualBox virtual machine (later VB) starts, the user sees a window with a fully Russian interface.
Recall that when you install the application, the shortcut is automatically placed on the desktop. If you are creating a virtual machine for the first time, in this article you will find detailed instructions, which can be useful at this stage.
So, in a new window, click "Create", after which you can select the OS name and other attributes. You can choose from all available OS.
Proceed to the next step by clicking «Next». Now you need to specify how much RAM should be allocated to the VM. For its normal functioning, 512 MB is enough, but you can choose more.
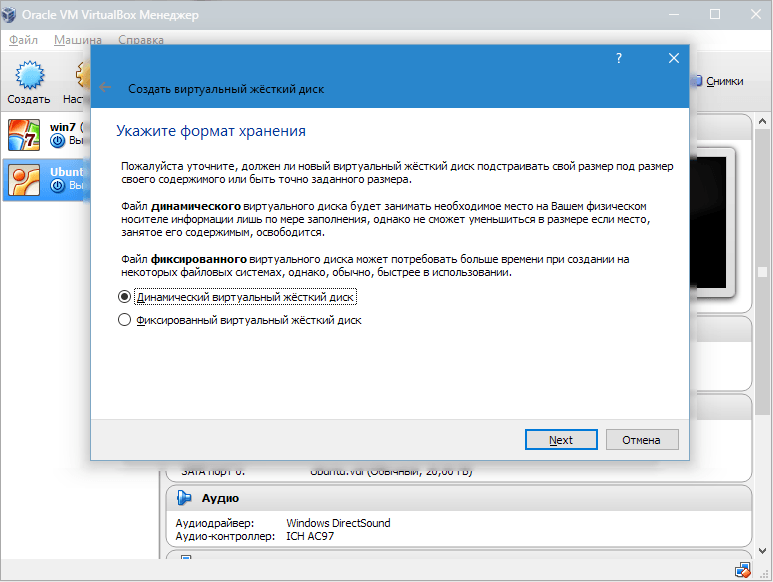
After that we create a virtual hDD. If you previously created disks, then you can use them. However, in this same article, we will dwell on how they are created.
We mark the point "Create a new hard disk" and proceed to further steps.

In a new window, you need to specify where the new disk image and what volume it should be located. If you create a boot disk that contains the Windows 7 operating system, then 25 GB is enough (this number is set by default).
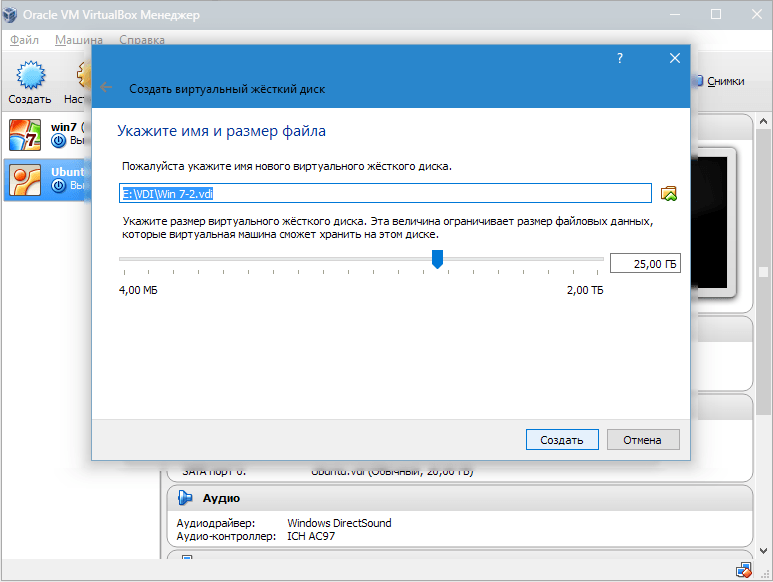
As for the placement, the best solution is to place the disk outside the system partition. Failure to do so may result in overloading the boot disk.
If everything suits, press "Create".
When the disc is created, the parameters of the created VM will be displayed in a new window.
![]()
Now you need to configure the hardware of the virtual.
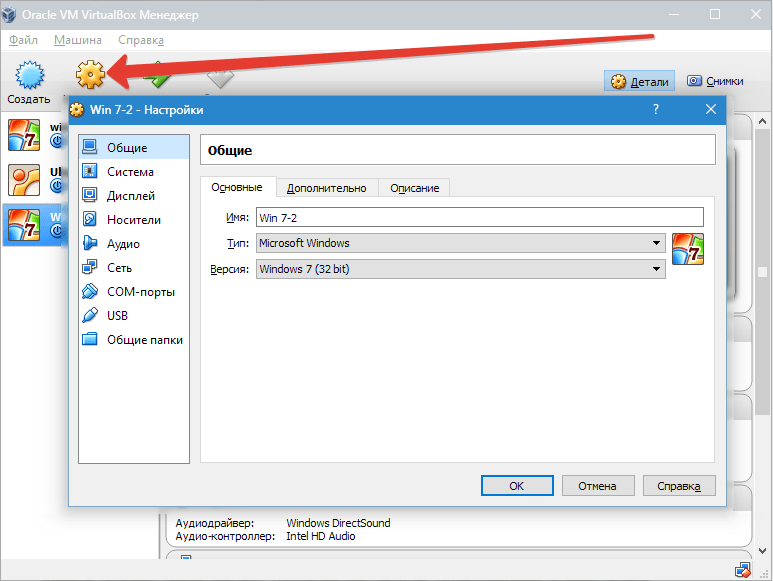
In the "General" section, the 1st tab displays the key information about the created machine.
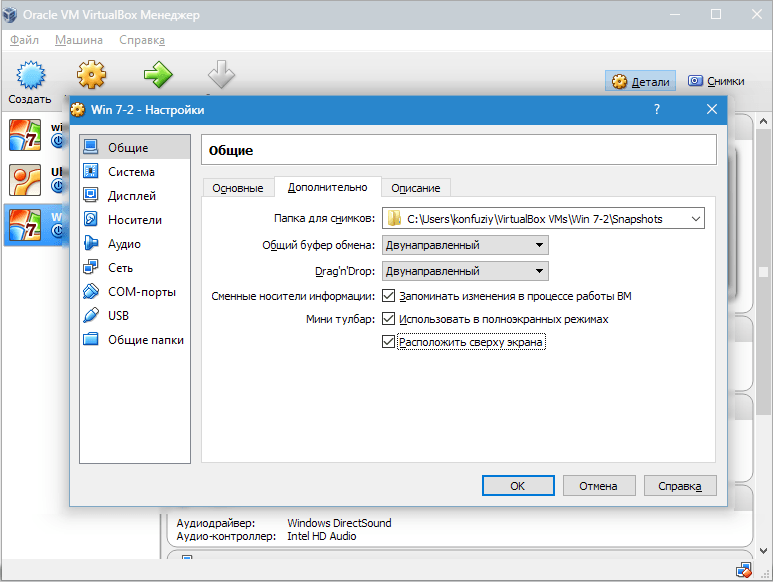
Open the tab "Additionally". Here we will see an option Folder for pictures. The specified folder is recommended to be placed outside the system partition, since the pictures are of a large volume.
"Shared Clipboard" It means the work of the clipboard during the interaction of your main OS and VM. The buffer can work in 4 modes. In the first mode, the exchange is made only from the guest operating system in the main, in the second - in the reverse order; The third option allows both directions, and the fourth one disables the data exchange. We choose the bi-directional version as the most convenient.
«Mini toolbar» is a small panel that allows you to control the VM. We recommend this console to be activated in full screen mode, because it completely repeats the main menu of the working window of the VM. The best place for it is the top part of the window, because there is no risk of accidentally clicking on one of its buttons.
We proceed to section "System". The first tab suggests to make certain settings, which we will consider below.
1. If necessary, adjust the amount of RAM in the VM. However, only after its launch it will become clear until the end whether the volume is chosen correctly.
When choosing, you should build on the amount of physical memory installed on the computer. If it is 4 GB, then for VM it is recommended to allocate 1 GB - it will function without "brakes".
2. Determine the order of loading. The floppy disk player (floppy disk) is not needed, turn it off. 1-m in the list should assign a CD / DVD-drive in order to be able to install the OS from the disk. Note that this can be either physical disk, and a virtual image.
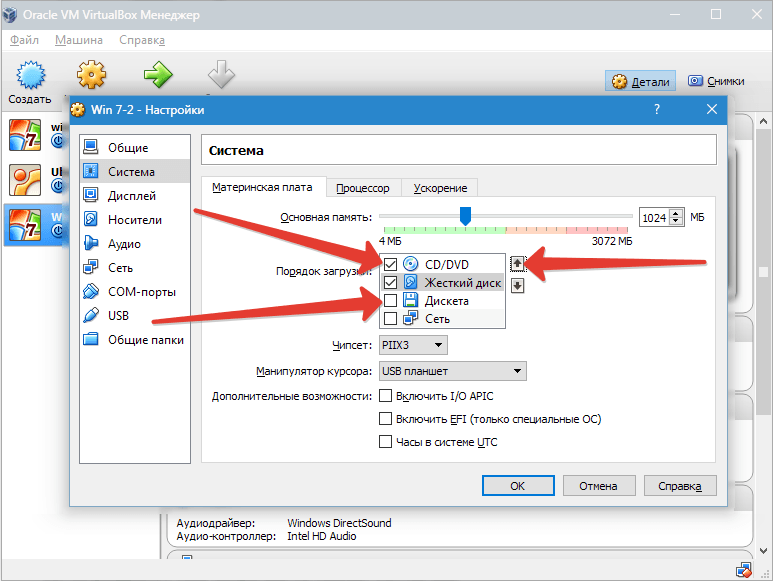
Other settings are listed in the help section. They are closely related to the configuration of your computer's hardware. If you configure settings that are not consistent with it, the VM can not start.
On the bookmark "CPU" The user specifies how many cores are available on the virtual "motherboard". This option will be available if hardware virtualization is supported AMD-V or VT-x.
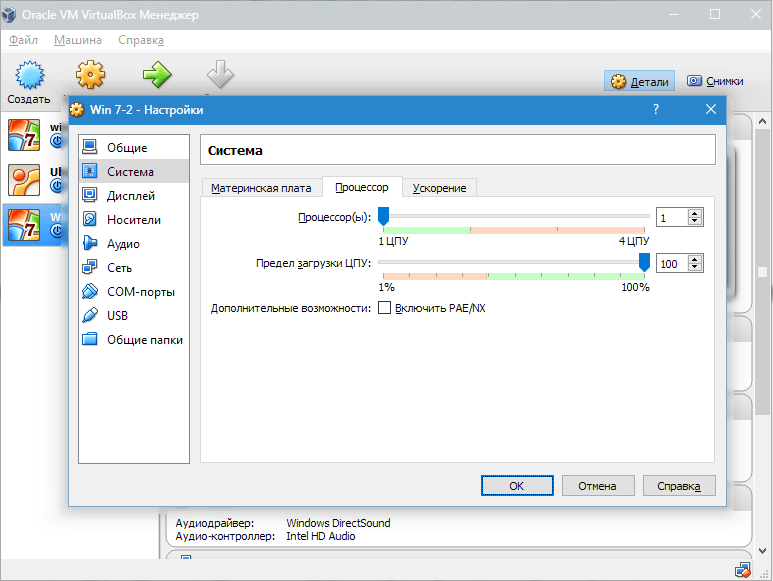
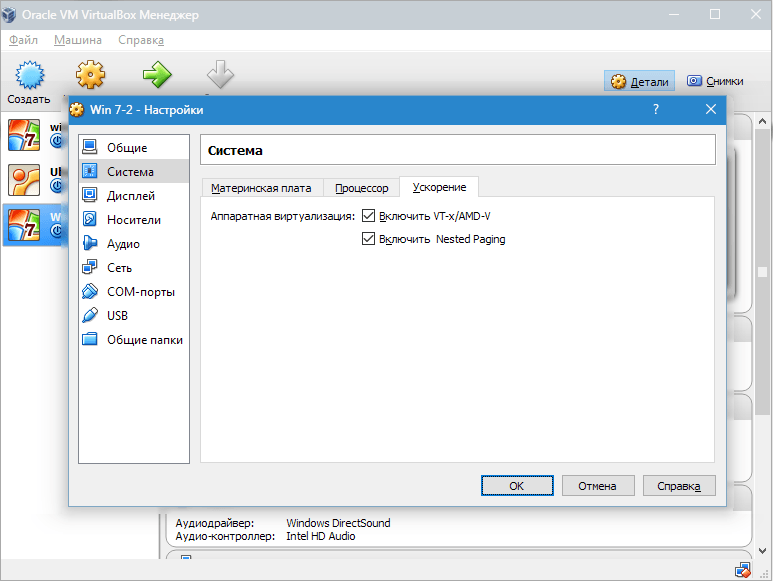
As for hardware virtualization options AMD-V or VT-x, then before activating them, it is necessary to find out whether these functions are supported by the processor and whether they are initially included in the BIOS - it often happens that they are disabled.
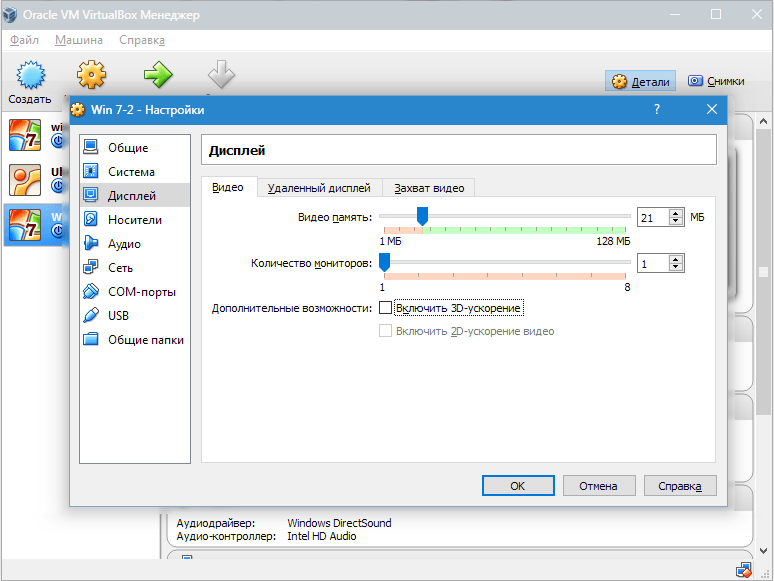
Now consider the section "Display". On the bookmark "Video" indicates the amount of memory of the virtual video card. Also here activation of two-dimensional and three-dimensional acceleration is available. The first of them is desirable to include, and the second parameter is optional.
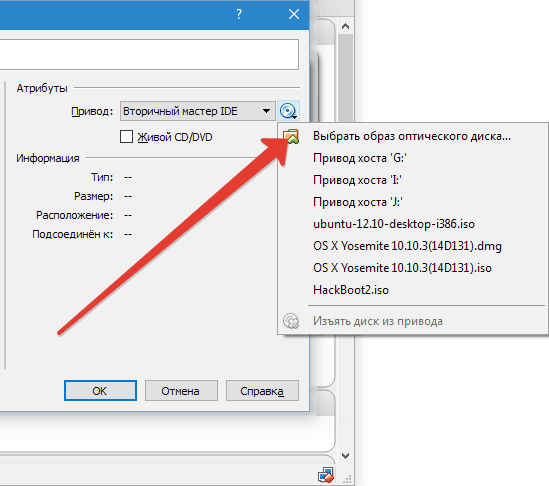
In chapter "Carriers" displays all the disks of the new virtual. Also here you can see a virtual drive with an inscription "Empty". In it we will mount the image of the installation the Windows disk 7.
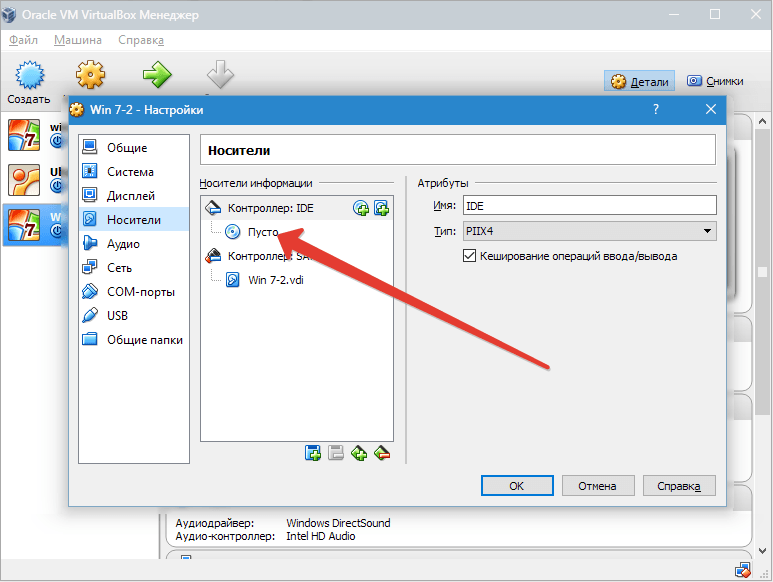
The virtual drive is configured as follows: click on the icon on the right. The menu is opened in which we press «Choose an image optical disk» . Next, you need to add an image of the operating system boot disk.

Questions concerning the network, we will not cover here. Note that network adapter is initially active, which is a prerequisite for VM output on the Internet.
On the section SOM There is no point in stopping because there are not any connections to these kinds of ports today.
In chapter USB note both available options.
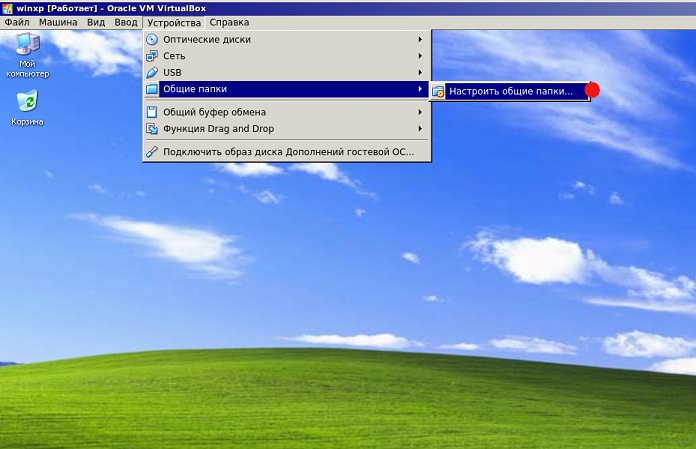
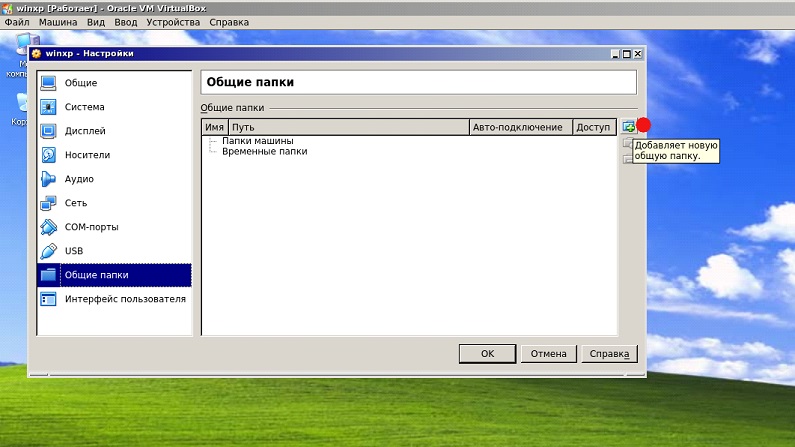
Let's go into "Shared Folders" and select those directories to which the VM is to be granted access.
The entire setup process is now complete. Now you can start installing the OS.
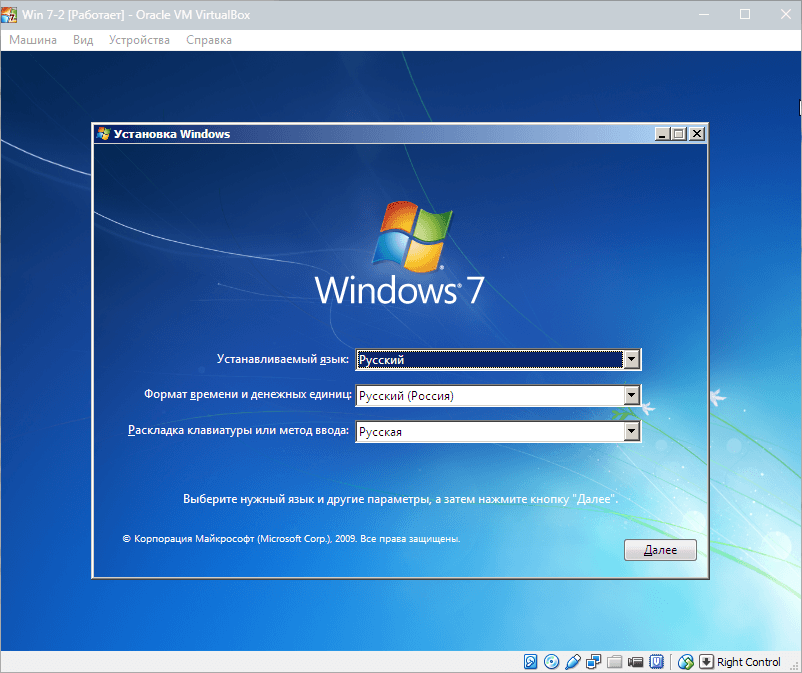
Select the created machine in the list and click "Start". The very installation of Windows 7 on VirtualBox is very similar to conventional installation Windows.
After downloading installation files a window with a choice of language will open.
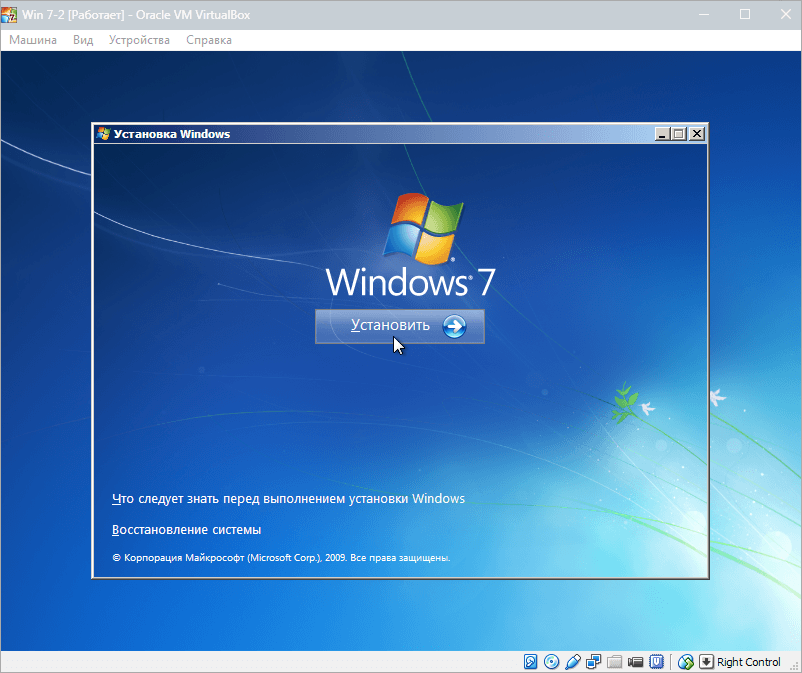
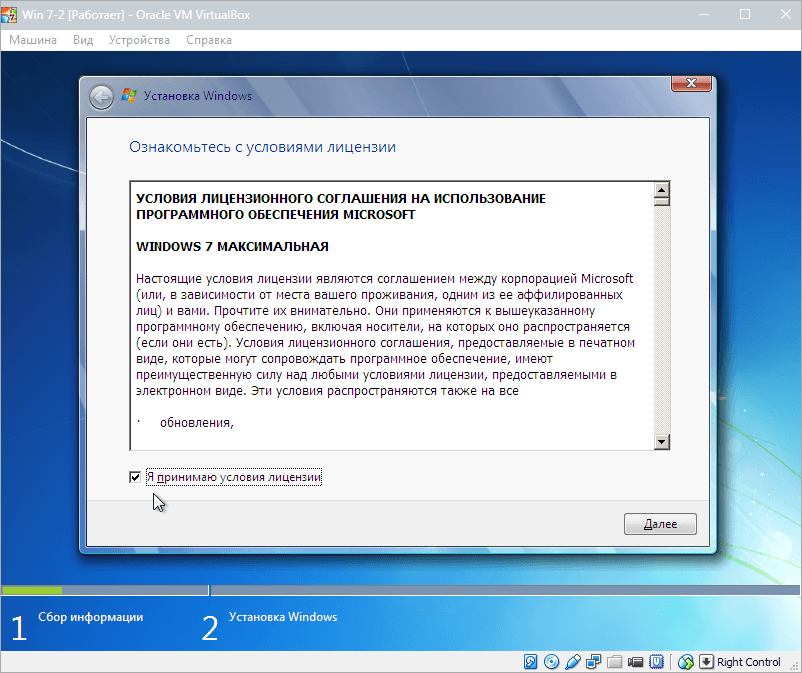
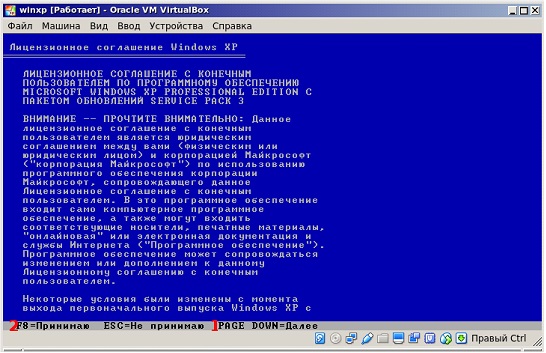
We accept the terms of the license.
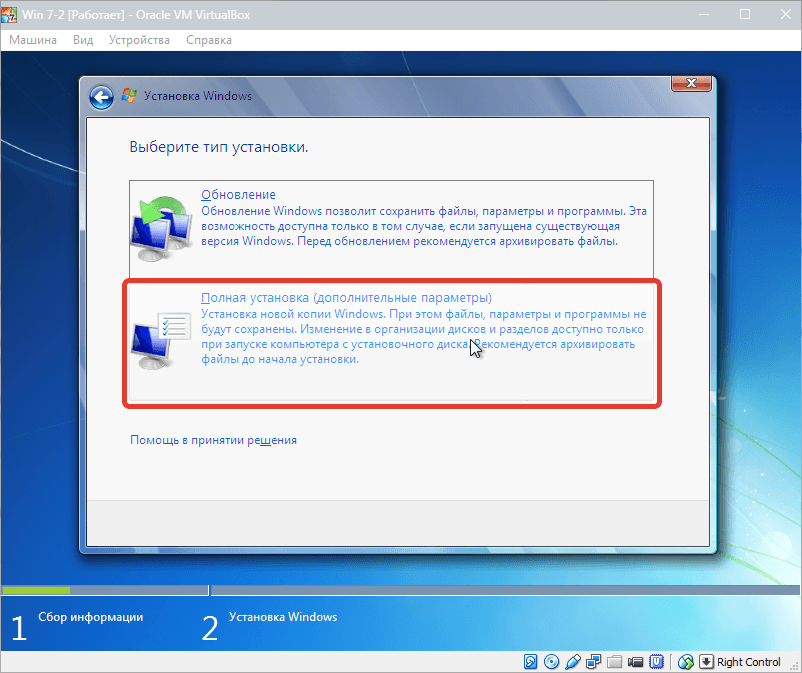
Then choose "Full installation".
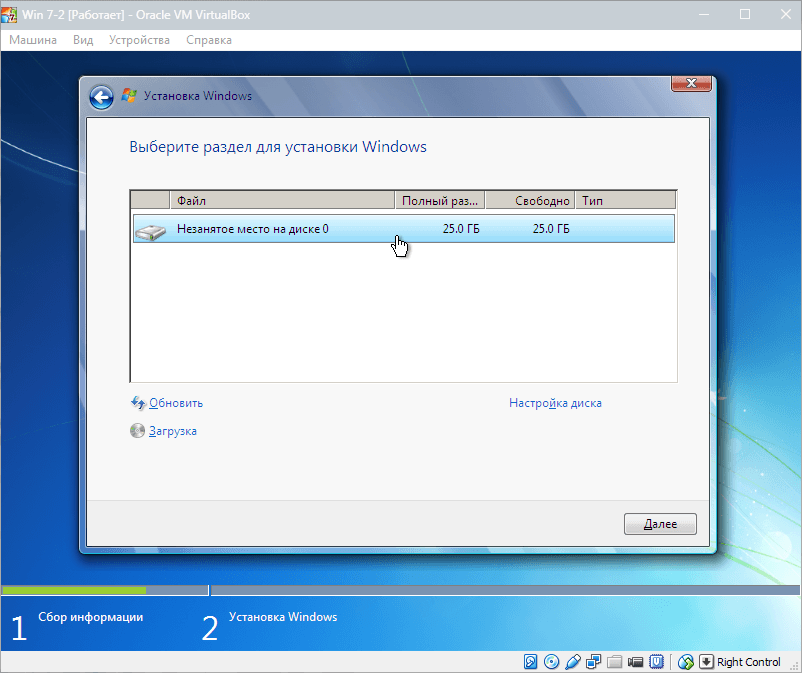
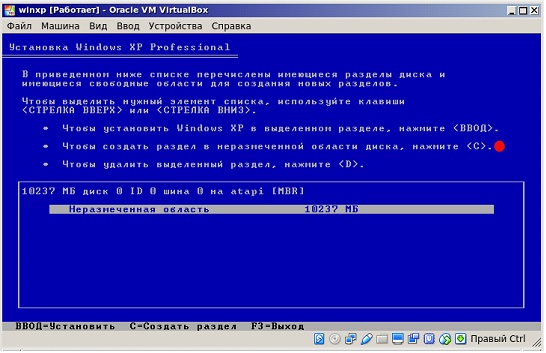
In the next window, you need to select the disk partition to install the operating system. We have only one section, so we choose it.
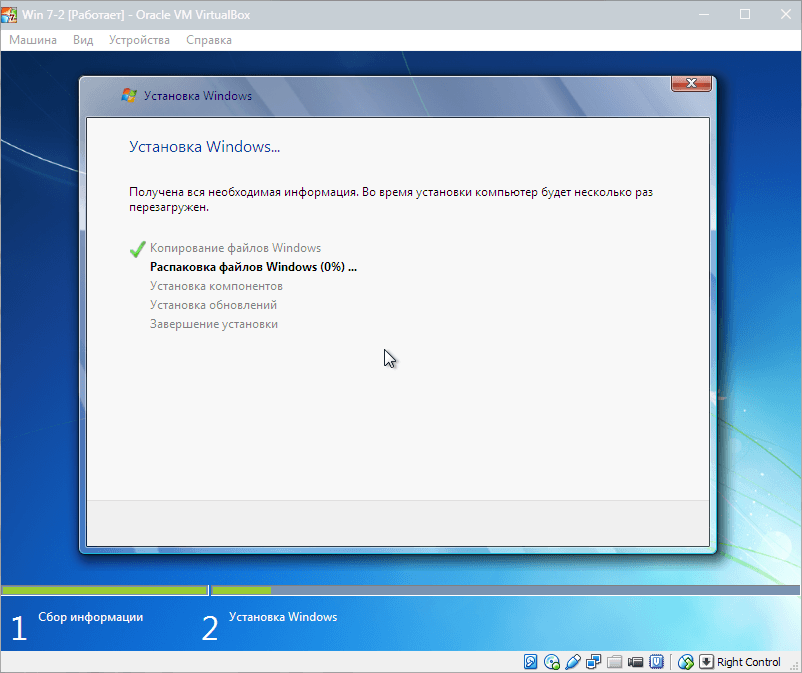
During installation, the machine will reboot automatically several times. After all reboots, enter the desired username and computer.
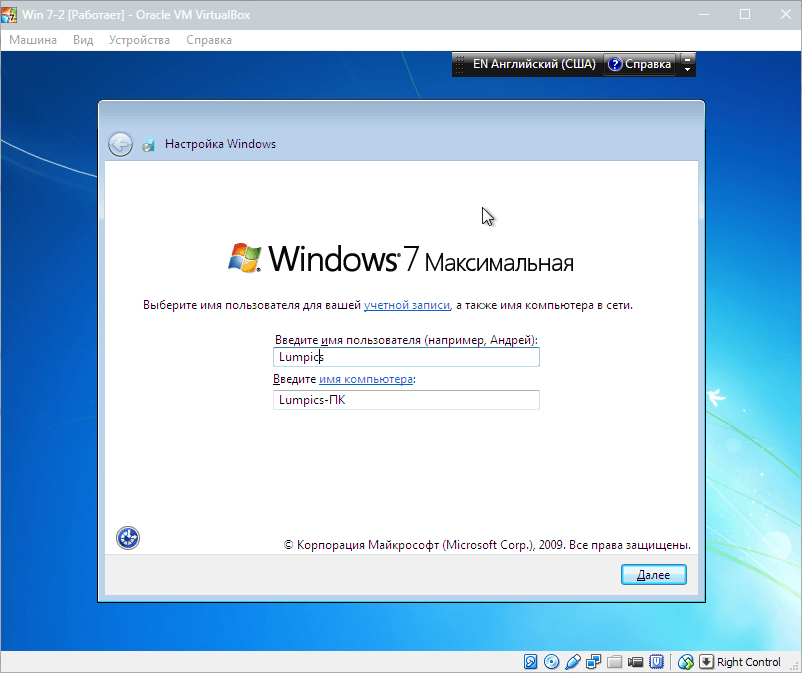

Here we enter the product key, if any. If not, then just click "Further".

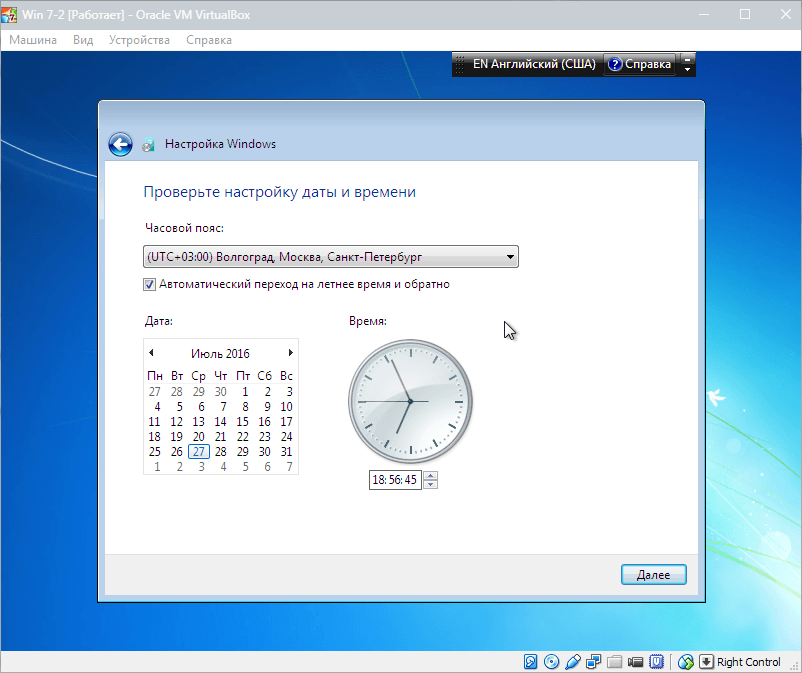
We set the time zone and date.
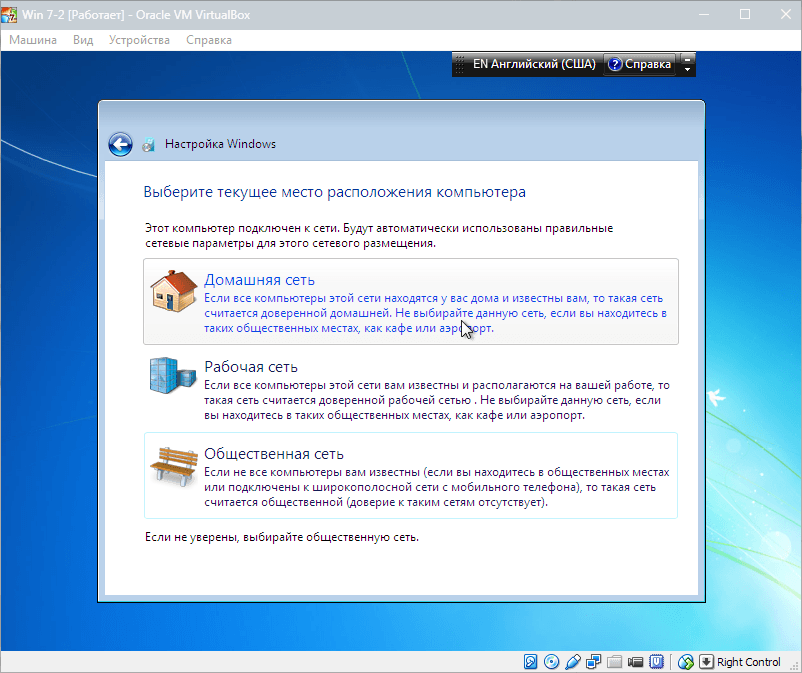
Then choose which network to include our new virtual machine. Click here "Home".
After these actions, the virtual machine will automatically reboot and we will get to the desktop of the freshly installed Windows 7.
Thus, we installed Windows 7 on a VirtualBox virtual machine. Then it will need to be activated, but this is a topic for another article ...
What is a Virtual Machine and why is it needed?
A virtual machine is a software environment that creates another "real computer" on your computer (with a different operating system). On the virtual machine, as well as on the real computer, the operating system is installed (any OS - Win, Linux, etc. suitable for the machine width) can be installed, the virtual machine also has a BIOS, hard disks ( HDD drives are virtual ie. the whole disk looks like one file on a physical HDD) rAM, can be emulated peripherals. Multiple virtual machines can be created on the same computer at the same time, the number depends on the physical resources of the real PC.
Why do I need a virtual machine? Where to apply it?
- To protect information and limit the capabilities of processes ie. you can run an infected file and only the virtual machine will be damaged, the main OS will be intact;
- To learn software and its settings;
- To emulate different architectures (for example, the game console emulator);
- To model information systems with client-server architecture on one PC (creation of a computer network with the help of several virtual machines);
- To simplify the management of clusters - virtual machines can simply migrate from one physical machine to another while running;
- To test your applications on various operating systems (for example, testing on Windows XP, Windows Vista, Windows 7, 8, etc.)
- If you or someone from the PC users are "spotters" ie. when you go to the Internet you will surely catch Trojan or "Blocker" , then also as an option you can use a virtual machine :)
Here some aspects of the application are described, the list can be continued. Enough talk, get down to business ...
Step 1. Preparation
There are a lot of programs that create virtual machines. I also chose Oracle VM VirtualBox. To fulfill my goals this machine completely suits me and the main advantage is that it free of charge . The installation distribution kit of the program you can take from the official site of the distribution kit, with the example of which this and subsequent lessons have been created. After you downloaded the distribution, go to step 2.
Step 2. Running the distribution VirtualBox
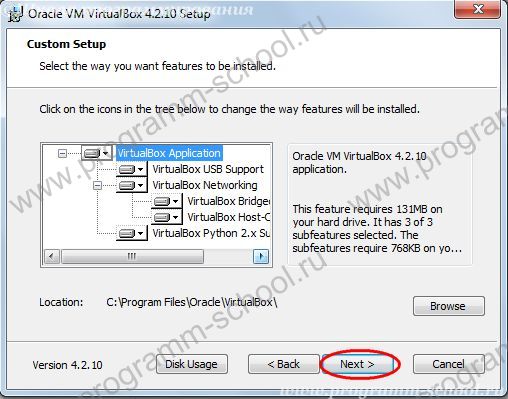
Run the downloaded installation file VirtualBox-4.x.x-Win.exe and click Next\u003e
In the next window we leave everything by default. If you want to install VirtualBox to another folder, then click " Browse "And specify your directory, but it is recommended to leave it by default. Click Next\u003e
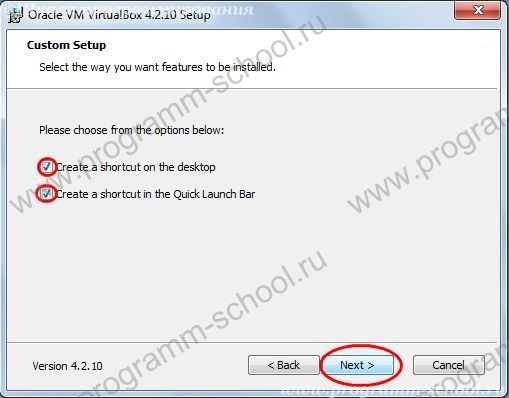
The next window offers a choice of where to create shortcuts for launching VirtualBox.
- "Create a shortcut on the desktop" - create a shortcut on the desktop
- "Create a shortcut in the Quick Launch Bar" - create a shortcut in the Quick Launch Bar
Enable or disable the creation of shortcuts and click Next\u003e
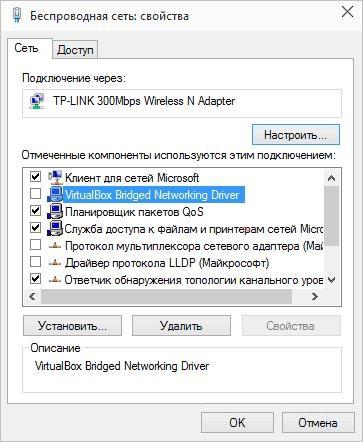
The following frightening window warns us that if you install Oracle VM VirtualBox, all network connections. The reason will be the installation of virtual network equipment to connect our machine to the network. Agree click "Yes"
![]()
And one more window in which they ask for confirmation of the charter. Click "Install"
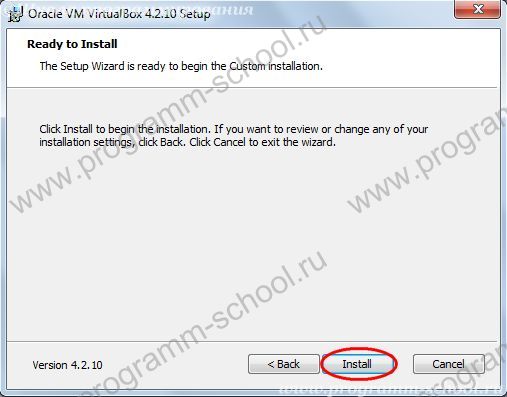
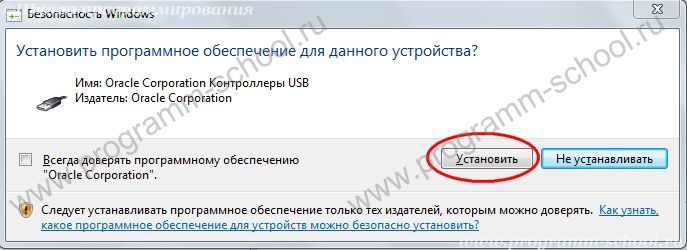
We are waiting for the installation to finish. When installing VirtualBox on Windows 7, windows should appear "Windows Security" . At all we press "Install" . Whatever messages are not "tortured" you can tick " Always trust the Oracle software ... »
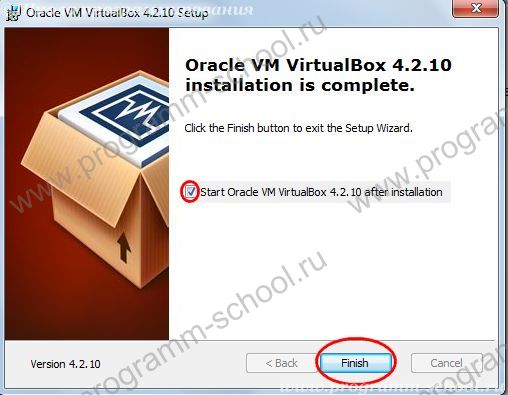
And at the end of the installation, you will receive a message that the installation was successful. The checkbox "Start Oracle VM Virtualbox v.4.2.10 after installation" means that the application will be launched when the installation is complete.
Click Finish
This completes the installation of Oracle VM VirtualBox. To configure and prepare for the installation of the OS will be described in the following articles.
Today, more than ever, in demand for completely different groups of users of computer systems. Actually, the Windows operating system does not lose popularity, which many users want to use on their terminals in parallel with the main OS. Let's see how to install Windows 7 on a virtual machine in the simplest way. As a basis, take the software package WM VirtualBox, which is not only one of the powerful, but also one of the easiest to understand the general principles of work.
What is a virtual machine?
If anyone does not know, software in the form of a virtual machine is nothing more than an emulator of a computer system with installed in it "hardware" hardware, operating system and user programs.
In fact, a virtual machine with Windows 7 installed is like a copy of a really (physically) existing computer with the "seven" on board, but only at the program level, and does not differ in any way from the present terminal. In such a virtual system, you can install programs and applications, test equipment, emulate the operation of web servers, and so on.
As a rule, all the processes associated with the installation of the software itself, and then the operating system, do not cause complications, but given the requirements of the "seven", it is still worthwhile to give some recommendations on the implementation of all steps of this process.
Virtual machine for Windows 7: WM VirtualBox
So, let's get started. As is already clear, first we will need to install a virtual machine into an existing operating system. We proceed from the use of the package WM VirtualBox.
Note, in this case the question will not be considered how to install the virtual machine on Windows 7, but how to put the "seven" on the machine. Indeed, why should we emulate its work, if it is already installed as the main system?
First we need to download latest version programs. You can do this either on the official website, or find it on the Internet. In any case, the application is free, so there will not be any problems with some "cracked" versions.
Run the installation file and follow the instructions. Here everything is as usual: we agree with licensed use and we constantly press the "Next" button until we reach the confirmation of the installation. There is one nuance. The matter is that after pressing the button Install for some time the connection will be disconnected, access to the Internet will be lost. Do not panic, it's normal.
Next, there will be windows with a suggestion for some devices. Everywhere we agree. In the last window, the field with the checkbox next to the line of the immediate creation of the virtual machine will be displayed. If you want to proceed to these actions, we leave everything unchanged. If the virtual machine is created later, uncheck the box and click the Finish button.
How to install Windows 7 on a virtual machine: Preliminary parameter selection
All. The main program is installed. The next stage will be the creation of a new machine, to which the "seven" will subsequently be placed.
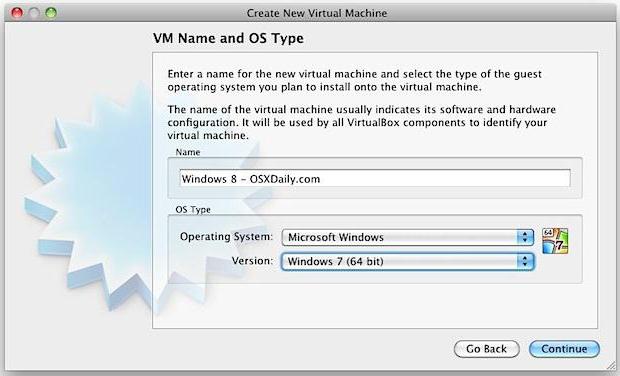
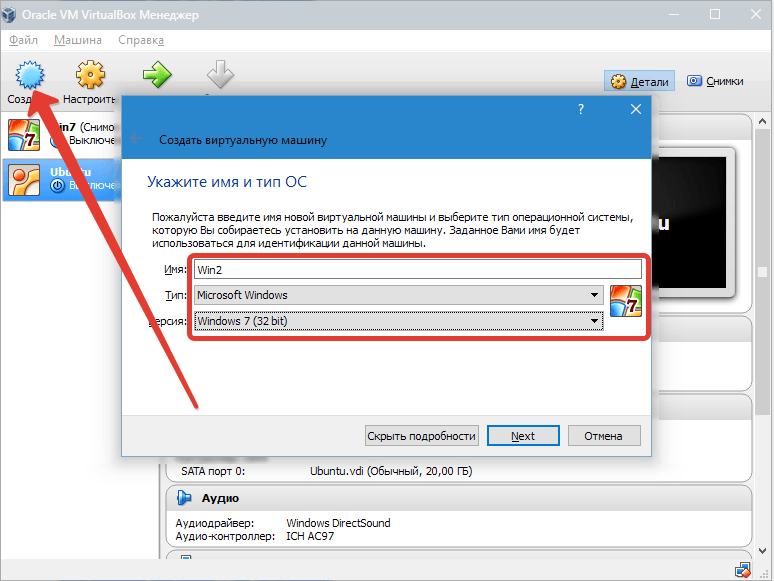
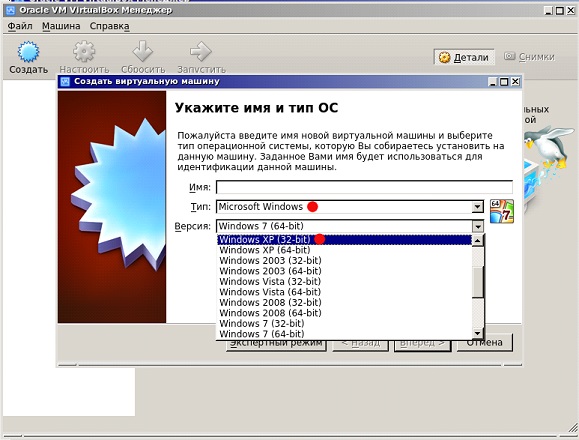
For this, in running the program use the corresponding button, and then click the continue button in the start screen of the "Wizard". Now you need to select several basic parameters. Specify the type of "OSes" Microsoft Windows and choose
![]()
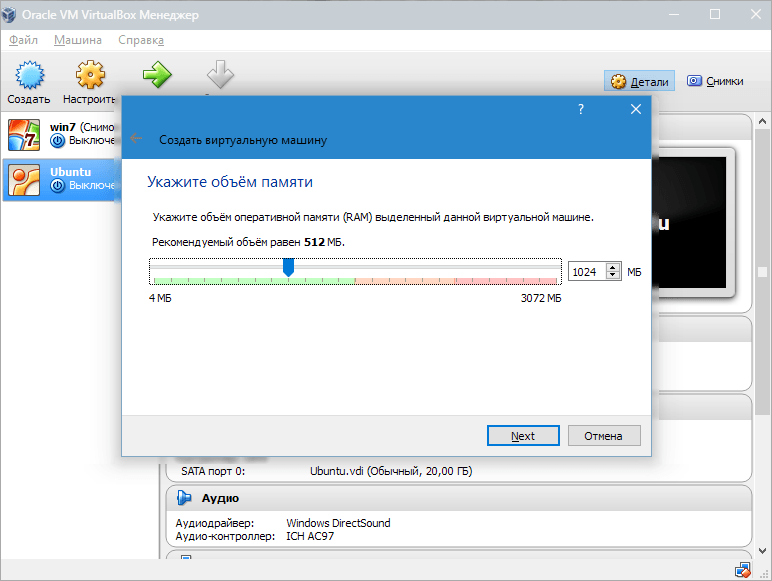
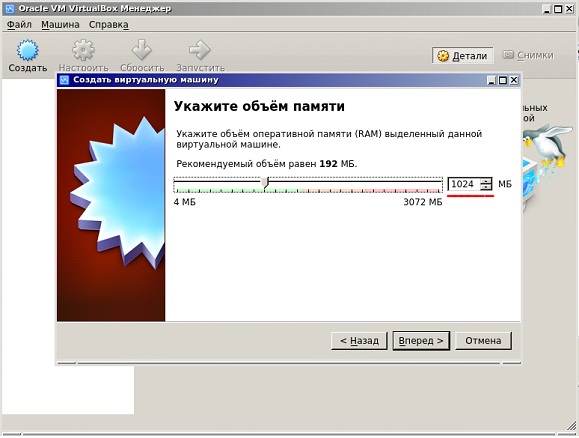
Now one of the most crucial moments is choosing the amount of RAM. Note that it will be allocated from the total amount installed on the computer, so that when the child OS is running, it will be reduced to the main one. It is not recommended to set the size to less than 512MB (better than 1GB and above) and more than half of the total available size, otherwise the main system will not just slow down, but it may even refuse to work.
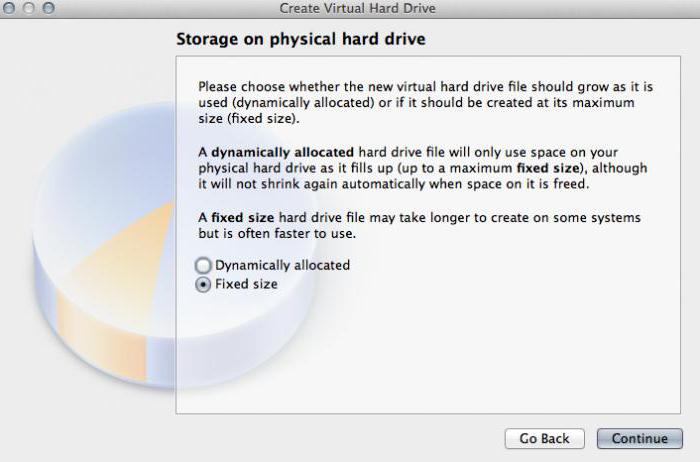
The next step is to create. In a similar "Wizard", it is recommended that you select a dynamically expanded disk (Dynamically Allocated) and name it. The save location and size will be specified by default, but you can change these settings, for example, use a non-system partition with the "operating system" installed, and another logical partition. The program suggests using a size of 20 GB. This parameter can be left unchanged, but if you decide to change it, it is not recommended to use a size less than 15 GB (this is due to the requirements of the "seven" itself).
Creating a boot disk (or system image)
If you consider how to install Windows 7 on a virtual machine, you should remember that it should be installed from the disk. There are two options: either the original installation disk (or a copy of it), or the installation will be done from the image.
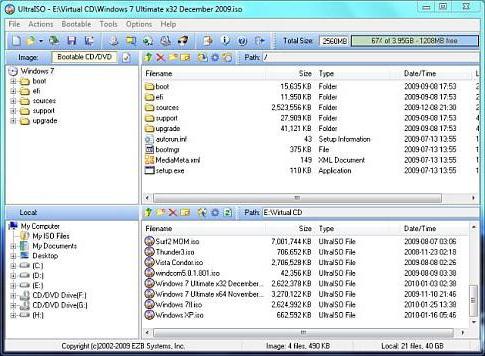
In principle, when an dynamically expanded disk is created at an early stage, it is better to select boot image system. You can create it from the original DVD quite simply in programs like UltraISO, Daemon Tools, Nero, etc. and save directly on the hard drive. To stop in detail on this sense is not present.
Presetting a Virtual Machine
Now, before proceeding directly to the installation of the daughter OS (in our case Windows 7), the virtual machine needs to be configured.
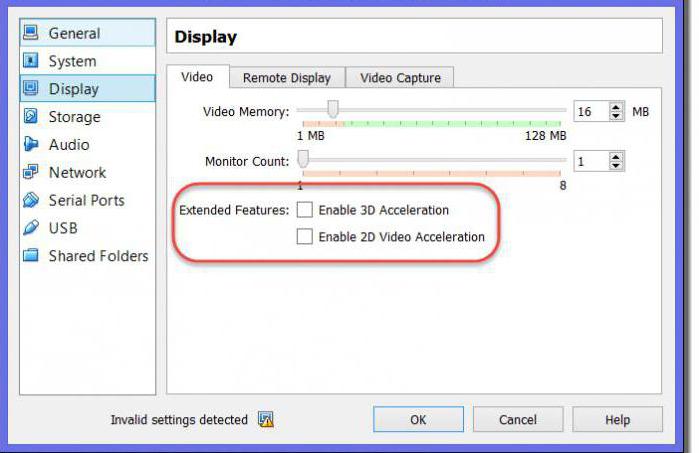
To do this, use the property button. In the menu, first set the size of the video memory for the display (at least 26 MB) and enable the acceleration of 2D and 3D.
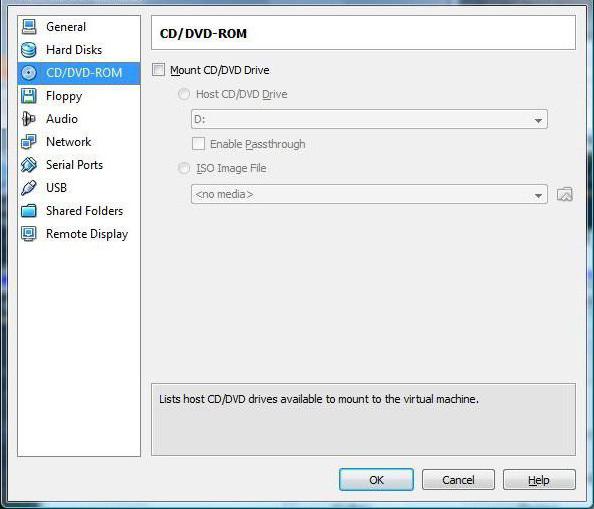
Then, in the media section, depending on how the "operating system" is installed, select the DVD-ROM icon for the optical media with the original (after which we insert the disc in the drive) or the folder icon to specify the location of the image.iso (after that the line will appear with reference to the image). Settings of audio, network, COM ports and public folders can be set unchanged.
Now the main application window appears again, where you should click the "Start" button. If appears announcement, agree, and then click on the virtual machine screen and in the pop-up window, select the "capture" command.
Installation of the "seven"
Only now we put Windows 7 on a virtual machine VirtualBox. In principle, the process of installing the "seven" is absolutely no different about how if this procedure was performed on a real computer. You just need to follow the instructions of the installer. Depending on the configuration, the process can take up to 20-30 minutes. At the end of the process, we get with the "seven", no different from the usual terminal.
Working with add-ons
Separately, it should be noted that the question of how to install Windows 7 on a virtual machine can not do without an understanding of some of the nuances that many users often do not pay attention to. The problem is that the included virtual machine blocks the use of the keyboard and mouse in the main system. In addition, it will not work for the hosting and child OS simultaneously. That is, it is impossible to copy data in the main application running on the main system and insert them into the program on the virtual machine.
To prevent this from happening, you just need to go to the add-ons installation section, then click on the VBoxWIndowsAdditions.exe line in the autorun window and install the program.
Conclusion
So we figured out how to install and work with the virtual machine WM VirtualBox. As you can see, there is nothing particularly complicated here. In addition, in most cases, the average user does not have to manually select the parameters, since the "Master" initially monitors the configuration of the main system and offers the optimal settings.
Well, how expedient and justified is the use of a subsidiary OS in the form of a "seven", already depends only on what tasks the user himself is entrusting to him. By the way, if you notice, in this case you can not even include support for virtual technology in bIOS settings. They are used mainly only when using the native Hyper-V hypervisor (for its operation or for selecting the bootable OS). But in our case this is not required.
Virtualbox is an intuitive virtual machine, that is, a program with which you can run additional operating systems as part of the basic operation, installed on the hard disk or SSD. Windows XP is an old, but time-tested and, in a sense, still relevant, lightweight and familiar operating system. Installing it on a virtual machine, you can solve a variety of tasks.
What is it for
To start with a little terminology. The operating system in which you are working now and reading this text is called a host. The OS installed and running within the host system is referred to as a guest OS. Setting up an "ex-pi" on Virtualbox can have different purposes. Even if your working system is Windows XP, a guest "copy" can also come in handy. Here are a few popular ways to use this feature:
- Installing and running "Windows" programs in a different environment (OS Ubuntu, Debian, etc.).
- Use old applications and games that do not work in new systems (7, 8.1, or 10).
- Testing of potentially dangerous applications (the guest OS is isolated from the host system if you do not create public folders).
Here are at least three reasons why installing Windows XP on a virtual machine is not a meaningless idea. In the end, you can just practice for self-education. The Virtualbox program is cross-platform and runs on most operating systems. The only rule for its correct operation is the availability of a good reserve of system resources. That is, for start Windows XP as a guest system there should be at least 500 MB of unused RAM and a more or less unloaded processor.
Step-by-step deployment of guest OS
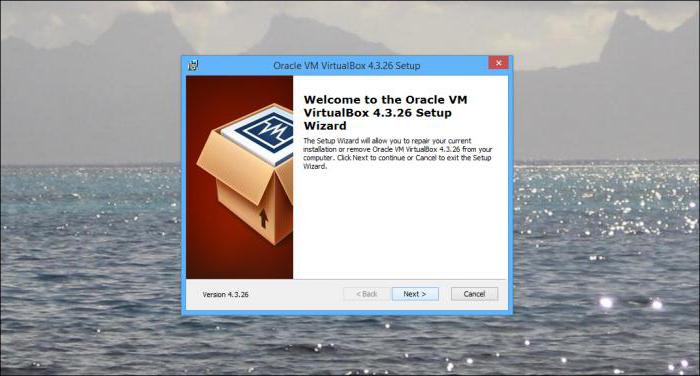
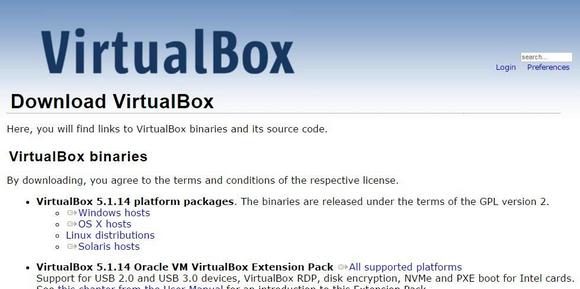
The first step is to download Virtualbox from the official site. Suppose your host system is one of the latest Microsoft operating systems, 8 or 10. The installation of Virtualbox is no different from installing any other program, except that in the process it can give a message that the software has not been tested with this version of the operating system. Do not pay any attention to him. It can appear up to 3-5 times, just continue the installation.
The interface of the program on different OSs is slightly different, but, on the whole, it looks like this:
You must have a CD or a Windows XP image in ISO format. But first you need to create the virtual machine itself. For this:
- Click the "New" button.
- In the drop-down menus, select the type and version of the OS, and give the machine an arbitrary name (it does not depend on anything other than the title in the window title).
- Click the "Next" button.
- Now specify the amount of RAM available to the guest system. The default values are sufficient for running Windows XP itself, but not enough to run the programs. If your RAM allows, move the slider at least 512 MB, or better at 1024 (the green zone is the most comfortable value for the joint work of host and guest systems).
- Click "Next".
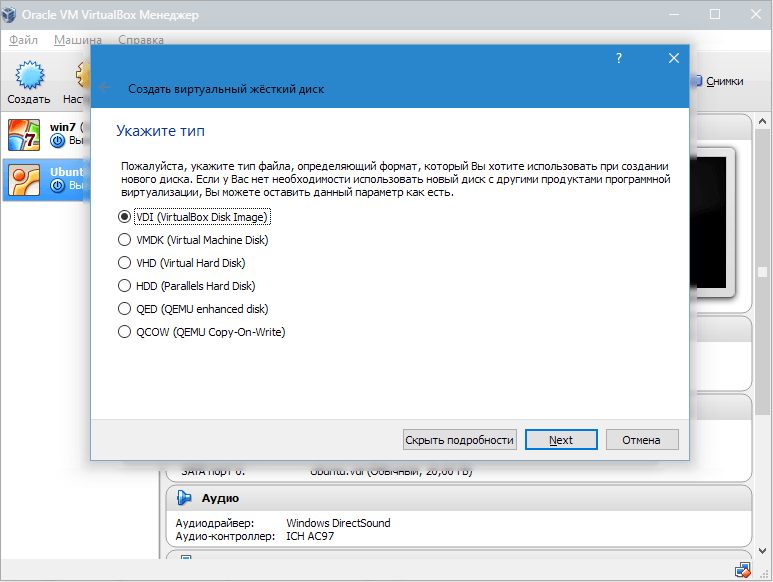
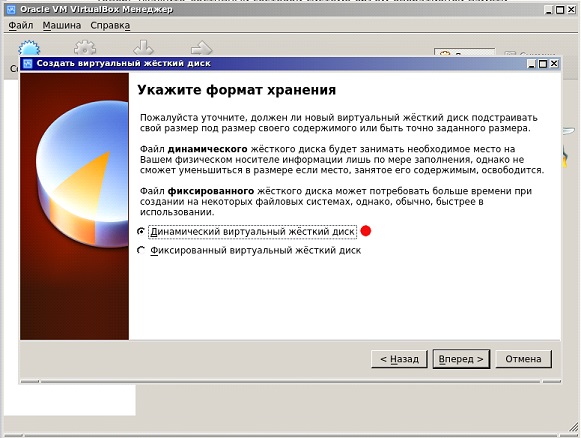
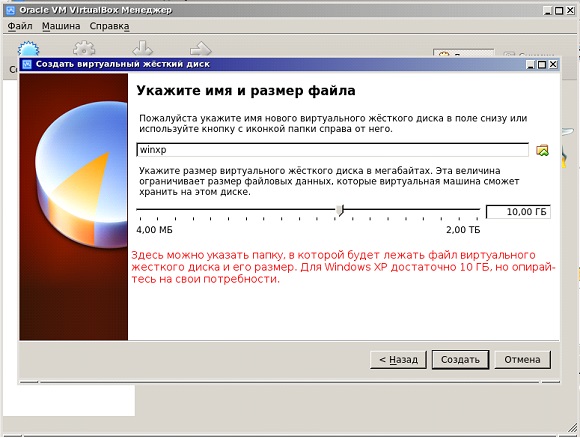
- Create a virtual hard disk for the guest system. All is indicated in the screenshots.
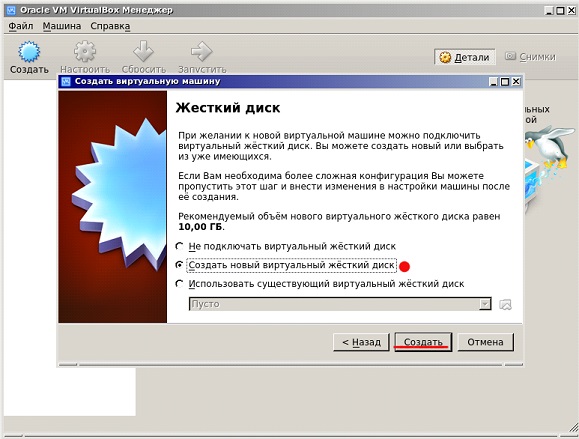

It is important to note: by selecting a fixed hard disk, you will automatically create a file of the specified size on your real hard disk. The dynamic hard disk will increase in proportion to the Windows XP installed on it (with the installation of new programs and so on).
- After clicking on the "Create" button, the virtual machine will be ready.
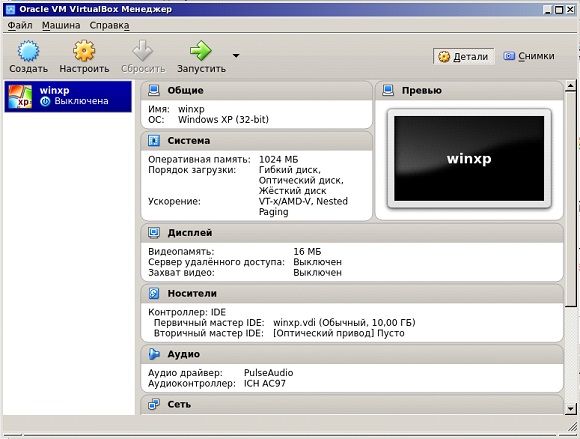
You can look in the settings by clicking the "Configure" button.
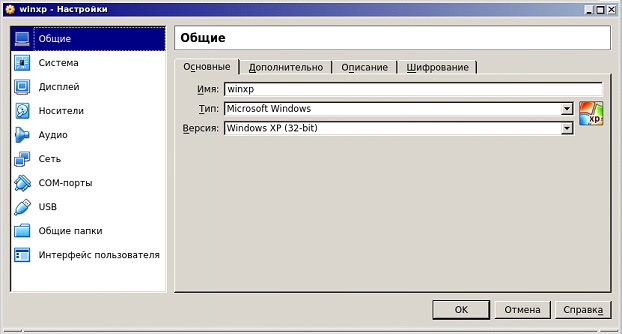
For example, in the "Display" section of the "Display" tab, you can add a video memory to the virtual machine or enable 2D or 3D acceleration to improve video quality or use 3D applications. But usually the default settings are enough to run Windows XP.
Now make sure that the disk with the OS in the drive or the disk image is in a folder. Click the "Run" button. There are such windows:
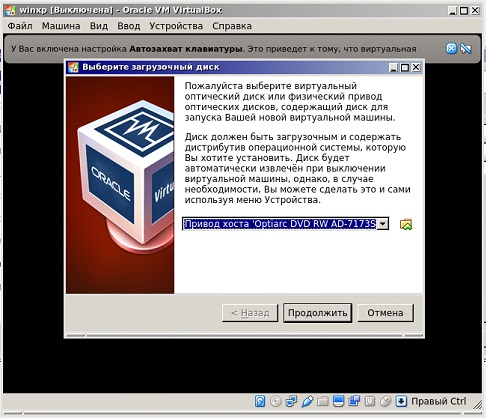
If you use a disk in the drive, just click "Continue". If the image is in .iso format - then click the folder icon and select your image and also click the "Continue" button. The operating system installation will start. It is no different from the one that can be produced on real iron. For those who have forgotten, here are the main points.
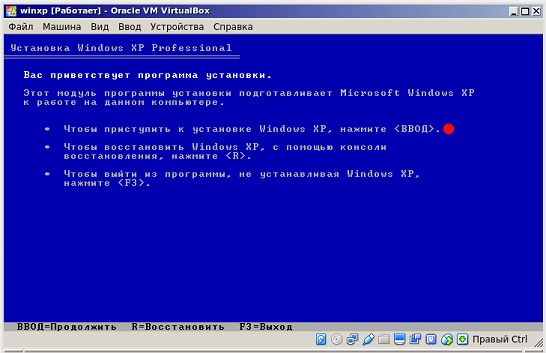
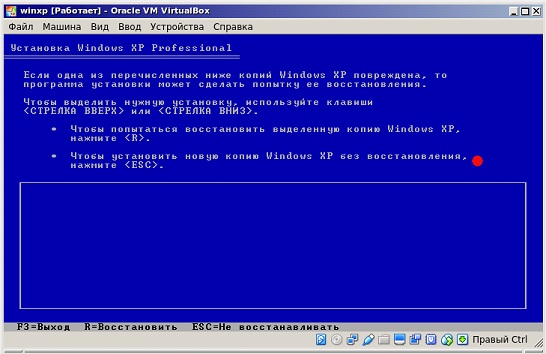
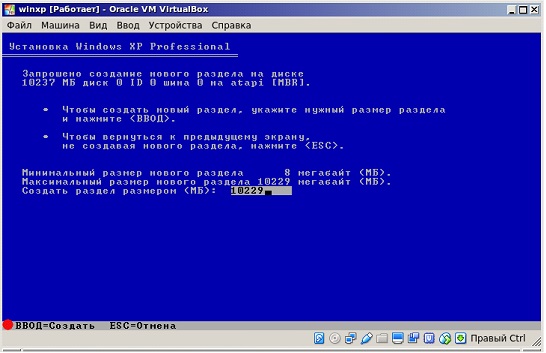
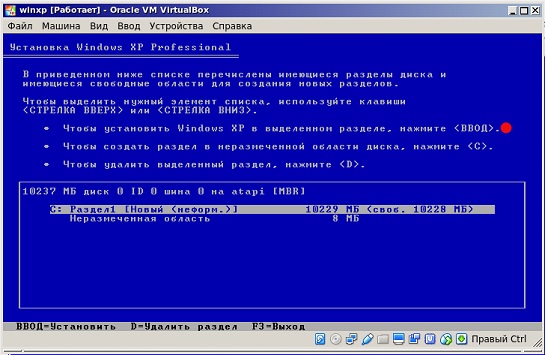

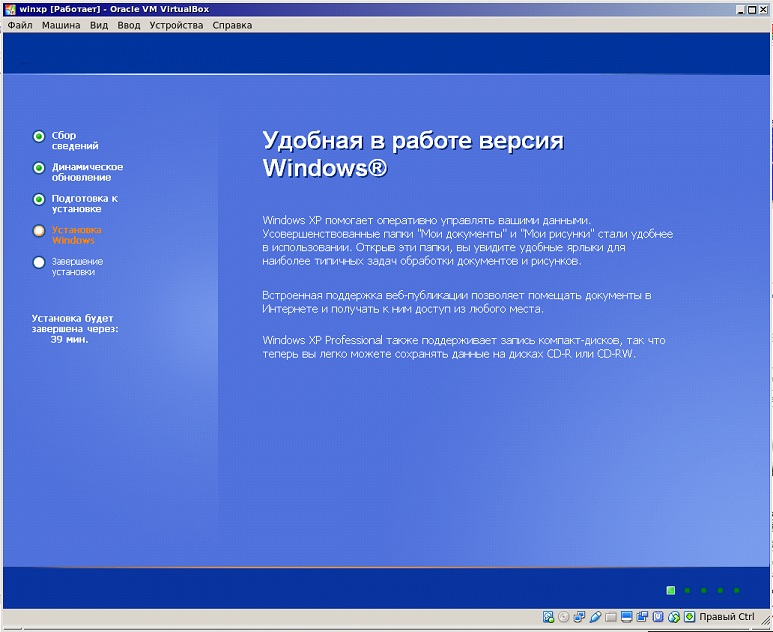
Next, the formatting of the virtual hard drive, copying the installation files and rebooting, at the time of which you do not need to press any buttons. Only in this way will it be possible to actually install the OS on Virtualbox, and not start on a new preparation for installation, as in the screenshots. Ideally, after a reboot, you'll see something like this:
Entering the key, the name of the owner of the computer, the time zone and other information varies depending on what kind of Windows XP you have, so this question will not be considered.
It is worth noting only one point. The Virtualbox window can grab the mouse cursor (not always) and it becomes inaccessible to other actions. To "return" it, hold down the right Ctrl on the keyboard and click with the left mouse button.
After the installation of the system on Virtualbox is finished and you see the desktop, install the guest OS add-ons for better screen resolution and full operation of the guest operating system.
Install and reboot.
In addition, if you need public folders between the host and the guest system, do the following:
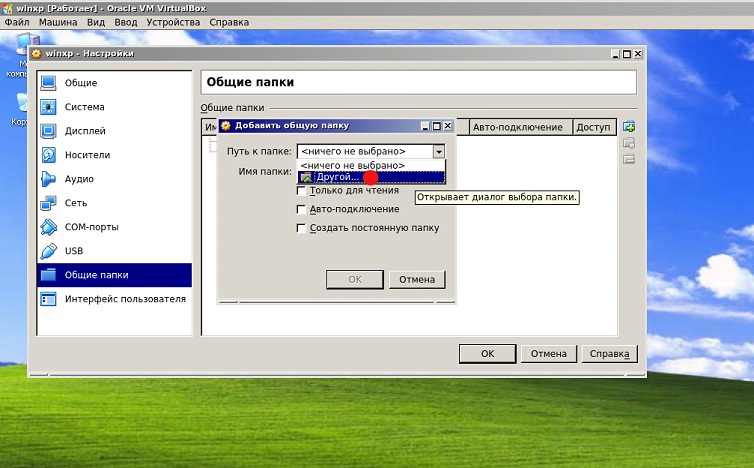
Select the desired folder. For example, this is a folder called Downloads, which is located in Documents. Save the result and open command line in the guest system. Enter the command:
net use x: \\\\ vboxsvr \\ Downloads
where x is the drive letter, and Downloads is the name of the folder created in the previous step. Press Enter. If successful, the network drive X will appear in the "My Computer" section, where files located in the Downloads folder of the host system will be available.

This completes the installation. You can use Windows XP in parallel to your primary operating system.
(Visited 17 959 times, 10 times today)
Computer users sometimes face the situation when it is necessary to work with old programs that functioned successfully on previous versions of Windows. Managing two computers at once is not always convenient. But there is an opportunity to install another edition of the operating system on a working laptop. A parallel machine for Windows 7 (VM) can provide parallel operation of two systems. From this article you can find out:
- what is BM;
- what programs exist for this purpose;
- how to install and configure Windows 7 in the VM.
The second computer is real
Virtual machine - software. With its help, a copy of the real computer is created with:
- hard virtual disks;
- optical drive;
- an analog of network adapters;
- BIOS, etc.
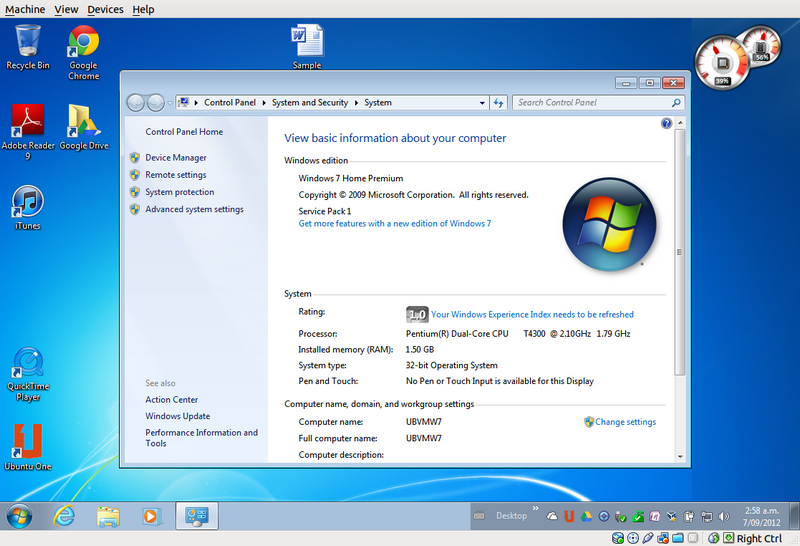
A virtual laptop with its own operating system runs in a separate window and takes up a certain amount of space on the physical hard drive. It looks like this:
From an example it is visible, as in real operating system with installed Windows 7 Professional, the program runs with the virtual OS Windows XP. And it performs the same actions as on a real device.
VM tasks
Virtually everyone is faced with a situation where the downloaded from the network and installed program pulls a plume of unnecessary applications. That is why more advanced users prefer to install the downloaded application in a virtual system and check it, both on performance and unexpected surprises.
In addition to this, other tasks are being solved:
- Possibility to test the program.
- Avoid the harmful effects of suspicious programs.
- Emulate the second computer network.
- Check the consequences of changing the settings in the system.
- Safe execution of autosurfing over the network.
- Reduce the likelihood of infecting a real laptop with computer viruses.
- Running programs that are incompatible with a real operating system.
The most popular emulators
You can find many programs with which you can create a virtual Windows. But it's best to get acquainted with the most popular ones.
This is the most common devil paid program, with which you can emulate the most popular operating systems:
- Windows (with support for different versions).
- MacOS.
- Any operating system from the family Linux.
- Supports interaction with the VM from the paid version of the emulator VMware Workstation.
Windows 7 and the created virtual machine can be easily configured by the normal user. The program is different, both performance and stability. In addition, despite its free-of-charge, it has wide capabilities, a clear interface. It is best adapted for home use.
VMware
Also known and popular program. The main application was found in large corporations.
There are two versions of this product:
- Workstation;
- Player.
Version Workstation can fully meet the needs of the user, but it's a paid program. Ordinary users can use a free analog Workstation - VMware Player.
In the paid version it is possible to work with systems of 32 and 64, see USB 3.0, various operating systems quite successfully work. VMware Workstation - an advanced version of the computer emulator, but because of its value found its application mainly among large companies, not ordinary users.
Microsoft Virtual PC
A similar virtual machine for working in Windows 7. It has a wide functionality and a clear convenient and practical interface. But there is a significant disadvantage - it can only work with Windows operating systems. Other operating systems, such as Linux or Mac OS, can not be run on it.
In that brief overview describes the three most popular virtual machines. Now it's clear that for home needs it's best to use the program. Next, the procedure for its installation and configuration will be considered.
Installing Windows 7 in a virtual machine VirtualBox
The process of installing a virtual operating system can be divided into several stages:
- Install the program .
- Download the image file with Windows 7 for VM.
- Installing virtual Windows 7.
Let's consider all these processes separately.
Install the program VirtualBox
First of all, we need a virtual machine. As already mentioned, there are several of them. We are interested in . You can download it from the official website https://www.virtualbox.org. From the list below, choose VirtualBox 5.1.14 for Windows hosts.
The process of how to install a virtual machine is described in other articles, but there are several points:
After the Internet connection is restored, you can start downloading and installing the finished VM file in Windows 7.
We find a ready BM
Microsoft for testing different versions Internet Explorer (8, 9, 10, 11) specially prepared several options for downloading from her site VM with pre-installed Windows versions (7; 8.1; 10) https://developer.microsoft.com/en-us/microsoft-edge/tools/vms/. If this link is not available, the browser will automatically be redirected to the English version of the site https://developer.microsoft.com/en-us/microsoft-edge/tools/vms/
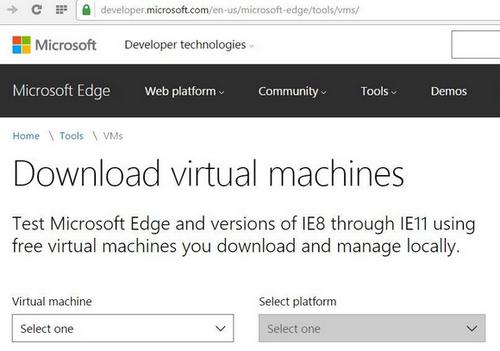
So, you first need to select windows image 7 with any version of IE (8, 9, 10, 11).
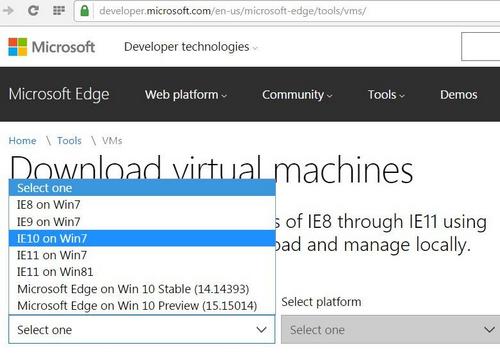
Choose from the drop-down list the item that the virtual machine will undoubtedly be used for. In our case this is.
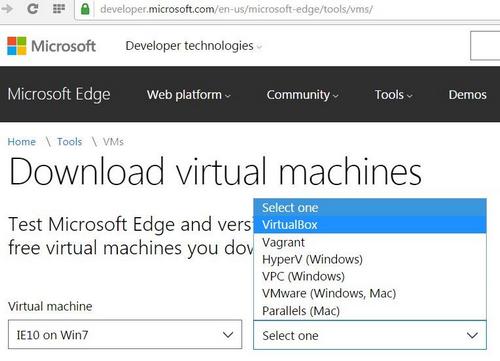
And click on the Download button .zip. The zip file download process starts.
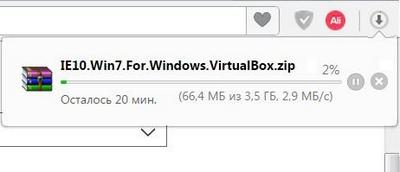
It remains to install and run the virtual machine on Windows 7.
Adjustment of virtual Windows 7
From the "IE10.Win7.For.Windows.VirtualBox.zip" archive, the virtual Windows file itself is extracted. 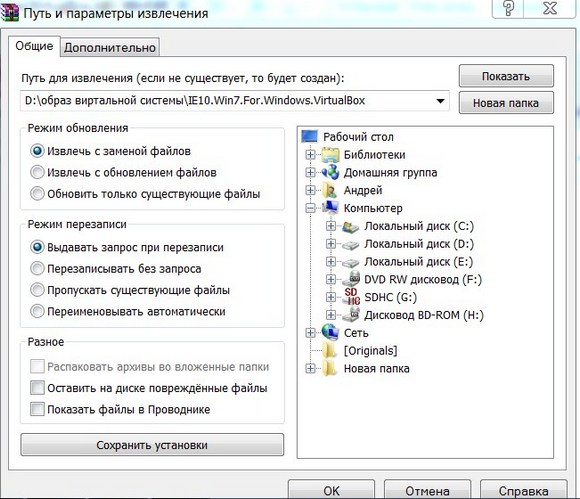
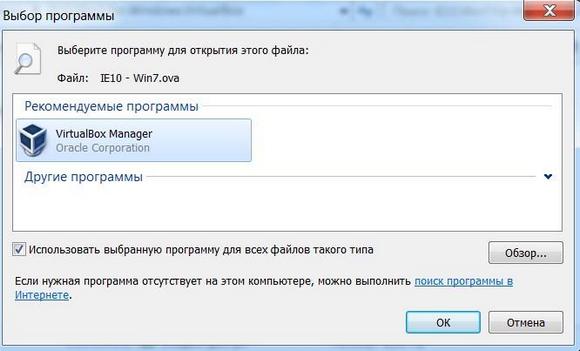
After the file is extracted, click on it with the right mouse button 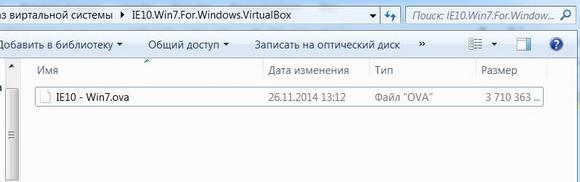 and from the drop-down list we stop your choice on " To open with».
In import parameters, in principle, nothing needs to be changed. You can leave it as it is and click the Import button.
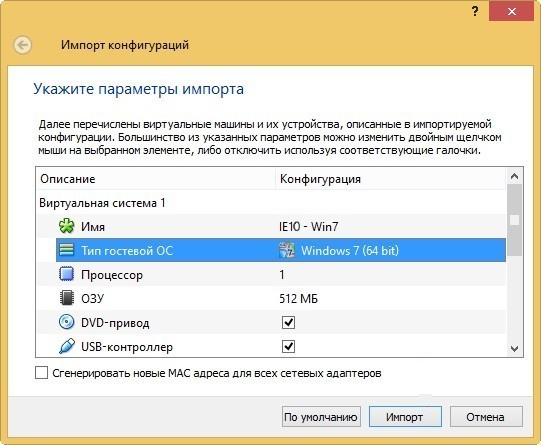
The configuration process starts. The window "" looks like this:

After the process is over, the new seven and the VM appear in the program list. To run it, just double-click on the VM itself, or click the arrow button " Start". The process of starting the operating system will start immediately. If you install it for the first time, it will take a bit longer, however, it also happens when installing a real OS. Once the setup program has completed all the necessary steps, a desktop with a working the Windows system 7.
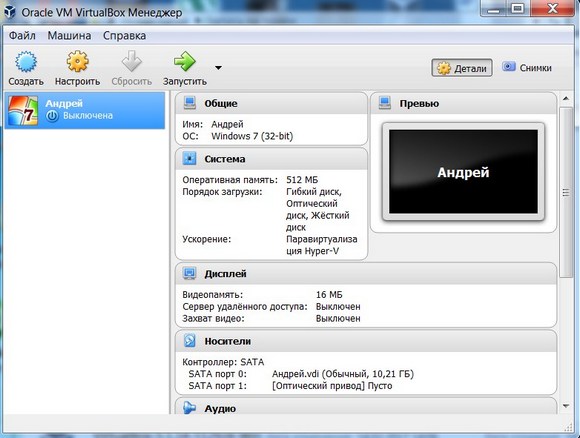
Windows 7 on english language and the created virtual machine are ready to be launched.
Configure the virtual system
All VM controls are intuitive. But if you have any questions, you should carefully read the tooltips in Russian. You can ask for help in the help, where you can find answers to all questions.
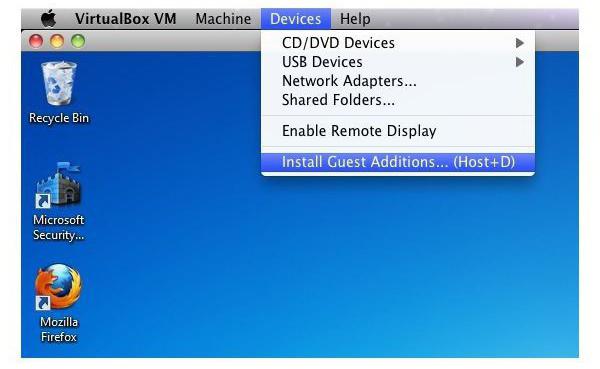
Usually both the mouse and the keyboard work only in the VM and are blocked in real Windows. But it is possible to switch between the two systems using the Right Control host button.
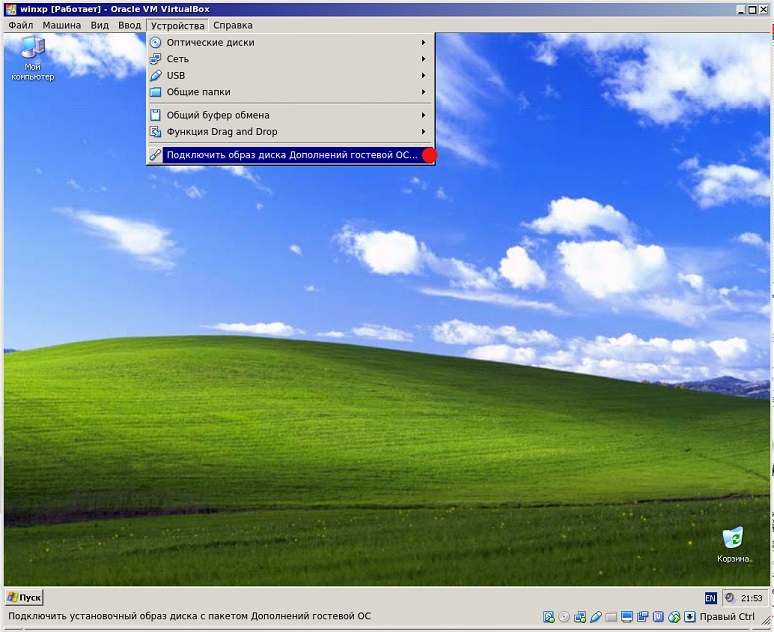
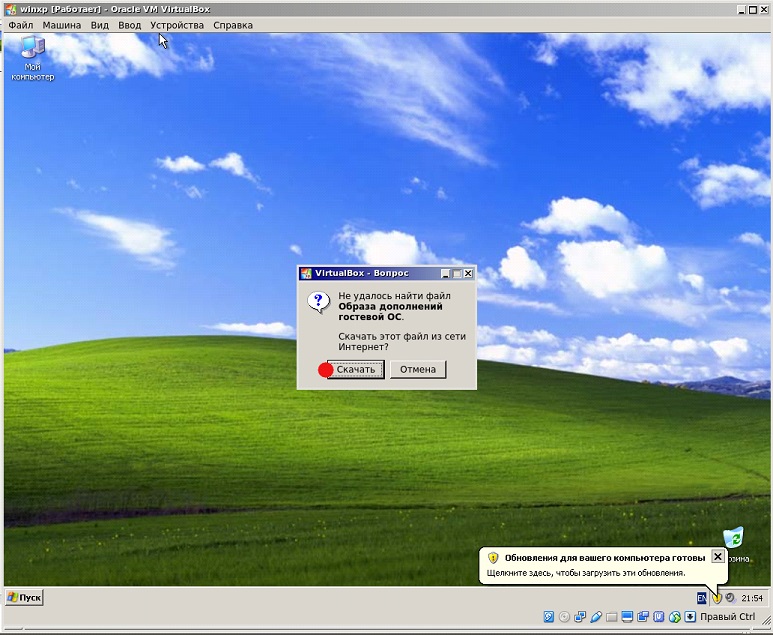
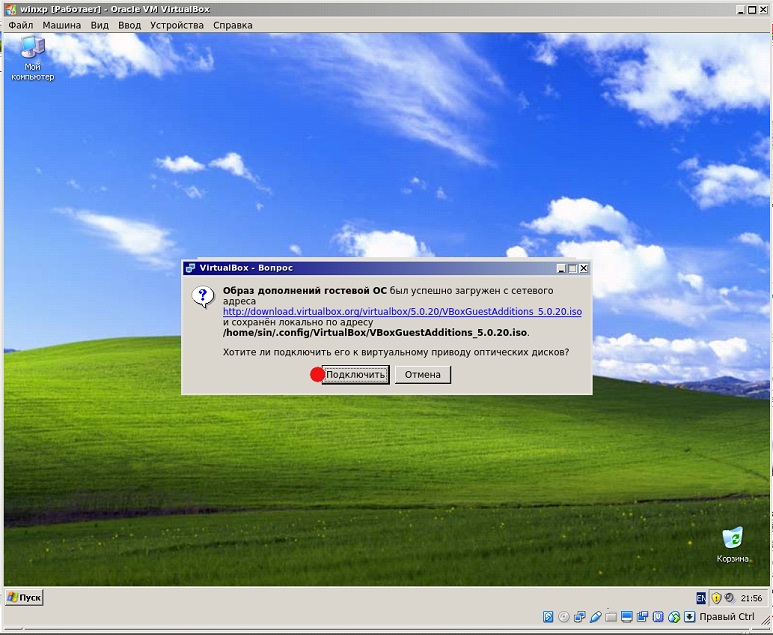
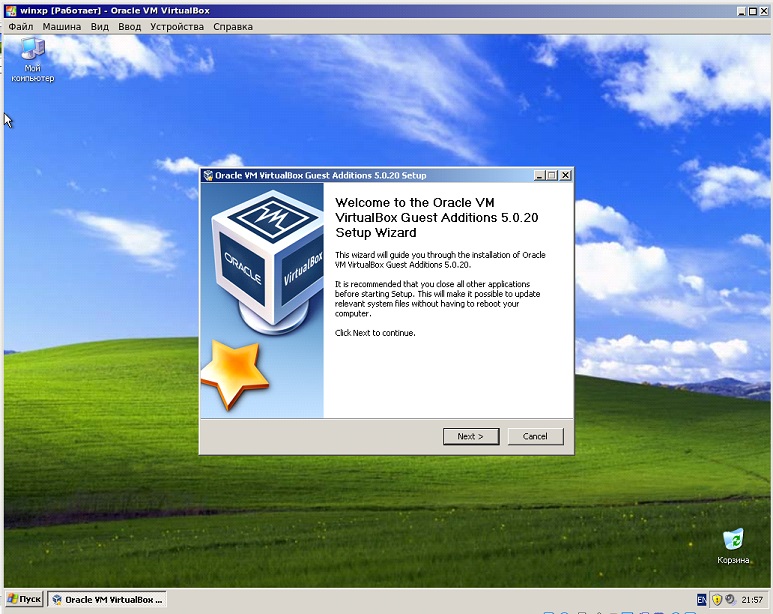
Now that the virtual machine is installed and running, you can configure Vindous. The first step is to install the software components (drivers) for all virtual devices. This process is quite simple. It is necessary to go to the main menu and in the line " Devices" click on " Install guest OS add-ons».
After the installation is completed, the VM is rebooted. Now the picture has become clearer, the VM window can be dynamically changed, the integration of the mouse support is connected, the Internet access will open.
Also, you can expand the function of the displays. In this mode, the windows that open in the VM will be displayed on the real desktop, and not in the stand-alone program window. This makes it possible to facilitate access to all control elements and installed VM programs.
Deactivating virtual Windows 7
As in a real laptop in a VM, the installed Windows requires a certain order to complete. Shutdown can be done by pressing the button to stop operation. A menu will open in which three options for closing the VM will be offered.
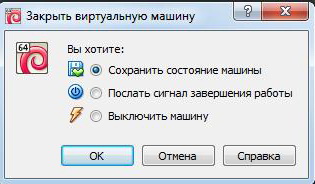
« Save machine state"- before disconnecting, the machine will save all running applications at the time of shutdown. When the VM recloses, the work in it can be continued from the moment it is turned off.
« Send the shutdown signal"- the work of all applications can be closed, and the machine will shut down automatically.
« Switch off the machine"- the same as if the real computer was de-energized.
Conclusion
From this short review it is clear that working with virtual machines, such as, allows you to connect several different operating systems on one device at once. Naturally, the more powerful the real device (RAM and CPU), the faster will work and virtual computers. To speed up the work will also help disabling the antivirus on your native machine or if you are on the list of exceptions antivirus software add a virtual directory.