A source: *****
Paint computer drawing program
In any computer, and to be more precise, in any operating system Windows, there are some number of "embedded" programs. These programs are called "Standard", since they do not need to be specifically installed. And one of these programs is designed for drawing. It is called Paint.
You can learn more about computer programs in the “Computer programs” lesson.
Paint - This is the simplest drawing program on a computer that children adore and are highly appreciated by many adults. It has a small set of drawing tools (brush, pencil, eraser, etc.) and a large number of colors. Paint capabilities are very limited, but despite this, it is possible to create almost masterpieces in it. It all depends on the desire and talent.
How to open Paint
To open Paint on your computer, click on the “Start” button in the lower left corner of the screen.
In the list that opens, click on "All Programs" (Programs).
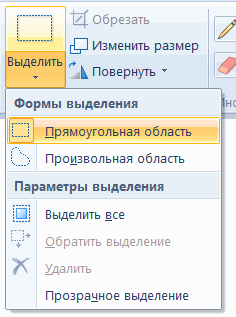
Will appear pretty big list. Select "Standard".
Finally, open the Paint () program.
How does the program Paint
There are two versions paint programs. By and large, they differ only in design.
This is how Paint of an older version looks like:
This is the modern version of this program:

Also, on many computers, instead of Paint, a similar program is installed. We will talk about this program separately. It looks like this:
How to draw in Paint
Let's try painting something in Paint. Left-click on the drawing tool. For example, on the brush.
Now click on the desired color (the colors are at the bottom or at the top of the program).
![]()
Move your mouse over white, click on left button Mouse and, without releasing it, move the mouse.
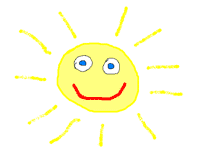
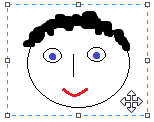
That's what happened with me:
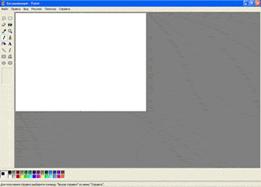
Paint program consists of several parts. The most important part is the white rectangle in the middle. This is our list, that is, the place where we will draw.
![]()
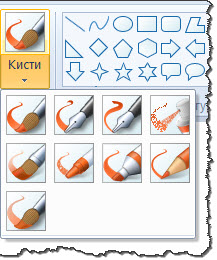
The next, no less important part of the program is the tools. It `s that, than we will draw. There are tools either at the left or at the top (depending on the version of the Paint program).
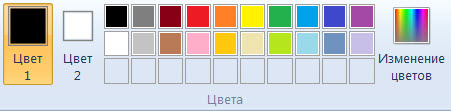
Also for the full drawing we need different colors. The part of the program in which you can choose a color is either at the bottom left or at the top right (depending on the version).
![]()
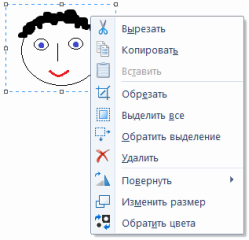
Well, there is another part of the program - the top menu. This, by the way, is the part that we will use extremely rarely.
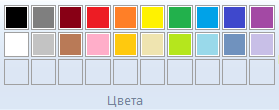
As you already know, you can choose a color for drawing either at the bottom left or at the top right. In order for the color you like to be “assigned”, you only need to click on it with the left mouse button. By the way, look at the two squares next to the flowers.
If you click on any color, it will appear in the first (front) square. This means that the color is selected, and you can draw them.
And the back small square is that color with which you will erase the drawn. By default it is white. Better not to change it.
By the way, this is not all colors. You can choose any other color. For this you need to change the palette.
In the old version of Paint, click on the "Palette" (top right). The inscription “Change palette” will appear. Click on it.
![]()
In the new version of the program Paint, use the button "Change colors".
Paint tools in Paint
And now the most interesting is drawing. In Paint, as in life, there are several ways to draw. You can brush or pencil, and you can spray paint. There are other options: the inscription, lines, shapes. Now we look at the most popular tools for drawing.
Let me remind you that the tools in the Paint program are either on the left side or on top.
Let's start with the tool "Pencil". It looks like this:
Draws a thin line. Try drawing something. To do this, left-click on the Pencil tool, then click on the desired color, then hover over white, click on the left mouse button and, without releasing it, move the mouse.
The next popular tool is the Brush. It looks like this:
Draws a thicker line than "Pencil".
By the way, the thickness of the "Brushes" you can choose for yourself.
If you have an older version of Paint, then under the tools there is a window in which you can choose the thickness and appearance of the line. To do this, click on any kind of line and try to draw (as well as "Pencil").
And if you a new version the program, then in order to select the thickness and appearance of the brush, you need to click on the button with the small arrow directly below the Brush tool. Try to draw with different brushes (draw in the same way as with a pencil).
In the old version of the Paint program, there is a tool called the “Sprayer” and it draws dots. It looks like this:
The sprayer, like the brush, has different sizes. And they need to draw just like a pencil and brush.
Eraser tool. Wipes what you drew.
"Fill". Fills the combined area with color.
To try this, draw a circle with a brush or pencil. Left-click on the fill and select a different color.
Move inside the circle and left click once. The inside of the circle will fill with color.
Scale tool. Increases part of the pattern. It is convenient to use this tool for drawing small parts.
In order to enlarge a part of the picture, click on the “Scale” tool and click on that part of the picture that you want to enlarge with the left mouse button. In order to bring it back, that is, to reduce it, right-click on the enlarged picture. If this does not work, then select the Scale tool again and click on the enlarged image with the left mouse button.
And finally, let's talk about another tool, which, compared to the previous ones, is not so often used.
Pipette tool. Needed in order to determine the color in the picture. To do this, hover the "Pipette" on a specific color part of the picture and click once with the left mouse button. Then look at the set color. He has changed. That is, using the "Pipette", you can select a color at a specific place (point) of the picture.
We have just reviewed the most commonly used Paint program tools. Try to draw a similar drawing using them.
Saving Paint Pattern to Computer
Many people do not save the drawing while working, but do it at the end. The fact is that when you try to close the Paint program, having already drawn something in it, a window pops up in which the computer “asks” whether to save the changes.
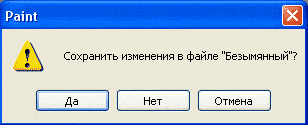
If you click on the "Yes" button, the computer will open a window in which you need to select a place for the picture, give it a name and click the "Save" button.
If you click on the "No" button, the computer will close the Paint program along with the drawing, and you will not be able to open it. That is, the drawing will disappear permanently.
And if you click on the "Cancel" button, the computer will leave open program Paint along with the picture. Thus, he gives you the opportunity to correct something, change the picture.
But it is better to save in another way. And not at the very end of the work on the drawing, but from time to time. The fact is that there is a possibility of losing a picture. For example, a jump in electricity or a computer freeze. If this happens, your picture may not be saved on your computer. This means you lose it.
By the way, this concerns not only the Paint program, but also any other computer program (Microsoft Word, Excel, Photoshop, etc.).
In the new version of the program, instead of the inscription "File", there is such a button:
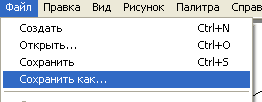
A list will open. Click in this list on the item "Save As".

A new window will open. In it, the computer offers to choose the place where you want to record (save) our picture.
Pay attention to the top of this window. This is where the computer is going to save the drawing. This part is as follows:
Or like this:
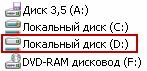
In the example in the picture, the computer offers to save the picture in “My Pictures” (“Images”). In one of the lessons we talked about the fact that in “My drawings” (“Images”), as in “My documents”, it is better not to store anything (of course, if there is an alternative). Therefore, it is better to save the drawing on some Local disk, for example, on Local Disk D. That is, in this window, instead of the “My Pictures” (“Images”) folder, select Local Disk D. To do this, click on the “My Computer” (“Computer”) label on the left side.
And after that, inside the window (in the white part of it) open the desired Local Disk, that is, double-click on it with the left mouse button.
If you want to put a picture in a folder, open it in the same window (double-click on it with the left mouse button).
After you have chosen the place where you want to save the drawing, you need to pay attention to the lower part of the window. Or rather on the item "File Name".
In this part is written the name under which the picture will be recorded in the computer. In the example in the picture this name is “Nameless”. If it does not suit us, then we need to remove it and print a new, suitable name.
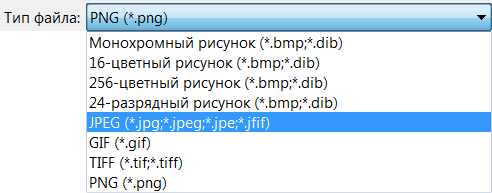
Also pay attention to the field, which is located immediately below the "File Name". It is called "File Type". By clicking on this field, we can choose the appropriate format for the picture or leave it as it is. About the formats of pictures (photos) you will learn at the end of the lesson.
![]()
Now you can close the Paint program and try to open your drawing from the computer. To do this, open the place where you saved the picture. There should be a file with the name printed by you or the standard name “Nameless”.
Picture and photo format
Figures and photographs differ from each other not only in content, but also in other "computer" characteristics. For example, in size.
It so happens that, it seems, two identical patterns, but one size is three times larger than the other.
You can learn how to determine computer size by studying the “File and Folder Size” lesson.
Also drawings (photos) differ in quality. I think you have repeatedly met photos of extremely poor quality. This is visible to the naked eye. For example, two identical photos, but one of the best quality, and the other - the worst.

And it happens that the picture (photos) as if there is not enough color. Here is an example.
And the file format is responsible for all this, or in other words, the file type.
You can learn about the concept of “file type” from the lesson “File Formats”.
In fact, the images (drawings, photographs) are the most different formats. And there are a lot of these formats. We will not consider all these formats - we will consider the most popular ones.
These are formats such as bmp, gif, jpg, png, tiff.
All these formats differ from each other, first of all, in quality. And the quality is different in quantity (saturation) of colors.
For example, I paint a picture using many different colors. And then suddenly a part of the flowers is over, and I have to finish painting with what I have. Of course, I will try to do everything so that this circumstance does not greatly reflect on the result, but still my picture will not turn out the way I would like - more faded, blurred.
So with the image formats. Some format leaves all the colors, the other part cuts. And, sometimes, because of this, the image (drawing, photo) deteriorates. But if it is to say in brief. In fact, everything is somewhat more complicated there, but I think the main thing you caught.
And now about the formats.
Bmp - format of drawings. It can be used to store the pictures you draw on the computer. But on the Internet, this format is not used because of its large volume. That is, if you want to “hang out” your drawing on the forum or in social network, pay attention to the format. It must be gif, jpg or png.
Gif - a popular format of drawings. It can save pictures without losing quality, but with a limited number of colors - 256. This format is very common on the Internet. By the way, small animated (moving) pictures are created in it.
Jpg - format of photos and paintings with a large number of colors. In this format, you can save the image without loss of quality, and with its loss.
PNG - modern format of drawings. The image in this format is small in size without loss of quality. Very convenient: the file is small and the quality is good. By the way, this format supports transparency well.
Tiff - The image format is very good quality (without compression). And, accordingly, the size of such images is huge. This format is used when quality is important. For example, when creating business cards, booklets, magazine covers.
So how do you choose the appropriate format? Of course, it depends on the situation. But you can be guided by a fairly simple principle:
If this is a drawing made in Paint, which you are going to keep in your computer and not “carry it out” on the Internet, then bmp.
If an animation or a drawing with a small amount of colors that you are going to publish on the Internet, then gif
If the photo is jpg (jpeg)
If there is a drawing, where there are many colors or some transparent parts, then png
If the drawing, photo for printing (business cards, booklets, posters, etc.) - then tiff.
When working with drawings and photographs, quite often you need to put an inscription on the image itself. You can, of course, try to do it “manually” - paint it with a brush or a pencil in the Paint program. But it is unlikely in this way it will be possible to make a neat, beautiful inscription. For this purpose, Paint has a special tool with which you can print text on an image.
How to print text on a picture or photo
To print text on an image, it must be open in Paint.
If you have the Paint program of an older version, then at the top left of this program there is an inscription “File”. Click on it, and in the list that opens, click on the item "Open".
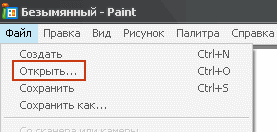
And if you have a new version of Paint, click on the small button with the arrow at the top left.
A list will open. Click on the item "Open".

As soon as you click on the "Open" window will appear. In this window you need to find and select the drawing or photo on which you want to put an inscription. Typically, the computer "offers" to choose an image from the folder "My Pictures" (Images). You can choose any other place. To do this, use the left side of the window.
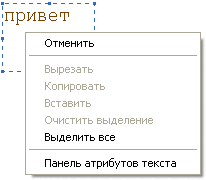
Do not forget to select the text you want to change!
Suppose I started typing text and wanted to increase its size. First of all, you need to select the text that I want to change. To do this, click the left mouse button at the end of the printed text and, without releasing it, pull to the beginning.
When the text is highlighted (painted), you can change the size of the letters. To do this, use the panel to edit text.
Draw lines and shapes in Paint
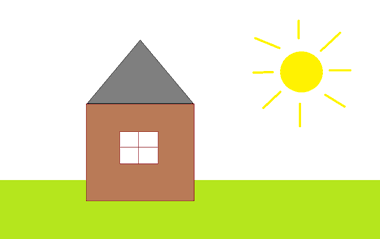
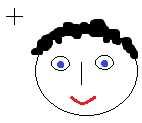
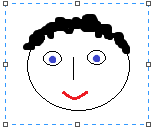
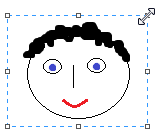
In previous lessons we learned how to draw and print text on pictures (photographs) in the Paint program. In this lesson we will learn how to draw lines and shapes. After all, without this it is impossible to carry out many ideas. For example, the following image is drawn only with lines and shapes.
In order to draw lines, Paint has a special Line tool. It is located in the same place as all the other instruments, either on the left or on the top (depending on paint versions).
Click on it with the left mouse button. Then select the color you want to draw the line. Let me remind you that in the old version of the Paint program, the colors are at the bottom left, and in the new version - at the top right.
![]()
You can also select the line thickness. In the old version of Paint there is a special field for choosing the thickness. Left-click on the appropriate type.
In the new version of the program to select the thickness, you need to click on the "Thickness" button and from the proposed list select the appropriate type.
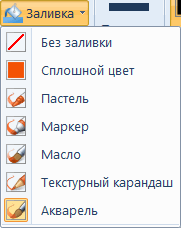
By the way, in the new version of Paint you can choose not only the thickness, but also the type of line (pastel, oil, watercolor, marker, and so on). For this there is a special button "Contour".
After selecting the color and type of line, move the cursor (arrow) to white, click on the left mouse button and, without releasing it, move the mouse to the side. When you stretch the line to the desired size, release the mouse button.
Next to the tool "Line" there is another interesting tool - "Curve Line".
You can also choose the color and thickness of the line, and in the new version of the program there is also an outline.
Make the necessary settings and draw a line. Then hover over the place where the bend should be, click on the left mouse button and, without releasing it, move the mouse in the desired direction. Release the left mouse button when you curve the line the way you want.
And now we will start drawing figures. For this there is a whole set of tools.
Let's start with the tool "Oval" (in the old version - "Ellipse").
|
Color oval. It will be the color you chose in the color palette (below). But in the new version of the Paint program everything is different. As with lines, you can select the thickness and contour for the oval. Moreover, this can be done after you have drawn it. Also, the inside of the oval can be filled with color with a certain effect. But first you need to choose the fill color. To do this, click on the button "Color 2" and select the desired color in the palette. That is, “Color 1” is the color with which the outline of the oval will be drawn, and “Color 2” is the color with which the oval will be filled (filled).
Let me remind you that "Color 2" is the color with which you will erase the painted. Therefore, to avoid confusion, after drawing the shapes, it is better to change it to white.
You need to draw an oval in the same way as a line: press the left mouse button and, without releasing it, “stretch” to the desired size. or - a rectangle. Just as in the case of the oval, in the old version of Paint you can choose the type (regular, opaque, color) of the rectangle. And in the new version - its thickness, contour, fill. Drawn also. All other shapes have the same settings. The Polygon tool deserves special attention. With it, you can draw shapes of various shapes.
|

In any computer, and to be more precise, in any Windows, there are some number of "embedded" programs. They were added to the system initially and are called “Standard”. Among them is a special paint program Paint.
Paint is a free drawing program on a computer that is natively built into the Windows system.
Paint capabilities are very limited, but despite this, it is possible to create almost masterpieces in it. It all depends on the desire and talent.
How to open Paint
To open a drawing program on your computer, click on the “Start” button in the lower left corner of the screen.
In the list that opens, click on "All Programs" (Programs).
A rather large list will appear. Select "Standard".
And finally, open the Paint program.
What does Paint look like?
There are two versions of Paint. By and large, they differ only in design.
This is what the 2003 version looks like.
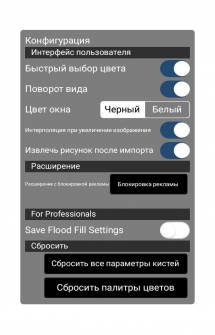
ibis Paint X, despite the Russian localization, is full of oriental art. And immediately the rating of projects begins to be broadcast, taking away a lot of traffic, and the “cold” start of the application takes a long time.
The main screen is represented by three buttons - “My Gallery”, “Local Gallery” and “Online Gallery”. I think their meaning is clear. In the upper right corner - the settings. By the way, the interface itself looks quite clumsy and outdated, although this is generally characteristic of Japanese applications and sites. No matter how the islanders are Americanized, they still remain faithful to innate minimalism mixed with excessive excessiveness in pop culture.
In the settings, you can use your account on Twitter or Facebook, activate direct upload of video of the drawing process on YouTube, and also enable the corresponding notifications on social networks.
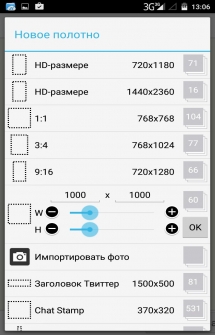
Drawing process. In order to create a drawing, you need to go to “My Gallery” and click on “+” in the lower left corner. First, you will be asked to choose the size of the canvas (it turns out that there is no manual scaling), for example, HD or 9:16. In this case, you can upload a photo, as well as choose a template - a headline on Twitter, a standard postcard, A4 format, and so on.
Everything, now it is possible to create. You can choose from a huge number of tools - brushes, pencils, “fingers”; there is a lasso, a pipette, the ability to add text, geometry, and adjust options. Quick color selection is activated, it is possible to select an extension and extract the image after import.
Special features:
Brush Functions
- Soft drawing with refresh rate up to 60 frames per second.
- 142 kinds of brushes, including the artist's brush, felt-tip pen, digital pen, airbrush, fan brush and flat brush.
- Various parameters of the brush, customizable at the beginning and end of the stroke: thickness, transparency, angle of inclination.
- Slider, which allows you to quickly adjust the thickness and transparency of the brush.
- Preview brush in real time.
Layer Functions
- As many layers as it allows to store the device’s memory (depends on the device itself and the size of the canvas).
- Different layer modes: individual layer transparency, blending modes, adding, subtracting and multiplying the transparency.
- Various commands: creating a duplicate layer, import from Gallery, horizontal inversion, vertical inversion, layer rotation, layer movement and scaling.
Area selection functions
- 256 gradations of choice for each pixel (layer of choice).
- The selection area can be inverted, moved, rotated and scaled.
- Brushes that change depending on the selection area, fill function, duplicate layer, join layers, move layers, rotate and scale.
Color functions
Download drawing program - ibis Paint X for Android for free You can follow the link below.
Developer: ibis mobile inc.
Platform: Android 4.1 and up
Interface language: Russian (RUS)
Status: Full
Root: Not needed
4.0.17
Date Updated: 2017-07-22
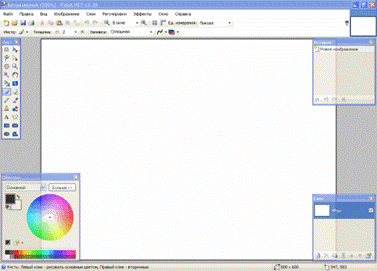
Paint.NET - this simple program to work with graphics. You can draw simple pictures, edit photos, especially children like to draw something in it. We will tell you the main points of work with this program.
To open the program you need to download free paint net, install it on your computer, click Start - all programs are Paint.NET. The program window opens. In the file menu contains a tab to create - creates a new clean sheet; open - opens already existing file; save, save as - saves this drawing; from scanner or camera — import documents from a scanner or camera, if connected to a computer; preview - picture preview, picture parameters - sets the desired picture parameters, can be adjusted at our discretion; print - send our drawing to the printer; send - sends drawing by e-mail etc.; ping Windows desktop in the center of the desktop windows backgrounds - Places the drawn saved picture on the desktop; last file - allows you to open the last closed file; exit - exit the program.
The next menu item contains the edit: cancel, repeat - cancels, repeats our action in the program; cut - cuts the selected area; copy - copies the selected area; paste - inserts the copied area; clear selection - clears the selected area; select all - selects the entire area of the picture; copy to file - copy the selected area to another file; paste from file - insert some other file.
The view menu contains: a set of tools, a palette, a status bar, a text attribute panel, if a check is present, then this attribute is present in the program window; scale - allows you to select the desired scale; view picture - view picture. Let's take a closer look at the toolbar: selecting and selecting an arbitrary area allows the mouse to make any selection of a picture; eraser-eraser - erases the color from the picture, can wipe with any other color; fill - fill the background of the picture in different colors; pipette - the choice of any color; scale - allows you to enlarge the image; pencil, brush - allows you to draw different lines of different widths, shapes with their help; sprayer - allows you to create interesting lines of different intensities; inscription - allows you to insert labels; lines, curve - allows you to create any lines; rectangle, polygon, ellipse - allows you to create any shape. With the help of these tools, the main creativity is made - the creation of a drawing.
The drawing menu contains: flip / rotate - allows you to flip or rotate our drawing; stretch / tilt - allows you to stretch or tilt the drawing; draw colors - draws colors to the opposite; attributes are the dimensions of our drawing, units of measurement, palette; clear - clears our drawing.
The palette menu can change the colors of our palette which is at the bottom of the program.
Here I told what menu items the program has and what they mean. The program is easily mastered. Children like from an early age.
If an error occurs at the start of the program Paint net, then you need to install the Microsoft .NET Framework.