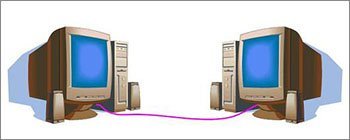
If you use at home not only one computer, but also other similar devices, then they can be combined into home network... In this case, you can create a home network through a router, which will have an Internet connection.
A local network through a router will allow you to easily connect all your devices. Then you can local network share files, play games or use for other purposes.
To do this, you only need to purchase a special device - a router (router). Using a router, communication between devices connected to the network is carried out, and a home network is created via wifi router... If your devices use one router to access the Internet, then there is a network between these devices. It doesn't matter how your devices are connected using a network cable or wireless Wi-Fi.
To create a local network through a router, you need to connect required devices directly to the router, or use a wireless connection. All modern routers can use a wired or wireless connection. But you can also use a router to connect several networks with each other.
Building a home network via a router is usually done using the star principle. When connecting according to this scheme, all devices that you plan to use must be independently connected to the router. The router in this case is such a center of the resulting star, or rather the network. At the same time, the router itself connects to the provider's network and can distribute the Internet to devices connected to it. A schematic diagram of this connection can be seen in the figure below.
Star connection with a router
Home network router
The router is the main device for creating a network. Before creating a network through a router, you must select suitable model router. You need to know exactly what type of connection your provider is using ( cable connection or by telephone). If a cable connection is used, then the router must be selected with a WAN connector, and if phone linethen there must be an ADSL connector.
In addition, more options are possible when using a 3G / 4G modem, telephone ("STREAM") or cable modem ("AKADO"). When using the last two options, a special modem is also required. Such a modem can be a standalone device or built into the router itself. You can see the diagram for connecting devices and creating a network through a router in the figure below.


On the back or side of the router are the device ports used for connection. The port that is used to connect to the Internet is called the WAN port. Ports for wired connection of a computer, NAS or other devices to a local network are called LAN ports... There are several such ports, but there are basically four of them. If the number of ports does not suit you and you need to connect more devices, you can use a network switch. When installing such a switch for eight ports, you connect one port to the router, and you can use the remaining seven to connect your devices. There are 100-megabit and gigabit switches. A gigabit switch makes sense if you need fast connection computer with network drive... This will not affect the speed of the Internet itself. Network configuration through a router can be done through the settings in the web interface of the router.
In addition to wiring devices using ethernet technology, other options are also possible. The network can be created via electrical wiring (HomePlug). But most often, a wifi network is created through a router using a wireless connection. These methods differ in different maximum speed and these characteristics can be found in the table below.

When choosing a router for a home network with WIFI best results are obtained by a router using 802.11n, as it provides, in comparison with the 802.11g technology, better performance and signal coverage. In addition, you should pay attention to other useful functions like built-in FTP client or a USB port that can be used to connect a USB flash drive, printer or network drive.
How to make a network through a router
Opening the port on the TP-LINK TL-WR841N router
For example, here will be described setting up a home network through a router using the model tP-Link router TL-WR841N that connects to the internet. In this case, one of the computers will be connected to the router using a network cable, and the second computer by wireless connection... The local network can also be configured for more computers. On each computer, you need to share the necessary resources so that you can access them from every device on the network.
First, you need to check that the Internet is being supplied to the router. When you connect the cable from the provider to the WAN port on the router, the corresponding indicator on the front panel should flash. If the indicator is off, then you need to update the router's firmware. To do this, download the latest firmware from the manufacturer's website. Or maybe a bad cable connection and you need to re-crimp the cable connector. If everything works fine, then you can start creating a local network through the router.
Checking the physical connection
It is necessary to check the connection between the computers before setting up the network through the router. You need to make a ping between them. For this check, you need to go to the router menu from your computer and find the value of the IP address of another computer in the settings.
To do this, type in the browser network address router, usually 192.168.1.1 and go to the router settings. Open the tab with the name "DHCP" in the settings, and then "DHCP Clients List". In this window, you will see the devices connected to your router. Remember the address assigned to the second computer in order to ping to it. Then you need to click the Start computer menu and enter cmd into the search bar to find a utility with this name and run it.

In the window that appears, you need to enter the ping command and write the address of the second computer. Then press enter and see the result of the command. If the exchange of packets takes place, then the connection between the computers is established and you can already configure the home network through the router.

If there is no packet transmission, then the router does not see the network. Perhaps the reason is in the settings antivirus software... Then you need to disable the firewall and antivirus. You can go to the antivirus network settings and find the option to change the network security mode for your computer. There you need to check the option to enable sharing.
Setting up a local network via a router
First, you need to check which workgroup each of the computers is connected to, and set the name accordingly. You need to see that the name is written in Latin characters and, if necessary, change it. To do this, you need to right-click on the My Computer icon and select Properties. Then select the Advanced settings option and open the Computer name item there. Here you can change the computer name and group name. After all the settings, you need to click Ok and restart your computer. Now you can set up a local network through a router.

All these actions must be performed on all connected computers on which a local network will be used via a wifi router. After that, you need to open the computer start menu and open the Control Panel item. Here we are interested in the Network Control Center. It is important that Home network is selected in the network settings. If so, you can click the Ready to create button.

Now you need to click the appropriate button to create a homegroup.

Now you need to specify which items you want to share.

After that, a window with a password will open, you need to write it down and click Finish. In the next window, you need to click the button to change additional parameters.

In additional parameters general access you need to disable the option to request a password on the local network. Then the General tab also opens and this item with password protection is disabled. Now don't forget to click - Save Changes.

Now the basic settings of the local network are done, and you need to restart all the configured computers. Check if all configured computers can see each other on the created network. To do this, you just need to go to My Computer and click on Network. All computers connected to the network should be displayed, both via a wired connection and wirelessly, using a wifi network for communication through a router.

Now you can use the network through a wi fi router. But, if you go to another computer over the network, you will only get access to the Public folder. To access some kind of disk or separate files, you need to make the appropriate settings.
Sharing setup
To configure shared access to a folder or a disk, you need to open the folder or disk, respectively, and click on Sharing, and then select the advanced settings item.

In the window that appears, you need to select the option to open public access by checking the box there and clicking Ok. Optionally, you can also provide a name for the share.

After this configuration, all devices connected to your network will have a shared access to the specified resource. When you set up your local network, it is recommended to save backup network configuration on the computer. This will save you from repeating the actions performed.
Two routers on the same network
Sometimes it becomes necessary to connect two routers to a network. This can be done by connecting several routers together.
Before you create a network router router you need to imagine the end result of such work. Routers can be connected to combine two local networks, can be used as a common access point to the Internet or to connect to a second router various devices via wired or wireless connection.
You can connect two routers using a network cable or a Wi-Fi wireless connection and set up a wifi network through the router. When choosing a wired connection of routers, when one of them is connected to the Internet, you need to follow these steps.
First, you need to connect one end of the network cable to the LAN port of the router that is accepted as the main one. You must connect the other end of the cable to the WAN port of the second router.

Setting up your home network router router begins with setting up the main router. You must enable DHCP function in the settings. After that, you need to open the "IP address" for the second router in the menu and check the box to automatically obtain an IP address.
If you need to connect two routers wirelessly, then in the settings of the second router you need to enable the option to search for wireless networks. Now you can connect to the Wi-Fi network created by the first router. To complete the configuration, you also need to enable the DHCP function in the router settings, and then configure automatic receipt IP addresses. Now you know how to connect the router to wiFi networkscreated by another router.
Network printer via router
You can customize network access to the printer. A method that is suitable for a printer that does not have a dedicated built-in Wi-Fi module will be described here. You only need a router to connect, which has a built-in USB port for a printer. For the above connection, a router model ASUS WL-520GU and Xerox Workcenter PE114e will be used.

The printer can only be connected via a USB port, so the standard connection to a computer using sharing imposes some restrictions. In order to always be able to access the printer, the main computer to which the printer is connected must always be on. This is not always convenient and in such a situation it is better to use the connection of the printer to the router.
To properly configure the printer's connection to your router, you need to open the computer's Start menu and select the Devices and Printers item there. In this window, open the Add Printer item. When a new window opens, you need to select the type of added printer (local) and click Next to continue setting.

Now you need to configure the printer port. You need to select the option -Create a new port, and select the port type - Standard TCP, as in the picture below, and then click Next to continue the configuration.

In the next window, you need to enter the value of the network IP address of the printer. Here you need to enter the address of the router, which in our case will be 192.168.1.1. You can enter any name for the port name, but you can also leave what will be the default after entering the printer's IP address (network address of the router). The option to poll the printer and select a driver can be left enabled (checkmark below). This option will not affect the speed of the process.

After that, the computer will need some time until it finds the TCP / IP Port that you specified. This will be indicated by the corresponding window.

If the port is not found, a window will appear asking you to enter additional information about the port. In this case, you must select the Device Type - Special by ticking the appropriate box and click Next.

If everything went well, a window with port settings will open. See that all settings are set as in the picture below.

In the next window for installing the printer driver, you need to select the name of your printer and its model. It is possible that you will not find the name of your printer in the above list. Then you just need to click a button to install the printer driver from the disk. In this case, you must specify the exact path to the driver file in the appropriate field. Latest version the drivers can be downloaded on the Internet from the website of the printer manufacturer.

If you have already installed drivers for such a printer, a corresponding window will appear asking which version of the driver to use. It is recommended to leave the default selection and use the installed driver.

After that, you can set any suitable name for the printer, which will then be visible in the Devices and Printers menu. You can leave the name for the printer as the default, and then click Next.

Network printer name
In the next window, you can configure the sharing of the printer. But since the printer will already be connected to your router, you do not need to use the choice of shared access to the printer. We recommend that you leave the default, not share.

You can allow the printer to be used over the network
On last page printer settings You can leave or remove the option to use a custom printer by default. Then you can test the printer and print a test page. Click Finish to complete the printer setup.

The printer is now configured on your computer. To access the printer from other computers, you need to repeat the same settings for each of your computers.
Hello! Today's time passes, and computers are no longer perceived as a luxury. As technology advances and user-friendly operating systems emerge, every family member may have a laptop or personal computer.
The PC helps children in their studies, the elderly can communicate with distant relatives and friends whom they cannot meet, and adults use technology both in work and for entertainment. To make it easier to use multiple computers in a home, you can create a local area network between "machines". In today's article I will tell you - How to set up a local network between two computers.
This does not require special skills. You only need to purchase two cables (or more, depending on the number of machines) and a router that you most likely already have. In this article, we will consider a quick and reliable way to create a local network for laptops and personal computers, and also figure out how to "distribute" the Internet on a local network.
Reasons: create a local area network between computers
If a user accidentally stumbled upon this article, then he most likely has a question: "Why bother connecting computers to each other?" I will give the following arguments:
1. The ability to quickly share files. This is perhaps the most useful function on the local network. If you need to quickly transfer any files from one computer to another, then using a local network it will be the fastest. You will not need to look for flash drives, wait for recording, send files via e-mail etc. The speed of data transfer between computers is the highest.
2. Internet distribution. Let's imagine that you don't have a router, but cable internet connected to only one computer. If you connect the devices with a cable, then the Internet can appear on both computers.
3. Online play, collaborative using hard disk of both computers. You can take necessary information from another PC and vice versa.
Typically, the local network includes 2-3 "machines". If you distribute the Internet from one device to 3-4 computers, then the speed will be low on all computers.
The methods described below are suitable for both laptops and computers, but on portable devices present Wi-Fi module, which greatly simplifies the process of creating a local network. We will explore these methods in detail.

Before connecting computers on a local network, you need to make sure that both machines have network cards. If this modern computers (not older than 10 years), then you don't need to check - the element is embedded in motherboard... This also applies to laptops. Now about the cables: for each computer you need to buy a cable that is crimped according to the "computer-router" scheme.
The connection "router + computer + computer" is optimal, as the local network will function properly. By connecting two devices directly with one computer-to-computer cable, you only get common networkthere will be no internet access.
It is also worth making sure that there are drivers for the network cards. To do this, click right click mouse on the "My Computer" icon. Select the "Properties" item in the list, as shown in the screenshot.

We go to the "Device Manager" section and view the list.

We find in the list the section “ Network adapters". On the example computer, network Card and the modules are working properly. If there are no drivers, then the device will be unknown, opposite it there will be an icon exclamation mark against the background of a yellow triangle. If you have it, then just click on the device and click "Update Driver". Check on both computers.

Now we connect cables to computers: one end to the network card connector, the other to the router. As a result, you will have a network. Wait for the identification of connected devices to complete.
Of course, in addition to these cables, the main cable must also be connected to the router, through which the Internet will go. On some routers, the main cable connection point is highlighted or marked, in other models there is no difference between the connectors at all. Determine which "machine" will be the main one.
We go to the main computer in "Start", then find "Control Panel". Here we are interested in the section "Network and Internet". In it, click on the inscription "Network and Sharing Center".

Here you will see that a local network has appeared. By default, the system defines it as public. Our task is to change the status to "home". Click on the "Homegroup" button, and then go to the page located in the lower left corner. Do you see a message saying that you are not connected? It doesn't matter, we click with the mouse on the inscription "What is a network location?"

In the window that opens, we need to select the "Home network" item. We are waiting for the system to complete the home network settings. The next step is to select the elements that will be available on the second personal computer or laptop. Click on the "Next" button - the system will provide us with a password to access the data of the second computer. If the password is not needed, then cancel it, after which you can click on the "Finish" button.

This will bring up an options window where you can make changes to the homegroup. Here we need to click on the inscription "Change additional parameters ...". Expand the item "Work or Home", after which it is necessary to put all markers in the first item. Done, the local network is created on the host computer. We just have to connect the second device to the homegroup.
Connecting a second computer
We sit down at the second computer, the cable connected to the router and to the computer. We go to the center of networks, the path to the menu is indicated in the instructions for creating a local network. Click "Home group".
If the creation of the local network was successful, then you will see the "Join" button - click on it and enter the password that the system generated before. Now we carry out the same procedures as with the first computer. That is, we select files that can be available on the first device, etc.
Done, you have created a home network between two computers. To check the status of the network, go to the Network Management Center. There you can make sure that the network is now home.
Important point: granting access to folders and files
Surely you do not want to open access to all folders on your hard drive, because they may contain personal information. To open access to a specific folder, we need to right-click on it, then select in context menu item "Sharing".

None of the users. The mode is set by default, has no relation to the local network.
--- Homegroup (read). By selecting this item, the user of the second computer will be able to watch movies in this folder, read
files, listen to music and even use applications, but he will not be able to copy anything from the folder.
--- Homegroup (read and write). This mode allows you to copy and work with files in this folder.
--- Specific users. This point also concerns access to data on one computer for different users.
If you are ready to provide all the data for users of another computer, then you can immediately open access to partition hard disk.

To do this, right-click on the partition and disk and select access in the same way as with a folder. In addition, you can configure a local network between two computers via Wi-Fi. Let's consider this with you.
Connecting two computers when wi-Fi assistance (with built-in or plug-in)
This method is most often used by laptop owners. You do not need to spend money on cables, since the device can be connected via Wi-Fi. First, check if the adapters are enabled on both computers. We go to the "Control Panel" - "Network and Internet", then go to the network control center.

Here we click on "Change adapter parameters". Inside you will see if the wireless module is enabled. If it is off, the icon will be grayed out. Turn on wireless connection on each laptop.

Now you can start creating the network. We again go to the center of the networks, where the previous actions were carried out. In the main menu we find the item "Setting up a new connection ..." and click on it.

After that it will start automatic tuning... We select the inscription "Configuring the wireless network computer-computer".

The next window is informational. Review the networking requirements and precautions. Next, we need to enter the basic parameters. SSID is the name of the network that will appear on connections. WPA2 Personal and WEP are encryption options. You can select "No authentication", then you will not be prompted for a password on the network. We recommend setting WPA2 (alphanumeric password) as it is more difficult to crack than WEP.

Done, the connection has been created. Now you will see your network in the list of connections. It remains to open public access. It is enabled in the Network Center under the "Network" section. Click on the house icon, after which an inscription will appear at the top of the empty window.

Click on it and select the item that opens public access. Setting up folders is done in the same way as with personal computers.
Internet connection of computers in the same local network
The instruction is suitable for connecting via cable or Wi-Fi. The information will be useful for those who have the Internet on one computer, but not on other devices from the local network. We need a computer connected to the internet. We go into the connection properties: from the network management we go to the section "Changing adapter parameters". Select the active connection and right-click. Go to the "Properties" menu.

Here we need to select the "Access" tab.

We put a tick in front of the inscription "Allow other users ...".

Done, surf the internet on all devices. That's all for today. If you have any questions, ask in the comments.
In this article, we will set up a local network between two or more computers with installed Windows 7 (Windows 8) that are connected via a Wi-Fi router. In fact, setting up a local network in Windows 7, Windows 8, and Windows 10 is almost the same. Windows XP only has its own nuances, there are always some problems when setting up a network between the seven and XP. But, more about this in a separate article, and it's time to switch from Windows XP, it is outdated.
It is clear that in order to set up a local network and share files, computers need to somehow be connected among themselves. This can be done with a network cable, I have a direct connection between two computers. But, it is much more interesting to connect all computers through a router, which is now installed in almost every home and office. When connecting via a router, you can already set up a local network not only between two computers. All computers, and even mobile devices that are connected to one router can be connected to a local network
For example, desktop computers can be connected to a router using network cable, and laptops - on Wi-Fi networks... This is how it is more convenient for you and how you do it. It doesn't matter if the computer is connected to the router via Wi-Fi or a cable, the local network will work. And it doesn't matter what operating system you have installed, but I'll show you on windows example 7.
And I will configure and display the network through a router to which my laptop is connected via Wi-Fi, and a stationary computer. Both work on Windows 7. It is between these two computers that we will now set up a local network. And also, open the general access to folders and files. What is a local network between computers for? Mostly for file sharing. If you often need to transfer some files from one computer to another, then in order not to run with a flash drive, you can do this over the network. Well, you can play games over the network.
If your network still has a TV with Smart TV, then you can set up access to movies on your computer from the TV. Read more in the article.
Instructions for setting up a local network in Windows 7
Let me remind you that the computers that you want to network must be connected to the same router, or directly connected by cable. Also, all the actions that I will show in this section must be performed on both computers.
An important point! If you want to set up a network via a Wi-Fi router, to which some third-party devices (for example, your neighbor) are connected, then after setting up, he will be able to access those folders on your computer that you set up public access to. Install a good one to protect your network. If you still need to connect third-party devices to your router, but you want to set up a home network, then you can create a "guest network" for guests, as we did on the Zyxel router in.
One more point. If you are setting up a network when connecting computers directly, without a router, then you will also need to set static IP addresses, in the properties of the local area connection. If you have a connection via a router, then you do not need to do anything else, continue to follow the instructions.
1 First of all, we need to check that all computers work in the same workgroup. This should be checked on all computers that will be connected to the local network.
We do this: press the key combination Win + R, and in the window that appears, specify the command sysdm.cpl... Push Ok.
On the contrary Working groupis likely to be written WORKGROUP... You can leave her. The main thing is that on the other computers the workgroup should also be WORKGROUP.

If you go to change it, for example on MSHOME, then press the button Edit, and indicate new group... Save changes and restart your computer.
2 The second step is to change the sharing settings. We perform these settings in the same way on all computers in the network. Now I'll show you what to enable.
Right-click on the internet connection icon in the notification bar, and open Network and Sharing Center... In the new window select Edit extra options general access.

There will be two profiles. Home or Work, and General. We change the one that is written current profile... You can make these settings for both profiles.
First of all, put the switch next to Enable network discovery... Also, turn on File and Printer Sharing, and include share folders... See screenshot below.

Scroll through the settings page, find and open the tab All networks, or General, and necessarily disable Sharing with password protection.

After these steps, it is advisable to restart your computer. This is actually all the settings, the local network should already work. To check, you need to go to the explorer (My Computer) on one of the computers, and open the tab on the left Net... All computers on the network will be displayed there. In the screenshot, you can see my computer, and another one from the network.

We can already go to a computer on our home network, there will be access to shared folders.

If you do not have computers on the network, or you do not have access to a computer, then see the solutions at the end of this article.
Setting up file and folder sharing
As I wrote above, you already have access to shared folders. But, we may need to open shared access to some other folder, which is, for example, on the local drive D. This can be done without problems. After we open shared access to the folder, all computers from the local network will be able to view the files located in it, modify them, and add new files to this folder. (however, it depends on what permissions we enable).
For example, I want to share my Pictures folder. To do this, right-click on it, and select Properties... Go to the tab Access, and click on the button Advanced customization... We put a tick next to the item Share this folder, and click on the button Permissions.

In the window that opens after clicking the button Permissions, we need to set the permissions to this folder. So that netizens can only view the files, then leave a tick only opposite Reading. Well, for full access to the folder, with the ability to change files, set all three checkboxes.

Click on Apply and Ok... In the window Advanced sharing setup, also press the buttons Apply and Ok.
In the folder properties, go to the tab Safety, and press the button Edit... Another window will open in which we click on the button Add to... In the field we write "All" and press Ok.

Select the group All, and from below we mark the necessary access points for this folder with checkmarks.

All, after these steps, there will be a general access to this folder from all computers on the network. Starts working without rebooting, checked. Open this folder from another computer:

Everything was done in a confusing way, until you figure it out ... It was possible somehow to make these settings more simple and understandable. But, everything works. It turns out that I have access to a folder that is located on another computer. And this is all over the air, since I have both computers connected to the router via Wi-Fi.
By the way, this folder will also be available from smartphones and tablets that are connected to this Wi-Fi router... To view network folders on Android, I advise you to install ES Explorer, or use a standard explorer. Everything is working:

Now we will consider possible problems and errors that can very often be encountered during the configuration process.
Possible problems and errors when setting up a home local network
If during the configuration process any errors or problems appear, then first of all disable antivirus, and other programs that might block the connection. If the problem is in the antivirus, then you will need to add your connection to the exceptions.
- Computers from the local network do not appear on the Network tab. In this case, on all computers we check the workgroup and the sharing settings. Open a tab in the explorer Net, right-click an empty area, and select Refresh... Another important point, very often antiviruses and firewalls block access to the local network. Try disabling your antivirus for a while. Also, you need to make sure that there is a connection to the router.
- Shared folder cannot be accessed. Another problem, when we seem to have set everything up, shared access, but when we try to open a folder on a computer on the network, a message appears that we do not have access, we do not have permission to access this folder, we could not open network folder and so on. Or, you are prompted for a username and password.
Be sure to check the sharing settings in the properties of this folder. There are a lot of settings, everything is confusing, perhaps something was missed. Well, again, turn off the antivirus, it can block. - A computer connected via Wi-Fi cannot be seen by other computers on the local network. Or vice versa. If you have a network built with computers and laptops that are connected both wirelessly and by cable, then there may be problems with a certain connection. For example, laptops that are connected via Wi-Fi may not appear on the local network.
In this case, pay attention to which profile you enabled network discovery (settings at the beginning of the article)... Also, it is advisable to assign the status of a home network to connect to your Wi-Fi network. Well, be sure to try disabling your antivirus.
I think you did it. If something could not be configured, then ask in the comments. Also, do not forget to share your tips on this topic.
Microsoft Corporation starting with Windows Vistahave greatly changed the security policy of their systems regarding the local network. operating system seemed new, somehow too complicated, and therefore many could not figure out how to open access to files on a computer. Today we will analyze how this is done using the example of Windows 8.1, but Vista and 7 have a similar system, and the difference is not fundamental. The local area network can also be used for subsequent creation which will unite all the multimedia devices of the house or apartment, or to share files with your phone or tablet.
In my opinion, this is very convenient when, without additional movements, you can play a movie from a computer, laptop or even a phone to big screen TV or listen to your favorite music from your phone, on speaker system without connecting additional wires, although here it is already necessary ... But let's move on to setting up a local network.
Video instruction is available by link.
Step-by-step instruction
- For normal functioning local network, all computers on this network must be in the same workgroup, for a home network, let's take MSHOME. To install it, we need to go along the following path: open "Control Panel" - "System and Security" - "System" (you can also right-click on the "Computer" shortcut on the desktop and select "Properties" or the key combination "" ). In the window that opens, in the left column, select "Additional system parameters".

- In the window that opens, go to the "Computer name" tab and press the "Change" button. A dialog box opens, in which we need to record a new working group. We register MSHOME (all in capital letters) and click OK. We also close the system parameters by pressing the OK button and restart the computer.

- Further, it is advisable to configure a permanent IP for both computers. To do this, go to "Control Panel" - "Network and Internet" - "Network and Sharing Center" - on the left side of the "Change adapter settings" window - select the network card, right-click and click "Properties".

- Before doing this, read the notes below the screenshot. Select "Internet Protocol version 4" and click "Properties", fill in as shown in the picture.

P.S. If your local network is organized through a router with a DHCP server enabled - the IP address, the Default gateway and DNS Server can be left in automatic mode... This action must be done if you have two computers connected directly or DHCP is disabled on the router.
P.P.S.The value of the IP address must be different on computers within the same local network. That is, at this computer specify the IP 192.168.0.7, and the next one has 192.168.0.8.
- At this point, we begin to work with the folders that we will share on the network. I will tell you on the example of one folder, but you can open access to everything local disk in a similar scenario.
First, we need to share the folder. It should be borne in mind that if the network is not limited to two computers (for example, some providers (Beeline) conduct the Internet in apartments on the basis of one large local network), it makes sense not to give the right to change the contents of the folder; if you are sure of computers included in the local network, feel free to give "Full Control". So, open the properties of the folder we need, for this we right-click on the folder and select "Properties", open the "Access" tab and click the "Advanced settings ..." button.
- In the window that opens, check the box "Share this folder", press the "Permissions" button and give necessary rights folder; since this is an example i give full access to the folder, but you put it at your discretion. Here's what I got:

- Click OK to accept the changes, also click OK in the "Advanced Sharing Settings" window, then in the folder properties go to the "Security" section and click the "Change" button.

- Click the "Add" button, in the window that opens, write "All" (without quotes) and click OK.

- Select our new group in the window and give it full access at the bottom of the window.

- Click OK, in the properties of the folder, too, OK, and for reliability, restart the computer again.
Next, we need to configure the visibility of the computer within the local network. To do this, go to "Control Panel" - "Network and Internet" - "Network and Sharing Center" - on the left side of the window, select "Change advanced sharing settings" and we will open profiles of sharing settings. Your task here is that in all profiles you must enable "network discovery" and "file and printer sharing" and "sharing so that network users can read and write files to shared folders", As well as" Disable password-protected sharing. " We press to save changes.


Visit our partner store OGO.ru, there you will find a lot of electronics from computer components and to refrigerators and washing machines at delicious prices.
That's all. I hope you found this article helpful, click one of the buttons below to tell your friends about it. Also subscribe to site updates by entering your e-mail in the field on the right or by subscribing to a group on Vkontakte.
Thank you for attention!
Hello.
Even 10-15 years ago - having a computer was almost a luxury, but now even having two (or more) computers in the house does not surprise anyone ... Naturally, all the advantages of a PC appear when it is connected to a local network and the Internet, for example: online gaming, sharing disk space, fast transfer files from one PC to another, etc.
Not so long ago I was "lucky" to create a home local area network between two computers + "share" the Internet from one computer to another. I will tell you how to do this (from fresh memory) in this post.
1. How to connect computers to each other
The first thing to do when creating a local network is to decide how it will be built. Home LAN usually consists of a small number of computers / laptops (2-3 pcs.). Therefore, most often 2 options are used: either computers are connected directly using special cable; or they use a special device - a router. Let's consider the features of each option.
Direct connection of computers
This option is the simplest and cheapest (in terms of equipment costs). In this way, you can connect 2-3 computers (laptops) with each other. Moreover, if at least one PC is connected to the Internet, you can allow access to all other PCs in such a network.
What is needed to create such a connection?
1. Cable (also called twisted pair), slightly longer than the distance between the connected PCs. It is even better if you buy a crimped cable from the store right away - i.e. already with connectors for connecting to the computer's network card (if you crimp yourself, I recommend that you familiarize yourself :).
By the way, you need to pay attention to the fact that the cable is needed specifically to connect the computer to the computer (crossover). If you take a cable to connect a computer to a router - and use it by connecting 2 PCs - such a network will not work!
2. Each computer must have a network card (all modern PCs / laptops have one).
3. Actually that's all. Costs are minimal, for example, a cable in a store for connecting 2 PCs can be bought for 200-300 rubles; network cards are in every PC.
It remains only to connect with cable 2 system blocks and turn on both computers for further settings. By the way, if one of the PCs is connected to the Internet via a network card, then you need a second network card - to use it to connect the PC to the local network.
The advantages of this option:
Fast creation;
Easy customization;
The reliability of such a network;
High speed when sharing files.
Minuses:
Extra wires around the apartment;
To have access to the Internet, the main PC must always be turned on, which is connected to the Internet;
Inability to access the network for mobile devices *.
Creating a home local network using a router
A router is a small box that makes it really easy to create a local network and connect to the internet for all devices in the house.
It is enough to configure the router once - and all devices will be able to immediately access the local network and access the Internet. Now in stores you can find a huge number of routers, I recommend that you read the article:
Stationary computers connected to the router via a cable (usually 1 cable always comes with the router), laptops and mobile devices - connect to the router via Wi-Fi. You can see how to connect a PC to a router (for example, a D-Link router).
The organization of such a network is described in more detail in this article:

Pros:
Configure the router once, and access to the Internet will be on all devices;
No extra wires;
Flexible settings for Internet access for different devices.
Minuses:
Additional costs for purchasing a router;
Not all routers (especially from the low price category) can provide high speed in the local network;
It is not always so easy for inexperienced users to configure such a device.
2. Setting up a local network in OS Windows 7 (8)
After the computers are connected to each other by any of the options (whether they are connected to a router or directly to each other), you need to configure the Windows OS for the full operation of the local network. Let's show using the example of Windows 7 (the most popular OS today, in Windows 8 the setting is the same + you can familiarize yourself with).
2.1 When connecting via a router
When connecting via a router, the local network, in most cases, is configured automatically. The main task comes down to configuring the router itself. Popular models have already been discussed on the blog pages earlier, I will give a few links below.
After configuring the router, you can start configuring the OS. So…
1. Setting working group and PC name
The first thing to do is set a unique name for each computer on the local network and set the same name for the workgroup.
For instance:
1) Computer number 1
Working group: WORKGROUP
Name: Comp1
2) Computer number 2
Working group: WORKGROUP
Name: Comp2
To change the name of the PC and workgroup, go to the control panel at the following address: Control Panel \\ System and Security \\ System.


Properties windows systems 7
2. Sharing files and printers
If you do not take this step, then whatever folders and files you share for public access, no one will be able to access them.
To enable the option to share printers and folders, go to the control panel and open the "Network and Internet" section.


Now click in the left column on the item " change advanced sharing options«.

Several profiles 2-3 will appear in front of you (in the screenshot below 2 profiles: “ Home or work"And" General "). In both profiles, you need to enable file and printer sharing + disable password protection... See below.

Setting up sharing.

Additional sharing options
After making the settings, click " save changes”And restart your computer.
3. Sharing folders for shared access
Now, in order to use files on another computer, the user needs to share the folders on it (to share them).
It is very simple to do it - in 2-3 mouse clicks. Open the explorer and right-click on the folder that we want to open. In the context menu, select “ Sharing - Homegroup (Read)«.

Then it will remain to wait about 10-15 seconds and the folder will appear in the public domain. By the way, to see all computers on the home network - click on the "Network" button in the left column of the explorer (OS Windows 7, 8).

2.2 When connecting directly + sharing Internet access on a second PC
Basically, most of the steps for setting up a local network will be very similar to the previous option (when connected via a router). In order not to repeat, steps that are repeated, I will mark in brackets.
1. Setting the name of the computer and the workgroup (similarly, see above).
2. Setting up the sharing of files and printers (similarly, see above).
3. Setting up IP addresses and gateways
The configuration will need to be done on two computers.


