User smartphones often need to make a screen shot. There can be a lot of reasons for this - send a snapshot of the desktop to a friend, show a message, photo and so on. As with any action with the operating system, there are many ways to create a screenshot. You can take screenshots with standard tools, third-party software And using the program on the computer. In this article you will get acquainted with all the methods. You will learn how to make a screenshot on android.
Many situations need to transfer the image from the mobile device screen in the picture format. To do this, who do not like that users immediately take over another machine with the camera to sfotkat the screen. But there are more convenient options.
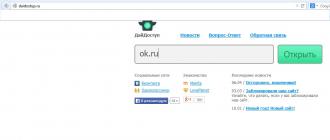
Screenshot - capture the screen area or the entire screen and displaying what is on it in format graphic file.. It is convenient to share information, to clearly show the actions performed, acquaint users with functionality, etc. When writing this instruction, screenshots also used screenshots for a visual explanation, which you can make sure that below.
How to take a picture across android?
Unlike operating system iOS, on Android combination keys to capture the screen varied depending on the versions and generations. If the Apple has a combination to create a screenshot does not change from the first generations, then android (for example, Meza) is increasingly harder. Let's wonder how to take a picture from the display on different versions of the operating system.
Version 2.2, 2.3 and below
During the release of the first generations, the developers from Google have not yet built this feature In the standard set of features. Therefore, the manufacturers of smartphones added it independently.
For example, the old Samsung devices or the alkatel could create screenshots using simultaneous keystrokes "Home" and "Back". Therefore, to clarify the combination, you can enter the exact name of your model (for example, DEXP IXION or SAMSUNG A5) in the search engine and find information relative to the device.
After exiting 3 generation of the operating system, the screen capture was added to the standard set of features. Now using a long press button "Recent programs" A snapshot of the desktop was created and stored in the gallery of the phone. This method no longer used in modern devices, but it is useful to owners of old smartphones that are no longer updated to modern versions OS.

Before the output of Android 6, a general screenshot algorithm was used using the volume keys and "Enable / Lock". Most Chinese manufacturers (Huaway, Meisu, etc.) decided not to change the existing traditions, so the printscreen is created in them using the volume and inclusion buttons.

All methods presented above work for the standard shell of the operating system. If the smartphone manufacturer uses custom launchers, it has the right to change the ways to control the system.
Now let's go through individual manufacturers who enjoy the greatest demand from users:
Samsung often changes the OS management in its devices. For example, in new samsung Galaxy can create a screenshot edge of the palm from one edge of the screen to another.

Samsung J3, J1, J7 models and similar to have a mechanical button "Home"so the screen shot is created through "Home" + "Turning on"either "Home" + "Back".

The creators of the model line of Sonya Cospiro decided not to be limited to key combinations and added the corresponding point to the menu that can be called using a long press on the inclusion key.

Chinese manufacturers known in series Xiaomi Redmi. and Meizu M3 preferred not to change the standard control and left "Volume down" + "Lock".On smartphones Asus Zenfone You can use the feature in the menu. Asus supports pictures using the system keys.

Depending on the shell, all screenshots appear in different places and folders. In most cases, saved screenshots can be found in the gallery on the phone in the corresponding folder:

If you use Google Services, which are pre-installed on the smartphone, then you will need an application "Photo". In it you must open the menu.


Third-party applications
Standard combinations are convenient and fast. But not in all situations they can be used. Banal example - broken button "Home", volume key or power on, and the screenshot creation function from the menu on your device is not. What to do then?
In this case android system Will not offer you anything. We'll have to use third-party means. Enter in the store Google Play. Screenshot and select one of the applications in the list:

So that you do not have to search for and pick working applicationwe offer a few convenient programs To create screenshots. Most of them require root rights to capture the screen. This will require a certain time, skills and software.
If you already have root access for your smartphone, you can use OK Screenshot, Drocap 2 for root users or Screenshot Er. But we need to quickly and easily take pictures from the screen, so we turn to the description of other applications.
Screenshot Capture
You can download this program in Play Market completely free, and it does not require root rights. Let's try to make a screenshot in Vaiber:
- Allow access to multimedia files on your device. Next, open the side menu and go to the tab.

- Click to run the background service.

- The application icon will appear on the screen. Widget can be moved as it is convenient for you.

- Open Viber. Click it to open the image creation option (2) or video recording (1).

- After creating the screens, the menu with editing will open. You can trim the picture (1), draw on it (2) or add stickers (3).

- To view, open the application and go to the side menu. In it, select item "Video" (1) or (2) Depending on which screen capture you are executed.

All screenshots made through Screenshot Capture will be displayed here.
So you can take a snapshot with a correspondence in Vaiber, in Watsape or any other messenger, and after sending it to a dialogue or group.
The application with a simple name is also free downloaded in Play Market. After starting the screenshot, you will see the following menu:

We will analyze the interface:
- start shooting;
- transition to the screenshot gallery;
- switch to settings.
In the app settings you can:
- change the way to save images;
- enable / disable notifications;
- change program shell.

How to make a screenshot through a computer?
And finally, if you did not help any of the above methods, go to help personal computer. To do this, you will need:

- computer and USB cable;
- smartphone;
- installed drivers for smartphone;
- adB Run or similar to it.
With this program you can perform automatic creation Screenshot. The utility will work free download by reference. After starting the program, you will see the following menu:
All commands are entered here using the keyboard. Now you need to enable USB debug mode on the smartphone in the settings and connect it to the computer. Next, go to the program again:
- Go to the menu 14 - Screenshot / Record (1). To do this, enter the sequence number 14 in the INPUT (2) string.

- Drive 1 to the screenshot of the phone screen appears on the desktop in the AdB_Run_screenshot folder, which will be created automatically after installing the program.

- Open the folder and follow all the necessary actions with pictures.

MyPhoneExplorer.
If you are not satisfied with the ADB RUN archaic interface, then we offer the MYPHONEEXPLORER utility. Install it on the PC and follow the instructions.
- After startup click on the section "Add user".

- Select the USB Cable Connection Type and click "OK".

- Wait for the smartphone. Now click on the item "Miscellanea" (1) and select "Phone keyboard / download screen snapshot" (2).

- A window will appear on the computer screen, duplicate the contents of the phone display. Click on the floppy icon.

Enter the name of the picture and save it to any folder on the PC.
The advantage of two recent ways in the fact that all screenshots are saved immediately on hDD Computer, so it is more convenient to work with them with subsequent editing.
Results and comments
We reviewed all sorts of options for creating screenshots on smartphones: on the old models of Fly and the like - using standard functions, on modern Samsung devices and other flagships - through applications in Play Market. And through the software on the computer. All options are fully workers. If you did not come together a few of them, then definitely try another!
Video instruction
We also prepared for you a training roller on the topic.
Unlike apple products, on Android devices, a key combination that allows you to take a screen shot, always different and is determined not only by the operating system capabilities, but also the manufacturer of the device.
In this manual, we will tell you in detail how to make a screenshot of the screen on android different versions Systems, as well as advise applications that can be used for this purpose, that is, a kind of universal ways.
- Android 6.0
- Android 4.0, 5.0 and above
- Android 3.2.
- Android 2.3.
It is necessary to emphasize the fact that the screenshots differ slightly from those that can be obtained on earlier versions of the system. It is about the fact that when you get a screenshot with use Google NOW ON TAP, you will find that the image will be missing a lower navigation bar with standard buttons (triangle, circle and square).
If yours mobile device Works running version 4.0 or higher system, then in order to save the screen shot, it is required to simultaneously press the "Power" button and "Sliding volume". The resulting image can be viewed in the "Gallery" section.
Users of this version of the OS, you must hold and hold the button that displays the list of recent applications.
Unfortunately, in the old woman 2.3, it is not possible to keep the screen snapshot with standard means of the system. As a rule, on smartphones and tablets of some manufacturers, this issue was resolved (first of all these are smartphones from Samsung, on which everything is done with the help of the "power" and "home" button hold. Therefore, in this case, you can try to carefully examine the capabilities of your device, it is possible that the manufacturer has provided a combination for saving the snapshot.
In the event that it turns out that there is no such combination in the device, you can use third-party programs (required root rights), which are presented later in our review.
Screenshot Removal Applications
If root rights are obtained on the device, you can use one of the applications.
Here is the list of the most popular programsthat provide the user with the ability to make screen screen screen screen. All programs are available in the Google Play store or you can download them from some proven site on the Internet:
- Screenshot Ultimate.
- Screenshot Pro.
- No root screenshot it.
By the way, several of the applications presented above do not require superuser rights, however, you need to connect to a computer.
We make a screen on devices of different manufacturers
As mentioned above, some manufacturers provide their own solutions to create a screenshot of the screen on the phone:
- On ruler devices Galaxy Note.The screenshots are made using the S Pen stylus.
- On the devices from HTC, you need to hold the "power" and "home" button.
- Product users from LG are available to the Quick Memo utility, which not only can instantly capture the image on the screen, but also allows you to make notes.
- On the Sony Xperia. Everything is done using a special menu. The user can cause it using a long press on the "power button".
- On the meizu devices And most of other manufacturers, you must simultaneously hold the "Volume +" or "Volume" key and "Enable / Disable".
- On some smartphones from Samsung, a snapshot can be retaining the "Home" button.
Where to find the screenshots made?
Suppose you managed to make screen screen. But where to find it in the system where she keeps the image?
Find the "Gallery" point on the desktop and open. There will appear new folder With the name "Screenshots", all pictures are saved in it. You can also use anyone to search. file Manager. Here it is more convenient for you.
Conclusion
As you can see, how to create screenshots differ depending on the version of the operating system and the device used.
To resort to third-party programs you need to last, because in terms of convenience they are not so good (require additional rights, load rAM etc.) as standard funds originally provided in the operating system. But with the help of the functionality of such programs, you can always make screen screen on a smartphone or tablet running any version of Android. The main thing is that the application itself supports work with your system version.
Screenshots are very convenient, and sometimes there is a need when working or communicating. However, in some users it causes difficulties in view of the fact that no one has written in the instructions for the phone as it is. Of course, the way to analyze the screenshot on the smartphone depends on the operating system. The most popular in our time are:
- apple iOS;
- Android from Google;
- Windows Phone from Microsoft.
Screenshots on models of phones with different OS
On the features of the screenshots of each of them, let's talk below.
First consider iOS from the developers from Cupertino. If you want to make a screenshot on the iPhone, simultaneously press the "Home" buttons and lock (power). Your smartphone "flashing", granting that the screen is made. You can find it right in the photo film album, where all the pictures you make are added.

With devices under android management Everything is more interesting. Since Android itself is an open and flexible system, each developer did not fail to create a so-called shell, which will allow the user to associate OS with this brand of smartphone. From this heats, that, depending on which brand is your device, there will be a way "photographing" screen.

The most famous method among Android devices is to keep the locking keys and reduce the volume. Such a combination is operated in smartphones:
- Sony;
- HTC (in some models a combination can be used: "Home" and nutrition);

- Lenovo;
- Xiaomi;
- Motorola;
- Nexus (As you know, Nexus release various companies).
If you use a device from sAMSUNG., then everything is just as simple as on iOS: simultaneously press the "Home" buttons and lock (power). In newer versions of the shell from Samsung Touchwiz, you can make the edge of the palm from the edge to the edge, as if we wipe the screen. This feature must be enabled in addition to the settings in the "Management" section - "Land Control".

In the event that you use the old version of Android (2.3 or below), photographing the screen you can exclusively with third-party programShe will have to download from the Google store.

You can find the pictures made on the Android-smartphone in the gallery, namely in the "Pictures" or "Screenshots" folders.
As for the devices on Windows Phone, then in the case of using the eighth version of the OS, you must click and hold the "Start" and blocking buttons. If you have 8.1, you need to press the power buttons and
All popular I. available methods creating a screenshot on Android.
The rapid development of the Internet opens up daily new benefits for doing business, finding work, entertainment and communication. One of the popular destinations is the creation of blogs, sites, online stores. Many users are able to realize their potential, creating video instructions and step by step guides. To do this, you need to capture a video or screen shot. Hold such a procedure on stationary computer Quite simple, but how to make a screenshot on a smartphone or tablet?
Options for solving such a task a lot, each has its own characteristics. Consider in detail all the solutions.
Standard means
Manufacturers of gadgets running Android provided the need to create screenshots using function buttons:
- In most cases, it is enough to press and hold the button "Reducing the volume" and "Power" button.
- IN smartphones Sony Xperia You must use the "Volume Reduction + Enable". However, the function is not available for all devices, but only for certain models.
- SAMSUNG GALAXY S gadgets simultaneously pressing "home + blocking". Default, in sAMSUNG smartphones Screenshots are saved to the ScreenCapture folder. After pressing the combination, a menu appears with action options.
- Many HTC brand models also execute a screenshot function. This feature is implemented by a combination of the + home buttons.
- Starting with the Android 3.2 version, the screenshot can be performed using the "Recent Programs" button. It is necessary to simply hold it for a few seconds. In some cases, a variant of the simultaneous use of the "Reduction of the volume + inclusion" is possible.
On the result of the action performed, it will be possible to learn from characteristic sound alerts or on the smartphone screen.
On the one hand, such methods allow you to quickly take a snapshot of the entire screen. On the other hand, the user has no control over the characteristics of the screenshot obtained. If, for example, you only need to display a specific part of the screen, then the standard funds will not cope.
Screershov creating programs
If the gadget works on Android last versions (4.0 and higher), then the most practical way to make a screenshot will be using additional programs. Here you need to know the main rule - it is necessary to install such programs. Simply put, the user must have administrator rights to get additional features using the operating system.
After completing all the settings, you can start installing the desired software. The choice is very large, many developers have worked on creating effective screenshots. The highest quality development: Screenshot UX, Screenshot ER Pro and MyPhoneExplorer.
There are a lot of programs, you can find them in Google Play.
Consider in more detail how to make a screenshot on Android using Screenshot UX. After installing and running the program, a special service icon appears on the screen facilitating the setting and execution of screenshots. The program has some additional features and functions:
- Setting the reverse timer until the screen shot is taken.
- Execution of the screenshot after shaking the gadget.
- Select the image format in which the snapshot will be saved.
- Setting the size of the service icon on the screen.


It is worth noting that Screenshot UX allows you to edit a screenshot: you can add text comments, cut the desired fragment, work with a brush with a transparency setting and color selection. The program provides a choice of further action options with a ready-made screenshot.
Screenshot with a computer
This method is difficult to name optimal, but it is definitely effective. Standard means may not work in many models of Chinese gadgets. If the smartphone works on android old versions, then the screenshot function will also be unavailable, as it is simply not provided there. Here and comes to the rescue home computerwhich will make the screen shot special program SDK. The versatile method works in all android versions. It is necessary to perform the following procedure:
- Connect the device to the PC. Do it better through standard USB Cablethat is included.
- Now you need to install software and drivers for the gadget. If such a procedure was performed earlier, the action can be skipped.
- Download SDK, unpack the archive. In the root folder of the disk (for example, D or C), create a folder (it is better to select a short name, for example, SCR) and copy the contents from the unpacked archive to it. This is done for the convenience of further use and input commands. As a result, the SCR folder must contain the following items: Eclipse, SDK folders and SDK Manager application.
- Next in the SDK folder we find the Platform-Tools directory. Now copy the ADB.exe files from it, adbwinapi.dll, as well as fastboot.exe, in system folder System32, which is located in the Windows directory.
- Next you need to start the command console. You can do it through the Start menu. The command console is in the Standard section. More fast way It is to press the Win + R key combination. In the appeared window we enter cMD command And press ENTER. Must be opened black window With a flashing cursor to enter commands.
- The next action is moving to the desired folder. For this purpose, DOS commands are used: CD D: \\ (switch to root folder), CD SCR (transition to SCR folder), CD SDK (transition to subdirectory), CD Platform-Tools. Each command must end with pressing the ENTER key.
- The last entry on the screen will be the line D: \\ SCR \\ SDK \\ Platform-Tools\u003e and the flashing cursor at the end. Now you need to start the executable file. To do this, enter the ADB Shell command, press ENTER. With successful execution of the command on the screen, a message will appear [Email Protected]: / $. The work in the console is over, but it is impossible to close it, just turn it out.
- Through the conductor go to the folder D: \\ SCR \\ SDK \\ Tools \\. There must be a DDMS.Bat file that needs to be launched. Davlik Debug Monitor should be downloaded.

For those who do not know or just forgot what the screenshot is, we remind you that this is an instant screen shot. It can be needed in order for you, for example, could capture any point occurring on the screen of your phone (smartphone).
On a computer or laptop, make a screenshot is quite simple - just click on the button PRINT SCREEN. on keyboard. And how to make it on the device where there is only virtual keyboard? The method is there and no keyboard you will need.
Those users who prefer iPhone or iPad, perfectly know that the screenshot on Apple devices is made simultaneously by pressing the "Enable" and "Home" buttons. In the case of Android, the situation is different. Since the versions of the firmware android are a great set, and all the devices are different, the manufacturers use a different key combination. However, for most devices, including those that work on the basis of standard android firmware, Screen can be made as follows: You need to simultaneously press the "Turning on" key and the volume button to reduce. After about a second, a characteristic click will be distributed, and at the top of the screen you will see the appropriate notification. For example, you wanted to save the picture on the screen. As soon as you make a click, a notification will appear in its top:

And if you push the curtain, it will be said in it, that the screenshot is saved:

Of course, on your device to create a screenshot you may need to clamp other keys. Here are all possible options:
- The "Turning on" key and the sound reduction button (this option is the most common).
- "Enable" key and a sound increase button.
- The "Turning on" key and the Home button.
- The "Home" key and a sound reduction button.
- The "Home" key and the zoom button.
An example of the location of the buttons on Nexus 5:

Other Android devices
- SAMSUNG devices can use a combination of "Home" and "Back" buttons. For some devices, for example, Samsung Galaxy, a combination of the "Turning on" and "Home" keys works.
- On the devices from the HTC, press the "Turning on" and "home" keys, after which the screenshot will be saved.
- If you use devices from ASUS or Acer, you can use the standard combination - clamp the "Turning on" key and the sound reduction button.
- Sony also has everything standard - a combination of the "Turning on" key and the volume button is used here.
- In case of company Huawei. All the same as Sony.
By the way, many companies began to add a button to create a screenshot into the drop-down menu (curtain). She looks like this way.

Some devices like Samsung Galaxy Note to create a screenshot can use an electronic pen.

Applications for creating screenshots
Screenshots can be done with third-party applications. True, there is one big one here - for this you need to rush the device. If you have root installed, then you can download from Google Play almost any application that allows you to screenshots. In this case, the screenshot can be done, for example, if you simply shake the device. But if there is no root, then such applications may not swing at all, since the maximum that they can, it is about what buttons you can try to click on how to get a screenshot on your device.