There have been errors in the Windows operating system since its inception. They occurred in almost all versions. It looks different. An error message pops up, a "blue screen of death" is displayed, the application crashes or the system reboots altogether. In most cases, this is due to a violation of the integrity of system and important files. But the reasons for such consequences can serve as well as the overall clogging of the system and failures.
Starting with Windows 2000, a mechanism was implemented inside it that made it possible to check the integrity of important files with the possibility of their recovery. The utility name is SFC. The best known application is SFC / scannow. What this command is and what it is used for will be described in detail in this article.
SFC / scannow - what is it?
In general, on the Internet, this bunch is used everywhere in instructions and the like. In fact, the expression following the slash is just the key or argument to the SFC utility.
SFC is a special program designed to check the status of system files in order to find distortions, integrity violations, or even their absence. You need to run it with certain arguments, a list of which will be presented below.
- SFC /? This key will list all available arguments with examples of their use. Actually, the same effect can be achieved by calling just SFC without prefixes;
- SFC / scannow. What is that key? It scans, calculates whether the system files have been changed, and if any are found, it starts recovery. The whole cycle will happen in default mode, i.e. user intervention after entering a command is not required. Sometimes the output of this procedure may display something like "SFC / scannow cannot restore some files." This means that the file is so damaged that it cannot be restored or is completely absent;

- / verifyonly. This argument simply checks the files without restoring them;
- / scanfile \u003d Path to the checked file. Scan and attempt to restore one specific file;
- / verifyfile \u003d Path to the file to be checked. Similar to the previous command, only does not restore the found problematic instances;
Additional teams
- / offwindir \u003d drive letter on which to scan. Provides the ability to verify integrity by specifying specifically where Windows is installed;
- / offbootdir \u003d drive letter from which to restore files. This key is used in conjunction with scannow and the previous argument;
- / scanonce. This key sets the scheduled check for the next system restart;
- / scanboot. This argument, like the previous one, plans to scan, only now every time it reboots;
- / revert. This key cancels the applied changes during the execution of previous commands;
- / purgecahe. The argument deletes the source files from the special cache, by which the recovery takes place. At the same time, it is checked and filled with current ones, if their integrity is not violated;
- / cachesize \u003d i. This key sets the cache size at the request of the user. The value of i in megabytes is measured.
Examples of using SFC / scannow. What it gives and the conclusion of the results
Use SFC on the command line. This will require administrator rights. To do this, you need to click the "Start" button and go to the "Accessories" item. There is a "Command Line". You need to right-click on it and select "Run as administrator".
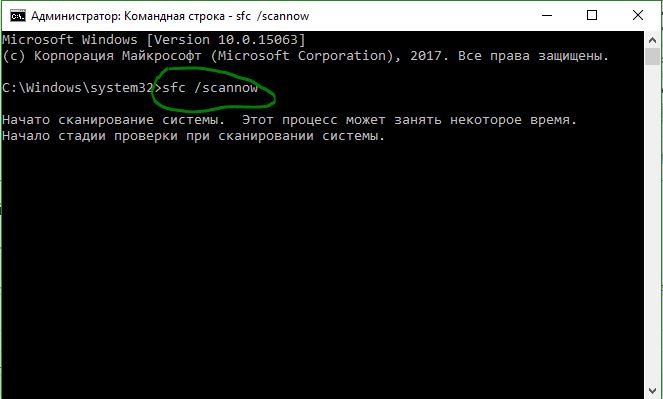
A black screen will appear in which the commands will be entered and the corresponding result will be displayed. The window looks like this:

You can enter one of the above commands in it, depending on the situation. For example, the first one you can use is SFC / scannow. What will it give? Firstly, the utility will check all the important system files, then compare them with the database from the cache.

If any inconsistencies are found, they will be repaired. During the operation of the utility, progress is displayed, after which 100% of the result of the procedure is displayed. There may be several:
- The program did not detect integrity violations. The conclusion of this proposal tells that everything is in order with the system;
- A reboot is required to complete. Restart the Windows system and run sfc again. The occurrence of this result when using SFC / scannow recovery may be due to a limited environment. The system proposed a solution to the problem.
This list of system responses occurs most often.

Other messages used less frequently
The program detected corrupted files, but cannot recover some of them. This is not the most favorable option, as the cache storing the whole and correct versions of the file may be damaged;
The utility cannot perform the requested operation. This result is displayed in case of any restriction on the part of the system. It is worth trying to reboot into safe mode and enter the commands here;
The utility detected corrupted files and successfully restored them. This message indicates that all system problems have been resolved. The result of running SFC / scannow in Windows 7 is saved at the path to the Windows \\ Logs \\ CBS \\ CBS.log folder;
Using SFC / scannow on Windows 7, 8, 10 can sometimes lead to unusual results. In the case when the utility says that it has not found any errors, and the system is still unstable, you need to restart SFC again. There are cases when the successful elimination of the problem was realized from the third or even fifth attempt. The same goes for other unsuccessful results. It is also worth using the provided utility in safe mode, as individual services and processes will not interfere.
Conclusion
The article examined in detail the use of the SFC.exe / scannow utility. What it is and how to apply it has been described in the examples of various keys. To avoid using the SFC utility, it is better to monitor the system and prevent its destruction and malfunctions. This can be implemented using anti-virus software products, scanning systems and registry cleaning. It is also worth carefully monitoring what is installed on the computer. And the most important thing is to avoid downloading obscure files and programs from suspicious or unfamiliar resources. Compliance with the simplest norms of computer literacy eliminates the need to use the means of checking the integrity of the system and calling the wizard.
This article shows the steps that you can use to recover damaged Windows system files using the SFC utility.
If the operating system is unstable and there are various errors in its operation, then for troubleshooting you can use the SFC command-line utility to restore the integrity of damaged system files.
SFC (System File Checker) is a Windows system tool for checking and restoring system integrity, which scans and checks all protected Windows system files for errors and replaces damaged or missing files with a copy of the Windows files located in the WinSxS directory.
How to check and recover corrupted system files using SFC utility
To check and repair damaged system files, as administrator and run the following command:


Depending on the scan results, you will see one of the following messages:
Windows Resource Protection did not detect integrity violations. This means that no damaged or missing files were detected in the system.
Windows Resource Protection cannot complete the requested operation. This message means that an error occurred during scanning. If you encounter this problem, try running the command sfc / scannow
Windows Resource Protection detected corrupted files and successfully restored them. See the CBS.Log WinDir% \\ Logs \\ CBS \\ CBS.log log for details. This message appears when the SFC utility was able to fix the problem. You can see detailed information about the files that were restored in the log file stored in C: \\ Windows \\ Logs \\ CBS \\ CBS.log
Windows Resource Protection has detected corrupted files but cannot recover some of them. See the CBS.Log% WinDir% \\ Logs \\ CBS \\ CBS.log log for details. In this case, Windows failed to fix some files. Again, you can see the list of files in the log file stored in C: \\ Windows \\ Logs \\ CBS \\ CBS.log. In this case, the user will have to manually replace the missing or damaged files.
You can also check and repair damaged system files using the open system as administrator.

How to check and repair damaged system files if the system does not boot
If the operating system does not boot, then you can also use the tool to restore the integrity of damaged system files, since the SFC utility supports offline scanning and recovery of damaged system files.
To do this, you need (disk) s. Boot from the installation media and on the screen for selecting regional parameters, launch the command line, for this press the key combination Shift + F10

Now you need to find out the letter of the partition on which the Windows operating system is installed, which you need to check. This is necessary because the letters of the disk partitions in the boot environment are often different from those used in a running system.
There are several ways to do this, such as diskpart, wmic, or the dir command, but we will use another method.
At the command prompt, run the following command:

In the Notepad window that opens, select in its main menu File - Open ...


In the Explorer window, you will see the available sections and the letters assigned to them. In this example, the partition on which the operating system is installed has the letter C. Now the Explorer and Notepad window can be closed.

Knowing the letter of the partition on which the operating system is installed, run the following command at a command prompt:
sfc / scannow / OFFBOOTDIR \u003d C: \\ / OFFWINDIR \u003d C: \\ Windows


Whenever something goes wrong with a computer or laptop, there are a number of troubleshooting tools that you can follow to try to fix the problem. Windows 10/8/7 has several built-in commands that you can use to check and repair damaged system files, which over time cause problems when changing. One way to troubleshoot Windows-related issues is to check the system and restore system files. This can help in all types of problems, such as a slow system, a blue screen of death, sudden power failures and system crashes.
Let's see how to run the system file checker in Windows using cmd command line and Powerhellsuch teams as sfc / scannow and tool DISM. I want to note that for updating the Anniversary Update Windows 10, it will be better to use methods with PowerShell.
Checking and Restoring System Files via CMD
System File Checker scans your computer for any damage or changes to system files that could otherwise interfere with the normal operation of your PC. From there, it replaces the file with the correct version to ensure smooth operation. Using the command line, you can try to scan and restore the system files of later operating systems, like Windows 10/8/7 / Vista. Let's analyze two teams sfc / scannow and DISM using CMD.
1.
- Run the command prompt (CMD) as administrator. Press "search" and just type "cmd" or "command line", then right-click on it and start as administrator.
- Set command sfc / scannowand wait until the process ends.
Note:After scanning your system, one of three results will be displayed:
- There will be no system file errors.
- There will be system file errors and Windows will repair them automatically.
- Windows has detected errors, but cannot repair some of them.
If your option 3 shows that an error has been detected and the system cannot recover, then repeat the procedure. I advise you to disable encryption and, if at the time of verification, they are available. Nothing succeeded? We move below.

2. (DISM)
If the above does not work in safe mode, there is one last way to check for damage in the system files and fix them. We use the Deployment Image and Service Management (DISM) tool. The team works with Windows 8 / 8.1 / 10 systems. Open back and use the following command:
The process can take a long time with the percentage scale hanging. When finished, restart your computer and start it back sfc / scannow, to make sure there are no errors or the error is gone.

Checking and Restoring System Files ViaPowerhell
We will use Windows PowerShell to show how to use the service and management service. DISM to scan and repair damaged system files in Windows 10. This method will be more effective for updating Anniversary windows 10 than the command line.
1. Using the System File Checker Tool (SFC)
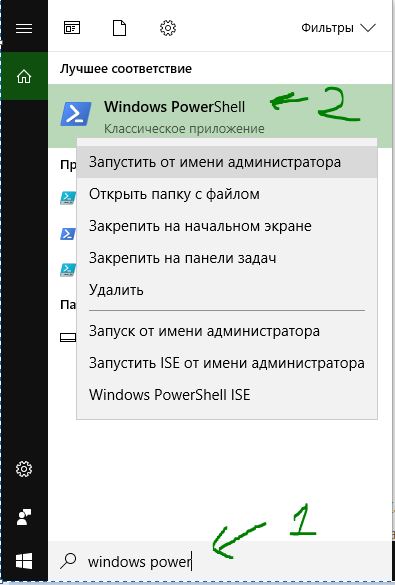
- Run Powerhell on behalf of the administrator. Click "search" and type windows powershell, then right-click and select as administrator.
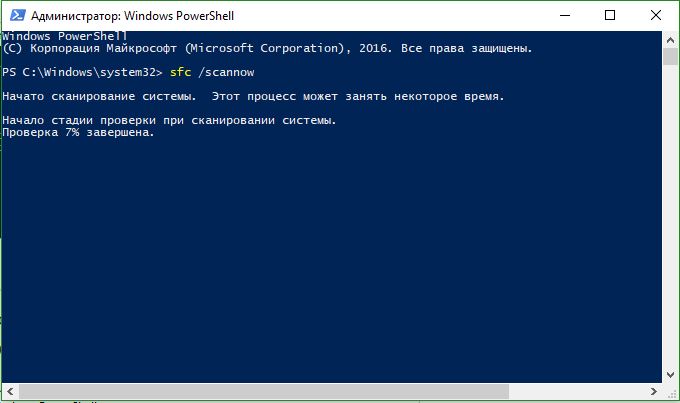
- Set the command in the PowerShell window sfc / scannow.If the scan detects any problems, Windows will try to fix them. If Windows cannot fix them, it will warn you that further research and action is needed. Move below if errors are found.
2. Using the Deployment Image and Service Management Tool (DISM)
Scan DISM detects damaged system files and Windows will try to fix them and give you a progress report at the end. If Windows cannot find the files needed to recover damaged system files, you will also be given information on what to do next, with a link to the Microsoft website and troubleshooting options. Issue the command below in the PowerShell window.
DISM / ONLINE / CLEANUP-IMAGE / RESTOREHEALTH
If DISM corrected everything or did not detect errors, then restart the laptop, computer and run to check back sfc / scannow.

Restoring Windows 7 or Windows 8 / 8.1 system files is an interesting topic. Especially if the operating system starts to fail, and we don’t have a recovery image and we forgot to turn on system protection to create recovery points. In this case, we will not be able to restore the system from the image, we will not be able to roll back Windows to the created recovery point and reinstall the system, we are too lazy, as it will take a whole day. And just here we have another chance to return Windows to its normal state - to try to restore system files. In this article I will try to fully disclose the topic so that it is possible to reanimate our computer in any situation.
1. Restoring system files in a loaded system
If our computer somehow turns on, then do the following. (if not included, see section 2 of this article)
Open the Start menu. In the search field, write “Com”. On the element " Command line"Click with the right mouse button and select" Run as administrator»

In the command line that opens, write
sfc / scannow
Waiting a bit
If your system is OK, you will see the following image

If your Windows was broken, you will see the following

System files restored successfully. We reboot and immediately turn on system protection to create recovery points so that the next time you just roll back the state of the computer a couple of days ago and that’s all.
It happens that when scanning the system, the sfc.exe utility found damaged files, but could not fix them. In this case, I would restore the system files in Safe Mode. If in safe mode, read the last paragraph 4 of this article.
If your computer does not boot at all, then what was mentioned at the very beginning of the article, then read the next paragraph.
If our computer does not want to boot at all, then we use the recovery environment. You can boot into it:
- When you turn on the computer F8 repeatedly
- Booting from a boot (installation) disk or flash drive
The first option will work if we have a boot partition that the system created when marking up the disk when we installed the system. Boot partition size:
- Windows 7 - 100 MB.
- Windows 8 - 350 MB.
In any case, try to press F8 several times during boot. A window should open with additional download options. Choose Computer troubleshooting.
In the next window, select the keyboard input method. Choose the language in which you have set the administrator password (if there is no password, you can immediately click Next\u003e).
We select the user with administrative rights and enter the password if there is one. If there is no password, just click OK.
Select the command line.
If you can’t enter the recovery environment using the F8 key, you will need to boot from the installation (boot) flash drive or disk. In the same way, you can put the boot from disk. Only in this case, you need to put DVD-RW (drive for reading optical discs) put in the priority of loading in the first place.
I like to boot from removable media using the boot menu. In ASUS motherboards, it is usually called also by the key F8.
Booting from a flash drive or disk I saw the following picture. I choose Windows setup - Install Windows.
We are waiting for all the installed Windows to be found.
We choose the one that does not turn on for us. And here ATTENTIVELY! We remember the letter that the recovery environment assigned to your system (in the Folder column). I have it D.
Select Command Prompt.
Enter the command
sfc / scannow / offbootdir \u003d D: \\ / offwindir \u003d D: \\ windows
Instead of D, you substitute your letter. Press Enter and wait for the scan to complete
On the virtual machine, from where the screenshot above was taken, there was a blue screen, so I was not surprised that system files were found and restored.
3. How to find out the drive letter of the installed Windows
If you succeeded with the key F8 call the window “Advanced boot options” and select “Troubleshoot computer problems”, then we need to find out the drive letter where Windows is installed which was assigned by the recovery environment. There are two ways to do this.
1. Call the notepad with the command
Expand menu in notepad File and choose Open…
Left click A computer and in front of you will be wheels with letters.
You can go to disk and see what and where.
2. We use the utility DISKPART
At the command prompt, enter:
diskpart - we call the utility for work with disks.
list disk - view the list of drives.
select disk - I select the hard drive I need.
detail disk - I call information about this disk.
4. For Windows 8 / 8.1
If the sfc utility could not recover the damaged system files, then you should try to restore the storage of these system files. The place where copies of healthy system files should be located. As I understand it, it is located at C: \\ Windows \\ WinSxS. That is, we must first fix the file storage, and then restore the Windows system files after using the “SFC / Scannow” command.
4.1. Restore storage using Windows Update
1. Run Windows PowerShell with administrator privileges. To do this, open the Start menu or the initial screen and click on the "Search" icon. In the search box, write "PowerShell". Right-click on “Windows PowerShell” and select “Run as administrator” or “Run as administrator”.
2. In the window that opens, write
Dism / Online / Cleanup-Image / RestoreHealth
and wait. If the storage is intact or it was restored using Windows Update, you will see the following picture.

If Image Health State: Healthy - everything is fine. We reboot the computer and try SFC / SCANNOW again.
4.2. Restore storage using an image
If we have problems with Windows Update, then this method is suitable.
1. Download the original Windows 8 / 8.1 image of the same bit depth as your system. How to know the capacity of the installed system.
2. Connect or mount the downloaded image. Click on the image with the right mouse button and select "Connect" or "Mount".

3. On the command line with administrator rights, we look at what edition there are in the image with the command
Dism / Get-WimInfo /WimFile:F:\\sources\\install.wim
I have 2 editions in my image. Understanding what I need for these decals is hard. We use the first. If it doesn’t, the second.
4. Run Windows PowerShell with administrator rights and set the command
Repair-WindowsImage -Online -RestoreHealth -Source F: \\ sources \\ install.wim: 1
where, F is the drive letter to which we connected the image, 1 is the Windows revision number in the image.
5. Manual system file recovery
If using sfc utility it was not possible to recover the beaten files, you should try to do it manually. In this case, you need to run the command
findstr / c: ""% windir% \\ Logs \\ CBS \\ CBS.log\u003e "% userprofile% \\ Desktop \\ sfcdetails.txt"
Findstr / s: ""% Windir% \\ Logs \\ CBS \\ cbs.log\u003e sfcdetails.txt
and carefully examine the file sfcdetails.txt on the desktop or in % windir% \\ Logs \\ CBS \\.
There should be something similar as in the picture below.
After the name of the damaged file is known (Accessibility.dll), we look for it on another computer with the same system as yours. If this is not an option, then I would download the original Windows image and install it on a virtual machine. I found the file I needed and copied it to the boot or installation flash drive. Then, from this installation flash drive booted into the recovery environment, would launch a command prompt. From the command line I would open notepad. Opened the menu File\u003e Open - and now I have almost a full explorer. Copy the replacement file from the USB flash drive, reboot and everything should work.
If the option of installing a virtual machine does not suit you, then you can connect the install.wim file to the folder. Then go to this folder and copy the necessary files.
1. Create a folder. For example, “Win8.1Pro” in the root of drive D.
2. Copy the install.wim file to the root of drive D.
3. Mount the install.wim file to the created folder.
Dism / Mount-Wim / Index: 1 /WimFile:D:\\install.wim /MountDir:D:\\Win8.1Pro
We go into the created folder and copy the necessary files.

Disable Image
Dism / Unmount-Wim /MountDir:D:\\Win8.1Pro / Discard
Utility sfc.exe checks the integrity of all system files protected by the Windows file protection system ( wfp), it has the ability to automatically replace damaged versions with the correct versions of Microsoft. To run the program, the user must have Administrator rights.
Sfc
Description
At startup sfc uses a number of flags, the most used of which is / scannow. sfc can be run on all computers running Windows, as well as in the Windows recovery console, but it is worth considering that all flags are supported on all operating systems. More details in the Compatibility column.
Parameter List:
/?
Lists all available flags.
/ scannow
Checks the integrity of all protected system files and restores damaged or modified files immediately after the command is executed. These files will be restored to their default values.
/ verifyonly
Checks the integrity of all protected system files, but does not restore them.
/ scanfile \u003d file_path
Scans the integrity of the specified file (by the absolute path of filePath) and restores it if changes are detected. An example of an absolute path when instead of filePath there will be c: \\ windows \\ system32 \\ example.dll
/ verifyfile \u003d file_path
It scans the integrity of the specified file (by the absolute path of filePath) but does not restore it. An example of an absolute path when instead of filePath there will be c: \\ windows \\ system32 \\ example.dll
/ offwindir \u003d drive_disk with Windows
It is necessary to manually indicate the drive on which Windows is installed and on which we are looking for file changes.
/ offbootdir \u003d drive_ drive_from_recover
Specifies the drive letter from which files to recover are taken. It is used in conjunction with / offwindir \u003d in the recovery console. Console usage example: sfc / scannow / offbootdir \u003d d: \\ / offwindir \u003d d: \\ windows. In this example, files indicated by the offwindir flag are scanned and repaired using the original Microsoft files found in the offbootdir path.
/ scanonce
Scan and recover files on next Windows boot
/ scanboot
Scan and restore files every time you start Windows
/ revert
This command is used to undo previously executed commands. For example, if a user runs the / scanboot command, which launches a scan each time Windows boots, the / revert command will terminate this process.
/ purgecache
Removing source files (from which recovery occurs) from the Windows cache folder. Use this command with caution, as it can lead to system crashes. The command also launches a system scan and populates the cache folder with copies of the current system files.
/ cachesize \u003d x
Changes the size of the cache, according to the needs of the user. The x parameter specifies the number of megabytes.
Return codes
Returns 0 if the operation was successful and 0 if with errors.
Usage example
To immediately scan and repair damaged system files:
To check file integrity without fixing it
sfc /verifyfile\u003dc:\\windows\\system32\\example.dll
Check example.dll file in the system recovery console from the installation f: Windows disk
sfc /scanfile\u003dd:\\windows\\system32\\example.dll / offbootdir \u003d f: \\ / offwindir \u003d d: \\ windows
Compatibility
Utility sfc compatible with operating systems Windows Vista and higher.
Possible problems
- sfc scannow cannot start recovery service - Check that the service has been started Windows Module Installer. (Control Panel \\ Administrative Tools \\ Services) and the startup type is Manual
- sfc scannow cannot restore files - Try the following command
Dism / Online / Cleanup-Image / RestoreHealth
It is used to repair damaged components, then restart the computer and try sfc / scannow again.
The second option is to replace files that the utility cannot recover on its own, either from another computer, or from a backup, etc.
To do this, you need to get a list of files that the utility could not restore; enter:findstr / c: ””% windir% \\ Logs \\ CBS \\ CBS.log\u003e ”% userprofile% \\ Desktop \\ sfc.txt”
This command will create a text file on your desktop sfc.txt which contains a detailed log of the utility