Greetings to all!
Screenshots are an integral part of working at a computer, and each of us sometimes needs to take them. And it’s very sad when for some reason the Print Screen does not work - I just want to break the keyboard. However, this will not help ...
You can, of course, take a picture of the screen on your phone or camera, however, the picture quality will be worse. You can do even more radical, like the blonde in the preview image on the left (but this is absolutely ridiculous).
In this article I will offer several options for how to solve this problem in more simple and sensible ways. Even if your button is completely “torn out” with the root and it just doesn’t physically exist - anyway, this article should help you!
What can be done in case of problems with Print Screen
1) To begin, check the spec. keys
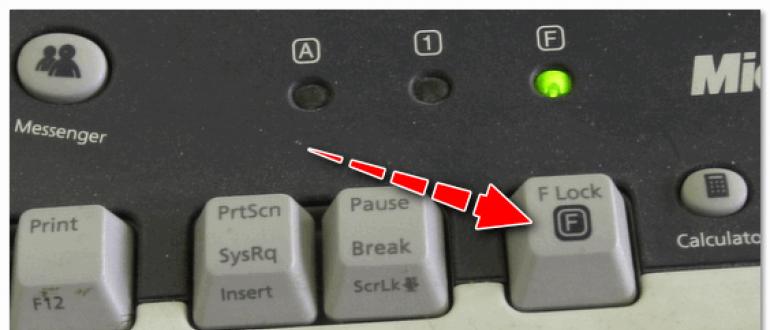
On some keyboards (seen only on PC) there is a special key F lock. When pressed, the value of some specials changes. and function keys. If you have a similar key, try disabling it ...

As for laptops, then often they have all of these keys (F1 - F12, Print Screen, Pause, etc.) have a double value that can be used with the key Fn (sometimes Alt) Thus, try pressing the following keyboard shortcut:
- Fn + Print Screen (and then open Paint and check if the screen is pasted);
- Alt + Print Screen

Another point is that the Fn key may just not work! For example, it can be disabled in the BIOS (check its operation with other function keys). The main causes of problems with the Fn key are described in this article:
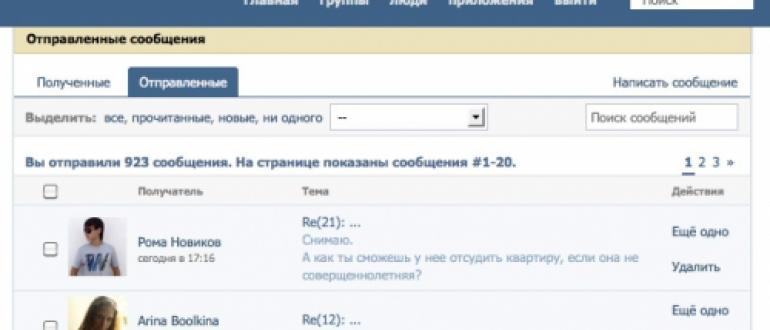
Also pay attention, didn’t you install any programs on the eve, for example, Yandex screenshots (included with the Yandex disk), OneDrive, Dropbox, Snipping tool, etc. The fact is that they can “intercept” the creation of a screenshot to to automatically save it to the cloud drive. If there is such software, open its settings and disable the capture of the Print Screen key.

2) You can install special. screenshot utility
I think that many will agree with me that clicking the Print Screen button and then opening Paint (or another editor) is not always convenient and fast. It is much more convenient to install a special application in which you can create and save a screen screen with a single click directly to disk (or automatically upload it to the network or add it to the editor).
Moreover, in all programs for creating screenshots (in 99%) - you can change the button to create them! I would recommend the following software: GreenShot, FastStoneCapture, Snagit, PicPick, Light Shot.

3) You can reassign one key to another
If in the previous method we just assigned a hotkey for one program, then in this I suggest a more radical one - change globally for all programs and the Print Screen system, say, to Shift or Home. Here, see for yourself which key would suit you more instead of the idle one.
The change is fast enough, just run one of the utilities: Key Remapper, KeyTweak, MapKeyboard.

MapKeyboard: just three steps to replace a key
4) Call on-screen keyboard
Not everyone knows that Windows has a special center with interesting tools: a magnifier, an on-screen keyboard (you can click on it with the mouse), etc.
This section is located at: Control Panel -\u003e Accessibility -\u003e Accessibility Center (to open the control panel - press Win + R, and enter the control command) .

Control Panel - Accessibility - Accessibility Center (Clickable)
Actually, the on-screen keyboard has all the buttons, as on the usual (physical) one. You can click on the desired key and use the PC in normal mode ...

5) Try to clean the keyboard, if there is no effect - replace with a new one
In most cases, the keys stop working and start to work badly due to dust, crumbs and other debris that accumulates under them. You can clean the keyboard in several ways:
- just flip it and knock: all the crumbs and dust will fly out of it (if you want to do this with a laptop - first disconnect the keyboard from the device!);
- there are special keyboard vacuum cleaners - they can quickly collect all unnecessary under the keys (you can use a regular vacuum cleaner, by the way);
- there are special “slurs” on sale - keyboard cleaners. The principle of their work is simple: stick them to the keyboard, they spread, and then "tear off" along with dust and debris.

Another "collective farm" grandfather way to clean the keyboard:
- remove the keyboard (disconnect from the PC);
- rinse it in warm water with a detergent (e.g. Fairy);
- dry it well;
- assemble, plug and try in action. Even in the most sad cases (for example, when pouring juice or coffee on the keyboard) - the method helps! True, I’ll make a reservation, you do everything at your own peril and risk, I can’t give any guarantees ...
If all of the above does not help, there is only one way out, buy a new keyboard (so that they are not so expensive).
Constructive criticism and additions, as always, glad ...
Have a good work!
Hello dear readers of the blog site. Everyone or a laptop at one time or another is faced with the question: how to take a screenshot (or in other words, take a picture — read more) of the screen, for example, to send it to someone later. Sometimes, on the computer, there are no special programs that help to quickly and efficiently implement all this.
It does not matter, because the built-in capabilities of Windows (even in the old XP) are quite enough to implement this task. If you use Windows 7, 8 or Vista, then they even have for this purpose a special built-in program called “Scissors”. So be sure to handle it if you read the relevant section of this publication.
The second frequently asked question is: how to make a screen on the phone running Android, Ios (this operating system is used on the iPhone and iPad), Windows Phone (used, for example, on Nokia Lumiya), Sinbayn and other OS. If this is your first experience, the answers will not be obvious to you.
Well, finally, I want to devote some time to describing specialized programs that allow not only making all conceivable screenshots on my computer and laptop, but also automatically uploading them to the Internet so that the person you give the link to can see them and download them if you wish . Hope it will be interesting.
How to make a screen on a computer or laptop in Windows XP, 7 and 8
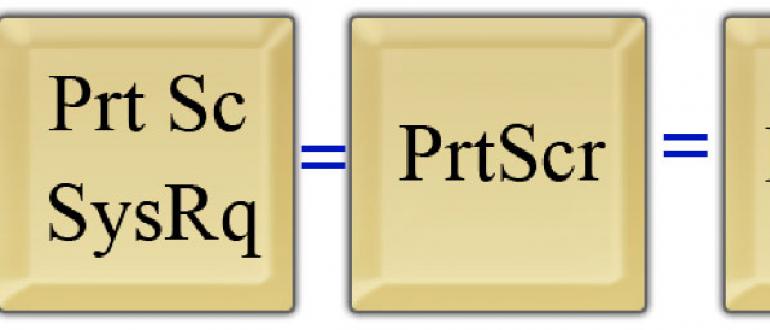
The most ancient and proven way to take screenshots on a computer is still the key "Print Screen". Usually it is located in the upper right part of the keyboard, as shown in the figure below:

True, on different types of keyboards (depending on its size and purpose), instead of “Print Screen”, it can be written: PrntScrn, PrtSc, PrtScn, PrtScr or something else like that.
On laptops however, to make a screen, you may need to press not a single key, but their combination: Fn + print screen. The fact is that laptops (of a particularly small size) use a truncated keyboard, some of the keys of which are accessible only by holding the additional Fn key, usually located at the bottom of the keyboard (these firm keys will be written in the same color as the Fn inscription).
When you press the Print Screen key (or Fn + PrtScn in the case of a laptop), the screen of everything that was displayed on the screen of your computer or laptop is copied. If you need to take a screenshot of only the currently active program window (on which the focus is now placed), then you should use the key combination Alt + PrintScreen.
Okay, we can assume that we have learned how to make screenshots. Now is the time to learn how to use them, i.e. save them as graphic files, which can then be, for example, sent to someone, inserted into the site (as I do) or stored in a secluded place. To do this, you will need to paste screenshots from the clipboard of your computer into any program for working with graphics that you have on your computer or laptop (I can cite Photoshop, IrfanView, and dozens of others as an example).
If there is nothing of the kind (you didn’t install it, or you are working on someone else’s computer), then the Windows operating system itself has a built-in free graphics editor Paint. It’s not perfect (rather, it’s simply wretched), but for the "manifestation" of the screenshot made quite fit. So, to get the Point out of the wilds of the software built into Windows, you will need to do the following manipulations: “Start” - “Programs” - “Standard” - “Paint”.
Now in the open graphics editor (Point or some other), select "File" from the top menu - "Create" (or press the combination Ctrl + N), and then type the combination of keys Ctrl + V (or choose "Edit" from the top menu - “Paste”). The screenshot copied earlier to the clipboard will be pasted into the editor window, and you will be able to properly process it if necessary (crop, add labels, emphasis, etc.).

At this stage, we have achieved that we finally saw firsthand the screen we made and even managed to mock it (process it), but this is not enough. It will still need to be saved as a graphic file (most often used for this). To do this, you can use the keyboard shortcut Ctrl + S, or select "File" - "Save As" from the top menu. It remains only to select the desired format and give the file a name. All. Now you can do with it whatever your heart desires.
How to make screenshots in the “Scissors” program from Windows 7 and 8
There is one obvious drawback in the method of taking screenshots described above - the process itself does not proceed in an explicit form, and for those who first encountered this, it might seem that nothing happened after clicking on the “Print Screen” button. However, in Windows Vista, 7 and 8, a new tool called “Scissors” has appeared, which allows you to make screenshots in a much more understandable and visual way. In the same program, they can be processed and saved as a graphic file.
The “Scissors” program lives in the same place as the Point considered just above: “Start” - “Programs” - “Standard” - “Scissors”. As a result, you will see a tiny program window, and the rest of the screen will appear to be lit up.

It is assumed that you are already ready to select the desired area of \u200b\u200bthe screen on your computer or laptop to take a screenshot of it. If so, then holding the left button, select the fragment. If, at the moment, it’s not what you wanted to shoot, it’s open, then click on the “Create” button in the “Scissors” program window (or click on Escape) so that it is wrung out. After that, open what you want to screenshot, and again click on the "Create" button, and then select the desired area of \u200b\u200bthe screen.

Default rectangular selection is used, but if you click on the arrow to the right of the "Create" button, you can choose one of four options:

- Free form - you are free to circle the desired area with the mouse cursor or a graphic pen (if you use it)
- Rectangle - used by default
- Window - a screen will be made of the window of the program that will be under the mouse cursor (for clarity, it will be circled in red)
- Full screen - in this case, the program takes a screenshot of everything that is currently displayed on the screen (except for the mouse cursor)
What this method is better than when the “Print Screen” button is used is that you will immediately see the screen in the window of the graphic editor built into the “Scissors”, where you can paint something using the three available tools: a pen, Marker and Eraser.

The Scissors editor’s functional doesn’t even reach Point, but it’s possible to get a little quick on the screen (I’ve snickered in this regard, because I use a professional program for working with screenshots, which will be discussed below). In general, when you make the necessary notes, you can safely press the button with a diskette to save screen in the form of a graphic file of the Gif, Png or Jpg format, and it is also possible to do this as a separate Html file (it is not very clear, however, for what purpose).
There is also a button on the program panel for sending a screenshot as an email attachment, for example, when you took a screenshot to show it to someone. Again, there are options for third-party programs for the computer and laptop, which allow you to automatically upload screenshots to the network and give everyone access to them, but we will talk about them a little lower.
Well, finally, choosing “Tools” - “Options” from the top menu, you will get access to the poor settings of this program.

In my opinion, the developers of Windows 7 and 8 could already add a bit of functionality to this built-in program so that it does not look so unpresentable in terms of editing screenshots. .
Yes, I forgot to say that “Scissors” allows you to make a screen, for example, a drop-down menu. To do this, you will need to open this menu and press the key combination “Ctrl + Print Screen”. A screenshot will be taken with the desired menu, which can then be cropped and saved.
Programs for working with screenshots in Windows
First, I’ll talk a little more about those programs that I use myself, and then I will give a list of other popular applications for working with screens.
One of the most popular software on my computer is. It has a lot of features and can be useful not only to the webmaster, but also just in the household to solve a number of everyday tasks, one way or another connected with taking a screenshot or recording a video from the screen.

The program has powerful functionality both for taking screenshots and for processing them. For example, it easily allows you to take a picture of a web page that occupies more than one screen (it takes a long time to scroll to the end).
For this purpose, there is a universal and convenient All-in-One mode of operation, when by clicking on the red button or the Print Screen key (when Snagit is running, this key starts working on this particular application, rather than copying the screen to the clipboard), you can easily do whatever you please.

For example, if you press the “Print Screen” key and move the mouse cursor to the application window from which you would like to take a picture, then magic happens. Moving the cursor to different places in the window, you will see that either the entire window, the menu, or some other internal units of it will be automatically selected. Those. you don’t need to aim precisely to frame the fragment you want to capture.
But you can work in normal mode, highlighting the desired area while holding the left mouse button, and you can precisely aim, because under the cursor there is a magnifying glass increasing the place where the cursor contacts the screen.

Using Snoogit, you can capture video from the screen, and much more. And already about the ability to process screenshots on your computer or laptop generally you can add songs. Here it will probably be easiest to bring a few screenshots, so that all the grandeur of this creation is clear:


There are a number of programs standing with Snagit in approximately the same row:
- Faststone capture - A good screenshoter for a laptop or computer is not overloaded with anything superfluous.
- Picpick - allows you to quickly take a screen shot of a computer screen or any of its selected area, including scrolling windows. The functionality is very close to Snagit, except that only the video can not capture. The built-in editor allows you to actually professionally process the resulting image.
Programs for removing and filling screenshots from a computer on the Internet
Clip2net can not only take screenshots and record video from the screen, but also allows you to instantly upload the whole thing to the Internet (the link to the screenshot will automatically be copied to the clipboard and it will only have to be pasted into the letter, on the website, forum or blog). As a result, you will not need to use your own hosting or one of Yandex Disk, Dropbox, etc.
After taking the screenshot, the program will open a window for editing the captured image. If this operation is not required for you, check the “Immediate download” field in the Clip2net settings. In the editing window, you can use standard tools (insert labels, highlight, arrows):

Clip2net is not unique in its kind, and there are some good ones on the market. programs for quick sharing screenshots:
- Joxi - A good screenshoter with the ability to instantly publish. They are edited right when the desired area of \u200b\u200bthe screen is selected, i.e. without going to the editor window.
- Lightshot - allows you to quickly take a screenshot, add notes to it, draw arrows and other figures with a pencil. When saving to a file, the file is immediately assigned a unique name, and you can immediately send it to the development server and instantly get a link to it, which is very convenient.
- - to disgrace is simple and concise to use. It is as if there is nothing superfluous, but all that is - hits right the bull's eye (in my sophisticated opinion). Actually, the idea, as I understand it, was just taken from the "Yabloko" (makovodov) - you activate the key combination and the picture with a screenshot will immediately fall to the desktop.
- , which not so long ago learned to make screenshots and upload them to Yandex’s own cloud with a link to them. The program has a pretty convenient graphical editor that allows you to add arrows, frames, lines, etc. to the screenshot. things.
- Monosnap - also a very good service, which allows you to take, process and upload to the network not only screenshots, but also screencasts (video captures from the screen). It also allows you to organize access to your desktop or webcam in real time.
- Skitch - A simple screenshot and screencast, but with slightly poorer functionality than the services described above. However, it allows you to send screenshots from a computer or laptop to Evernote, of which it is a part.
- Jet screenshots - allows you to capture the entire screen, the active window or the selected area, and then crop the received screen, add arrows, circle the desired area or insert an inscription. In the program settings, you can specify where the final file will be saved - to the computer (laptop) or to the development server with a link to it.
How to make screenshots on the phone (Android, Ios and other platforms)
Also a rather interesting question. If everything is more or less clear about a computer or laptop, the problem is not how to do it, but how to do it in the most optimal and convenient way. But a screenshot of a mobile phone or smartphone - to understand how to make it a little more difficult, because there is no special button for this purpose, but a combination of control keys that will be different for different types of mobile operating systems.
Start with Ioson which phones from the Apple Campaign ( iPad and iPhone) In order to make a screen, you will need to hold for two seconds two buttons: “Turn on” (sleep / wake up mode) and “Home”. The received images are saved in the “Photos” application on your device from the operating system.


How to take a screenshot on android
There are several versions of the Android operating system, for which the method of taking screenshots varies. In addition, phone manufacturers also sometimes make their own adjustments (for example, on my old Samsung Galaxy S3, a screenshot is taken by dragging a palm edge across the screen from left to right). Actually, I’ll try to generalize the information I have on different types of devices:
- Android 1 and 2 - in devices running on this OS there was no built-in ability to take screenshots, so I had to install third-party applications to help implement this. The methods for creating screenshots in this case depended on the application you selected.
- Android 3.2 - starting with this version and before the appearance of the four, to create a screenshot of the screen, it was enough to hold the button "Recent Programs" for some time.
- Android 4 - a screenshot is taken after briefly holding the “Volume Down” and “Power” keys.
- Samsung running Android - most often this manufacturer of phones allows you to take screenshots by holding a pair of buttons "Home" and "Power", or "Back" and "Home".
- HTC running Android - hold the “Home” and “Power” buttons for a few seconds
Screenshots thus obtained from an Android-based phone are saved in the Gallery application, which ships with the OS.
There is also such an operating system for mobile phones as Windows phone, on which, for example, quite popular Nokia Lumia phones work. In the version of Windows Phone 8, to take a screenshot, just click on the “Power” button (on the right side of the phone) and the “Win” button (at the bottom of the phone screen). But in Windows Phone 8.1, everything has changed a bit - you need to click on "Power" and "Volume Up".
Good luck to you! See you soon on the blog pages site
you can watch more videos by going to");">

You may be interested
 Screenshot - what is it and how to make a screen
  Skype - what is it, how to install it, create an account and start using Skype
  How to install viber (viber) on a computer?
  FAQ and FAQ - what is it?
Screenshot - literally from English means "screenshot". On a laptop, this operation is done simply: using the PrtSc button on the keyboard or using the methods described below.
Screenshot on a laptop using system tools
These operations are performed by standard Windows tools without using third-party applications and programs.
Keyboard shortcut "Prt Sc"
The easiest and fastest way is to use the special Prt Sc key on your laptop keyboard. Due to the compact size of laptops and netbooks, this key can be located in different places on the keyboard. If you want to capture some kind of window or other, it is enough for comrades to click “print screen”.
Possible keyboard shortcuts
- PrtSc - the button takes a screenshot of the laptop with the elements on it.
- Ctrl + Alt + PrtSc - a combination of buttons that allows you to remove the window of the active program. System elements: tray, desktop will not fall into the screenshot.
The button is located in the top row. Usually between F12 and Pause. But on compact laptop models, especially on ultrabooks, their own characteristics. In particular, the figure shows the PrtSc button on a Lenovo laptop.
Where images are saved
When pressed, the desired image is placed on the clipboard. In order to save the image, you need to insert it into the graphics editor. The easiest choice is a native Windows application called Paint. You can find it in standard applications in the Start menu. In recent versions of Windows, starting with 7, click the Win button and start typing the name of the Paint program. 
You will see an empty field of the workspace, into which you need to paste the image from the clipboard. To do this, you can use the keyboard shortcut Ctrl + V.
After the manipulations are done, the necessary picture will appear in front of you. In the future, you can draw arrows, highlight the necessary or add a description. After that, you can save the image in the resolution and format you need. By default, Windows selects the format for saving the picture * .png. To select the popular * .jpg on the Internet, you will need to select the Save as item in the Paint menu. 
Due to more efficient compression, a screenshot in jpg format has a size about two times smaller than that saved in png.
For laptops running the Linux operating system, this method is also suitable. But it immediately asks for the name and format of the file being saved to disk. Many will prefer "Paint" - Adobe Photoshop because of its greater functionality and convenience, but the latter is a paid editor. Here, as they say, a matter of taste and preference.
Using Scissors
Another system tool for saving screenshots of a laptop screen is Scissors. The program is available on versions of Windows starting with Vista, but most users do not know about the utility. 
In Scissors, you can select the image capture mode on the screen: arbitrary shape, rectangle, active window or the entire screen. 
There is a delayed start function that will allow you to take a screenshot a few seconds after clicking the Create button. It is useful for taking photos of the display in a game or application that blocks the actions of system buttons. 
In the arbitrary fragment mode, you can select part of the laptop screen for capture by drawing a closed zone with the mouse.

Saving the picture is done in the Scissors program using the floppy disk button.
File format: jpg or png, is selected in the save dialog.

For more convenient use of the Scissors, assign a hot key on their label. For example, Ctrl-Shift-1. In the list of applications on the Scissors icon, right-click and select Open folder with file.

Open the shortcut properties and assign shortcut keys. In our case, Ctrl-Shift-1.

After such an operation, the Scissors will be launched by the specified combination of buttons.
Screenshot on a laptop using utilities
There is a whole set of paid and free utilities to solve this problem. They allow you to more conveniently than in system tools to perform the following operations.
- Editing a picture before posting it or sending it by email.
- Quickly send a picture to the cloud to share a link with users.
- File size reduction while saving for quick opening on mobile phones and tablets.
- Organize display photos in a directory or folder.
Here are the most popular and successful of these utilities.
Lightshot
The program is free, distributed without restrictions and advertising. After installation, it integrates into Windows and replaces the regular action on the PrtSc button.
After taking a screenshot of the laptop screen, the program allows you to edit the picture. Arrows, rectangles, pencil and text insertion are supported.


An important feature of Lightshot is that the settings indicate the format of the image file written to disk or to the cloud, and the quality as a percentage. The higher the value, the less loss there is when saving, but the larger the file size will be. Lightshot is the only free review program with this feature.
Yandex Disk
Relatively recently, the ability to take a screen shot of a laptop or computer appeared in the Yandex Disk app for Windows. It turns on by default and changes the regular behavior of the system when you click on PrtSc.
The advantage of Yandex Disk is the ability to instantly generate a link to an edited and published file in the cloud storage.

The names of the pictures are assigned automatically by time or by the name of the window and time. This is necessary to quickly search for photographs of the display and restore order in the catalog. The format for saving the image file is selected in the settings: PNG or JPG.

Yandex Disk has an autoload function for images, which makes it easier to take screenshots from a laptop display for further processing on a personal computer. You connect both devices to the same Yandex.Disk account, and the drawing when saved on a laptop becomes available on the PC.
To save important correspondence, funny comments of friends to a common photo on your computer, or to capture a frame from your favorite movie - all this and much more can be done with screenshot - i.e take screenshot .
To do this, you do not need to use the phone’s camera, which significantly reduces the quality of the resulting image. To take a screenshot of the laptop screen, you can carry out the manipulations as in the creation, which we talked about earlier. Let's analyze the main points for creating screenshots on laptops with Windows and Mac OS.
How to take a screenshot on a Windows laptop
This operating system allows you to make screenshots on a laptop in several ways at once, many of which are very easy to use. Consider universal options and individual features for different versions of Windows.
The easiest way
On any laptop running Windows, you can find a button on the keyboard PrtSc which means Print Screen. It is this button that is reserved for the screenshot creation function.
To make the screen the easiest way, need to:
- Go to the necessary page or open the window whose snapshot you need, press the PrtSc button . If you want to save only a screenshot of the working window, and not the entire screen, then you need to simultaneously press the keys Alt + PrtSc . On Windows 8, you can hold buttons Win +PrtSc. With this action, the saved screenshot remains in the clipboard of the laptop.
 This looks like the button needed to create a screenshot on most laptops.
 - Now you need to transfer it from there for further storage. For this, any graphic editor program is suitable, be it Paint, Paint.NET, Photoshop or another. We open the program and press the button Insert (or press the key combination Ctrl + V ) A screenshot of the entire screen appears in the editor.
 The Paste button will help to "show" the desired frame from the clipboard.
 - The final stage is saving your screenshot . To do this, press the button Save or Save as (when you want to choose from b aboutnumber of possible formats), and select the folder where your screen will go after saving.
 In the end, you need to choose the format of the future picture, the name and places where it will be saved.
 Screenshots on Windows 7 and 8 - Scissors program
A very convenient built-in program for creating screenshots on a laptop and computer on Windows 7 and 8 generation operating systems - Scissors . It can be found in the section Standard .
 Thus, you can find Scissors in the list of standard laptop programs.
 - We go to the page we need to save and leave it open. We find in the Start menu Scissors and open. After clicking on the button Create , you can select a shape for the future selection area.
 Select the area of \u200b\u200bthe screen selection.
 - Select the desired area and get this window:
 A window with an almost finished screenshot.
 - The program allows you to edit screenshots: make inscriptions, mark areas with a marker and remove excess with an eraser.
- It remains only to save the picture to the laptop. To do this, select the button in the top menu Save as . This will allow you to give the picture a name, choose a folder to save and the screen format.
 The final stage of creating a screenshot on a laptop using this program.
 Screenshot on Windows 10
This version of the operating system helps to create screenshots on a laptop without unnecessary programs and additional manipulations. Very convenient and easy way.
How to create a screenshot on the tenth Windows:
- We open the page we need;
- Push Win +PrtSc ;
- We are looking for a finished screenshot in the folder Screen shots , which is created automatically in the system folder Pictures.
Take a screenshot on Mac OS
Macs have a different keyboard structure, so their laptops have a different key combination for creating screenshots. However, it is also very comfortable.
The following combinations are suitable:
- For screenshots of the whole screen you need to click cmd (⌘) + shift + 3 . The picture is saved to the desktop;
- A key combination is clamped to create a screenshot of a selected area of \u200b\u200bthe screen. cmd (⌘) + shift + 4 . After that, the finished picture can also be found on the desktop;
- To create a screen of the working window, click cmd (⌘) + shift + 3 + space . The finished photo is also saved on the desktop.

Screen capture using third-party programs
For those laptop users who regularly make screenshots at work or through their hobbies, they came up with special programs for creating screenshots.
They allow you to execute additional commands, such as a screenshot with a scroll (when you need to save a long page in a browser, for example), take several pictures in a row, save pictures to a server with the ability to get links to a finished picture, and other nice editing additions.
Often, users have a situation where they need to take a screenshot. In fact, this is not difficult to do, but when it comes to a laptop, beginners have some difficulties. This is due to the fact that such a device has a different keyboard.
On a Toshiba laptop or other similar device, a screenshot can be taken in several ways, namely:
- Windows tools;
- The Scissors Program;
- Specialized software.
Screen means OS
To take a screenshot, just click on the PrtSc button. Unfortunately, on many laptops the button may not work. This is due to the fact that a number of utility keys must be enabled. To do this, click on the combination of buttons Fn + PrtSc.

As for Toshiba laptops, the developers did not provide such keys. To take a screenshot on this laptop, press Fn + End. After that, the picture will be placed in the buffer.

When the picture is taken, it must be saved to any type of image. To do this, it is recommended to use any graphics editor. Even Paint will do. If you wish, you can use Photoshop. After creating a new document, you need to extract the snapshot from the buffer. There are several ways to do this:
- The keyboard shortcut Ctrl + V;
- The keyboard shortcut Shift + Insert;
- Selecting the “Paste” item from the context menu.

When the picture is inserted into the document, it remains only to save it in any graphic format.
Scissors Program
Sometimes users are interested in how to take a screenshot of the screen on a laptop if the “PrinceScreen” button does not work. Modern operating systems are equipped with a program such as scissors. To start it, you need to open the start menu, and then in the programs, enter the "Standard" section. There the program shortcut will be placed.

When the program is launched, you need to open the "Create" menu, and then select one of the items:
- Free form;
- Rectangle;
- Window;
- Full screen.

When the area necessary for the screenshot is highlighted, the simplest graphic editor will automatically open, allowing you to select the necessary places with a marker or pen.

To save a screenshot, you need to open the File menu, and then select Save As.
Specialized Programs
Since making a screenshot on a laptop is a bit more complicated than on a desktop computer, many experienced users recommend that beginners pay attention to specialized software that allows you to take screenshots.
There are more than a dozen programs that can not only take a screenshot, but also edit the created picture. Notebook owners are advised to pay attention to the following programs:
An application designed to take screenshots on a computer and laptop. The utility allows you to save pictures to any folder specified in the settings. In addition, in comparison with analogs, ShotTheScreen is able to create screenshots automatically, with a specified time interval.

It should be noted that you can take a picture of both the entire screen and a specific area. Such an application is perfect for beginners who have begun to learn the operating system and laptop.
A program such as FastStone Capture is a real “Monster” in creating screenshots. The application has a huge number of settings and advanced functionality. The finished image can be sent to a Word document, by e-mail, as well as via FTP.

The screenshoter is capable of capturing:
- Active window;
- Full screen laptop;
- Free area;
- Fixed area.
The advantage of this program is that in addition to ordinary pictures, users can create video clips by shooting the desktop. Compared to peers, FastStone allows laptop owners to set up hot keys in order to create screenshots later. The utility can be Russified, which facilitates the work.
Shareware program that allows you to take screenshots and capture certain areas of the screen. Great for laptops and desktops.

The advantage of this application, in comparison with analogues can be considered:
- Capture images and text of running programs;
- Create screenshots by timer;
- Ability to edit created screenshots;
- Ability to save images in any graphic format;
- Configure hotkeys.
Please note that this utility is most suitable for experienced users. Before using the program, it is recommended that you familiarize yourself with the manual.
Conclusion
Sometimes it is recommended to use the built-in tools, since it is enough to get a screenshot of the entire screen. If you need to edit or take a picture of an arbitrary area, you will have to install additional software.