In order to enter the BIOS SETUP it is required at the initial moment of computer loading to press the necessary button on the keyboard or a combination thereof. Usually this is the Delete (Del) or F2 key. Sometimes F10 is mainly for HP notebooks and Compaq. Other variants are much less common.
F1, F3, F10, F11, F12; Ctrl + Schift + S; Ctrl + Alt + S; Ctrl + Alt + Esc; Ctrl + Alt + Del; ESC; Ins; Alt; Ctrl; Ctrl + Esc; Ctrl + Alt; Ctrl + Alt + Ins; Ctrl + S; Ctrl + Schift + Esc; Ctrl + Schift + Alt + Del.
There are also various programs that allow you to view and configure the BIOS settings directly from under Windows, but the settings will be accepted only after the PC is restarted.
Settings Award bios. ADVANCED BIOS FEATURES. |

Virus Warning Virus warning - the resolution of this parameter will exclude any entry in the boot sector of the hard disk without permission. This parameter is used to protect against boot-viruses that damage the boot sector.
Boot Virus Detection - Informing about the presence of a virus in the boot sector, if this parameter is disabled, then before the OS boots, the BIOS overwrites the boot sector in the flash memory and saves it there. After setting the parameter to Enabled, the BIOS will not allow the OS to boot from the hard disk if the contents of the boot sector do not match the one stored in the memory.
CPU Internal Cache / External Cache - Internal or external processor cache - the internal or external cache of the processor is allowed or prohibited. Prohibition is recommended only if you need to artificially slow down the PC, for example, when installing an old board.
CPU Level 1 Cache / CPU Level 2 Cache Level 1 and Level 2 processor cache - the first level or second level cache for decayed processors of the Pentium Pro architecture (Pentium II, Deshutes, etc.) is enabled or enabled. You should prohibit only if you slow down your computer.
BIOS Update - Update the BIOS Pentium Pro, Pentium II, Celeron, Xeon, etc. have a special mechanism, programmable microcode, which allows you to exclude some types of errors in the processor by changing the microcode. Updates of the microcode remain in the BIOS and are loaded into the processor after the computer power is turned on.
CPU Fast String - Fast string operations - Enabling this option allows you to use certain specific features of the processor architecture.
HDD S.M.A.R.T Capability S.M.A.R.T diagnostics - allows you to diagnose the state of hard disk in accordance with the requirements of S.M.A.R.T. If the normal operation of the hard drive is disrupted, a message appears on the screen. It should be added that allowing this option will reduce the performance of your computer.
Deturbo Mode The FLUSH # signal becomes active and the data is no longer cached by the processor to the internal L1 cache.
Quick Power On Self Test quick test - Enabling this option results in less time for initial testing of the computer. It should be added that memory is not tested, but only its size is checked.
Boot Sequence - boot sequence - the parameter sets the sequence of devices to boot the OS.
Boot Up System Speed the system bus and processor speed after turning on the computer. The parameter is used to artificially reduce the PC speed for older programs.
Boot Up NumLock Status - Enable numeric keypad after power on - Enabling this option enables the NumLock indicator
Typematic Rate Setting - Set the speed of entering characters by the keyboard with the key pressed.
Typematic Delay - retry delay from the moment the key is pressed to the beginning of the symbol repetition.
PS / 2 Mouse Function Control control of mouse port functions PS / 2 - renders IRQ12 only for PS / 2 mouse otherwise IRQ12 is free for other devices.
PCI / VGA Palette Snoop Adjustment of the VGA palette of the video card to PCI is only allowed if the colors on the screen are not displayed correctly
Video ROM BIOS Shadow - BIOS video in memory - Enabling this option causes the video BIOS to be transferred from the ROM on the video card to the main memory, which greatly speeds up the work with the video BIOS
Setting parameters for FPM DRAM, EDO DRAM and Synchronous DRAM
AUTO Configuration - automatic configuration.
DRAM R / W Leadoff Timing number of measures in preparation for the read / write operation - determines the number of cycles on the bus before performing any operations with DRAM.
DRAM Read Burst Timing packet read time - The read and write request is generated by the processor
Speculative Leadoff advanced reading signal - the resolution of this option gives a read signal earlier than the address will be decoded. This reduces the total time spent on the read operation. Otherwise, the processor will initiate the read signal in parallel with the generation of the address where the necessary data is located. The read signal is sensed by the DRAM controller and, if Speculative Leadoff is enabled, the controller will give a read signal until the address decoding is completed
Data Integrity (PAR / ECC) (data integrity) - Enables or disables memory monitoring for errors. The type of monitoring is set by the DRAM ECC / PARITY Select parameter.
DRAM ECC / PARITY Select (error correction mode / parity check) - The parameter is available only in those motherboards in which the chipset supports ECC and only if true-parity memory modules are installed.
Fast RAS # to CAS # Delay (the interval between RAS and CAS) - When the memory is regenerated, the rows and columns are addressed separately, so this parameter sets the interval between the RAS and CAS signals.
SDRAM (CAS Lat / RAS-to-CAS) (CASH - CAS latency / From RAS to CAS) - allows you to combine between the duration of the CAS signal and the delay between the RAS and CAS signals. The value depends on the characteristics of the SDRAM used in the motherboard and on the speed of the processor. Therefore, use this parameter very carefully.
SDRAM CAS to RAS Delay (delay between CAS and RAS) - the parameter determines the delay value after the RAS signal is issued before the CAS signal of synchronous memory appears. The lower this value, the higher the memory access. Nevertheless, it should be changed cautiously.
SDRAM CAS # Latency (CAS delay for SDRAM) - Sets the CAS delay for SDRAM. A smaller value increases system performance. It is recommended to set a lower value for SDRAM with a speed of 10 nc or better.
SDRAM Banks Close Policy (rules for closing SDRAM banks) - the parameter was introduced for 440LX cards because the memory with the 2 bank organization does not work correctly in these boards, if the access parameters to the memory banks are set by default. In the 430TX set, this was not required, so the access rules for different memory were the same. Change the default BIOS settings for this parameter only if the memory is unstable
Spread Spectrum Modulated (Spread Spectrum Modulated) - Enabling this option allows you to reduce electromagnetic radiation from the computer by reducing the value of the clock signal emissions.
Setting parameters for caching
S ystem BIOS Casheable (caching the system BIOS area) - Enables the caching of the memory area at the system BIOS addresses from F0000H to FFFFFH in the cache memory. The parameter will be applied only if the cache memory is enabled in the BIOS Features Setup section. If any utility attempts to write to these addresses, the system will generate an error.
Video BIOS Cacheable (caching the graphics card BIOS area) - the ability to cache the memory area at addresses BIOS graphics cardss from C0000H to C7FFFH into the cache memory.
Configuring PCI, AGP, I / O buses and setting IDE controller parameters
Graphics Aperture Size (Graphics Aperture Size) - this parameter specifies maximum size memory area for use by the graphics card
PCI 2.1 Support (Support for PCI 2.1 bus specification) - When this option is enabled, the features of the PCI bus specification 2.1 are supported.
8 Bit I / O Recovery Time (recovery time for 8-bit devices) - The parameter is measured in processor cycles, and determines what delay the system will set after issuing a read / write request for the device.
16 Bit I / O Recovery Time (recovery time for 16-bit devices) It determines what delay will be set after issuing a read / write request for the device. Can take values from 1 to 4 cycles. Memory Hole At 15M-16M ("hole" in memory inside the 15th megabyte of memory) - Enabling this option allows you to access I / O devices as a memory and thereby increase the speed of access to such devices.
Peer Concurrancy (parallel work) - This parameter enables or disables the simultaneous operation of multiple devices on the PCI bus.
Passive Release - Turns on / off the mechanism of parallel operation of the tires. If this parameter is enabled, the processor access to the PCI bus is enabled during passive separation.
PCI Delayed Transaction (delayed transaction on PCI) - The presence of this parameter means that the motherboard has a built-in 32-bit buffer to support the extended exchange cycle on the PCI.
Parallel Port Mode (ECP + EPP) (Parallel Port Mode) - the parameter allows to set the operating modes of the parallel port in accordance with the IEEE 1284 standard.
Parallel Port Mode (parallel port mode) - the parameter is similar to Parallel Port Mode (ECP + EPP), but with some extensions
Onboard PCI IDE Enable - This parameter controls the enable / disable operation of each of the two channels of the IDE controller installed on the motherboard. Can take values
Onboard FDC Controller (Floppy Disk Controller) - This parameter controls the enable / disable operation of the floppy drive controller installed on the motherboard.
PNP OS Installed Is the operating system with Plug-Play support installed?
Resources Controlled By (how resources are managed) - If AUTO is selected, the BIOS will automatically assign interrupts and DMA channels to all devices connected to the PCI bus otherwise all of these parameters should be set manually.
Reset Configuration Data - It is recommended to set it to Disabled. When the Enabled BIOS is installed, the BIOS clears the Extended System Configuration Data (ESCD) area, which stores the BIOS configuration information for the system, so hardware conflicts are possible.
IRQ n Assigned to Each interrupt of the system can be assigned one of the following types of devices
PCI Latency Timer (PCI delay timer) - Sets the maximum time during which the device on the PCI bus can hold the bus in the event that another device requires access to the bus.
USB IRQ (USB bus interrupt) - the parameter enables or disables the interrupt assignment for the USB bus controller. Because the computer often does not have enough interrupts, this parameter should be enabled only if there is a device on the USB bus in the system
VGA BIOS Sequence (sequence bIOS downloads video cards) - determines which BIOS of the video card will be booted first
USB Keybord Support Via (support USB keyboard through ...) - Who is responsible for the USB keyboard - on the BIOS or the operating system.
BIOS Award settings. Power Management Setup. |
Power Management power management - allows you to reduce the power consumption of the laptop, if it does not work
Suspend Switch (Suspend mode switch) - the parameter enables or disables the transition to suspend mode with the the system unit. To do this, you must connect the SMI jumper on the motherboard with the button on the front panel.
HDD Power Down - sets the time that the hard disk will be turned off if there is no access
How to reset the BIOS |
Very often, a factor in the unstable operation of a computer or laptop, up to failure, is the BIOS setup error. Also, you may get an unpleasant situation when you forget the password to enter the BIOS SETUP or to start the operating system. In such unpleasant situations it is possible and necessary to return to initial settings or reset the BIOS to the default settings. Another procedure called the experts "zeroing" the settings.
Hello dear readers! I'm pleased to see that there is already movement on the site. I can see though not a huge but still attendance. This gives impetus to writing new articles and reviews. And today we will analyze what BIOS is, how it works, what it's all about and how important it is. So it's more convenient to sit in front of the screen and get another dose of knowing your PC.
In previous articles about, and also we have already familiarized ourselves with the basic components of the laptop, it's time to dig deeper, namely bios, installation of Windows, registry, etc. And today with Bios and start. So in each laptop there is a small chip, on which a small program is recorded while building a PC. The program itself is responsible for the first launch of the laptop, preparing it for installing Windows. This is called providing the BIOS - basic system input and output. As soon as you press the start button on your laptop or on the system unit, immediately this program looks for and checks the operation of individual devices, looks at which media to start the system from, and sometimes displays certain requests to the monitor. It's like an intermediary between the system and the hardware parts of your PC. The main tasks of the bios are:
Enable or disable some built-in devices, as well as their initial configuration.
Adjustment of the operating frequency and voltage of the CPU.
Temperature control, fan control.
Switching PC to energy saving modes and back.
Turning the notebook off and on.
Although now oS Windows, have learned to do without BIOS for tasks such as DREAM, GIBERNATION, BLOCKING, referring directly to the hardware of the computer. If these functions are disabled in the BIOS, then they will be unavailable for the system.
To view and edit the BIOS settings, there is a special menu (BIOS Setap), which is called at the time of power-up or when the system itself is rebooted. Already from the factory, the program settings are optimized for Defaults (by default), but we still apply some changes basically this:
- Changing the mode of the hard disk controller when installing Windows 7.
Set the priority of the bootable media.
Disconnect unused or faulty devices.
Set, change or disable the password to turn on the computer. (not to be confused with the account password).
Call up the settings menu or enter the BIOS.
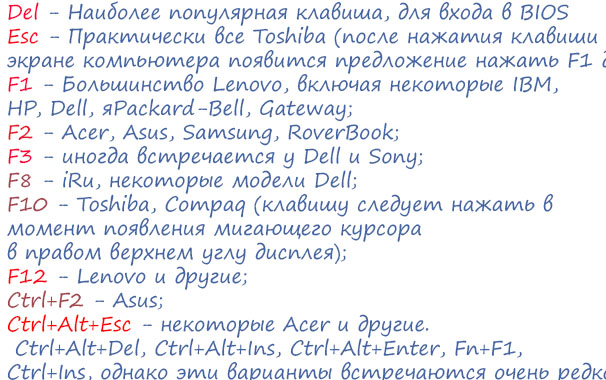
When you turn on, start the computer, when the system issues one short signal from the system speaker, you need to press a certain key or a combination of several. To do this, you are allocated a couple of seconds 2-3. If you do not have time or press the wrong key, the system will start loading from the specified media. To make it easier for you to know what to press the system gives a prompt like: Press DEL to enter Setap - this is a proposal to use the Delete key to enter the BIOS. In each model of the laptop, depending on the manufacturer, different keys or their combinations for input are used. If there are no prompts, then see the instructions that come with the laptop. Or use After a successful entry, our eyes will be given approximately the following window:
 At once I will tell, this window at each manufacturer can be a miscellaneous, even in one mark, in different models, line of laptops, there are different Bios. All settings and instructions for english language, so if you do not know it, use an interpreter to avoid unnecessary mistakes. Pay attention to the pointers at the bottom of the window, in some bios, they can be on the right side of the window. So: F1 - Call for more information, help. Esc - the benefits from this catalog are one level to the top, or the output is at all. Keys Select - it's navigating through the tabs and moving from one line to another, usually it's the navigation arrows on the keyboard or F6 and F5. F9 - This is the default setting, that is, by default. For your changes to take effect, you must click F10, and then Enter. Now a little on the tabs so you have a general idea of what, where and why!
Main tab in the BIOS menu
Here you can change the settings for the settings for the time and date. With it, you can also roll back to extend the trial period of Windows 7, and sometimes even with a full load of viruses, can help roll back to the back date.
The Advanced tab
So this is the tab with the general settings for the BIOS, among which we can meet:
- Virus Warning - Protection of the boot sector of the hard disk from such as or changed at the level of bios.
- CPU Internal Cache - Enabling and disabling the first level cache.
- External Cache - Same thing, only the second level.
- Swap Floppy Seek - floppy disk drive to boot.
- HDD S.M.A.R.T. Capability - Inclusion of S.M.A.R.T. technology. This option gives additional load to the system.
- Security Option - Indicates the scope of Bios passwords, it will work only when entering the BIOS or when logging in and to the system.
- EzRestore - Disabling and enabling the system disaster recovery feature for various problems.
- Video BIOS Shadow - When enabled, the parameters will greatly improve the performance of your system. Copying the BIOS code, which is responsible for working with graphics in RAM.
Maybe I did not specify all the parameters, but they may differ from your version of Bios. If you have others and you do not know their purpose, write in the comments, we will understand together.
Security Option BIOS tab
Setting a password, changing it, turning it off and being able to specify the sphere of influence, for the BIOS only or for the entire system.
Power Option BIOS tab
You can set that the computer will start up automatically if the power failure is abnormal. For home PCs, this is not relevant.
Boot Option BIOS tab
Here we specify the order for system downloads from certain media or drives. Even if you have specified, the download from the sidirum or flash drive, the system in the absence of on-line, will boot from the hard disk. Also, if there is an external bootloader, you must confirm the input from it by pressing any key.
About the tab Exit I think it's not worth writing, the way out is in Africa). Now in more detail about windows Startup, and priority setting for the media. In order to install Windoes on your computer, you need to specify from where, from which storage the system will be loaded, in our case it is a DVD-ROM. We launch our PC, as soon as we see the prompt for entering the BIOS, how it looks like I wrote, we immediately press the corresponding key. After a successful login we need to enter the tab Advanced in some cases in the tab Boot.We are given a list of possible ways of downloads. Use the arrows or the F6, F5 keys to select the desired option and press F10. That's all, by such simple manipulations, you indicated the way to boot the system from the right place. I'll also write a little about the password function. So, go to the Security tab, now briefly about its contents.
- System password - The password you need to enter to enable and boot the computer.
- Admin passwordor Setup password - The password that is put on the BIOS itself.
- Internal HDD Password - put protection on the hard drive, while the drive itself is encrypted at the hardware level and can not be read without a password, as on this and on another computer.
When you set the password, you need to enter it twice, so the risk of incorrect entry is reduced. Pay special attention to this input, register and keystrokes, as this can lead to serious problems with lost or forgotten passwords. For laptop users, I'll tell you about the problems that occur when a password is lost. Reset it by simply closing the jumper on the board will not work. Although the reset is always possible, but in the best case you need "tricky" programs, and at worst - a tap of the chip with further flashing on the programmer. This will have to be done in the service centers and the price will not please you from $ 20 to $ 50, so think twice before setting something and be extremely attentive.
Well, that's all I know and what I shared with you. Of course, if there are problems and questions, I will be happy to help and work out your problem together.
Sincerely, AHDEPC.
You were interested, advise your friends.
Setting up the BIOS on the computer is a simple process, but it requires some knowledge and attention, because the result depends on the performance and performance of the PC. BIOS (BIOS) is a group of microprograms that are responsible for the interaction between the components of the PC and its further loading. This set of programs is "sewn" into a chip on the motherboard.
An interesting fact is that the BIOS was developed in 1981 and has not changed to this day. Only in 2005 appeared UEFI bios, but it has yet to drive out the good old BIOS.
BIOS setup on a new computer
Before you new computer. If it's a branded computer, then most likely, you do not need to configure the bios of the new computer. For you it was done at the factory. If not, take the documentation on your motherboard and see how to get into the BIOS. Usually, when you boot, you need to press one of the keys: Del, F2, or F10, but there are other options. Now you know how to find BIOS settings on your computer. Let's see what you need to tune in the BIOS.
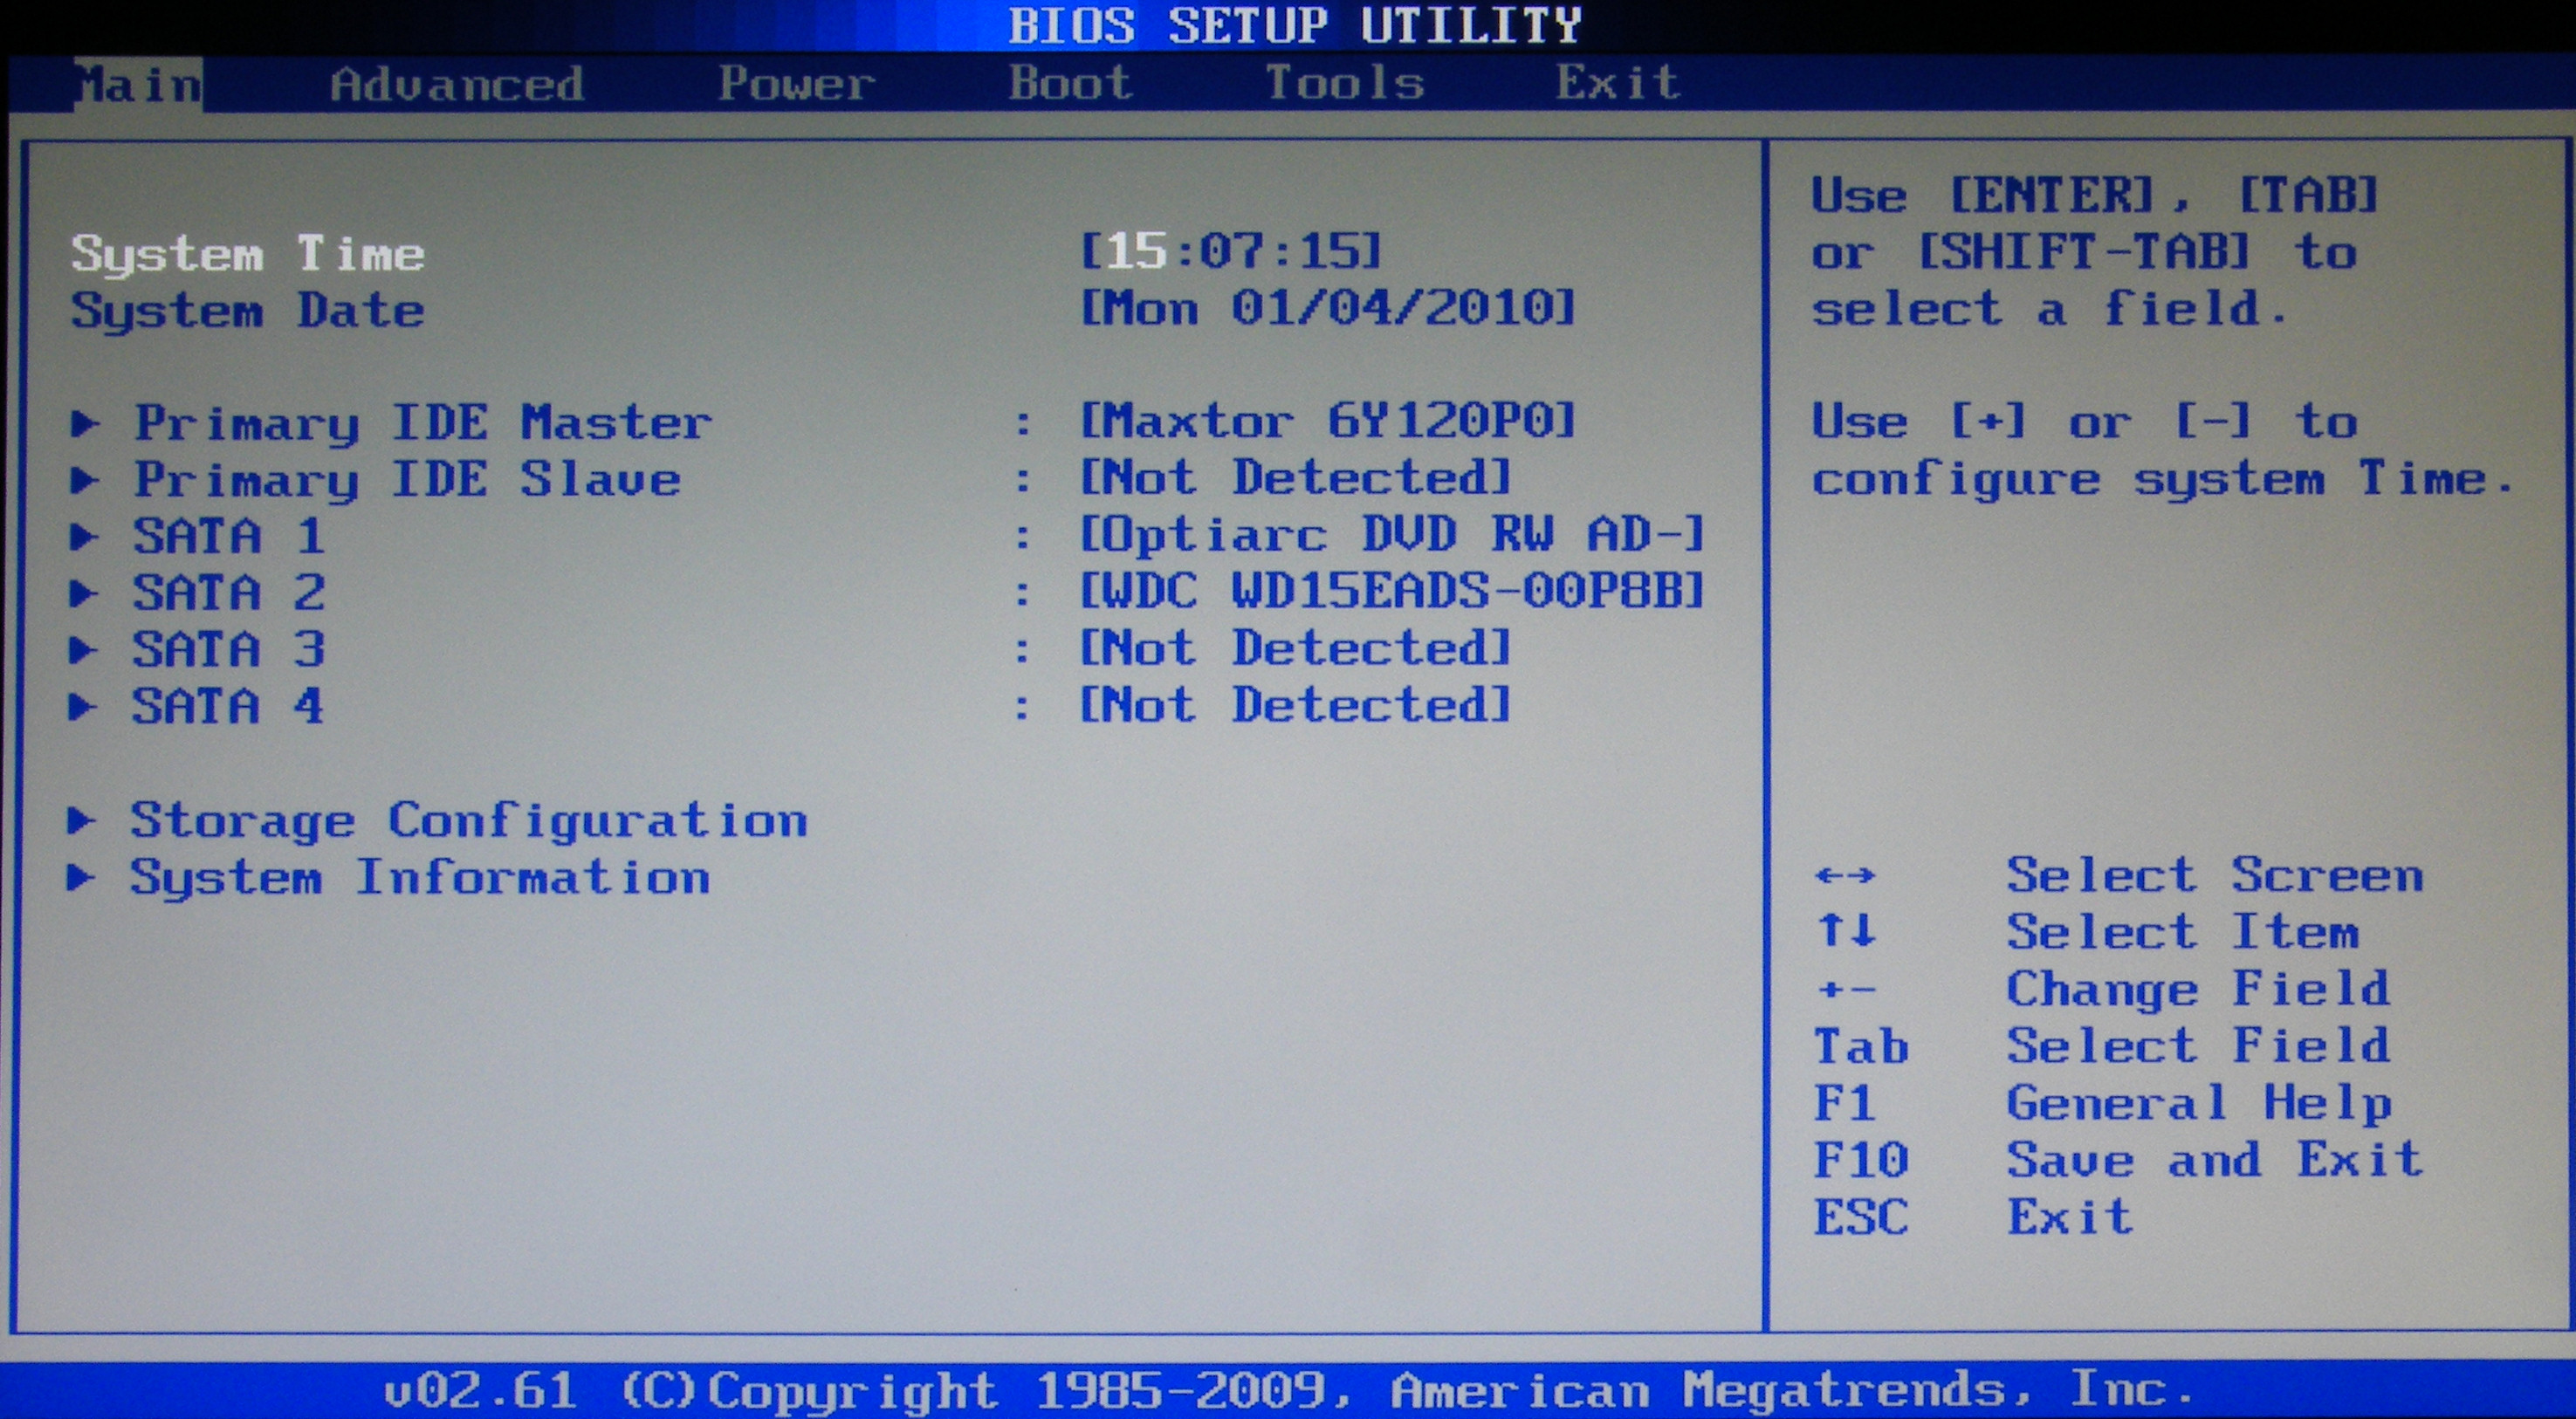
For example, consider how to configure the BIOS on the computer asus. This is AMI-bios version 02.61. We hit the BIOS by pressing the "Delete" key. The MAIN section opens. Here you can adjust the date and time, as well as configure hard drives and CD-DVD drives. Note: on the left on the screen you are given a hint which keys you can control the BIOS. The left and right arrows switch sections. The up and down arrows allow you to move between the section points. The Enter key is used to enter the selected setup item. You can save the settings with the F10 key.
1. In the MAIN section, we can see information about the processor, BIOS version and RAM size. To do this, enter the System Information item. In the Storage Configuration item, you can configure the operating mode of the hard drives. Here you can set the SATA configuration mode in the IDE or ACHI. In IDE mode, you can install an old operating system on your computer such as Windows XP. To install modern operating systems, ACHI is exposed.
2. The Advanced section. Here we are interested in the USB configuration settings item. In this section, you must enable the USB ports by selecting Enabled, and set the highest data transfer rate (HighSpeed). The remaining settings should be left in the Auto position.

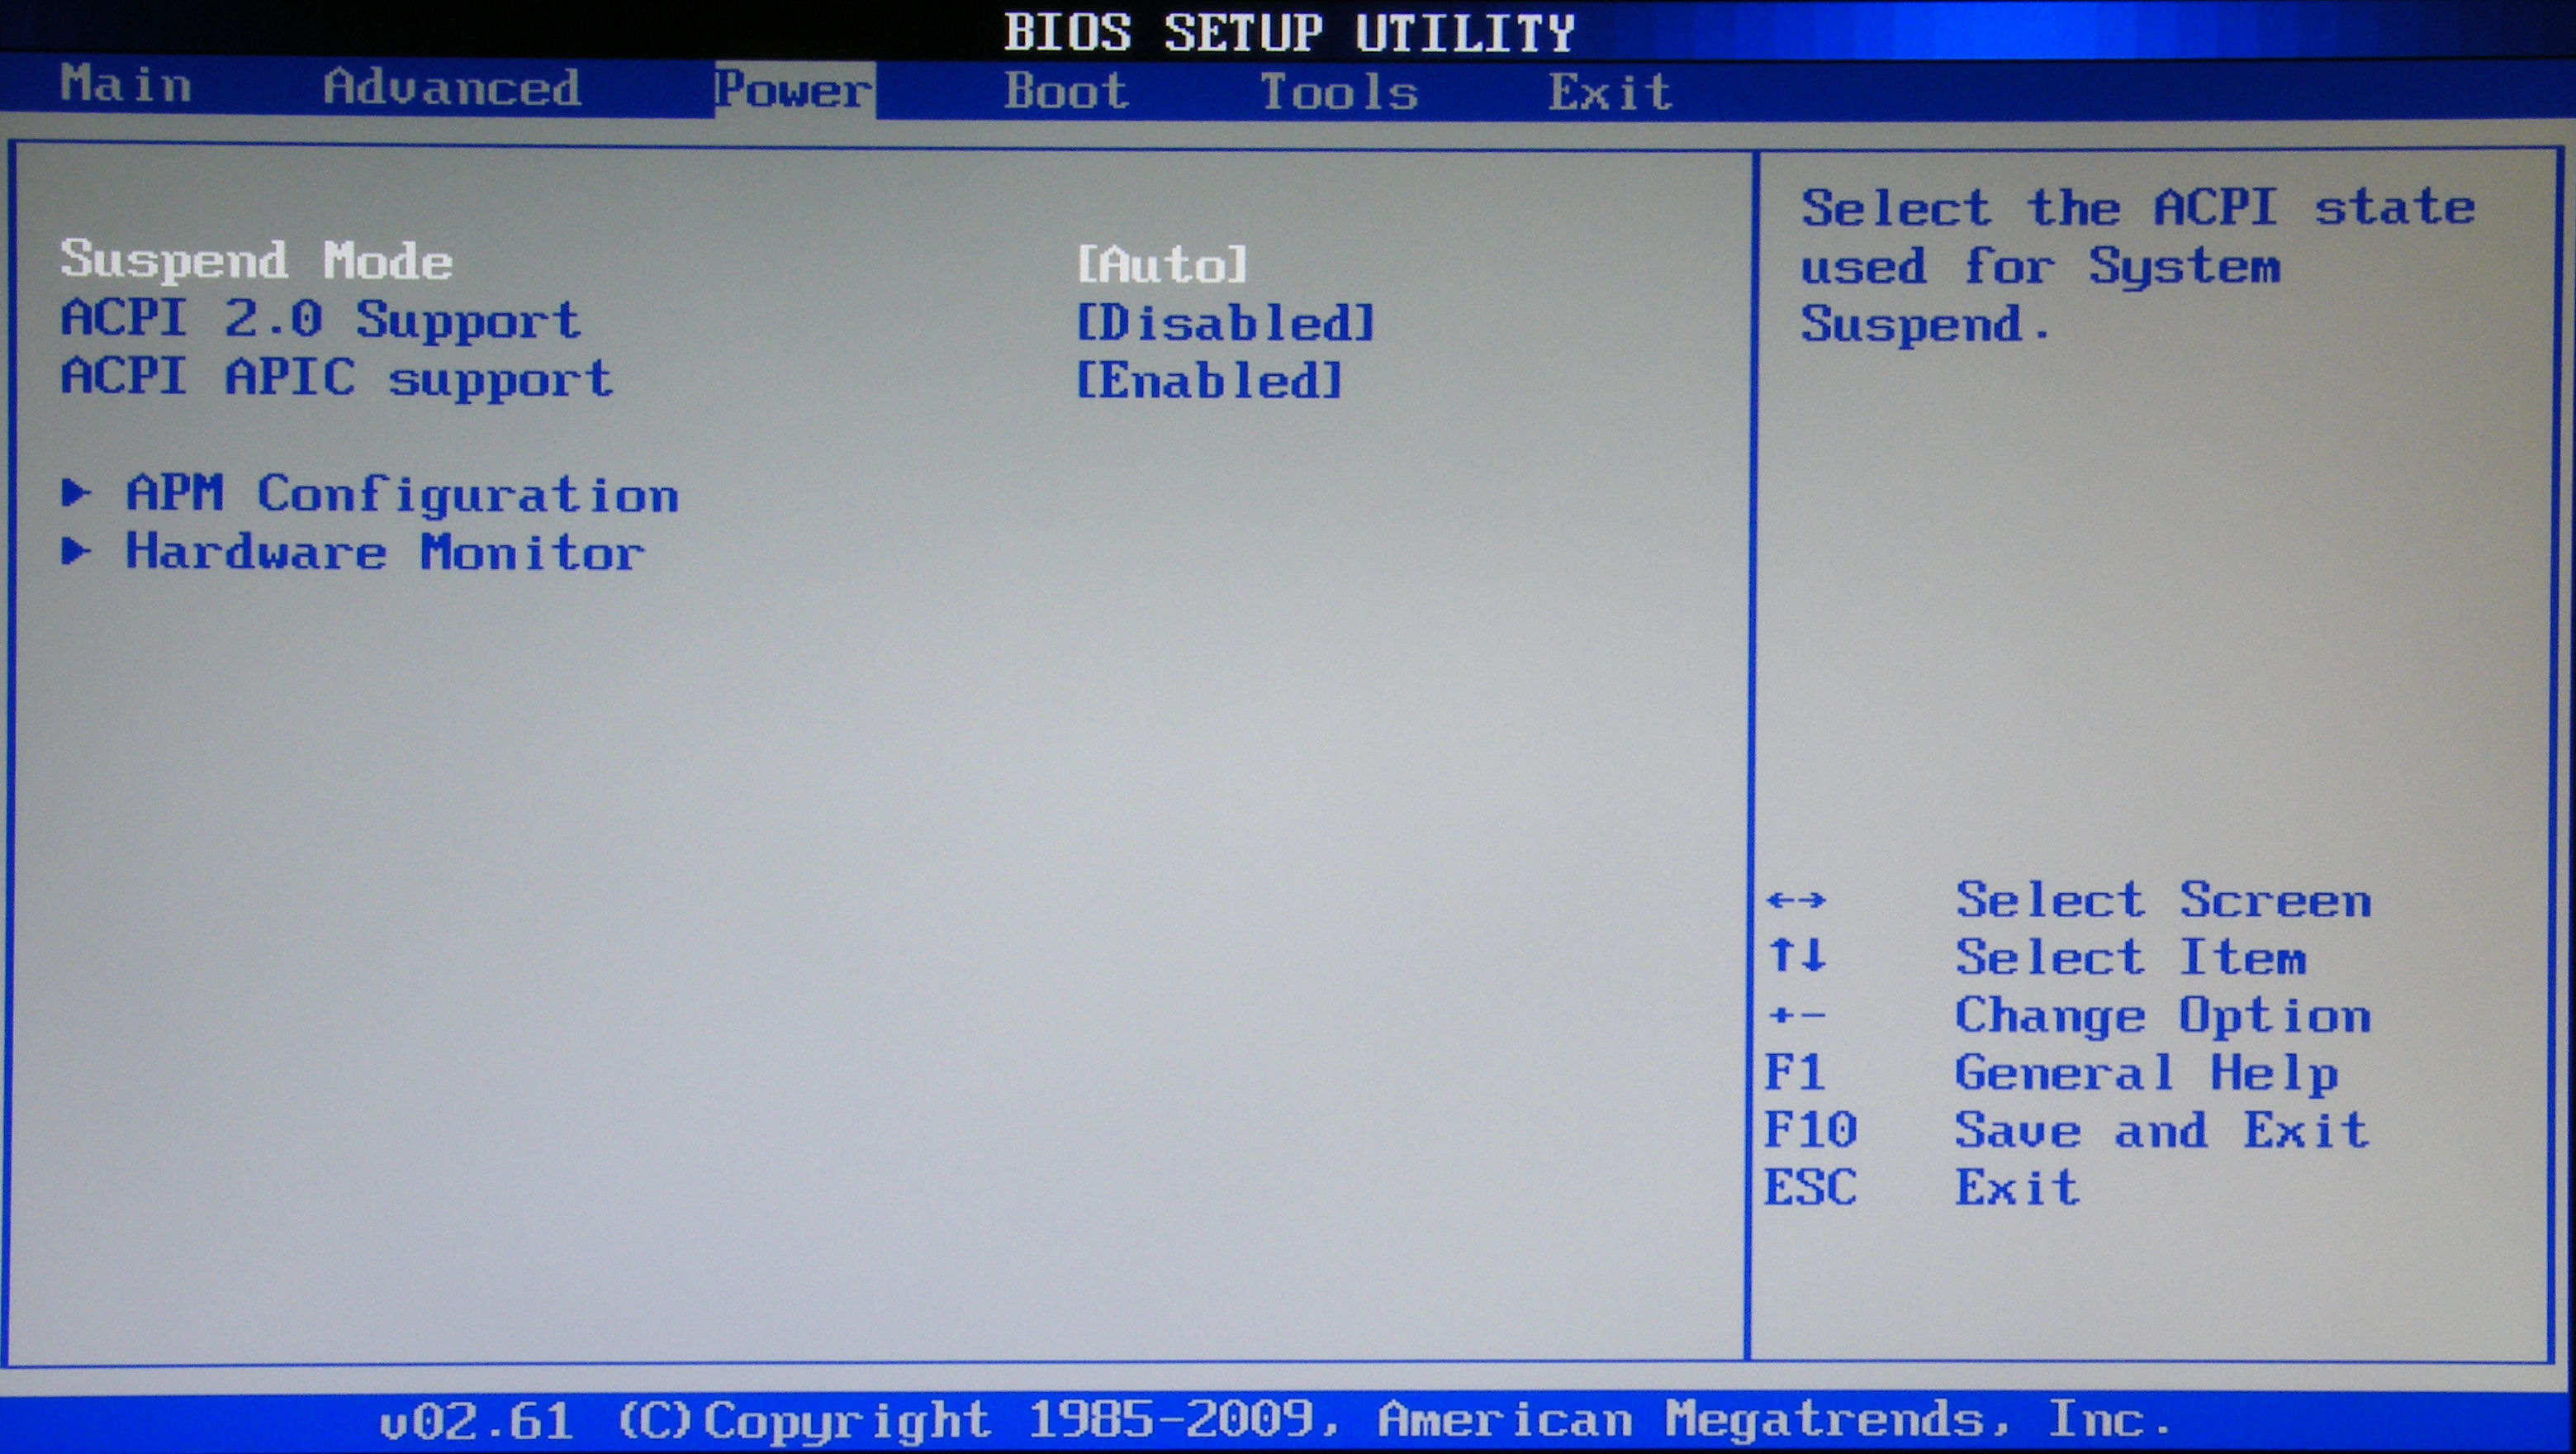
3. Another configuration of the computer through the BIOS is done in the Power section. Here we are interested in the item Hardware Monitor. It shows the CPU temperature, as well as the number of volts produced by the power supply. Here you need to enable intelligent control of the cooler. In the menu item CPU Q-Fan Control, select Enabled.
4. Next, see how to configure the bios of the computer in the Boot section. Here we put the download from this or that device. When there is more than one hard disk on your computer, you need to select the disk from which the download will be performed in the Hard Disk Drives. In the Boot Device Priority item, select the device from which the computer will boot (for example, a hard disk).

5. In the Boot Setting Configuration section, enable NumLock in the Bootup Num-Lock (select ON). Also, we select a quick boot of the computer in the Quick Boot section. In the Security section, you can set a password for entering the BIOS.

6. The Exit section. Here we save the settings. If you set something up wrong, then you can set the standard settings.
The laptop is built on the same principle as a regular computer. Accordingly, he also has a BIOS. To get into it, you need to press one of the keys F1, F2, F10, or ESC, depending on the manufacturer motherboard. In principle, the bios of all laptops are very similar, so you can easily understand how to properly configure the BIOS on the laptop.
By this scheme, a step-by-step configuration of the BIOS on the computer is performed. We learned how to configure the bios of the asus computer. In order to better understand what and how to configure, it is recommended to watch the video on how to properly configure the BIOS on the computer.
Configuring BIOS on an old computer
There are no fundamental differences between the BIOS of the old computer and the new one, so the bios configuration in the old computer is performed according to the above scheme. The only difference is that on the old computer can not be set to boot from the flash drive - only from a CD-DVD or hard disk.
In order to install on old computer the operating system, you need to configure the BIOS.
Let's see how the BIOS is configured in the pictures for the computer xn. Here, we set up for the hard disk configuration in the IDE and boot from the CD-ROM. All you can do is install the operating system.
Reconfigured the BIOS, but can not install Windows? With the cost of installing the operating system, a specialist is available. On how to independently configure the Internet on your computer, read.
Configure UEFI
We examined how the bios on the computer should be configured in its classical form. AT modern computers A UEFI system is used, which is not at all like the old BIOS, but carrying the same functions. In fact, UEFI is a simple operating system with graphical interface, so you can easily figure out how to configure the computer through the UEFI bios. In UEFI the same tabs as in the usual BIOS, you can choose the Russian language interface, the order of loading, etc. For clarity, you can see the video BIOS settings on the computer.
Conclusion
 As you can see, setting up a computer through bios is really a simple process. The answer to the question "how to configure BIOS on the asus computer" is given above. On computers of other manufacturers to do this is also easy. All settings are the same. Also now you know how to properly configure bios on a laptop. Perform BIOS settings best by using the manual to your motherboard, which describes how to configure the BIOS on your computer in pictures. This article provides recommendations for a typical BIOS setup. If something went wrong, you can always return the factory settings - d
By itself, the BIOS is a miniature set of programs located on the motherboard's chip and controlling the primary settings of the PC. It contains many functions, each of which can deserve a separate article, but below we will talk about the most important and most frequently used opportunities.
How to configure BIOS on a computer - login
This question is a stumbling block for many users, as different manufacturers assign separate buttons to enter the menu. The standard options are clicking DEL, F2 or F3 at the time the test screen appears. Also on it should appear a tip, saying "Press XX to enter Setup". In place of XX, there will be a key or a combination of them, leading in the BIOS. Owners of Windows 8 and 10 can choose to log into the BIOS from system settings, indicating the required option after the reboot. Specific input method should be searched in accordance with the brand name of the motherboard or the version of the installed operating system.
How to configure BIOS on a computer - set the default values
In the event of a malfunction or incorrect operation of the PC (as well as many other situations) it is useful to know how to restore the BIOS to its factory settings. If there are no special requirements, they are the most correct and will ensure the uninterrupted operation of the "iron". The same method will reset the password on the BIOS (if one was installed). Physically, the reset can be done by temporarily removing the BIOS battery on the motherboard, with its subsequent return, and also by a special switch (located next to the battery, it can be signed as Clear CMOS, CCMOS, Clear RTC, CRTC and the like). The software is executed as follows:
- go into the BIOS;
- we search for the necessary item which can be called Load Defaults BIOS \\ Setup Defaults \\ Fail Defaults;
- go into it by pressing Enter;
- set the value of "Defaults" or similar in meaning;
- we exit Esc, save the changes.

How to configure BIOS on a computer - select media for download
The second most frequently used BIOS item is the disk access priority setting menu. It is useful to run from the installation or service disk to fix / install the new OS, so it's important to know where these settings are located:
- go to the Boot tab (move through the arrows);
- in the Boot Device Priority section, select the hard disk, USB flash drive, dvd-rom or other source of information, and how to access them;
- hard Disk Drivers allows you to select only between hard disks (for example, if different operating systems are installed on them).

How to configure BIOS on a computer - Pre-boot settings
Some of the functions that are present in the BOOT BIOS section will allow you to speed up the start of the PC and specify what should happen before the start of the installed OS. Among them:
- item Quick Boot - disables the "default" pre-tests (oze and others);
- Full Screen Logo - displays the data on the characteristics of the PC in a graphic form;
- Bootup Num-Lock - determines the state of the button of the same name after the computer is booted;
- Supervisor Password - sets the password for accessing the BIOS;
- User Password - respectively, is responsible for passwords for users without administrator rights.
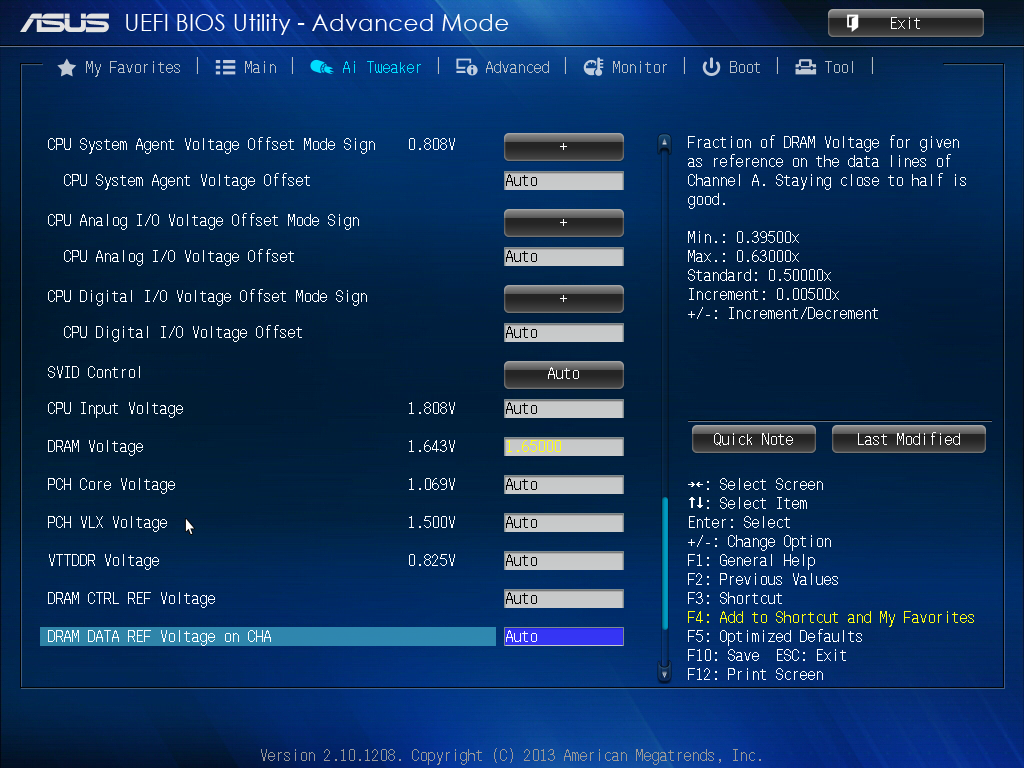
Some people may be interested in improving PC performance by overclocking. In this case, you need to access the two items of the BIOS menu - "System Voltage Control" (includes the ability to adjust the voltage on the base modules) and "Voltage Control" (here directly indicate the voltage for the main memory).
Introduction
The basic input output system (Basic Input Output System, BIOS) is written in a small chip of flash memory on the motherboard. Most often this memory is used for reading, but with the help of special utilities and technologies, the BIOS can also be overwritten. During the startup of the PC, the processor on the motherboard executes the BIOS program for initial verification and initialization of the equipment, and then transfers control to the OS.
If the PC does not pass through the boot process, if the system is running too slowly, Windows "crashes", "hardware" fails, then the cause may be an improperly configured BIOS. In this article, we show how to use the right settings BIOS Setup you can solve this or that problem.
The "Basics" section provides basic information about the BIOS. In it you will learn what the BIOS is, how to go into BIOS settings and deal with them. The "Key settings" section contains information about the main BIOS options that each user should know about. Experienced users can be recommended to go directly to the section " Tweaking BIOS ", where you can learn about the use of hidden settings, activation of new functions, bypassing" bottlenecks ", etc.
BIOS: basics and principles
At startup the computer BIOS "represents" the processor main components of the motherboard and tells the processor which program to run next, after bIOS Completion. Typically, the BIOS transfers control to the boot sector of the drive, which can be a floppy disk, CD-ROM, DVD or hDD. The boot sector starts the boot loader, which activates the underlying operating system, the same Windows or Linux.
The BIOS responds not only for the boot process. Many operating systems use the BIOS as an intermediary to access different hardware.
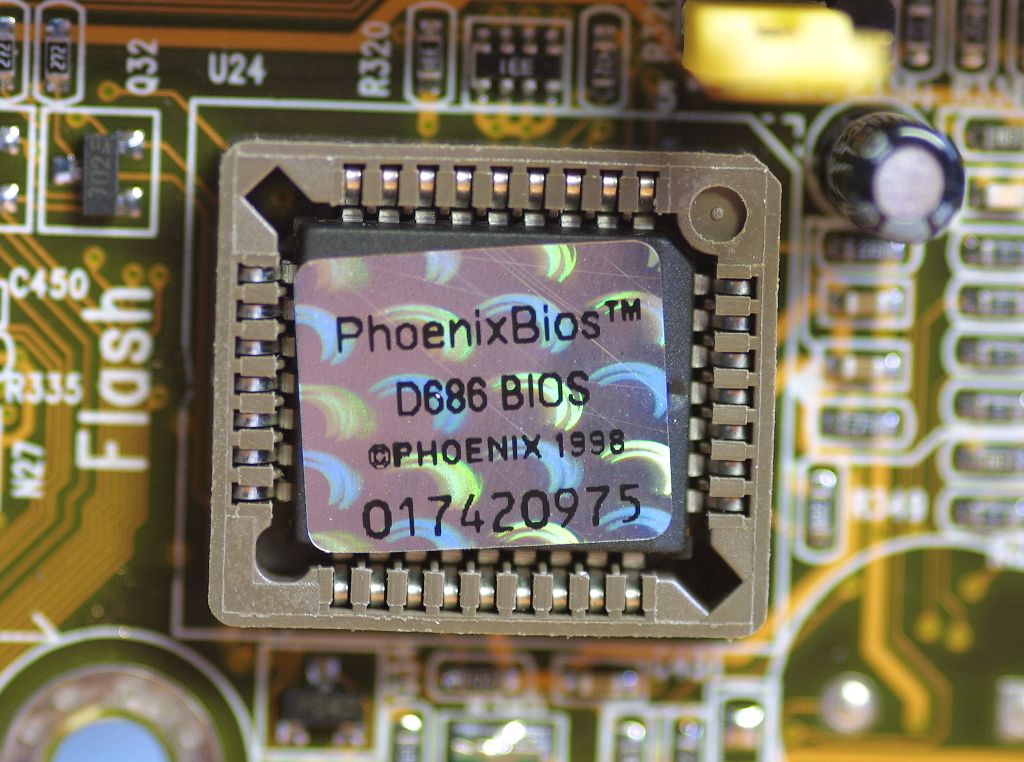
1. BIOS versions
Each motherboard uses its own BIOS version, specially designed for its hardware stuffing. The most common BIOS is the Phoenix Award, and in two varieties. In addition, some computers use the BIOS of American Megatrends (AMI).
The BIOS menu structure and the designations used vary from one manufacturer to another. Even the BIOS menu for two consecutive motherboard models may differ to some extent. That's why we can not give an exact description of the BIOS options of each computer known to mankind. But do not despair. You can easily find a correspondence between the sections discussed below (based on Phoenix Award BIOS) and the BIOS items of your PC. Do not worry if you do not find some settings: this means that the BIOS of your PC does not allow you to manage these settings directly.
2. Exit the BIOS
At boot time, when the BIOS checks the hardware components of the system, considers the available memory and finds hard disks and other drives or devices, you can use the special key to enter the BIOS Setup program. It is often enough to press a key, but other options are also used, for example. Look carefully at the screen at boot time: most BIOS displays a line like "F10 = Setup" near the bottom of the monitor. If nothing happens, open the manual for the motherboard, where the magic combination should be indicated. Press the specified key (or combination) and hold for a second or two while the PC is loading.
If it works, the BIOS will calculate the amount of available memory, after which the main BIOS menu will appear. If it does not work, restart your computer and try using a different key combination. For example, many laptops go to the BIOS by pressing the or key. Sometimes the keys work, or a combination like.
3. Changing BIOS settings
BIOS setup: use the cursor to select the desired line and press "Enter".
To select a menu in the BIOS, use the cursor and use the arrows to move it to the desired item. By pressing the "Enter" key, you will go to the section or get the window for selecting the setting (as in the picture below). To change the specified setting, you should press the plus or minus keys, or another combination like. From the main BIOS setup menu, you will be taken to various configuration sections that can be divided into their own subsections.
Open the subsection. The values of many options can be changed with the plus (+) and minus (-) keys, while others can be set using the drop-down menu.
Let me briefly go through the sections of the main BIOS setup menu.
- In the "Main" or "Standard CMOS Setup" section, you can set the date and time, as well as the parameters hard disks.
- The "BIOS Features Setup" section contains various general settings.
- Section " Integrated Peripherals"is responsible for interfaces and additional system functions.
- The "Power Management Setup" section allows you to configure all power and power options.
- In the "PnP / PCI Configurations" section, you can tie interrupts (IRQs) to expansion cards of your PC. If such functions are not available in the section, they can be found in the subsection "Advanced".
- The "Hardware Monitor" section allows you to find the values of system sensors: processor temperature or fan speed (rpm). Usually the processor and chassis fan speeds are shown, but also the fan parameters of the power supply unit or others may be present here.
- The "Load Setup Defaults" item restores the default BIOS settings and eliminates any changes you might make. This point will be useful if your actions have led to any problems in the system.
4. Exit the BIOS Setup
To complete the BIOS setup, press the key, or select the main menu item "Save & Exit Setup". Sometimes you first need to select "Exit", then specify the option "Exit & Save Changes". Then the choice is usually to save the changes: "Yes" [Y] or "No" [N]. Select the option you want, after which the computer will be restarted.
Key BIOS Settings
Below we show how to change the BIOS sequence for selecting bootable disks for the computer, turn on the PC by pressing a key or click on the mouse, activate the support for USB 2.0, and also solve problems with the fans or change the hardware configuration.
5. Install in BIOS Priority boot devices
In the BIOS, it's best not to put the drive first boot device. Instead of the drive, specify the hard disk.
Most PCs default to the drive as the priority boot device. This option for a couple of seconds slows down the boot of the PC, because it will check the presence of a boot floppy disk in the drive. You do not need to do this either because there is a danger of getting infected with a boot virus from a dirty floppy. Do you often boot from a floppy disk at all? And why do you need this vile sound of addressing an empty drive? It is better to set the hard disk as the first boot device.
In the BIOS Setup, it is possible to specify the devices from which the download can be performed, as well as the order of their verification. Let's look at how to remove the drive from the first boot device. To do this, select "Advanced BIOS Features, Boot Sequence", then select "1st Boot Device" and change its value from "Floppy" to "Hard Disk", as shown in the illustration above. In principle, a hard disk can be called "HDD-0". As a result, the computer will hard drive, bypassing the floppy disk. Of course, if necessary, the boot order can always be restored by returning to the BIOS Setup.
But now, even if the computer does not attempt to boot from a floppy disk, it will still check the drive at boot time, losing time. To avoid checking the drive, set the "Boot Up Floppy Seek" option to "Disabled".
6. Speed up PC boot up help with BIOS
As you understand, to speed up the download it is important that the PC did not check for extra devices, and loaded immediately from the hard drive. In addition, it is better to disable the search for new hard drives and other devices. If you do not often change the set of hard disks in the system, set zero search time. To do this, in the "Main" menu, set the value "Timeout" to "0".
7. How to include in BIOS support USB 2.0
USB: If you installed Windows XP with Service Pack 2, you should enable the "USB 2.0 Controller" option.
On many motherboards, the "USB Controllers" option is set to USB 1.1 by default. This is due to the fact that Windows XP without service packs Service Pack (and special patches) does not support USB 2.0. That's why USB 2.0 support usually needs to be turned on manually.
To enable USB 2.0 in the BIOS Setup, set the option to "Enabled" (as shown in the illustration above) or "V1.1 + V2.0". But remember that to use the USB 2.0 interface you need to install, at a minimum, Service Pack 1 for Windows XP.
8. How to solve problems with USB-devices using BIOS
Some flash drives, MP3 players and USB drives are powered by a USB port. If the power is insufficient, the device will not work. That's why you should make sure that the USB port provides enough power for such devices.
Check if there is an option in your BIOS called "USB 2.0 HS Reference Voltage". If there is, then set the value from "Low" or "Medium" to "High" or "Maximum".
9. How do I change the PC's reaction to the power outage in the BIOS?
In the "Power Management" section of the BIOS Setup, you can specify how the computer will react to the power outage. The "AC Power Loss Restart" or "Restore on AC Power Loss" options in the BIOS are responsible for the behavior of the computer after emergency shutdown electricity and subsequent recovery of food. Set this option to "On" or "Enabled" if you want the computer to automatically boot. Either "Off" or "Disabled" otherwise.
10. How to check the temperature and status of the PC via BIOS
The BIOS provides information about the operating parameters of your PC. You can track in real time the state of vital system components, including CPU, fans, power supply and hard drives. For example, you can turn on BIOS alarms if the processor exceeds a certain temperature, or even realize an emergency shutdown. As a result, your system will not overheat.
Various items in the "Health" or "H / W Control" section allow you to monitor the change in voltages as well as temperature sensors. Most BIOS displays values for CPU and chassis temperatures, and in some versions, other temperatures for, say, the hard disk or the chipset of the motherboard. In addition, in the BIOS you can find the speed of the fans (in rpm).
11. How to fix cooler problems with BIOS
If your PC does not boot up, it may be caused by a too low fan speed or even a stoppage. Especially often this situation occurs with high-end coolers, whose rotation speed depends on the temperature. They can rotate very slowly (or generally stop) at low temperature, as a result of which the BIOS can calculate that the fan has failed. In such cases, it helps correct setting BIOS.
Set the BIOS option to "CPU Fan Failure Warning" in "Disabled". When you turn this option off, the computer will boot even if the fan rotates at a low speed. Of course, there is one more problem: you can not enter the BIOS at all, because the computer may refuse to boot for the reason mentioned above (in many BIOS this option is set to the default value of "Enabled"). In this case, you'll have to connect to the motherboard any cheap cooler for a while, which always rotates at maximum speed. And after disabling the settings, you can connect already high-end model.
12. How to avoid system crash?
Modern hard drives can detect symptoms or problems that precede the drive failure, warning the BIOS. This function is called "Self Monitoring And Reporting Technology" (SMART). Enabling the "HDD SMART Capability" feature allows the BIOS to send warnings to programs like Norton System Works or the well-known free utility SpeedFan. As a result, the user receives information about the status of the drives. Such a possibility allows taking the necessary measures as soon as the first symptoms of the impending failure begin to appear.
13. We connect old printers and scanners (LPT)
Parallel Port: The fastest mode is "ECP + EPP".
The parallel computer port (LPT) usually works in one direction only. This setting is suitable for almost all devices, although the transmission speed is limited to 100 kbps. You can transfer the LPT port to a more modern mode, which gives a speed of up to 1 Mbps.
To do this, enable the "ECP" (Extended Capability Port) or "EPP" (Enhanced Parallel Port) mode. In fact, you can enable both modes at once by setting the option "ECP / EPP" or "ECP + EPP".
A warning: If you have several devices connected to the same port, then there may be problems with high-speed modes. In such situations, you can recommend buying a PCI expansion card, which will add a second LPT port. Or buy a USB-LPT adapter. Or, of course, go to a more modern scanner or printer.
Tweaking the BIOS
This part of the article is addressed to demanding users who want to maximize the download time, optimize the system parameters, fully use the computing resources of the PC, the chipset's capabilities of the motherboard and memory.
14. How to enable BIOS output of POST test results at boot time
When the PC is booted, many computers display multicolored manufacturer logos instead of the POST (Power-on Self-Test) lines. But, it seems to us, it will be much more useful to see which element of the computer is being tested, and with what results.
In the "Advanced BIOS Features" section, find the "Full Screen LOGO Display" item and set it to "Disabled". After that, you will be able to see the results of all the PC tests at boot time.
15. How to configure the BIOS so that the PC boots faster
Using the BIOS, you can further reduce PC boot time by reducing the time of the first test. Of course, we recommend doing this only if all the components of the PC work stably. For example, you can turn on the BIOS in a single scan of available memory instead of three. To do this, go to the "Advanced" or "Advanced BIOS Features" section, find the "Quick Power On Self Test" or "Quick Boot" option and set it to "Enabled".
Warning: if there are any problems with the hardware, we recommend to go back to the BIOS and turn off the quick test, setting the value to "Disabled". This BIOS is more likely to find an error.
16. How to enable a different graphics card in the BIOS
If your computer has several interfaces, in which a graphics card (built-in graphics, AGP, PCI Express, PCI) can be installed, the BIOS will try to determine which one the work card is in when downloading it. But this is not necessary, because you know all the necessary information!
Select an option in the BIOS Setup called "Init Display First", which can also be called "Primary VGA BIOS" or "VGA Boot From" depending on the BIOS version. Specify the value of "AGP" if you use graphics card AGP. In new systems with PCI Express, this option is usually called "PEG Port / Graphic Adapter Priority". In this case, set it to "PEG" if you are using a PCI Express card.
17. How to disable superfluous functions of video cards in BIOS
BIOS Cacheable: this option will improve performance only in MS-DOS.
Options "Video RAM Cacheable" and "Video BIOS Cacheable" improve the performance of graphics on older machines under DOS. But for Windows they are useless. Include them no reason.
Set the BIOS options "Video RAM Cacheable" and "Video BIOS Cacheable" to "Disabled". At the same time, disable the option "VGA Palette Snoop", if it is. Finally, you can disable the option "System BIOS Cacheable": it no longer increases performance, and in some cases can even negatively affect the stability of the system.
18. How to properly configure the memory for the video card in the BIOS
The option "Graphics Aperture Size" (which may also be called "AGP Aperture Size") was originally designed to make AGP graphics cards more efficiently using PC memory while displaying textures. This function is already outdated, since many graphics cards have built-in memory of 128, 256 or even 512 MB. In addition, the built-in video memory card runs faster than an operational PC. If previously recommended to set the value of the texture memory in half the amount of RAM of your system, today it is better to choose the optimal size. That is 128 or 64 MB.
19. How to set the BIOS clock frequency AGP correctly
This "trick" avoids problems with the AGP graphics card when overclocking the Front Side Bus (FSB).
On the motherboards equipped with the overclocking function, you can find the menu item "AGPCLK / CPUCLK" (it can also be called "AGP Clock"). If it is, set the value to "Fix". It prevents the effect of FSB overclocking on AGP frequencies. A value of "1/1" causes the AGP to operate at the same frequency as the FSB. A value of "2/3" sets AGP at 2/3 of the FSB frequency, so for example, 100 MHz FSB goes to 66 MHz for an AGP graphics card.
20. How to increase the clock speed of the AGP in the BIOS
Increasing the frequency of AGP increases performance, but there may be problems.
Some motherboards allow you to increase the frequency of AGP. In principle, you can try to increase this frequency (the "AGP Frequency" item) in small steps, and reboot the PC after each change. Test each setting on a 3D type shooter Doom 3 or Quake 4 to check the stability of the system. If any malfunctions occur, go to the previous AGP frequency value.
21. How to increase BIOS voltage on AGP
Higher clock speeds require more power. The "AGP Voltage" option allows you to increase the AGP voltage, most often in 0.1V increments. Voltage can be increased if the increase in the AGP frequency leads to instability, and the need for productivity growth is acute.
Warning: in some situations, excessive voltage increase can burn the graphics card. If the voltage rise does not lead to the desired effect, return the value to a lower level and lower the AGP frequency to guarantee stable work system.
22. How to enable and disable the CPU cache in BIOS
The inclusion of a processor cache at any level (1, 2 or 3) provides a significant performance boost.
The CPU runs significantly faster than other components on the motherboard, and it often has to wait for the data to arrive. Speed up data exchange allows the processor cache, which is a high-speed memory, located between the CPU and random access memory computer.
The L1 cache is very small, but it is on the processor core, close to the computational units, providing a very fast storage for temporary data. The second level cache (L2) is much larger in size and can store some program elements entirely or pieces of data. When a processor requests data, it first checks their presence in the cache. If the required data is there, then the performance of the computer is significantly increased, because the memory can not react with the same speed as the cache. Some processors, as a rule of a professional level, also have an L3 cache. As you know, the cache should always be enabled.
23. How to enable APIC in the BIOS
The chipset of the motherboard usually consists of two chips, which are called the north and south bridges. They are responsible for transferring data between the processor, RAM, expansion cards and peripheral devices. The inclusion in the BIOS of the APIC (advanced programmable interrupt controller) mode allows to improve the work with the devices. The number of interrupts increases from 16 to 24, and their management with APIC is much easier and more convenient.
All you need is to go to the "Advanced BIOS Features" menu and set the "APIC Mode" option to "Enabled".
24. How to enable the BIOS in burst mode (Burst Mode)
Batch mode (Burst Mode) allows you to speed up a lot: work with hard drives, PCI cards and RAM. Batch mode allows you to transfer several pieces of data in one transfer instead of processing all the pieces individually.
If, during the BIOS setup, you encounter anywhere the option "Burst Mode", then set it to the "Enabled" mode. Of course, after this we recommend checking the stability of the system.
Caution: Many PCI cards may not work properly if the "PCI Dynamic Bursting" option is set to "Enabled".
25. Turn on bus management (Bus Mastering)
Turn on bus management (Bus Mastering): this option speeds up the work with the hard disk.
This BIOS setting allows Windows to use a faster mode of direct access to DMA (Direct Memory Access) memory when reading or writing to a hard disk. DMA mode provides direct access to the hard disk controller to memory, bypassing the CPU. As a result, access to the hard drive is accelerated and precious CPU resources are saved.
If the option "PCI IDE BusMaster" is present in the "Integrated Peripherals" menu, set its value to "Enabled", as shown in the illustration above. When you do, go to Windows in the "Start, Settings, Control Panel, System" and click the "Device Manager" button on the "Hardware / Hardware" tab. There, find the item "IDE ATA / ATAPI Controllers / IDE ATA / ATAPI Controller" (it depends on the chipset, so it may be slightly different in your case). Find the "Primary IDE / Primary IDE Channel" entry and go to the "Advanced Settings" tab. There, find the item "Current Transfer Mode". Its value must be set to "Ultra DMA Mode / Ultra DMA Mode". Hard drives usually have Mode 5, and CD / DVD drives have Mode 2.
26. How to change the memory timings in the BIOS
Reduce memory latencies. This operation makes sense only for high-quality memory modules. But if it works, you will get a performance boost.
Each SDRAM and DDR / DDR-2 memory module carries a special Serial Presence Detect (SPD) chip, which stores the default latency values (timings). Memory manufacturers usually specify SPD values for guaranteed stable and reliable performance. Therefore, it often makes sense to slightly speed up the delay, since this step allows you to squeeze a few percent more performance.
The corresponding options can be called like "System Performance", "Memory Timings" or "Configure DRAM Timing". Typically, the default value for these options is "By SPD". It forces the computer to read the recommended values from the SPD memory chip and automatically use them. In addition, the value of "Enabled" is also unlikely to cause problems with the PC.
If you want to try to configure systems for better performance, set the option value to "Disabled" or "User Defined" (if any, see the illustration above). Then set the parameters manually, as indicated in the following paragraphs.
27. How to reduce latency in RAS-to-CAS in BIOS
Memory is better represented as a two-dimensional array. To obtain the data, you specify a column using the Row Address Strobe (RAS) signal, and then a line using the Column Address Strobe (CAS) signal. Between RAS and CAS signals, a certain time interval is required to ensure that addressing does not go astray. Typically, the delay of the RAS-to-CAS is two or more clock cycles.
The value of "SDRAM RAS to CAS Delay" allows you to precisely set how many beats pass between RAS and CAS signals. Settings from 2 to 5 are possible, and 2 is the fastest. Try to reduce the delay and test the stability of your system. The more quality your memory modules, the less delay you can get.
28. Reduce the delay in the BIOS CAS
When you receive data from memory, you should wait for a certain time interval between setting the address and transmitting data. It is also indicated in cycles: 2T for two measures, 3T for three, and so on. A smaller value of "SDRAM CAS Latency" provides better performance.
The correct (and safe) "SDRAM CAS Latency" value is usually printed on the module labeling or even burned on the chips themselves. For cheap modules, the values 3T or 2.5T are usually encountered. Set the value to 2.5T or even 2T, then check the stability of the system. Some memory manufacturers claim that memory supporting 2T mode is capable of operating at higher frequencies. If you reduce the delay of the CAS, you can try to increase the memory frequency using the "Memory Frequency" option.
Warning: Change only one parameter per test run. Then you can immediately determine the cause of unstable work and return to the verified value.
29. Reduce the BIOS RAS Precharge Delay
For memory cells to work quickly, they must be properly charged. The "SDRAM RAS Precharge Delay" option indicates the gap (in beats) between the charging of cells and the sending of the RAS signal. With a smaller value, say, "2", the memory runs faster, but often unstable. Try to reduce the charge delay and each time check the stability of the system.
30. Reduce in the BIOS SDRAM Precharge
The delay "SDRAM Active Precharge Delay" is also set in cycles. It indicates a delay between successive accesses to memory, so that its reduction can speed up the work with memory.
Typically, the delay is calculated as follows: Active Precharge Delay = CAS-Latency + RAS Precharge Delay + 2 (for stability). As in the case of other delays, try to lower its value by one cycle and check the stability of the system. If you have any problems, return the value back.
31. Reducing memory timings: general tips
RAM latency: reducing delays allows you to speed up the performance of the memory subsystem.
The recommended values for board tips 27-30 depend on the modules themselves. If the module indicates "2.5-4-4-8", then the delay of CAS Latency is 2.5 cycles, RAS to CAS Delay is 4 cycles, RAS Precharge Delay is 4 cycles and Active Precharge Delay is 8 cycles. It is these values that the manufacturer recommends for memory modules. Of course, smaller delays can also be earned, but there is a danger of system failures. If you want optimal performance, we recommend in turn to reduce delays for one value and test the stability of the system each time.
32. Increase the BIOS voltage for memory
If the memory runs faster, it will need more power. That's why, along with the increase in frequency, you should also increase the supply voltage.
The "DDR Reference Voltage" option allows you to increase the memory voltage normally in 0.1V increments. Increasing the voltage makes sense if you have reduced the delay or increased the memory frequency. Or if there are problems with stable work.
Warning: too high voltage can burn memory modules!
33. How to turn off the built-in sound in the BIOS
Often the built-in sound controller of the motherboard is not used. Say, if you installed a powerful PCI sound card or even use a computer without speakers. Then it makes sense to turn off the sound on the motherboard. In some cases, this can improve overall system performance and stability.
In the "Integrated Peripherals" menu, set the "AC97 Audio Select" to "Disabled" (as shown in the illustration above).
34. How to turn off the game port in BIOS
The game port is useful only to owners of old joysticks or those users who apply it as a MIDI interface. Then it makes sense to allocate two I / O ports and an interruption to the game port. (By the way, if you have a joystick, then it most likely uses uSB connection). All other users should disable the game port.
In the "Integrated Peripherals" menu, set the value of "Game Port" to "Disabled".
35. How to turn off the network port in the BIOS
Some motherboards have two network interfaces, but as a rule, most users only need one. It is better to disable non-working interfaces. In some cases, this increases the system's performance and stability.
In the "Integrated Peripherals" menu, set the "Onboard Intel LAN" item to "Disabled".
36. How to turn off BIOS extra ports
Today only old PDAs and modems need serial COM1 and COM2 ports. Disabling ports saves two IRQ interrupts, reducing the number of interrupts that the processor should check. And the parallel interface LPT today hardly anyone needs. Moreover, modern printers and scanners are connected to the USB port.
From the "Integrated Peripherals" menu, disable the COM1 and COM2 interfaces (the "IO Devices, Com-Port" option, but can also be called "Serial Port 1/2"). Turn off the LPT port by setting the "Parallel Port" to "Disabled".
37. How to turn off the FireWire BIOS (IEEE1394)
The FireWire interface is only needed if you need to download video from the camcorder or connect the FireWire peripherals. In all other situations, the interface should be turned off.
In the "Integrated Peripherals" menu, set the "Onboard 1394 device" to "Disabled".
BIOS Update
From time to time, motherboard manufacturers are releasing new BIOS versions. BIOS updates, as a rule, contain various optimizations, as well as new functions. Say, the same overclocking functions. We recommend updating the BIOS only when a new final version appears (and it's better to skip the beta and alpha versions).
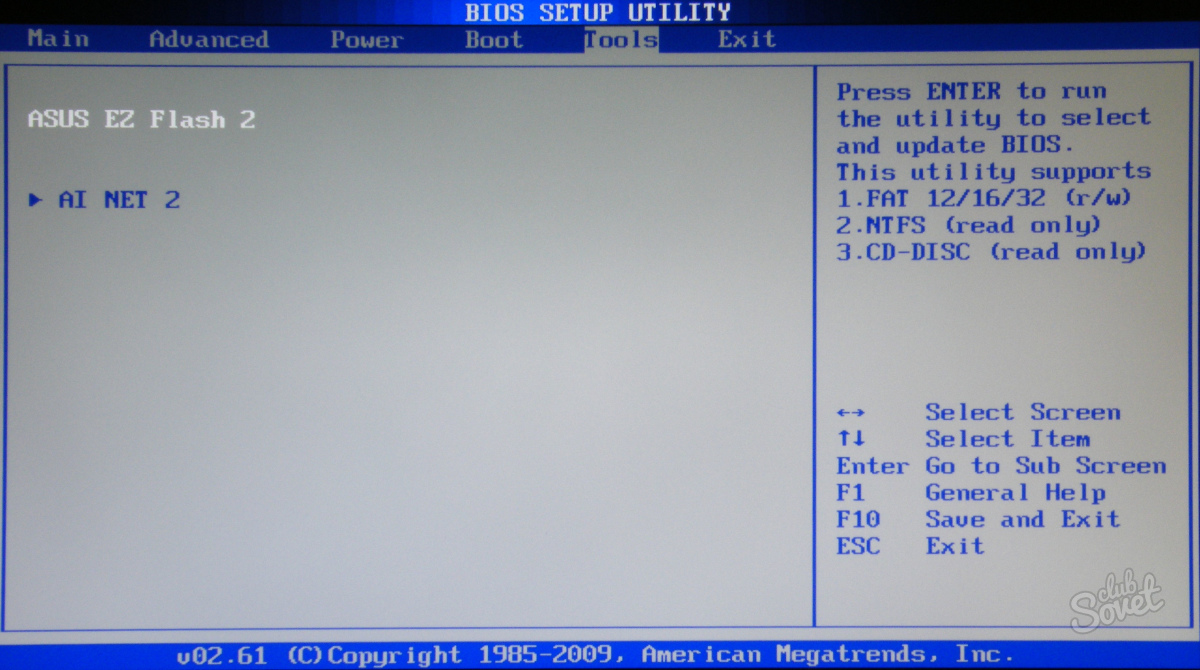
The BIOS is written to a special flash memory chip. During the firmware update, it is written in place of the old one. To update the BIOS, you need special utilities that motherboard manufacturers put into the package. In addition, some BIOS versions support the firmware themselves, using a combination of keys.
As for the BIOS update, there are usually two alternatives here. You can use the utility under Windows, which can usually be found on the CD from the motherboard or downloaded from the manufacturer's website. You can also install a utility that will periodically check for a new version of the BIOS and, if necessary, download it. This method is simple, but the test utility takes a place in memory and consumes some resources.
Updating the BIOS under Windows is an easy and easy way, unless your system works stably. For greater reliability, you can recommend upgrading via DOS.
To do this, you need to download the firmware from the manufacturer's web site. Then create a bootable DOS floppy disk and write the utility along with the new BIOS version to it. Then you should boot from the floppy and run the utility via the command line (if you downloaded the utility and the BIOS in the ZIP archive, you should copy them to the floppy disk in the unpacked form). This approach is considered by many to be more reliable, since there are no extraneous drivers in DOS.
Warning: if you update the BIOS of the laptop, you should not do this while the battery is powered. The laptop should be flashed when the power is supplied from the mains.
Choose your motherboard: use only those BIOS versions that are designed specifically for your model.
Visit the website of the manufacturer of the motherboard (or computer), then find the model you need. Most often, motherboard models are called "GA-686BX", "A7N8X-E" or "K8T Neo2". Sometimes motherboards have two names: retail (say, "K8T-Neo") and technical (for example, "MS-6702 Version 1.0"). The latter is usually indicated on the PCB of the board. When you find a page with your model, go to the "Downloads" or "Support" link.
39. Keep the old BIOS version
We recommend that you keep the old BIOS version in case the new BIOS becomes unstable or causes any problems. You can always flash the old BIOS instead of the new version. In addition, we recommend that you carefully read the Readme file, which is in the archive with the BIOS. It shows the changes and additions made to the new version.
40. Think twice before updating the BIOS
The notes in each version of the BIOS help you decide if you need to update the BIOS or not.
If the BIOS update solves any particular problem (see the illustration above), then you need to decide how relevant it is to your system. If the problem does not concern you, then you can skip the BIOS update. Of course, if it does not give any other improvements. Note that a new version The BIOS often allows you to install more modern processors.
If you did not buy the motherboard separately, or bought a branded PC immediately, then in such cases it is better to contact the PC manufacturer's website. Of course, it is possible that there you will find the same BIOS update as on the motherboard manufacturer's website. However, some PC manufacturers are releasing their own BIOS versions. If you do not know where to download the BIOS update (from the manufacturer's website of the motherboard or PC), find out the answer to this question from the manufacturer. If you do not get a clear answer, then it's probably not worth the BIOS update.
41. How to prepare a boot disk from the BIOS
When you download the BIOS from the manufacturer's website, you usually get a ZIP archive containing several files. In one of the files is directly a new version of the BIOS, and this file is often called very mysteriously: "W7176IMS.110" or "AN8D1007.BIN". In addition, in the archive you can find and text Document with instructions for installation.
As a rule, the archive also contains an executable file. EXE - a utility for BIOS firmware. For the BIOS Award, it is called "awdflash.exe". In addition, the archive usually contains a batch file that simplifies the process of the firmware. Most often it's called "start.cmd", "flash.bat" or "autoexec.bat". Extract these files to any folder. For example, in "C: \\ BIOS \\". If the BIOS archive is self-extracting, then copy it to this folder and run it.
Important: while you are not starting the firmware procedure, print out the Readme file, because it can contain important information. Keep the printout together with other documentation. By the way, if you do not have the documentation, you can almost always download it from the manufacturer's website as PDF files.
42. How to write the BIOS to the boot floppy
The BIOS requires a DOS boot floppy. To create it, click on the icon "My Computer / My Computer". Right-click the drive icon and select "Format ... / Format ...". In the appeared window put a tick "Creation the boot disk MS-DOS / Create an MS-DOS startup disk. "Then click" Start / Start "to start the formatting.Copy the BIOS file and the firmware utility on the floppy disk (for example, the files" awdflash.exe "and" w6330vms.360 "for the new version Award BIOS).
Then you need to reboot the computer and boot from the floppy disk. To do this, make sure that the drive in the BIOS is set by the first boot device. After rebooting, enter the BIOS setup menu by pressing the appropriate key. Select "Advanced BIOS Features, Boot Sequence", which can also be called "Advanced, Advanced BIOS Features" on some PCs. Make sure that "1st Boot Device" is set to "Floppy". Exit to the main BIOS setup menu on the key, then use the key to exit the BIOS setup menu. If you want to save the changes you made, then press the [Y] ("Yes") key.
43. How to flash BIOS under DOS
Ensure that the computer is supplied with a stable power supply. As we mentioned earlier, do not flash the BIOS in the laptop if it is running on battery power. Plug the laptop into a power outlet.
Download the PC from the floppy disk to which you wrote down the firmware utility and the BIOS file. AT the command line enter the name of the firmware utility, and after space - the name of the file with the BIOS. In our example for Award BIOS this will be a string like this:
A: \\\u003e awdflash.exe w6330vms.360
The utility will run, which will guide you through all other processes.
Keep the old BIOS. Before flashing the new BIOS, we recommend that you save the old version by entering the file name.
Although the name of the firmware and the BIOS file in your case may vary (for example, "awdfl789.exe" and "w6330vms.250"), the approach does not change. Follow the instructions of the utility and answer correctly. During each BIOS update, keep the old version just in case. It will allow you to go back if there are any problems with the new BIOS version.
Finally, the firmware utility will overwrite the BIOS image in flash memory with the new version. After the successful completion, restart the PC. During the firmware, you must ensure that the computer does not turn off the power. Otherwise, you will have to contact the service center (or to the craftsmen) and flash the BIOS through the programmer.
44. Setting up a new BIOS
When the BIOS update is complete, restart the computer, preferably in a "cold" way (by turning the power off and on). In some cases, you may need to reset the CMOS (see below). After enabling, the BIOS boot lines will be displayed, where the new version should be listed. Sign in to bIOS setup using the desired keys. Select the option "Load Optimized Defaults" (which in some PCs can be called "Exit, Load Setup Defaults"), which will load the default settings. Make any required changes to the BIOS settings. Exit the setting with the key, then press [Y] to save the setting. Then enjoy the products of your work!
Golden BIOS Firmware Rules
In principle, by changing BIOS settings, you can hardly do irreparable damage to the computer, unless you overcharge the power supply too much. In any case, it is better to remember a few golden rules.
- Create backup copy the current BIOS version. Before you patch a new BIOS, save the old one. In each BIOS firmware, you can save the old version, for example, "Save current BIOS as". If the new version turns out to be a problem, you can always go back to the old one.
- Change only one setting at a time. If you have switched to BIOS setup, then make the changes carefully, one at a time and in small steps, if possible. After each process, reboot the computer and test under Windows to detect any instability. This is the only way to determine how a particular setting will affect the performance and stability of your PC.
- Use stress tests. To test the stability of a PC, it is best to load the computer to the maximum. You can run games, an application for editing video, 3D tests like 3DMark 2005, etc.
- If nothing helps, try a "cold" reboot. If the computer refuses to boot after pressing the Reset key, then shut down the computer from the network and wait a couple of minutes. Use a disconnecting power cable or toggle switch on the power supply, rather than the shutdown keys on the front of the PC.
- Reset the CMOS. If the PC refuses to boot after the changes made in the BIOS, then you can not return the settings back. In such cases, reset the CMOS settings. Follow the CMOS reset instructions for your motherboard. In some cases, to reset the CMOS, you should close (or open) the jumper by sending a "Clear CMOS" signal. Or, you need to use the DIP switch. Do not forget that after resetting the CMOS, you need to return the jumper to its original position. Alternatively, you can get the battery of the motherboard and disconnect the computer from the network. But sometimes it takes a few hours.


