At the words "BIOS update" many owners of personal computers seem service center with dedicated master gurus who know the great secrets of handling microprocessor technology. Of course, in some cases, flashing the flash memory chip of the basic input / output system (BIOS or BIOS) cannot be done at home. But this is rather an exception to the rule, and if you do everything thoughtfully and slowly, then an independent update of the BIOS is completely within the power of any user. Basic knowledge of how to install programs and work with applications is usually sufficient. Why on the forums there are topics that updating BIOS is a rather complicated process and it is better not to produce it “once”? There are several reasons for this.
First, there are several ways to perform a BIOS update, which, although they lead to the same result, however, require a different approach to implementation, sometimes radically different. That's about them and will be discussed in our article today.
 In short, BIOS is a microprogram contained in a special chip on the motherboard. After turning on the computer, this small program performs testing of all major components and their basic setting. It is an obligatory part of any computer system, in particular, because it initiates the boot process from the selected carrier. In case of an error in the BIOS, the motherboard will not turn on, representing, in essence, a car without a driver. Therefore, all the boards go on sale with the already “stitched” (written in the chip) BIOS. For the end user, of particular interest is the possibility of self-reprogramming the above-mentioned chip to record an updated version of the firmware in its memory cell. For example, the next update of the GIGABYTE BIOS on the H61M-S2PV board made it possible to more flexibly control the operation of the integrated video core. Making corrective changes to the work of the memory modules began to be processed correctly. In addition, the UEFI component, which is responsible for interacting with the latest operating system Windows 8. Also, according to the developers, a new version BIOS increases the stability of the computer. One thing is clear: all these changes are desirable, but everything works without them. Thus, it is up to the user to update the GIGABYTE BIOS or leave it as it is. All of the above fully applies to motherboards of any other manufacturer.
 You can update using a special program-flasher, designed to work in windows environment (for Gigabyte boards this is “@Bios”); from dos; using Q-Flash technology. The first is the easiest.
In any case, you must first go to the board developer site, select your model from the list, download the new version of the BIOS file and the @Bios program. If an archive is downloaded, then it is required to unpack it into a folder on a disk or “drop” on a USB flash drive (for Q-Flash). After installing @Bios, we launch the application, indicate the type of update, the file itself, and ... we hope that at this moment the electricity will not disappear. Usually the process takes no more than a minute. After a reboot, the board is already with the new version of BIOS. Obviously, there are no difficulties.
Q-Flash allows you to flash firmware without booting the system. Go to the BIOS settings (Del button), connect the USB flash drive with the file, press the desired F (there are prompts), specify the file and flash it.
When you turn on the computer does not immediately load Windows. First, a rudimentary program code called the BIOS (Basic Input / Output System) is launched. This code is stored on chip. motherboard and is called firmware. The BIOS identifies all components of the computer and helps Windows interact with them.Motherboard manufacturers periodically release new BIOS versions to correct errors, improve performance, or provide support for new hardware (for example, or SSD). Upgrading the BIOS to a new version can increase the speed of work and expand the capabilities of the computer, but if improperly installed it can disable the system. In this article we will describe how to safely update the BIOS.
Please note: we repeat once again that a BIOS update is associated with a certain risk. If something goes wrong, the computer may not work. Before upgrading, be sure to read the instructions for your computer (or the motherboard, if you assembled the system yourself) and find out if the manufacturer provides for the possibility of a safe recovery — for example, in the form of a backup chip with a BIOS backup on the motherboard. Such functions, as a rule, are in most modern models. If you do not have instructions, it can certainly be downloaded from the manufacturer's website in PDF format.
1. Find out which BIOS version you have installed
In Windows 7, type “cmd” (without quotes) in the search bar and click. In the window that appears command line enter “systeminfo” (again without quotes) and click. After a couple of seconds, Windows will display detailed system information, including the current BIOS version. For example, our test system reported that the motherboard works with BIOS version F6 (and the latest available version is F11).
2. Find the latest BIOS version
Although most computer manufacturers do not release motherboards on their own, they still have their own BIOS version library. So go to the website of the company that released your computer, and see if there is a newer version. Find out the model number of your PC and look in the “Support” or “Downloads” section. If you collected the computer yourself, go to the website of the motherboard manufacturer. You can find out the model number of the board in the manner described in clause 1. In any case, be sure to download all the readme files and instructions accompanying the new BIOS version.
3. Read the instructions
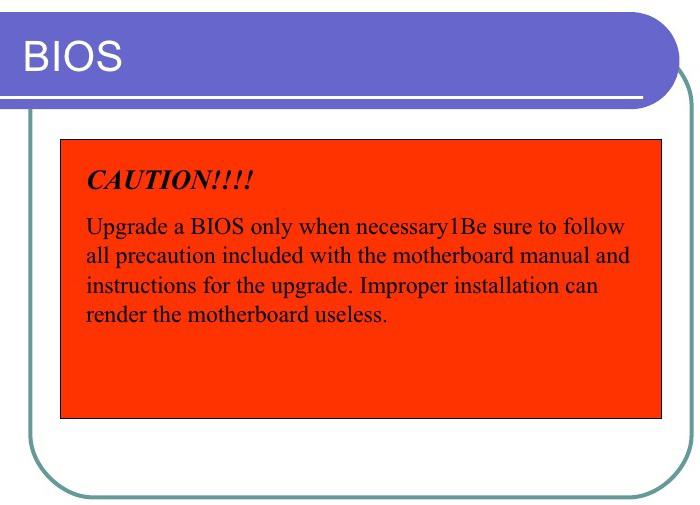
Carefully read the documentation attached to the new BIOS version. This is not a license agreement, replete with legal terms that can be viewed diagonally. In addition to information about the corrected errors and improvements implemented in the new version, the instruction may contain warnings about other fixes that must be installed before upgrading. If these requirements are not met, a BIOS update may disable the computer.
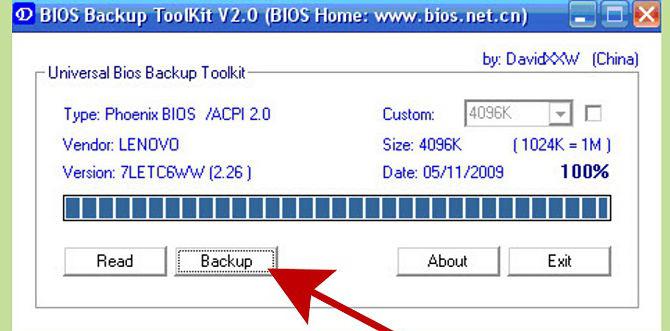
4. Create backup copy current BIOS version
Most new computers and motherboards come with simple utilities for updating the BIOS directly from Windows. As a rule, such utilities allow you to create a backup copy of the current BIOS version before it. Download the utility from the manufacturer’s website, install and save a BIOS backup on a bootable USB drive. It’s not a fact that it will help to restore the system in case of unsuccessful BIOS update, but at least you will be able to return to anything if you experience compatibility problems.
5. Install the BIOS update
So, you read all the documentation and backed up the BIOS. If you update the BIOS on a laptop, it should work from the mains, and not from the battery, because if the computer shuts down during the update, you run the risk of remaining at the bottom of the box. And in any case, regardless of the type of computer, you should not update the BIOS in a thunderstorm, if you often turn off the electricity in such situations.
Run the utility downloaded in step 4, select the new BIOS version file and install. When the program is finished, restart the computer using the new BIOS version. If everything goes according to plan, the system should boot up as usual, and you can use the updated computer.
6. Recovering from a failed BIOS update.
A detailed description of recovering from a failed BIOS update is beyond the scope of this article. But if something went wrong during the update and the computer is no longer willing to boot, first look at the instructions for recovering the BIOS. As mentioned above, such a function is in most modern motherboards. But if your computer does not have the option of recovery, almost all old motherboards have a hardware switch (in common language, jumper), which allows you to reset the BIOS to its default settings. If you have installed an unsuitable BIOS version and this method does not help, you will need to restore the BIOS from
- This is a set of firmware that are stored in a special chip on the motherboard. These firmware are recorded during the production of the motherboard. The BIOS is needed to start the computer, check its performance and start the operating system. In some cases, you may need to update it. For example, in order to add support for new processors that appeared after the release of the motherboard itself. In this article we will briefly describe how to update the BIOS.
Step # 1. Make sure you really need to update the BIOS.
Updating BIOS is always a risk. The slightest mistake or power failure can lead to your turning into a useless piece of PCB.
When exactly you do not need to update the BIOS:
- your computer is working fine and without updating;
- you have no experience in computer maintenance;
- you have frequent interruptions in electricity;
Step # 2. Find out the BIOS version that is installed on your computer.
Before you start updating the BIOS, you need to know what version you have installed at the moment.
For this, Windows (this can be done using the "CMD" command) and enter the "systeminfo" command.
After entering the command "systeminfo" information about your system will appear on the screen. Here you can find the BIOS version. As seen in the picture, in our case, the BIOS version is 17.0B1, dated June 14, 2011.
Step # 3. Find the latest BIOS version on the motherboard manufacturer's website.
Next you need to find the latest BIOS version for your motherboard. To do this, find the page with the description of your motherboard on the manufacturer's website. There should be a link to the "Downloads" (Downloads) or "Support" (Support). In this section you can find, as well as the latest BIOS version for your motherboard.
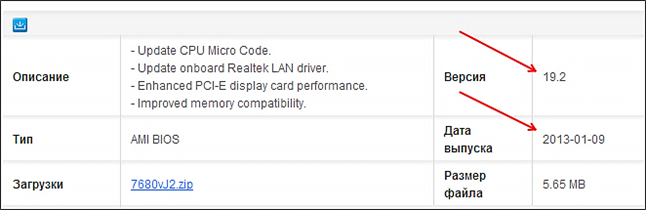
As seen in the picture, on the manufacturer’s website latest version BIOS - 19.0 of 09/01/2013. Since this is a newer version, you can install it (if necessary). If a installed version It coincides with the latest available version, then the installation is not necessary.
If a newer version is available, download it to your computer.
Step # 4. Install the BIOS update according to the instructions.
The BIOS update process varies greatly depending on the version of the BIOS itself, as well as the manufacturer of the motherboard. Therefore, it is not possible to write one instruction for all cases. Before you do something, find the instructions (documentation) on the website of your motherboard manufacturer and follow these instructions clearly.
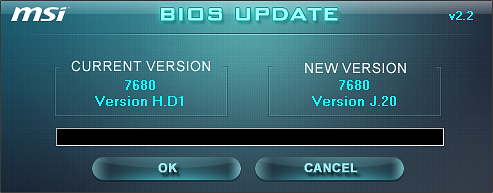
For example, in the case of my motherboard (MSI H61M-P22 (B3)) an EXE file is downloaded from the manufacturer’s website.
This EXE file must be copied to an empty one. file system FAT32 (with NTFS does not work). Next, the EXE file copied to the USB flash drive needs to be run.
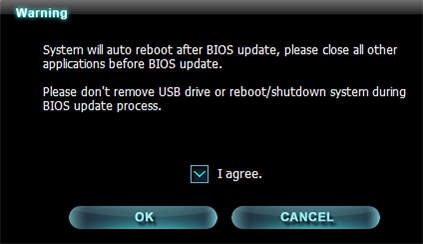
After the warning, the process of unpacking the content starts. Exe file on a flash drive.
At the end of the unpacking, the computer will restart and the BIOS update will start from the USB flash drive. The update process lasts a few minutes, and the computer restarts several times. During the entire upgrade process, the USB flash drive cannot be disabled.
Periodically, when working with a computer, there are situations in which there is a need to replace some components. The greatest problems may arise when replacing the CPU, since its support is provided through the BIOS. Therefore, when replacing in some cases, you will need to update it. However, before updating the BIOS, you need to know the manufacturer of the motherboard, since different manufacturers carry out this procedure differently.
What are we dealing with
An IC located on the motherboard that has the abbreviation "BIOS" means base system I / O. Its main functional responsibility is primary data processing and computer management prior to launching the operating system. As mentioned above, when replacing a processor, you may need to update the BIOS "a" in order for it to control the CPU. First, consider some common options for how to update the BIOS.
Improvement system
In order to upgrade, you need three things. The first is your confidence that the procedure is really worth it. The second is an internet connection. And an absolutely indispensable component of any person working with computers is skillful hands.
Before updating the BIOS of the motherboard of any computer, consider whether you should do this. For example, if you are going to change the processor on a personal computer, check on the website of the motherboard manufacturer whether your current firmware supports the processor you have planned. After that, check if there is support for such a CPU in the new updates, or you will have to change the motherboard as a whole.
Internet connection is understandable. If you are reading this article, it means that you are fine. The only thing you may not need it is if you update from physical media.
With regard to the ability to handle a computer, here, if the technique begins to “fail”, when you just approach it, if you can confuse the video card and rAM, then believe me, it would be better for you not to undertake this business, since an incorrect update can lead to the failure of not only the BIOS, but also the entire motherboard.
We work with Asus
We give an example of how to update the BIOS on a laptop company Asus. The fact is that an update program called Easy flash can already be integrated into the system of this company. Launch it in two ways.
- When starting the laptop, quickly press the F4 button. The update utility interface window should open.
- If it fails, you can first enter the BIOS management interface by pressing the F2 button. In the advanced options menu, select Start Easy Flash and press enter.
After the update utility menu appears on the screen on the left, use the arrows on the keyboard to select the disk on which the update file is located, and then select the firmware file in the same way. Firmware can be downloaded on the website of the manufacturer Asus, how to update the BIOS, you can specify there. Downloading is absolutely free and specifically for your laptop model.

After selecting the firmware file, the program will display a dialog box to confirm the update. First, it will format and launch the firmware. After the installation is completed, the installed firmware will be checked, the computer will turn off. It is worth noting that this is one of the most convenient utilities developed by Asus. How to update the BIOS on computers of other manufacturers, consider below. Some of the most common and reliable laptops are supplied by Acer.
Acer
Let's figure out how to update the BIOS. Acer provides its users with the ability to update the basic I / O system without going into additional utilities or BIOS.
To do this, on the manufacturer’s website, you must download the archive with the drivers appropriate for your laptop and your operating system. Then unpack the archive with the downloaded files.
To update, go to the Windows directory, there choose bios.dat or Update.dat. If these files are not present, then run the file with the extension ".exe". After that, the installation will automatically take place.
After flashing, if you experience a malfunction of the device, it may require static discharge of the motherboard. To do this, you must perform the following operations.
- Unplug the charger and pull out the battery.
- Hold down the device power button for 10 seconds.
- Connect everything back and turn on the device.
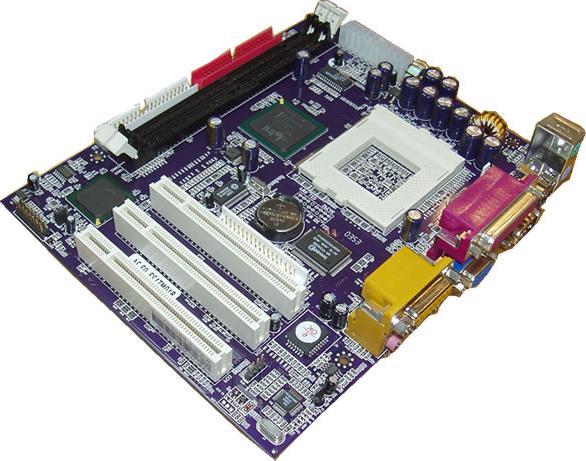
Motherboard
Consider another option how to update the BIOS. Gigabyte - a company that manufactures motherboards - gives its recommendations for updating the BIOS on its motherboards. There are a few rules at work.
- You can not interrupt the update process.
- Do not include protection in advanced settings.
- It is imperative to check that the installed update matches your motherboard.
- If your BIOS works like a clock, it is not recommended to update it.
If you decide to do this, there are two ways.
- A special Q-Flash utility from the manufacturer, built directly into the I / O system. Runs the same procedure as Asus.
- And the @BIOS application, which is controlled by the operating system itself. In the absolutely automatic mode, it will find and update your BIOS to the latest version.

Other options
Other than the above ways of having a motherboard, there are some more.

- At the time of buying personal computer You must be given a disk with various utilities and drivers for your motherboard. Insert it and when you start the computer, press Alt + F2. There, using the navigation, we find the application to restore and run.
- Another way that is suitable for advanced users is to rearrange the Flash Recovery jumper to the “Recovery Mode” status on the motherboard. Insert the boot floppy into the drive and start the computer. The I / O system is updated. Remember that in this mode the display will not turn on. The update process will be noticeable only by flashing lights on system block and drive. When they stop notifying about work, you can turn off the computer, remove the floppy disk, return the jumper to its place and turn on the PC.
- In absolutely hopeless cases, when you are sure that the BIOS does not work, you can use another motherboard with a working system. To do this, carefully disconnect the broken BIOS and tie it with threads. Start another computer, then carefully remove the BIOS from the working PC (as it is used only when the PC is started). Insert the disabled BIOS so that the common wire contact is connected first. Everything, you can restart the flashing utility.
Conclusion
The task of updating the motherboard's BIOS is quite complex and requires professional training. If you are not confident in your abilities, it is better to contact the experts or first experiment on older computers. After all, damage or improper flashing can be fatal for your computer.
After you turn on the computer, Bios, a small microprogram stored in the motherboard's ROM, transfers control to it.
On Bios lays a lot of functions for checking and determining the equipment, transfer control of the OS loader. Via Bios, you can change the date and time settings, set a password for downloading, determine the priority of device loading, etc.
In this article we will see how best to update this firmware using the example of Gigabyte motherboards ...
In general, just out of curiosity or the pursuit of the newest version of Bios - you should not update. Anyway, nothing but the numbers of the newer version you will not get. But in the following cases, perhaps it makes sense to think about updating:
1) The inability of the old firmware to identify new devices. For example, you bought a new hDDand the old version of Bios cannot identify it correctly.
2) Various glitches and errors in the work of the old version of Bios.
3) The new version of Bios can significantly increase the speed of the computer.
4) The emergence of new features that were not previously available. For example, the ability to boot from flash drives.
Immediately I would like to warn everyone: to be updated, in principle, it is necessary, but this should be done very carefully. With the wrong update, you can spoil the motherboard!
Just do not forget that if your computer is under warranty - updating Bios deprives you of the right of warranty service!
2. Bios Update
2.1 Determining the version you want
Before upgrading you should always correctly determine the model of the motherboard and bios version. Since in the documents to the computer may not always be accurate information.
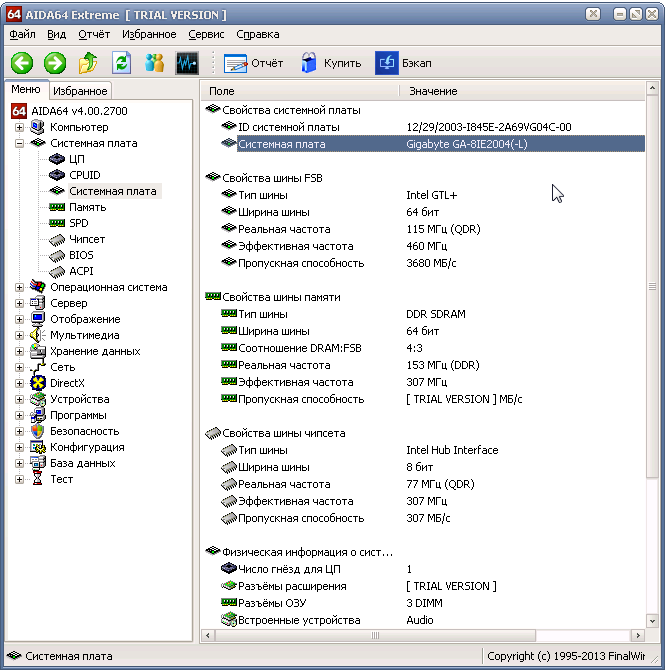
To determine the version, it is best to use the Everest utility (link to the website: http://www.lavalys.com/support/downloads/).
After installing and running the utility, go to the motherboard section and select its properties (see the screenshot below). We can clearly see the model of the Gigabyte GA-8IE2004 (-L) motherboard (by its model and we will search for Bios on the manufacturer's website).
 We also need to find out the version of the directly installed Bios. Just when we go to the manufacturer's website, there may be several versions presented there - we need to choose a newer operating one on the PC.
For this in the " Motherboard"choose the item" Bios ". Opposite the Bios version we see" F2 ". It is advisable to write down your motherboard model and Bios version somewhere in a notebook. An error even in one digit can lead to sad consequences for your computer ...

2.2 Preparation
Preparation mainly consists in the fact that you need to download the correct version of Bios by the motherboard model.
By the way, you need to warn in advance, download the firmware only from official sites! Moreover, it is advisable not to install the beta version (version under testing).
In the example above, the official website of the motherboard: http://www.gigabyte.com/support-downloads/download-center.aspx.
On this page you can find the model of your board, and then view the latest news to it. Enter the board model ("GA-8IE2004") into the "Search Keywords" line and find our model. See screenshot below.
The page usually indicates several versions of Bios with descriptions, when they came out, and brief comments on what is new in them.
 Download newer Bios.
Next, we need to extract the files from the archive and put them on a USB flash drive or a floppy disk (a floppy disk may be needed for very old motherboards that do not have the ability to update from a USB flash drive). The flash drive must first be formatted in the FAT 32 system.
Important! During the upgrade process, no power surges or power outages should be allowed. If this happens your motherboard may become unusable! Therefore, if you have an uninterruptible power supply, or with friends - connect it to such an important moment. In extreme cases, postpone the update to a late calm evening, when no neighbor thinks at this time to turn on the welding machine or the heating ten.
2.3. Update
In general, Bios can be updated in at least two ways:
1) Directly in the Windows OS. To do this, there are special utilities on the website of the manufacturer of your motherboard. The option, of course, is good, especially for very novice users. But, as practice shows, third-party applications, such as anti-virus, can significantly ruin your life. If suddenly the computer freezes with this update - what then to do is a difficult question ... Nevertheless, it is better to try to update it on your own from DOS ...
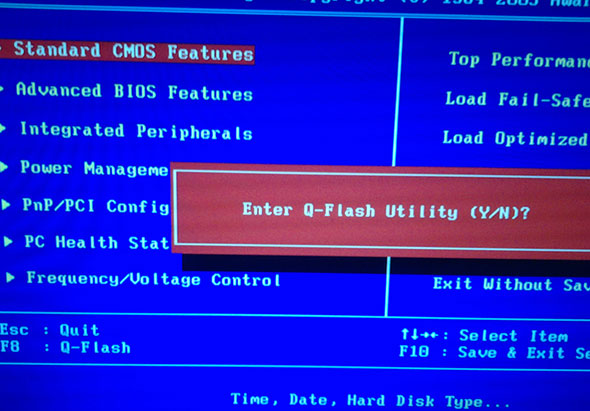
2) Using Q-Flash utilities for updating Bios. Called when you have already logged in bios settings. This option is more reliable: during the process in the computer's memory there are no any antiviruses, drivers, etc., i.e. none third-party programs will not interfere with the upgrade process. We are going to look at it below. In addition, it can be recommended as the most versatile method.
When turned on PC go to the BIOS settings (usually the F2 or Del button).
Next, it is desirable to reset the Bios settings to the optimized ones. This can be done by selecting the "Load Optimized default" function, and then saving the settings ("Save and Exit"), leaving the Bios. The computer will reboot and you will go back to Bios.
Now, at the very bottom of the screen, we are given a hint, if we press the "F8" button, the Q-Flash utility will start - we launch it. The computer will ask you whether to launch it exactly - click on the "Y" on the keyboard, and then on the "Enter".
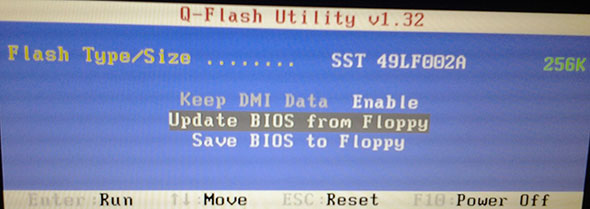
 In my example, a utility was launched offering to work with a diskette, since motherboard is very old.
Acting here is simple: save first current version Bios by selecting "Save Bios ..." and then clicking on "Update Bios ...". Thereby, in case of unstable work of the new version - we can always upgrade to the older, time-tested! So do not forget to save the working version!
 In newer versions Q-Flash utilities you will have the choice of which media to work with, for example, a flash drive. This is a very popular option today. Example of a newer, see below in the picture. The principle of operation is the same: first save the old version to the USB flash drive, and then proceed to the update by clicking on "Update ..".
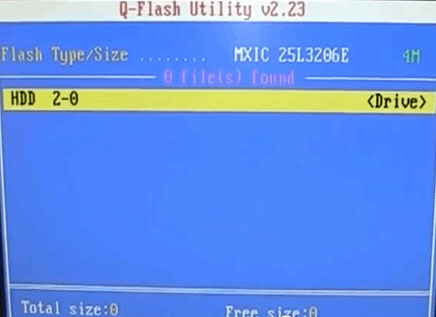
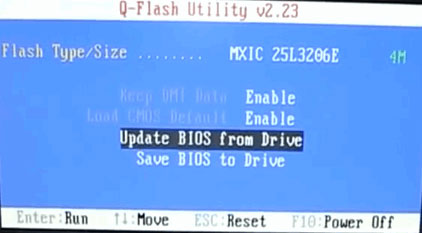 Next, you will be asked to indicate where you want to install Bios from - specify the carrier. The picture below shows the "HDD 2-0", representing the failure of a regular USB flash drive.
 Further on our media, we should see the Bios file itself, which we downloaded a step earlier from the official site. Navigate on it and click on "Enter" - reading starts, then you will be asked whether it is accurate to update Bios, if you press "Enter" - the program will start working. At this moment do not touch or press a single button on the computer. The update takes about 30-40 seconds.
Everything! You updated Bios. The computer will go to reboot, and if everything went well - you will work in the new version ...
1) Without the need not go and do not change the settings of Bios, especially those that are not familiar to you.
2) To reset the Bios settings to optimal: remove the battery from the motherboard and wait at least 30 seconds.
3) Do not update Bios just like that, just because there is a new version. Update should be only in cases of extreme necessity.
4) Before upgrading, save the working version of Bios on a USB flash drive or diskette.
5) 10 times check the firmware version you downloaded from the official site: is it the one, for the motherboard, etc.
6) If you are not confident in your abilities and poorly familiar with the PC - do not update yourself, rely on more experienced users or service centers.
That's all, all successful updates!