Vkontakte - the largest social network in the CIS countries - monthly service is visited by more than 955 million users. Vkontakte accounts are used for authorization on a huge number of services and sites. In addition, relatively recently, network users were able to send money directly through messages.
This means that you will receive these tips regularly, once a day, or even more often than something that quickly becomes annoying. There is no “never ask me again” option. Below is a screen shot of a login prompt to the left of it. Only two options are available to completely stop requests.
How to log in using an authenticator?
All others can register using an unrelated email address to enter the service without releasing their personal or work email address. Do not worry, if the code on your phone turns red and changes, you have some time left to enter the old code. You cannot use a code more than once, and you cannot use old codes. Therefore, if you just used the code, you must wait for the code change before using another.
The high popularity of Vkontakte makes it an attractive platform for intruders. Under these conditions, it is very important to ensure maximum security for your account. Additional account security can be obtained by setting up two-factor authentication (2FA).
How to enable two-factor authentication for the account “Vkontakte”
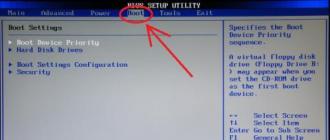
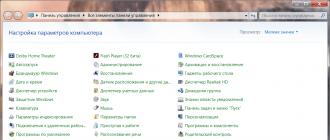
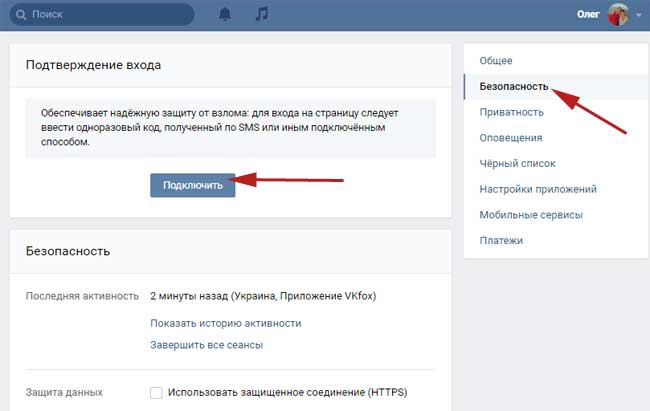
- Log in to your account and go to Settings . Then select the tab Security.
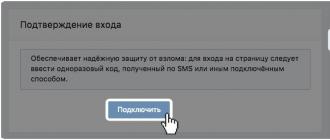
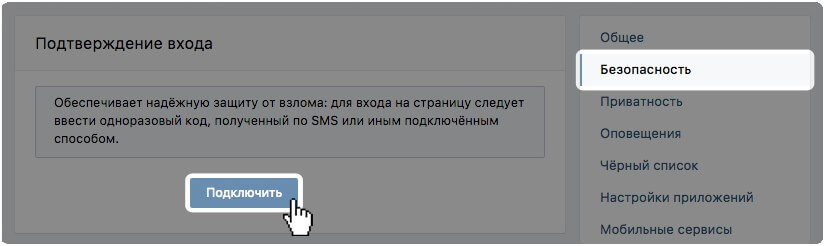
- The top section is called Login confirmation. Click the "Connect" link.
Where is my mobile authenticator code?
If you are not logged in, you will see your current code on the login page. . Autonomous authenticator support is being considered, but it is not available today.
What is the best way to use two-factor authentication?
- Never tell anyone your password or authenticator code.
- Check the links carefully.
My authentication codes do not work!
Use the “Help me with my problem” button in the upper right corner of this page to get help in removing your authenticator. If you are unable to log in using authenticator codes. Check the time on the phone and make sure that it is accurate. . When the application requests your authenticator code, select "Please help, I no longer have access to my codes for mobile authenticators." Follow the steps offered by the application, and you can either transfer your authenticator to a new device or delete it from a previous device.
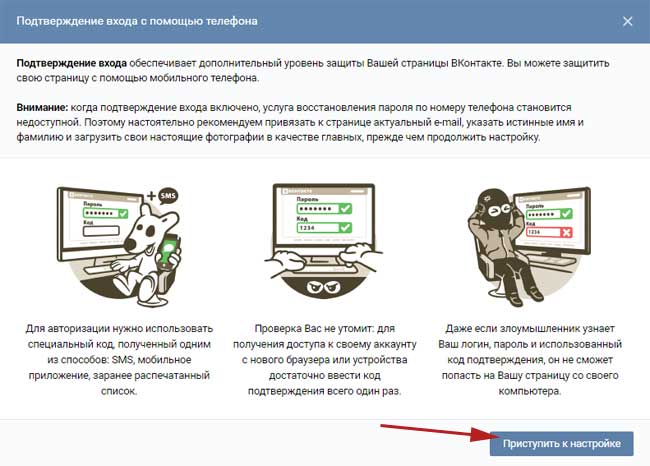
- A pop-up window will open informing you that when you turn on two-factor authentication, your mobile phone number will be used to access your account. Press the button Proceed to setup.
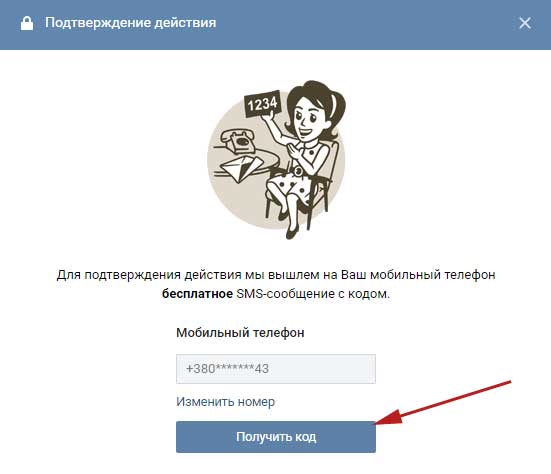
- In the next window, you need to check your phone number or specify a new number, then click to get the code.
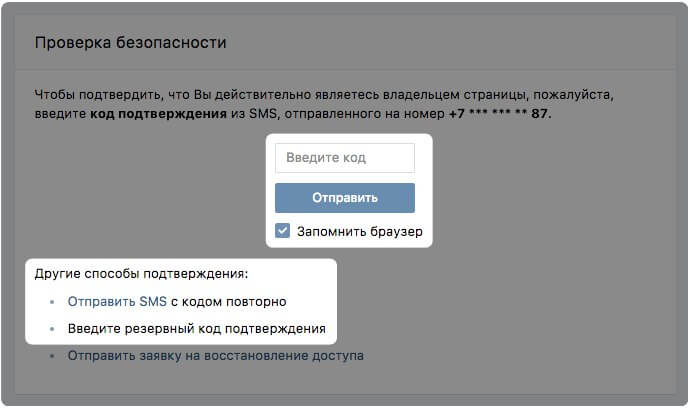
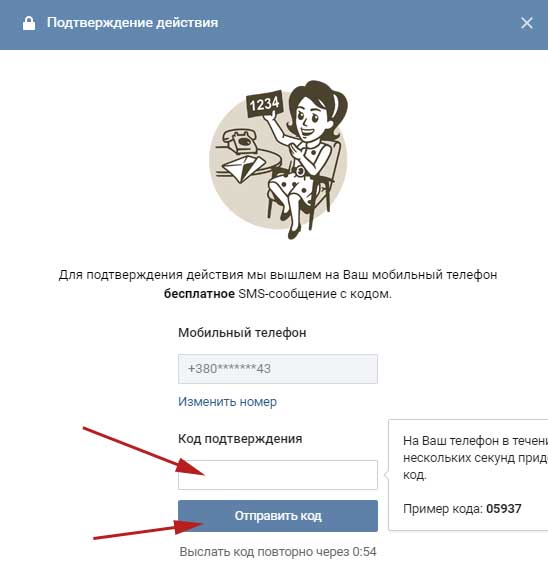
- A confirmation code will be sent to the phone number. Enter this code in the box below, and then click Confirm and Complete setup.
- This completes the setup. Now when you try to log into your account from an unknown device, an SMS message with an access code will be sent to your phone.
After the transfer of the authenticator, any new deals or market listings will be stored for several days to protect your products in case your authenticator is ever transferred by the attacker. If you keep your phone number, you do not need to do anything in advance to get ready. Once you get your new phone, you can transfer your authenticator to a new phone using.
If two-factor authentication is enabled, and you also lose access to your old phone number, you need to. Before you sell or give away your phone, we recommend resetting it to the factory and deleting personal information. Enter the store in the browser, then.
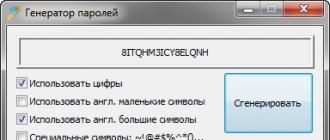
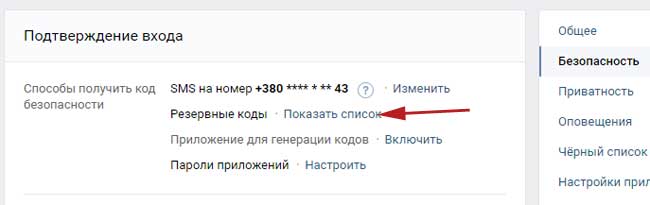
In section Login confirmationby clicking on the link Backup codes You can generate and save alarm codes that can be used in the absence of access to a mobile device.
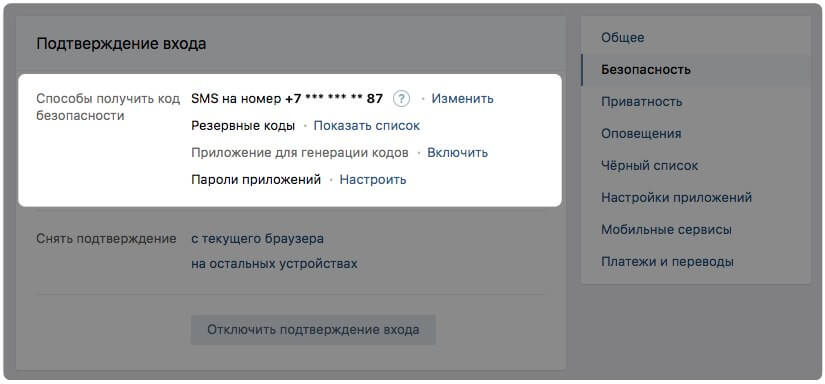
As a second stage of authentication, instead of the SMS message, you can use one-time codes generated in the authenticator application using the TOTP algorithm. To activate this authentication method, pre-install an authentication application on your mobile device, for example, Google Authenticator and perform simple steps:
Choose one of these options and follow the instructions. . Yes, you can create backup codes for use in an emergency. It is a good idea to print these codes, and not to save them on your computer. Do not remove them from the screen. Our text messages can come from a 6-digit phone number, please make sure your provider supports this. You must also make sure that your phone’s inbox is not full.
Why is my phone number not working?
First, make sure you enter your phone in the international format. Make sure your country code is correct. Standard messaging rates are possible; check your cordless phone plan for confirmation. You can not save your credentials and do not require a code every time you log into the system.
- In section Login confirmation next to the option Code Generation Applications Click the "Enable" link.
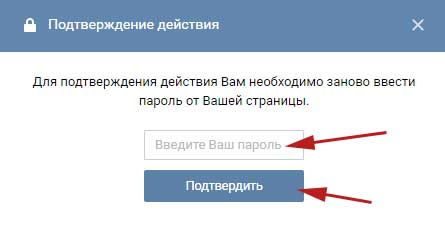
- For security reasons, the current password for your account will be requested. Enter the correct password and “Confirm”.
- The following screen will display the QR code that you want to scan using a mobile application. If the image is not recognized by the scanner, then manually enter the 16-digit secret key into the application.
- Enter the 6-digit one-time code generated in the application. After that, authentication through the application will be configured.
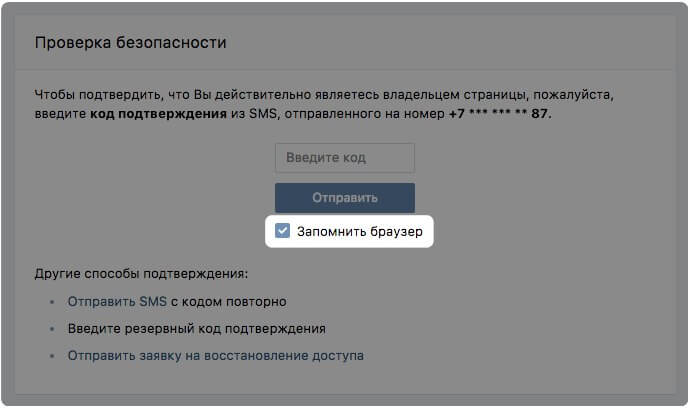
After successfully completing the two-factor test in the browser, you can remember this browser in order not to enter the second factor when entering the account on this device.
The duration of the recharge to apply the phone number after the ban increases each time a cooldown is applied. This feature is not enabled for all games and will be used at the discretion of the developer. Instead of entering a password to log in, you also enter a code that is sent via a text message to your mobile phone.
Using login validation through the web interface
Note. To disable the login check. We recommend storing a screenshot of the code if necessary for further use. Security, then click "Login Requests". You can also approve or reject your login requests from the app by clicking “Security” and then clicking “Login Requests”.
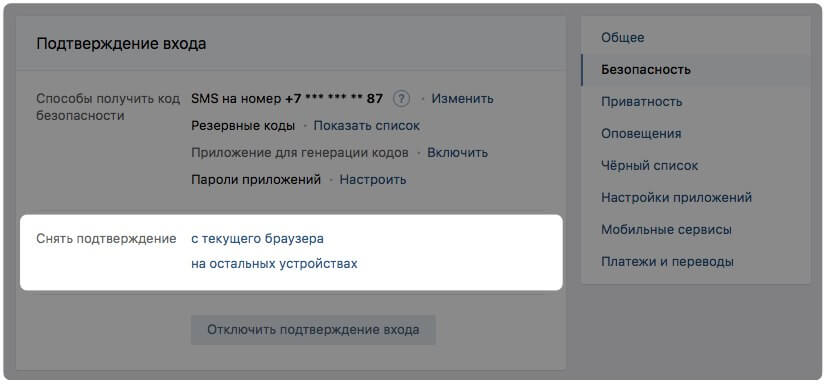
If necessary, you can reset codes on all trusted devices or only on the current device. In this case, during the next authorization attempt, a confirmation code will be requested again.
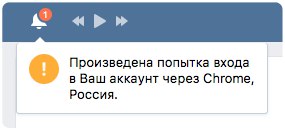
If someone tries to log into your account, you will receive a pop-up warning about this.
Site Administration: Message Display
Drag the list to update new requests. In addition, you can create your own temporary password. It can be enabled or disabled. How it will look, to a certain extent, will depend on the topic. You will need to install it only if your server does not allow the mail relay. All emails sent by forums and other modules will be sent through this host.
However, a non-standard port is sometimes used. You can specify here the default email address that you want to use as the “From” address, where users cannot directly reply to others. You can check the box to enable "Always send email from unanswered address." This can be used to stop controls by spoofing external mail systems that block emails.
How to disable two-factor authentication in the account Vkontakte
At any time, you can disable two-factor authentication for your Vkontakte account. However, remember that in this case, an attacker will only need to know the password to access your account. To disable two-factor authentication, follow these steps:
Suppose both options are disabled. You will not get an answer. The administrator can configure the site to send messages to mobile devices. Users will need to connect at least once with the latest version of the mobile application to register their phones on the site.
Order messaging settings
You can also specify the extent to which each type of message is allowed, and whether users can change these default settings in their profiles. Forbidden - this type of message is not allowed at all, and users will not see any settings associated with them. Messages will be delivered as the user sets them on his message settings page. Messages will be delivered to all users as they are installed on this page.
- The message of the selected type will never be delivered.
- Allowed - users are allowed or allowed to change settings.
- Go to menu
Today we will be talking about one of the most effective methods of protecting your Vkontakte page. We will configure the authorization on the site in such a way that it will be impossible to get to your page until you enter the code received from the SMS, which will come to your phone number tied to your account. That is, everything will happen in the same way as you use Internet banking.
Other message related settings
Roles and Messaging Features
The following features can be used as permissions to make custom changes to roles that affect messaging. The user can immediately read the message or ignore it. If they choose to ignore this message, the message is returned until it is read. However, the administrator has the ability to override this so that users can have an alternate email. Users have this option if their website is connected to a messaging server and if they are connected to a mobile device in a mobile application.Therefore, before you begin to configure something, make sure that the current number is attached to your page in VC and you are not going to change it. .
The function is quite useful, if you are afraid for your page, then the actions taken will increase its security at times.
Let's break into practice
In the top menu in the right corner, click on the button with your miniature and select the item “Settings” from the drop-down list:
Prevent non-contact messages
Disable contacts can be disabled by marking this field in the “General Settings” section at the bottom of the screen. The fault viewer should be used when troubleshooting results in crashes on inbound delivery. This may be due to a number of reasons.
How to connect the login confirmation VK
If the email is legitimate, you can use this information to solve the problem and make sure that the email is allowed to the internal recipient at the next attempt to send. The bounce viewer lists all deviations for the current day, although the disclaimer information is stored for no more than seven days.
In the next step, go to the "Security" tab. At the very top we find the section “Confirmation of entry” and click on the “Connect” button:
Next, we are provided with a whole petition to confirm the password using a mobile phone. They write how good it is for you and how bad it is for intruders. They also warn that if you enable this feature, then password recovery by phone number will become unavailable, in connection with which we are offered to bind the current mail and specify all the true data on the page. So that it can be easily restored later. ()
Common types and bounce permissions
To find a faulty mail connection. 
Private messages are similar to messages, but instead of being sent to a thread, they are sent to one or more members. As a rule, private messages are private correspondence, and they can only be viewed by the sender and intended recipients — administrators cannot view these private messages except through the database.
We all read it and click on the button “Proceed to customize”.
A pop-up window pops up in which we need to enter the password from the page and click on the “Confirm” button:
How to enable login confirmation with a PIN?
Personal messages cannot be sent by guests or guests. However, if the sender is deleted some time after the message has been sent, they will be displayed as a guest. Because it’s so much more than the members you can have, it’s unlikely that you will ever achieve it. The number of messages that can be saved by a forum member can be limited by the administrator, who can change this setting by changing individual groups of members.
Only you and the person you sent him can read what you wrote. For this reason, it is recommended not to send private messages containing personal information that you do not want to read to anyone else. In the "To" field, enter the name of the person to whom you are sending a personal message. . You can also reply to messages using the same method.
Enter the confirmation code, which was supposed to come to our phone, and click on the button "Send code":
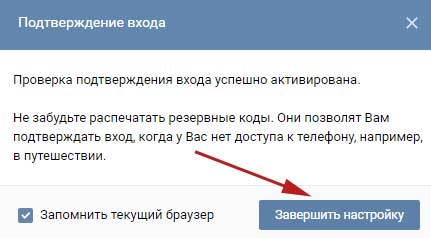
The next window pops up, in which they write to us about the backup codes and ask us not to forget to print them.
When you apply a shortcut, you can only view private messages with this shortcut. All your labels will be listed in the Labels category. To create, edit and delete tags, select “Settings” in the “Private Messages” section and select “Manage Labels” from the drop-down menu.
There are three categories on the personal message page, each of which includes several different functions. Select this if you want to create a new message to send to another user, as described above. The parameters for this can be changed as described in the “Profile” page section. Sent messages are automatically saved only if you selected the option “Save a copy of each personal message in my sent defaults” in the profile settings. Otherwise, when sending a message, you must select "Save a copy in my original field." Selecting this allows you to search for received messages in a manner similar to use. Label Management — selecting this allows you to add, edit, and delete any labels you applied to your messages. Manage rules - selecting this allows you to automatically sort your messages according to the set of rules you create. You can also choose whether all or some criteria should be met using the drop-down menu. Finally, you can choose the action to be taken with the messages to which the rule applies. Change settings Display private messages. If a member selects “All at once,” a list of messages is displayed at the top with all of these messages displayed below the list. When selecting “One at a time”, only one message is displayed, displayed at the top, with a list of messages below it. As a conversation imitates the functionality of the forum by creating a thematic list of answers. It is strongly recommended that a participant save their messages in the Outbox if they prefer to display messages as a conversation. Show the latest private messages from above. Users can choose whether to display new messages at the top or bottom of the list. Receive private messages from: - Members can control who is allowed to send private messages. It may be restricted to members not on their ignore list, only by buddies and administrators, or only by administrators. Notify by email every time you receive a private message. Users can choose to receive email notifications of all personal messages or only personal messages from friends. You can also turn off all email notifications about private messages. Users can select this option if they would like a pop-up window to notify them of new private messages. Save a copy of each private message in my outbox by default. When this option is selected, any personal messages sent by the user will be automatically saved to outbox. This option should be enabled when viewing messages in the form of a conversation. If this option is not selected, users should remember that before sending each message, check the “Save a copy in my original folder” box. Remove the Inbox label when applying a different label. When enabled, the Inbox label is removed when a new tag is applied to a message.
- A new message.
- Inbox - Shows all the messages in your inbox.
- Sent - displays all messages sent to other forum members.
- You cannot search for sent messages.
- Multiple criteria can be selected by selecting “Add criteria”.
- Again, you can select more than one action by selecting “Add Action”.
Backup codes - a list of 10 access codes. These are constant numbers, they do not change and can be useful if you want to go to the page, and the phone will be unavailable at this time. You can enter one of these codes and get to the page. Therefore, it is important to print this list and have it with you.
Click on the button “Finish setup”:
Backup codes can be viewed in the same section "Security". We find the phrase "Backup codes" and opposite it click on the link "Show list" next to it.
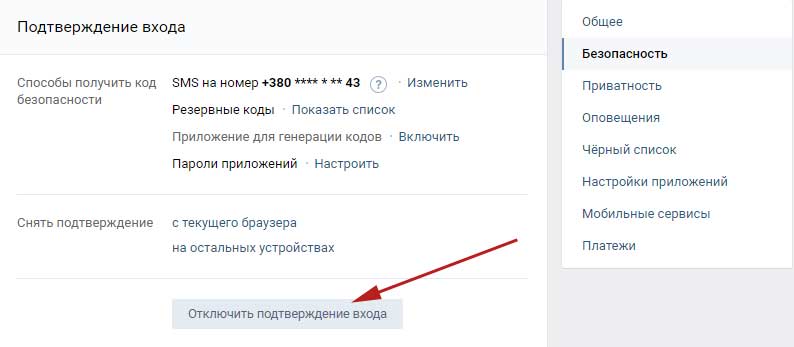
How to disable phone login confirmation
This is done in the same way as the inclusion of confirmation of input. Go to the settings, go to the tab "Security" and click on the button "Disable login confirmation"
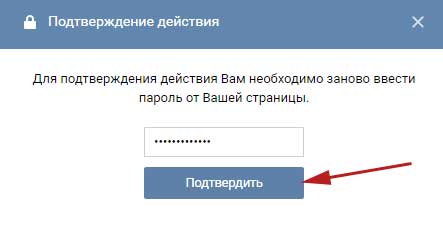
Again, enter the password from your page and click on the "Confirm" button
:
All function is disabled, we completed the task.
And on this I will finish this article, I hope, the knowledge gained was useful to you and you implemented it, thereby securing your account on Vkontakte.