Upgrading to Windows 10 is quite simple and on most computers everything works without reservations. However, there are exceptions to this rule and it may happen that after the update and logging in we will be greeted by a black screen. What should I do when a black screen appears when I download windows 10?
Unfortunately, in my case, the system was updated not as I expected. Although the system detected updates and made a quick installation, after its launch, troubles began. Windows did not load the system shell, instead the mouse cursor appeared on the black screen, and a message appeared in the upper left corner that the desktop personalization service is not responding.
How to fix a black screen after upgrading to Windows 10
This error occurred earlier when you installed and updated the versions of Windows 10 Technical Preview. Fortunately, it is not (in most cases) fatal mistake and it can be fixed without losing your computer's data. Since the mouse cursor is working and the system responds to key combinations, we can still call up individual functions to diagnose the error and make certain adjustments.
Step 1: Scan the disk using the sfc / scannow command
Press CTRL + Shift + Esc to display the Task Manager window. Another way to start the Task Manager in Windows 10, right-click on the Start icon and in the pop-up menu you will see the corresponding item.
In the manager window, select "File - Run a new task". A window will appear in which you can call up individual programs.
Type in the command "cmd", and then select the option "Create a task with administrator rights". Thus, we called the command line in administrator mode.
Type sfc / scannow in the console and confirm with Enter.
Will begin hard check disk for errors - if a fault is detected, the system will automatically try to correct the problem. After checking, you can proceed to the next step.
Step 2: Remove the key from the system registry responsible for updating the desktop
In the system registry, when you upgrade or install Windows 10, you create a key that is responsible for setting up the desktop. A black screen signals that something went wrong and did not allow you to complete the setup. In this case, you need to remove the key, which is possibly corrupted and causes an error.
Again go to Task Manager and select "File - Run a new task". At this time, type regedit and confirm with OK.
In the Registry Editor, navigate to the following path:
HKEY_LOCAL_MACHINE \\ SOFTWARE \\ Microsoft \\ ActiveSetup \\ Installed Components \\
In the "Installed Components" section you will find a list of keys with random names. We need to find a key that has a default value named "Windows Desktop Update". To do this, you will have to check each key until you find the specified value.
After you find it, you need to delete it. Click on the found key with the right mouse button and select Delete from the menu that appears. After you delete, you can close the registry editor.
Step 3: Restart your computer in safe mode
After the performed actions it is necessary to restart the computer in safe mode, so that the system can boot into the system with the minimum number of included processes.
To do this, open the "File - Run a new task" in the Task Manager and type msconfig. Confirm with the OK button.
In a new window go to the Downloads menu and at the bottom choose "Safe Mode". The remaining options are left by default and restart the computer.
The computer will start in safe mode and after logging on to Windows 10, the desktop with the taskbar and the Start menu should appear. Now you need to turn off safe mode. Reenter in the Browser, enter the msconfig command, go to Downloads, and clear the "Safe Mode" check box. After reboot a Windows computer 10 should be loaded normally and the desktop will appear instead of the black screen.
This will never happen to me. Black screen when you boot Windows 10? No, not me and not with me. Everyone thinks so. So I thought. But the other day, that's exactly what happened!
Of course, first of all, I turned to the official instructions of the manufacturer, as a result of which such a mental dialogue took place:
There is nothing to invent here, just reinstall the system - it's something. - The corporation answered.
No! Not this! I shouted. - And what about my files on the "Drive: C" and all the settings?
Do not be afraid, reinstall the OS, and you will have new files, do not worry. - So I was reassured by the "beloved" Microsoft.
Should I listen?
Maybe someone will listen, but not me! By using all the brain resources (in the presence of which my second half seriously doubts) and having spent the whole day experimenting, I found working solutions that will get rid of Windows 10 black screen. Be comfortable and repeat after me, if this "happiness" has not bypassed you.

Cases in which a black screen appears
Now I will show you how easy it is to get rid of bugs if after installing Windows 10 a black screen is loaded for a long time. For this we will conduct a small analysis. It is needed to first identify the cause of the problem, and then successfully find a solution.
Types of black screens
The solutions will be different, depending on what you see on the screen, there are 2 options:
- black, but with the mouse pointer;
- one black, without any mice.
When appears
Here we define when a problem occurs:
- Black screen after upgrading to Windows 10 and its subsequent download.
- When you restart the computer with the already installed "Ten".
- When exiting from sleep mode.
- Black screen when you boot Windows 10.

Reasons for the appearance and ways to solve the "black screen"
Having determined exactly your version of Windows 10 black screen, you will choose the only solution that suits you.
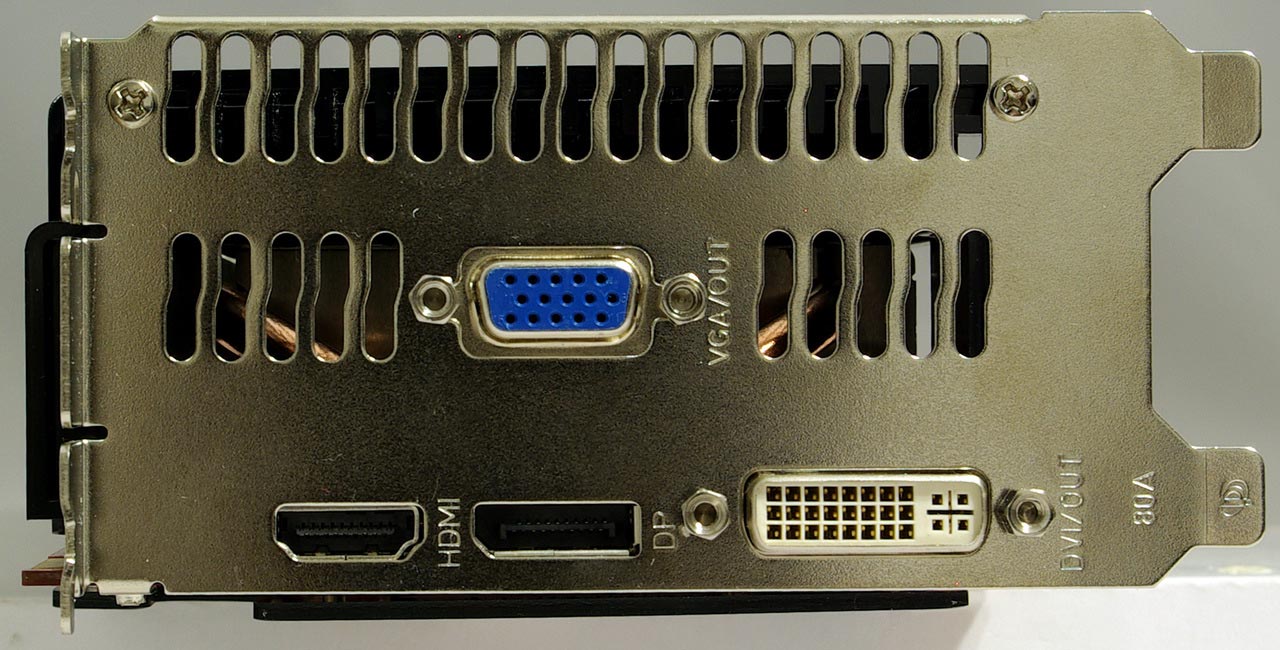
- Redirecting the video signal to another connector on the video card.
Symptoms: before you completely black screen, without any signs of life. In this case, everything is simple. Disconnect the monitor from the main connector of the video output and connect it to the second one. After that, go to the settings of the video card and make the desired settings. That is, force check boxes, depending on what video output you want to use.
- Conflicting with the system device.
Here, as a hypothesis, a device with old "firewood" is connected to the system. A black screen appears after upgrading to Windows 10. Solution:
- Disconnect all devices connected to the computer.
- Connect them one at a time, constantly rebooting the system.
- If you find a buggy device, update the driver on the manufacturer's website or in automatic mode.
The result is a fully workable "Ten", without any Windows 10 black screen.
- New drivers for the video card have been installed.
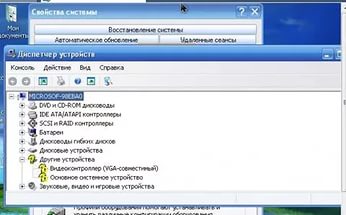
It appears after installing Windows 10, the black screen is loaded for a long time. Here, as a solution, we need to roll back to the old drivers. To do this, we need a device manager, in which we will return to the previous version of the "firewood". How to get into it, if there is only a "black hole" in front of you, without any signs of photons in the form of a mouse arrow, read below.
Another option to return previous versions drivers, when a black screen appears after upgrading to Windows 10, this will roll back the system completely, to the previous restore point:
- enter the safe mode (to do this with a completely black screen, you need to read the recipe below);
- select "Diagnostics" (in the safe mode window);
- go to "Advanced Settings";
- here choose "System Restore";
- in the window of the recovery itself, you need to select the previously created point;
- confirm the system restore action;
- wait until the restore is complete.
Voila, Windows 10 black screen as unheard of.
- Infection of the system with viruses.
We will not consider the causes of infection. Just solve the problem. We will need again the same safe mode (the instruction to get into it - later in the article). Then:
- completely scan the computer with antivirus software;
- remove the detected bloodsuckers.

Reboot our comp. Enjoy the result.
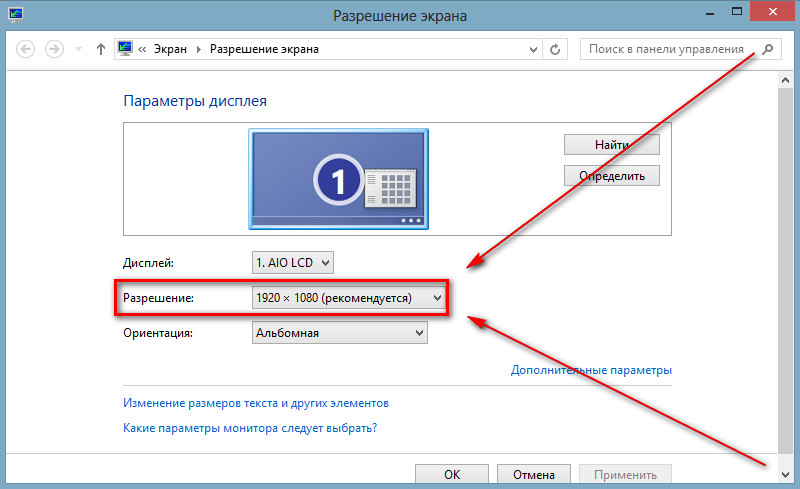
- Wrong screen resolution.
As an option for the appearance of evil blackness, the screen resolution is incorrect. Correcting:
- we enter Windows from a safe mode (the way to enter it read in the article below);
- change the screen resolution to a lower one;
- we reboot the computer.
If the reason is this, the medicine will help.
- Software failure.
Sometimes a software failure occurs during the upgrade process. But here everything is simple. The treatment will be the restart of the update process, after which the black screen will disappear when Windows 10 starts.
- Conflict of old drivers installed earlier, with a video card updated to Windows 10.
This reason for the appearance of the problem should be allowed only if all previous methods have been tried. The solution here is a little more complicated than in the previous cases, but with my help you can do it.
If you have a black screen in front of you, after upgrading to Windows 10 and none of the above does not help, you need to at least log into the system, but always in safe mode.
We enter the OS in a safe mode.
There are two ways:
- using the Windows installation disk;
- with the help of manipulations similar to the dance around the fire (not everyone helps, not always and not everywhere, but it will help you.) Why? I will answer all the known memes: I guarantee it!)
I think the disk is clear. Let's stop on dances with a tambourine. So after you install Windows 10 for a long time, the black screen loads, turn on the computer and follow the order:
- During the boot process, press and hold Shift, constantly pressing the F8 key. This will not work, but it is necessary to try. (This is actually the dance itself).
- Then a window should open where you can select and go through "Diagnostics" and go to "Advanced Settings".
- A window will open, where you will select "Command Line".
- In the window of the line, insert the lines copied from here: "bcdedit / set (globalsettings) advancedoptions true", then click on the Enter button.
- In the window that opens when you finish these manipulations, select: "Continue".
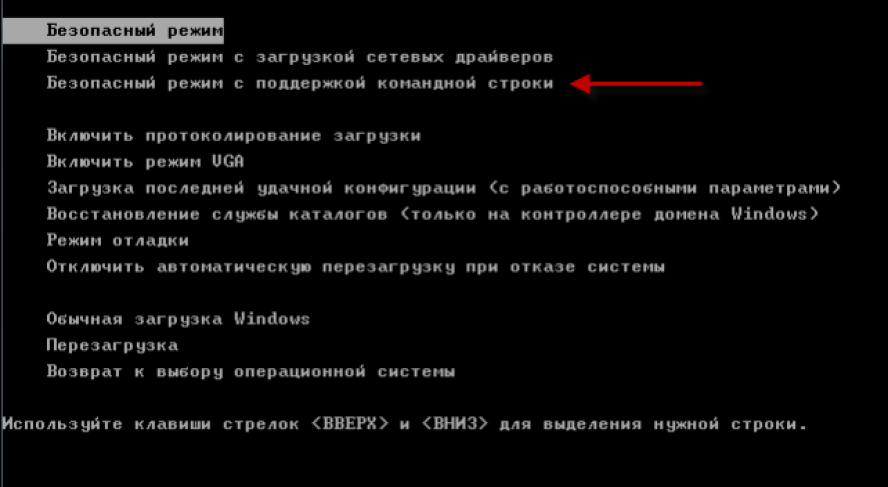
- Finally, in the final window, select "Enable Safe Mode" using the F4 key on the keyboard, then press Enter.
The result of all actions is to restart the computer and start in safe mode.
- Follow the chain: Icon: Start Menu -\u003e Next: Control Panel -\u003e Then: Power -\u003e After that: System Settings ».
- Remove the birdie on the opposite: Enable quick start.
- Save the settings.
Then go to the desktop. Point the arrow to the computer icon (My Computer), then click the Properties button from the mouse and in the drop-down menu go to Properties.
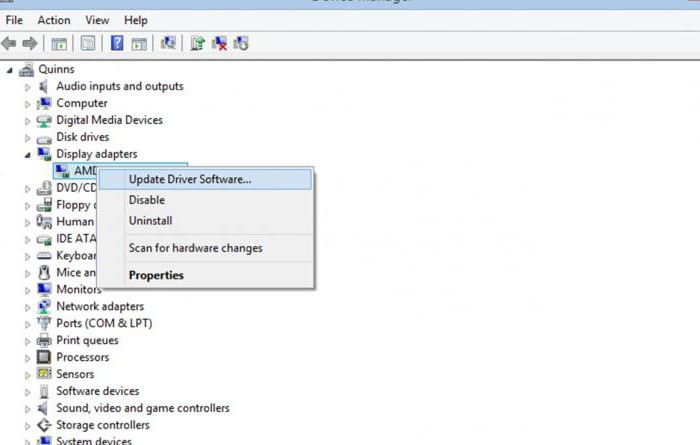
In the resulting window, do the following: Go to: Hardware -\u003e Follow in: Device Manager -\u003e Go to: Video adapters. The line with the video card installed by you will open, on which you right-click the mouse. In the drop-down menu, select: "Update drivers". There are 2 options:
- in normal automatic mode;
- after downloading the new drivers from the resource of the equipment manufacturer.
After updating the drivers, restart the system. The black screen will disappear when Windows 10 starts.
Conclusion
To get rid of the persecution of such an unpleasant phenomenon as a black screen after upgrading to Windows 10, or when downloading it, go from simple to complex. Do not immediately roll back the graphics driver, first try to simply change the connectors on the video outputs. And if simple steps do not help, only then go into safe mode and do more complex manipulations.

P.S. I hope my modest advice solved your problem and we were not in any way interfered with the opinion of my second half, concerning the complete absence of gyri in my biological processor. Successes.
As usual, a thematic video on this topic:
Windows 10 pleases its users with an innovative approach. Especially breaks from the happiness of people who see a strange black screen after installing a new operating system. And the reason why a black screen crawls on boot is simple: Windows 10 conflicts with video card drivers. A black screen can occur not only during bootup, but also after the computer returns from sleep. Also, a black screen may appear when using two monitors. In general, there are lots of reasons, but there are many ways to get out of this unpleasant situation.
Reboot
The first method to solve this unpleasant problem is a simple reboot. In this case, it is necessary to cancel the fast starting Windows 10. But how to do it, if there is only a black screen? You need to press the Back Space button to delete all the characters, if any. Next, you need to change the keyboard layout, enter the password and press the Enter button. Then wait until Windows 10 is loaded.
Next we need to proceed to the immediate restart Windows 10. We click consecutively on the Windows keyboard + R, wait about 15 seconds, type shutdown / r and press the Enter button. Then you will have to wait a bit and then click Enter again. What have we done? Entered the code to restart the computer through a special window Run in the Windows system 10.
This is not the only way to restart the computer if a black screen is booted out. Again, press several times Back Space, then five times click on Tab. Such actions will lead us to the shutdown button. Press Enter, then the up arrow and again Enter. Next, Windows 10 should reboot. In the extreme case, if these two methods did not help, you can simply keep the power button on the system unit for a long time.
If after the reboot the image appeared, then it's all about the driver failure during a quick start.
Now you need to disable it:
- Click the Start button with the right mouse button, select Control Panel, go to Power Options.
- Select the Actions of the power buttons.
- Click Change settings ....
- Scroll down and remove the daw from the item Turn off quick start.

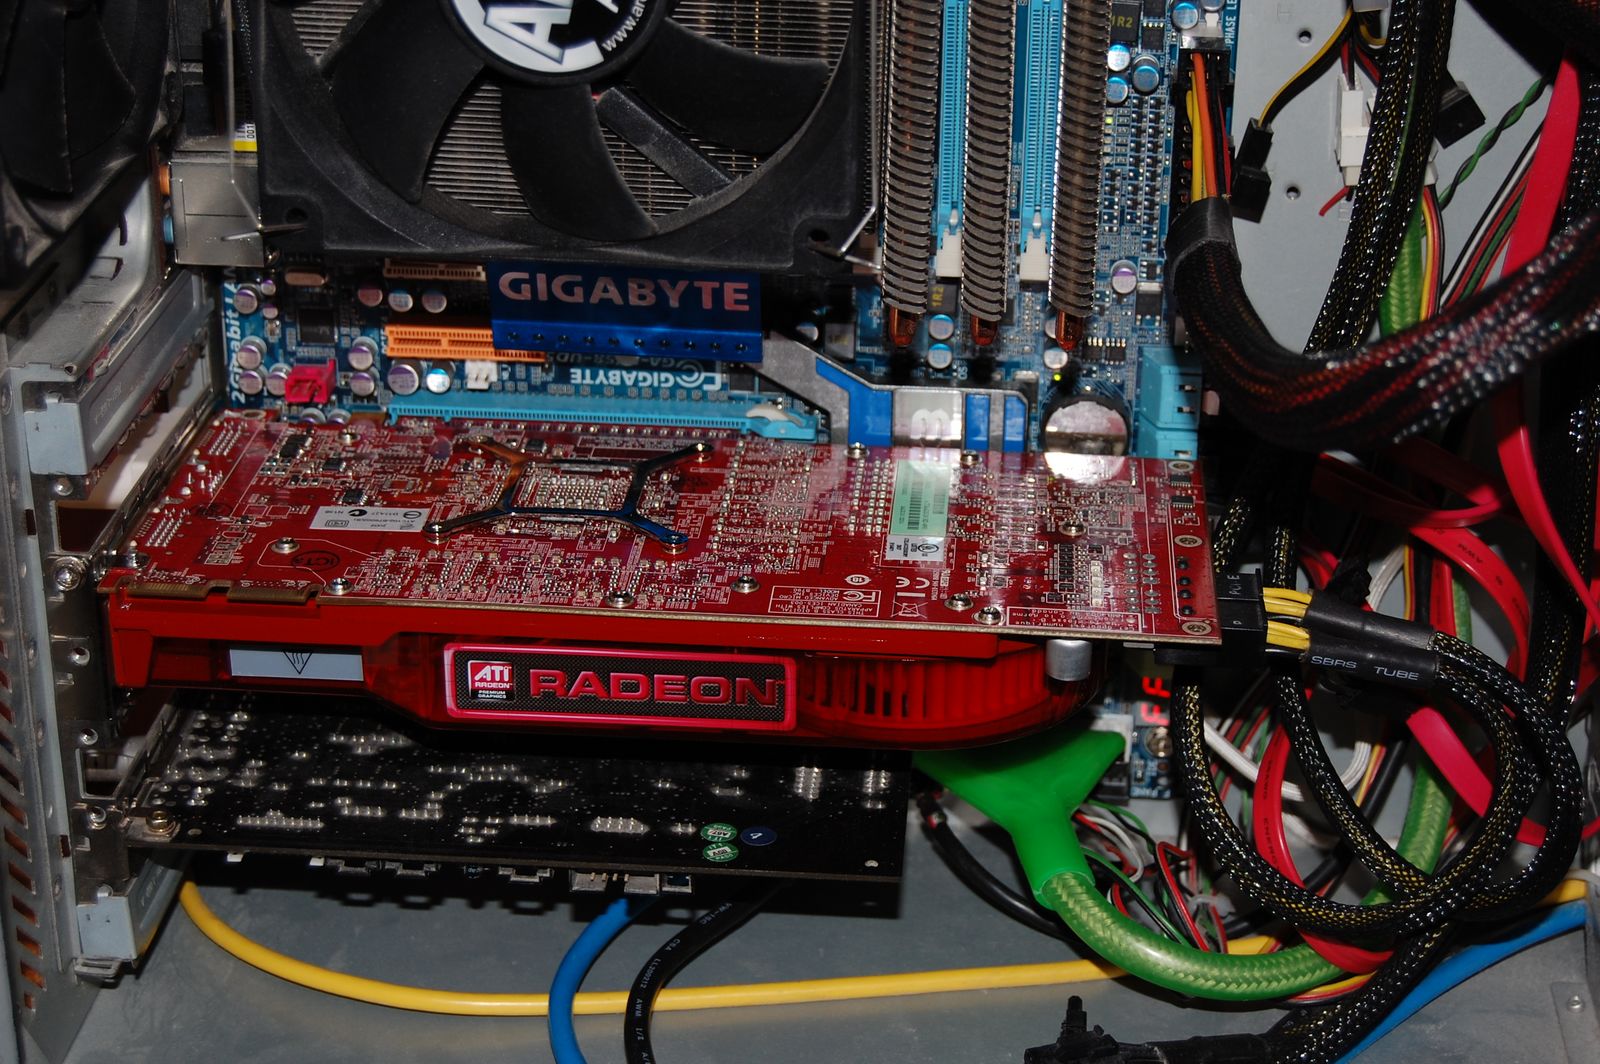
Motherboard
There is a possibility that a black screen appears from the video card. If there is an output to the monitor in motherboard, then you can connect the display there, load the graphics card driver back and load it back into place. It should be remembered that Windows 10 is a very new operating system, which is still full of hardware incompatibilities. After its installation, some programs and computer components may not work.
Changing drivers
If after all these methods the black screen reappears, you can try to remove the graphics driver. To do this, click on Back Space several times, five times on the Tab and Enter button. Then click on the up arrow, holding Shift, and again Enter. Next, in the blind mode, the recovery window will appear, but no one will see it. Further all it is necessary to continue to do or make by the touch:
- Three times click on the down arrow, press Enter.
- Double-click the down arrow and press Enter.
- Double click the arrow to the left.
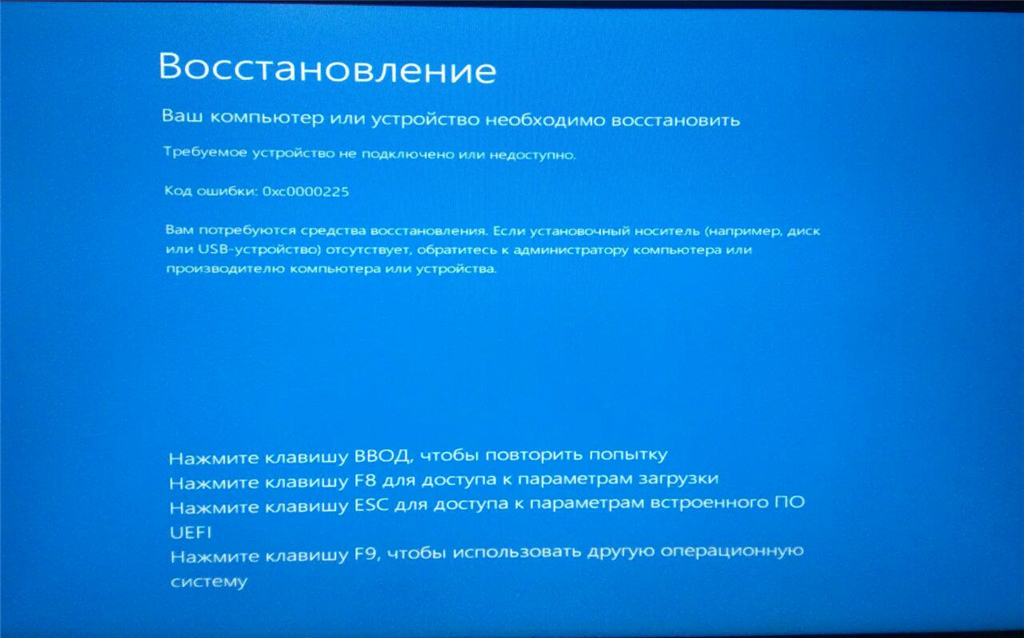
- If you have a computer with BIOS and MBR, then you must click once on the down arrow and Enter.
- If the computer is only with UEFI, then press the down arrow twice and press Enter.
- If you are not sure whether the BIOS or UEFI is on the machine, then you have to press the down arrow once.
- The last step is click on Enter again.
And so it looks like with the monitor turned on:
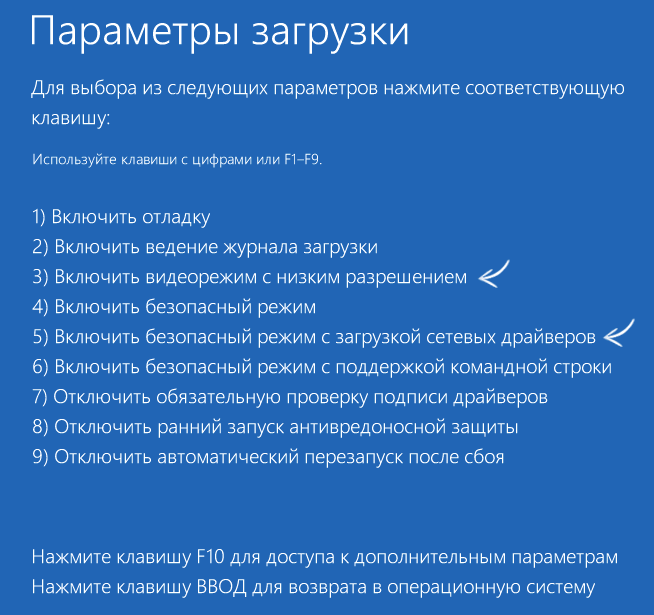
After all these dances with tambourines, it will be necessary to start the mode with low resolution and safe mode. At boot, you should try to restore the system or remove the drivers of the video card. Then reboot and put the drivers again.
- If this interesting blind method does not help, then you can try another great way with your eyes closed. For this:
- We go with the password in Windows 10.
- To do this, we press Back Space several times, change the keyboard layout, enter the password and click Enter.
- Then we pinch Windows + X.
- We press 8 times on the up arrow, click on Enter.
- By these manipulations, we open the command line.

Intuitively you need to understand what layout is now on the keyboard. Then you need to enter the code: bcdedit / set (default) safeboot network and press on the Enter key. Next, you need to enter one more code: shutdown / r, click on the Enter key and after a special sound from the computer or after 15 seconds again on Enter. After all this magic, Windows 10 should start in safe mode. In this mode, you can remove the video card drivers, put new ones, return conventional installations with the same code in the the command line: bcdedit (default) / deletevalue safeboot.
If all this horror do not want to, and the mood to use Windows 10 has not yet been lost, then you can try a banal system recovery from the boot disk or USB.
One of the most unpleasant and, I must say, absolutely non-standard is the situation when either the update screen appears or after the update of Windows 10 the black screen appears. The reasons for this phenomenon are not clear to many. And users panic begin to bite their elbows in search of a solution. But do not despair. Even if you are watching a black screen after upgrading Windows 10, there is a solution. By the way, it will suit both those who updated to "ten" the installed eighth version. We will make a reservation at once: it not such and simple, so be reserved by patience.
Why is the black screen after updating Windows 10?
In general, this situation is quite unusual, because there are cases completely different. For example, a black screen (with or without cursor) can occur when update Windows 7, 8 or the subsequent modification 8.1 to the tenth version. It can also be seen in an already running Windows 10 during or after its own updates.
Consider several reasons that can affect this. As a rule, there are several of them:
- discrepancy installed drivers video cards;
- failures in the Explorer service;
- enabled quick start;
- re-licensing.
In addition, it is worth mentioning two more varieties. First, after upgrading to Windows 10, the black screen disappears after a while, and the system returns to normal. Secondly, the black screen "hangs" constantly, but the control elements (at least the keyboard) are working. In principle, solutions for almost all situations, in general, are the same. But we will consider them proceeding from the first causes (about mechanical failures of computer systems speech now does not go).
Restore the system in a standard way
So, after upgrading to Windows 10 - a black screen and no response to the download of the newly installed system. What to do? Naturally, the easiest solution is to restore the system to the original "OSes" if you have an installation disc or a bootable flash drive.
All this is simple, when a disk or a flash drive is available. And if they are not, then what? Do not give up. The output is: the black screen after upgrading to Windows 10 can be removed by built-in tools, and at the same time and return to the old system. This is all the more so since the G8 is not destroyed when upgraded to the tenth version, but is in a deactivated state, so to speak.

What do you need to do? First of all, we call the Task Manager with the standard three-finger combination Ctrl + Alt + Del, and then create a new cmd task in it (starting the command line), starting with the admin. In the window that appears, write the line shutdown / r / o / f / t 00, and then reboot.
Now we use the diagnostics in the action selection window, then in the additional parameters select the system restore. When the process is complete, the computer will reboot again, and then an old, workable system will appear before you.
Windows 10: How to fix the "black screen" during the update?
The above situation is not the only one of its kind. In this case, the solution concerned the name of when the black screen appears after upgrading to Windows 10. But what do you want to do if it occurs during the update process? The reason for this, apparently - obsolete drivers graphics accelerator.
If you see a black screen when installing Windows 10, in principle, you can do the simplest way, although many may seem barbaric. We forcibly shutdown and restart the terminal or laptop. When the system is restarted, the system will check hDD on the presence of errors (maybe even in and will download the desktop.
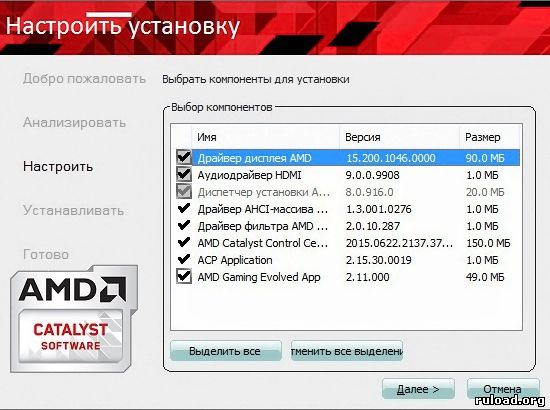
To prevent this situation in the future, we update the video card drivers. You can do this from the Device Manager, but if you have a utility like Driver Booster at hand, it's better, because the driver will be downloaded from the official website of the manufacturer (not only for the graphics chip, but for all other devices that need in driver update), and then automatically integrated into the system. After that you can try to make windows installation 10 again.
Logging in to safe mode
All this concerned the fact that it was after the upgrade to Windows 10 that the black screen was the result of system failures or conflicts with the drivers. But what if the installation of the "dozens" went kind of successfully? And suddenly the cursor appears before the user's eyes, and the system does not want to start, although the initial boot process clearly indicated that the system is trying to work?
It's not so simple. If there is installation disk, there will be no problems. Perform the sequence as shown below (transitions from the diagnostics menu):
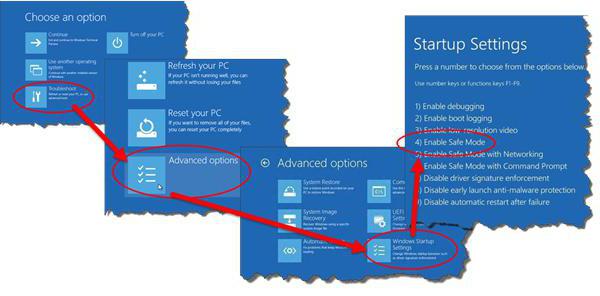
Otherwise, you will need a secure login mode. But with him there are problems. The fact is that the standard pressing of the F8 key at the start of Windows in the tenth version does not work (why it had to be removed, it is still unclear). However, not on all devices, but sometimes pressing F8 times this way 10-20 with the Shift key pressed.

In the next window, click on the continuation line and finally, in the options window, press F4 (safe mode). Then the system reboots, the system boots in safe mode.
How to restore your system in safe mode
In principle, if a "dozen" was installed, you can easily return to the old system, however, with one caveat: if the user has deleted the files of the previous "operating system". Otherwise, nothing happens.
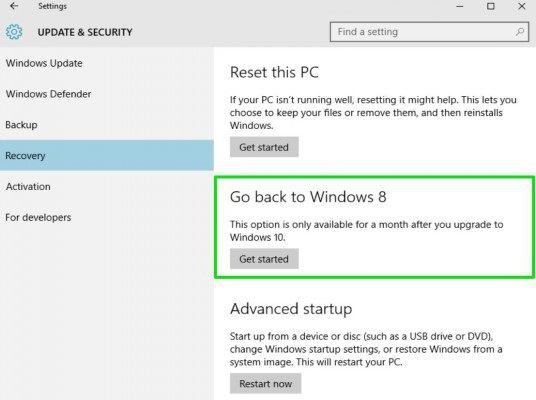
You can do this in the security and recovery section, where there is a special link to return to the previous system. That's all. The process will end automatically, after which a restart with the previously installed "seven" or "eight" will follow.

If you need to restore the "ten" itself after its own update, you need to type the command sfc / scannnow at the command line (even at the download stage) and press the enter key (the scanning and recovery process is activated system files). The process can be quite long, so you have to suffer. You can reboot the system and verify its functionality by using the shutdown -t 0 -r -f command.

But when entering safe mode, you can simply activate the recovery process and select a control point that precedes the appearance of this situation.
Installing drivers and uninstalling updates
Another step that you can take when booting in safe mode refers to How to do this was described above, so there's no point in dwelling on this.
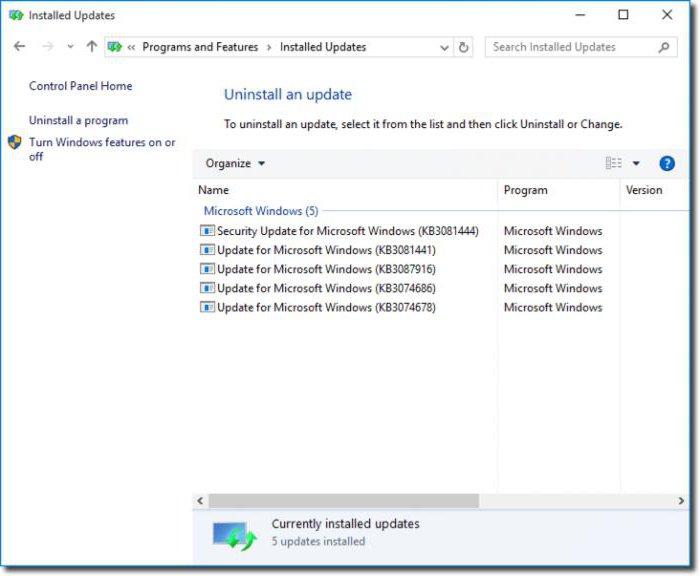
As for the service packs that could cause this failure, you should go to the update center and see the latest installed packages. Latest updates you should uninstall, then manually search for updates, and those that caused the critical failure to be excluded from the list. In principle, the automatic update can be disabled at all. Windows does not recommend this, but there is nothing to worry about. Updates for the most part relate to security systems, office applications and only sometimes - drivers. But if the user has the same Driver Booster package, the drivers will be updated through it. In addition, the program itself will issue a notification about the need for an update (free version). The version of Pro will generally update all the drivers in the background. The user only knows about this from the message of the successful installation.
Running the Explorer Service in Manual Mode
Let's consider one more impartial situation, when instead of the expected start of the system we have after boot Windows black screen and cursor (in some cases, the cursor may be absent). The reason is the failure of the Explorer service, which could not load the Desktop. It will have to be started manually.
We go to the "Task Manager", as described above, then in the process tree find the service explorer.exe and terminate the process forcibly. Next, in the file menu, create a new task and enter explorer.exe in the startup line. If nothing happened, you can try to find the file yourself by clicking the browse button. Typically, the desired file is in the root directory of Windows on the system drive. In part this can solve the problem. In extreme cases, we use the same safe mode and scan the system with recovery, as described above.
Enabling Quick Launch
Safe mode is also good in that it can change some key parameters that affect the system's performance. It's about the so-called quick launch mode.

Its activation is made from the power section in the standard "Control Panel", where the action of the buttons is first selected, and then the parameters that are not available. We put the "bird" opposite the prompt line, save the changes and overload the system.
Get rid of Windows Activation Technologies
Finally, one of the reasons may be reactivation. If a copy of Windows is licensed, there should not be any problems, but sometimes the activation file just causes trouble after upgrading to Windows 10. The black screen in this case can "hang" constantly.
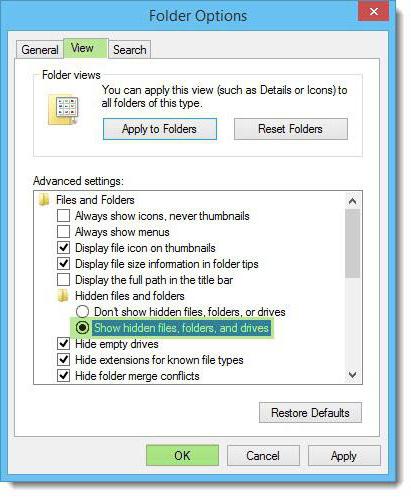
We use the safe mode, in the properties of the folders we indicate the display of hidden elements, and then we find the folder with the same name. As a rule, for 64-bit systems it is located directly in the directory with the system (C: \\ Windows), but for systems with 32-bit architecture it can be in the System32 section, where you must first go to the Tasks folder, then Microsoft, and - finally - Windows. Delete the folder with all its contents and reboot.
Conclusion
So we examined the main causes of failures after upgrading to Windows 10. The black screen is a thing, of course, unpleasant, but as you can see, it is possible to combat such type of failures, even if they arise in an already running system. Naturally, some of the above methods will be somewhat difficult for many users to understand or apply in practice, nevertheless, if you show a little patience, you can fix the problem yourself, and not run to any service center, and even pay money for it, even if small, but still it is material costs.