All new hard disks already formatted at a low level by the manufacturer and re-initialization does not require. In practice, under normal circumstances, you are unlikely to have to perform low-level formatting hard drive, because only the manufacturer can perform this kind of formatting purely technically.
Any false operation can lead to the worst result, directly formatting hDD computer. That's why I need to find a free tool for formatting the hard drive. If you have any suggestions, please let me know. Simple software offers a free tool for formatting a hard disk that helps format the hard drive. You may wonder how to find and download such a free tool to format the hard drive and use it to format the hard drive of your computer?
What is called low-level formatting in computers is actually more of an initialization and testing of the disk surface, because in this process, writing and reading is checked in all sectors of the disk. If there is no disk problem, there is no need to fully initialize or check the surface.
Steps for using a simple wizard partition and formatting the hard drive
Follow the next steps to get started. hard disk formatting drive right now! There will be no obstacles or problems. If you have important data on your hard drive, do not forget to first make backup copy or move the data to a safe place. Formatting hard disks and external hard drives is usually a fairly simple process. However, with all the different disk manufacturers, interfaces and other compatibility and formatting problems that hard drives may have, sometimes the best choice is to use special formatting applications and utilities.
What is low-level formatting?
For starters, let's look at the concepts of formatting at low and high levels.
Low-level formatting - operation, in which process the servo marks are placed on the magnetic surface of the disk (the information used to position the hard disk heads). It is performed in the process of manufacturing a hard disk, on special equipment.
However, there are times when they simply do not interact very well. If you are comfortable using the command line, you can see our guide. In addition, your computer may not recognize the external hard disk at all. If this happens, this is the guide.
The best programs for formatting hard drives
The interface is quite simple, and the software is great for simplifying complex formatting options. This ultra-simple formatting utility has only a few options, but it is effective and has received excellent reviews. The next option is to use the command line, but it's more complicated, not for everyone. Thank you for staying on the site for today's message.
When the process of low-level formatting of the hard drive is started for the first time, the hard disk plates are empty, that is, they contain absolutely no information about sectors, tracks, and so on. This is the last moment when the hard drive has absolutely empty plates. The information recorded during this process will no longer be overwritten.
Older hard drives had the same number of sectors per track and did not have built-in controllers, so low-level formatting was handled by an external hard disk controller, and the only information he needed was the number of tracks and the number of sectors per track. Using this information, an external controller could format the hard drive. Modern hard drives have a complex internal structure, including changing the number of sectors per track when moving from external tracks to internal tracks, and built-in servo information to control the drive of the heads.
Due to this complex data structure, all modern hard drives undergo low-level formatting only once - at the factory.
There are two types of high-level formatting:
Formatting in Normal Mode - a process that consists in creating a master boot record with a partition table and (or) empty file system structures, installing the boot sector, and the like. During the formatting process, the integrity of the media is also checked to block the defective sectors.
Quick formatting - the same process as formatting in the normal mode, only without checking the media for defective sectors.
Using the term low-level formatting with respect to hard disks has spawned many myths. For example, there is an opinion that low-level hard disk formatting can not be performed and that attempting such an operation will lead to the destruction of the disk. In principle, there is some truth in this error. It consists that at low-level formatting of old disks of the sample of the late 1980's was violated optimal tuning a bevel of heads and cylinders, installed by the disc manufacturer, as well as a disc defect map.
All this negatively affected the performance of devices. This problem has been solved for a long time already, and all devices that use zone recording (with a variable number of sectors on the track) are immune to any problems that low-level formatting can lead to, since real sector markers can not be replaced.
So the low-level formatting of disks released in the 1990s and later, excludes the violation of its settings.
At the same time, there is often a real need to perform low-level formatting of ATA and SCSI disks. Now we will talk about programs that will help to do this.
Programs of low-level formatting of ATA disks (SATA, PATA, etc.)
ATA disk manufacturers defined and standardized extensions to the original WD1002 / 1003 hard disk controller, creating an AT bus interface (known as the ATA interface). The ATA specification is implemented for the unique commands of specific manufacturers, which are an extension of the standard. To prevent incorrect low-level formatting, many of the ATA devices have special commands that must be sent to the device to unlock the formatting procedures. These commands depend on the device manufacturer, so you need to find the low-level formatting and defect management programs created by the disc manufacturer.
These programs are most often intended not only for the devices of a particular manufacturer, but also for their individual models. So before you perform a search, write down the manufacturer's name and model number of the hard drive.
Modern hard drives are protected from the possibility of changing the bevel or defect map, because they are always in the conversion mode. Devices with zone recording are always in this mode and are thus fully protected.
Most hard drives have an additional set of commands that are used during the formatting process, with standard ATA specification commands not working (especially for ATA devices with zone recording).
Spare sectors can also be allocated automatically using programs provided by the device manufacturer. Not knowing the correct commands specific to the manufacturer, it is impossible to replace the defective sectors with spare ones specially selected in modern devices for these purposes. The detected defective sector is replaced in the distribution structure by the spare sector closest to it.
Some hard drive manufacturers offer low-level formatting programs. They can be found at the following addresses.
- Seagate
ftp://ftp.seagate.com/techsuppt/seagate_utils/sgatfmt4.zip
http://www.seagate.com/support/seatools - Hitachi / IBM
www.hgst.com/hdd/support/download.htm - Maxtor / Quantum
http://www.maxtor.com/softwaredownload/default.htm - Samsung
www.samsung.com/Products/HardDiskDrive/utilities/hutil.htm
www.samsung.com/Products/HardDiskDrive/utilities/sutil.htm
www.samsung.com/Products/HardDiskDrive/utilities/shdiag.htm - Western Digital
http://support.wdc.com/download/
First of all, you should try the programs provided by the device manufacturer. They are all free and often allow you to work at a low level, as wide-profile programs do not allow.
If the disc manufacturer does not offer initialization / validation / formatting programs, you can use Drive Fitness Test from Hitachi (formerly IBM). This program perfectly copes with disks from other manufacturers and performs detailed full testing of the entire hard disk. This is one of the the best programs general purpose, because it allows you to perform a non-destructive test. Despite the fact that any device can be tested with it, there is one limitation: destructive read / write tests can only be performed on Hitachi and IBM disks.
Advice!
All listed programs for initialization, testing and formatting of the hard disk, as well as many others can be found in the collection of utilities Ultimate Boot CD (UBCD). It's just a fantastic collection of diagnostic tools, contained on one downloadable CD-ROM! A copy of this CD-ROM can be downloaded at www.ultimatebootcd.com.
Means of non-destructive formatting
I strongly do not recommend using non-destructive formatting tools that work at the BIOS level, such as Calibrate (formerly part of Symantec Norton Utilities), in the case where low-level formatting is really needed. For such funds, a number of limitations and problems that reduce their effectiveness are characteristic. They perform low-level formatting on separate tracks using the BIOS functions; while backup and the restoration of individual tracks.
These programs also do not create a defect map, as is usually done by low-level formatting programs. Moreover, they can remove the markers of the defect map added standard programs low-level formatting. As a result, it becomes possible to store data in damaged sectors, which in some cases can lead to a loss of warranty.
Another limitation is that the program data can only be used when working with hard drives preformatted using the BIOS functions.
The low-level formatting program created by disk manufacturers "bypasses" the system BIOS and passes commands directly to the controller. Therefore, many similar programs are designed to work with certain controllers. The existence of one such program, which could be used when working with different controllers, is almost impossible to imagine. Many hard disks can be incorrectly identified as defective only because an unsuitable program was used.
Low-level formatting of the hard disk and solid state drives Western Digital
At once I will make a reservation, that in this case, under low-level formatting is meant testing of a surface of a disk on bad sectors through reading and writing. As already mentioned above, the factory low-level formatting of a modern hard drive can only be produced by the manufacturer.
Hard and solid-state disks can be formatted at a low level, in several ways. Consider one of these, applicable to the PC. Mac computers are not suitable for that example.
For low-level hard disk formatting we will need:
- The drive on the hard drive, in this case, the manufacturer of Western Digital (in this example, the Maxtor was tested, and the procedure was successful)
- Data Lifeguard Diagnostics for Windows
Before formatting, connect the device to the computer. This can be done either through the IDE, SATA, USB or Firefire interface. In this case, low-level formatting will be performed in the Windows system, without preloading using special boot disks. This is the easiest way to ordinary user PC.
After the device is connected:
1. Download the Windows program Data Lifeguard Diagnostics from http://support.wdc.com/product/download.asp?groupid=113&sid=3&lang=en
2. After downloading the application, start it and follow the installation wizard.
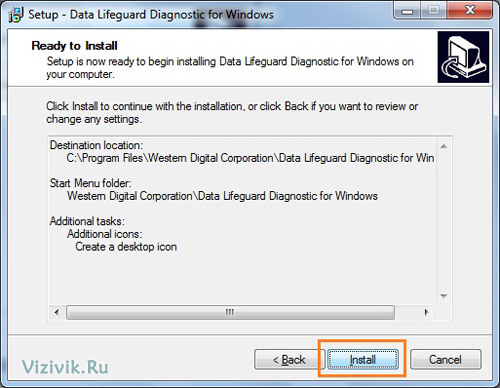
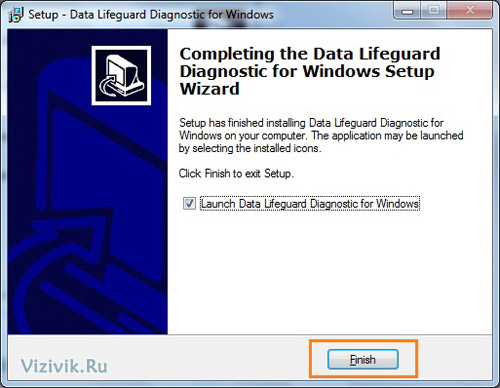
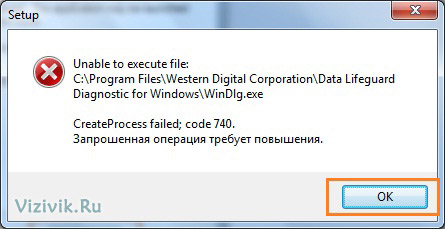
If, after installation, a dialog box appears, indicating that the program can not be started, close it and click the OK button. The program must be started in a different way.
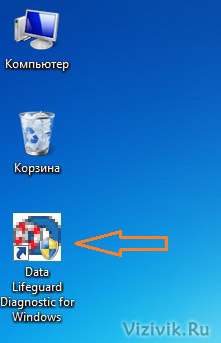
3. A shortcut to the program appears on the desktop, click on it twice.
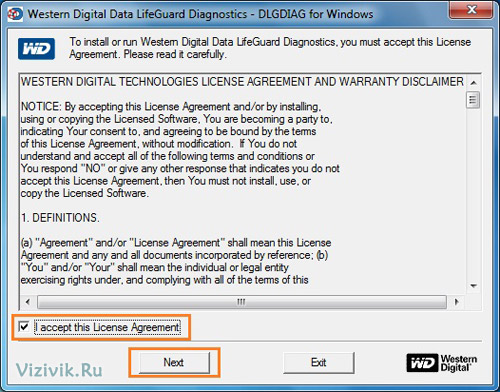
4. Check the box next to I accept this ... and click the Next button.
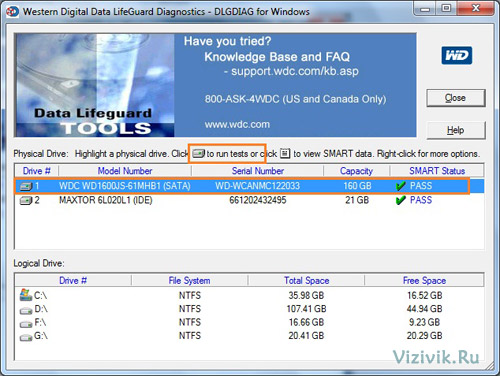
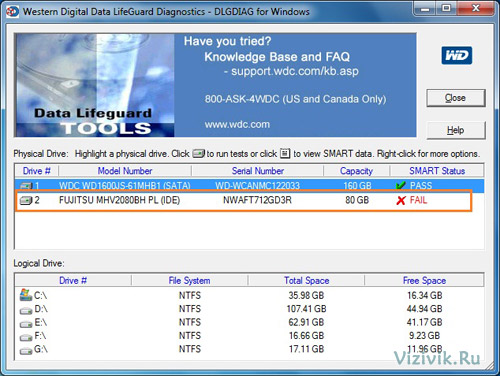
The program displays all connected disks. In spite of the fact that in my example, the formatting was conducted by Maxtor's test hard drive, and it was successful, I recommend you to use this program only for Western Digital, to avoid possible problems with the carrier. If you have a Seagate hard drive, use a similar program from Seagate.
5. Select the disk that you want to diagnose and click on the button to run tests. ALWAYS check that you have chosen this drive, otherwise, you will lose all data on this medium, without the possibility of their recovery, as this process is destructive and irreversible.
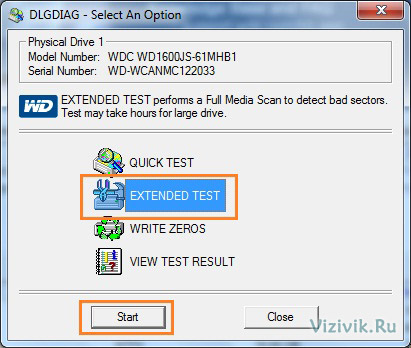
7. In the next window, select the EXTENDED TEST option and click on the Start button.
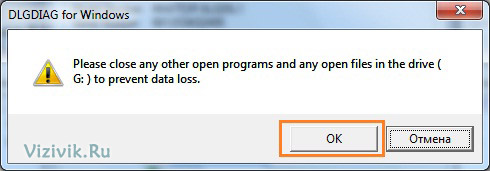
8. Close all files that are open on the selected hard disk and click OK.
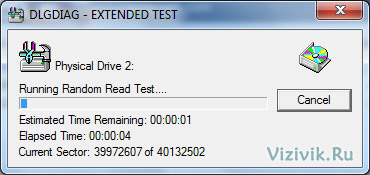
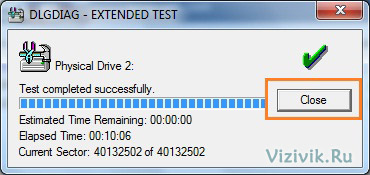
9. The procedure for testing on a 20 GB hard disk took about 10 minutes. At the end of testing, click on the Close button.
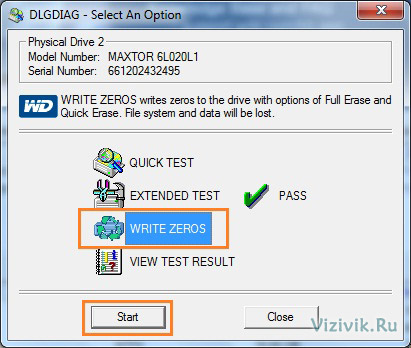
10. But that's not all. Now click on the button again to run tests and in the dialog box select the WRITE ZEROS option and click on the Start button. This procedure overwrites all sectors with zeros.
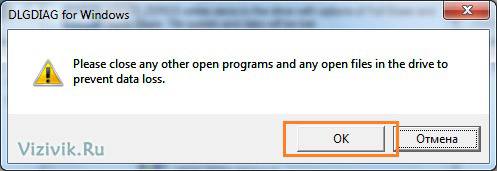
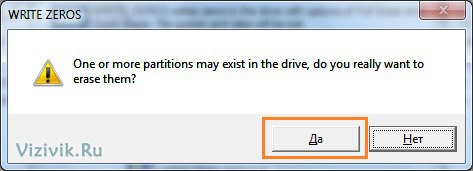
10. Depending on the state of the disk, you will receive one or two prompts reminding you that this action will destroy all data currently on the disk. Click Yes.
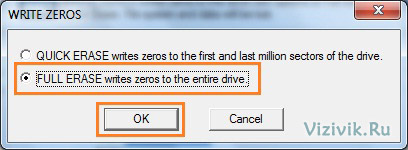
10. Then select which method you would like to use to write the zeros. The QUICK ERASE option is much faster, but does not completely overwrite the disk. This is suitable for users who plan to rewrite the disc many times. FULL ERASE completely wipes the disc. It takes longer, but ensures that no data on the disk can later be recovered using data recovery methods. This method is designed for people who need to permanently delete data from their disk, for example, hackers;).
Once you have determined which method you would like to use, select the OK button to start the formatting process. I recommend choosing FULL ERASE (Full erase).
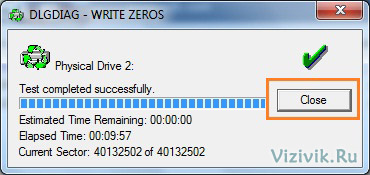
11. Begin the process of rewriting. For example, it took me about 10 minutes to rewrite a 20 GB hard drive.
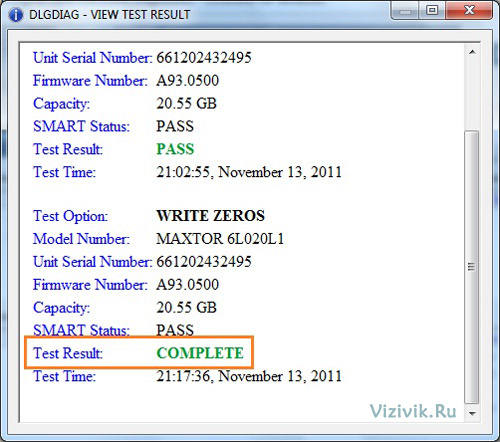
12. After the process is complete, click on the button to run tests again and in the dialog box select the VIEW TEST RESULT option and click on the Start button.
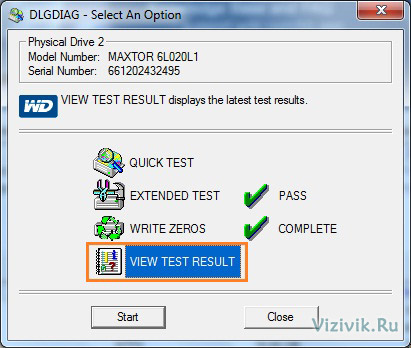
13. The window will contain information about the hard drive and the past tests. Honestly, the information in this report is very scarce.
14. If the process was successful, the hard disk formatted at a low level will not be available in the system. Now it needs to be initialized, create partitions and format at a high level.
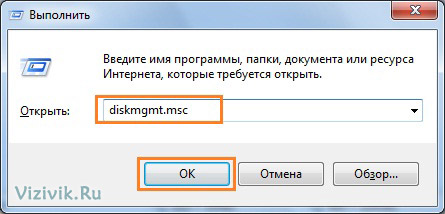
14. Open Start -\u003e All Programs-\u003e Accessories-\u003e Run and in the window enter the command diskmgmt.msc.
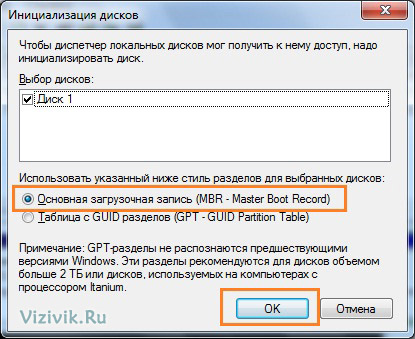
15. The "Disk Management" program starts and the Initialize disks window automatically appears, where the desired disk will be selected. Specify the Master Boot Record option and click the Ok button.
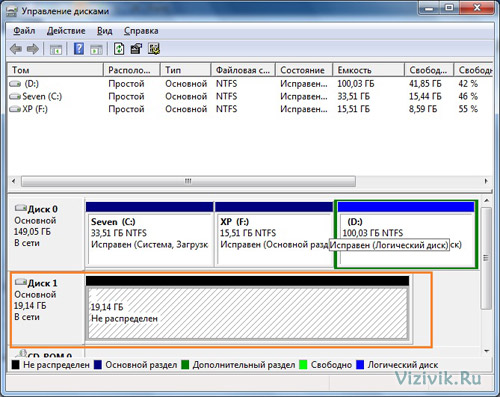
This completes the process of formatting at a low level.
A similar process can be used with respect to hard disks other manufacturers. For example, digging Seagate for its carriers offers a very convenient tool for diagnosis.
In conclusion, I will give an example of how the Data Lifeguard Diagnostics bad disk. As an example, Fujitsu hard disk was taken. The program determined that the media is not working, as evidenced by SMART STATUS.
The program with the help of EXTENDED TEST showed that the disk found bad sectors.
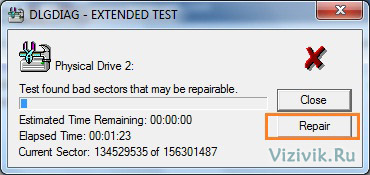
The program tried to fix them, but nothing happened.
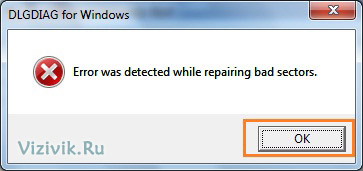
There can be two reasons for this: first, the hard drive and the diagnostic program are from different manufacturers, so some commands may not be processed correctly, and secondly, this disk can not be restored, since it started to "pour", i.e. On the surface of its disks there were physical injuries; before that he was already on my test table.
In the process of using computer technology, sooner or later each user faces the need to format the hard disk. This is due to the fact that any technical device in the event of its long operation inevitably wears out, which leads to a violation of functionality. And hard drives from this point of view are no exception. On the hard drive, information is repeatedly recorded and erased, which eventually leads to a disk error, including the known "fatal error". This signal indicates that it is time for the user to be interested in how to restore his normal functioning.
Many experts recommend that before starting the process of reformatting a hard disk, resorting to alternative methods, such as defragmenting a hard drive or using free cleaning programs that can be downloaded free of charge on the Internet. However, if the measures taken did not bring the desired result, and the user again receives information about the availability fatal errors, the hard disk will need to be formatted.
The process of formatting itself does not represent a great deal of complexity, but in the process of its implementation it is necessary to observe some caution. This is caused by the fact that when the disk is formatted, all the data stored on it is erased. Thus, you can permanently remove the operating system, software applications, and most importantly photos other valuable personal files. Below we will consider the most effective ways, how to format a hard disk completely.
Formatting the hard disk in the process windows installations is the most effective, but not always available, method, since users rarely have the opportunity and desire to reinstall the operating system. But if you have the opportunity, we will proceed.
In this article, we will not consider the entire process of installing Windows OS, you will be able to find information on this issue yourself, so let's move straight to formatting. This operation can be performed during the selection of the location for installing the OS. Depending on the version of the system, this window looks different, for example, in Windows 7 and Windows 8 it looks like this:
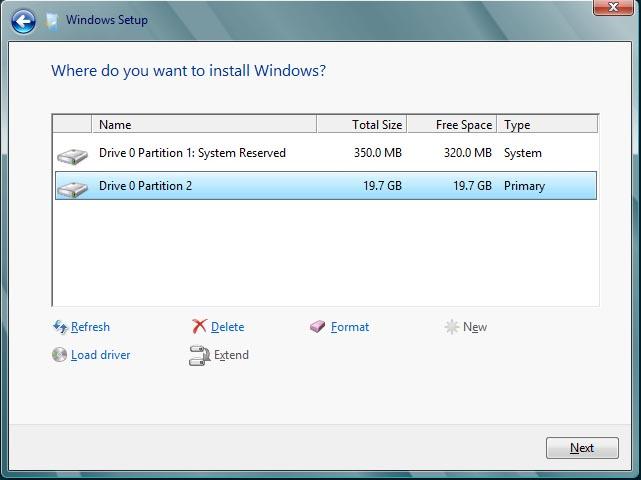
Select the desired partition of the hard disk, then click " Formatting"And click" OK". Remember that this operation will remove all your files!
Also in this window you can perform the division of the hard disk. To do this, you need to delete the partitions, and then create new volumes and specify the desired size.
You can use Windows tools to format a single partition. Thus, the sites on which the operating system. This method similar to formatting the flash drive. Before how to format a hard disk completely, in the "My Computer" section we select the hard disk partition that needs to be formatted, for this we right click on it and click " Format».
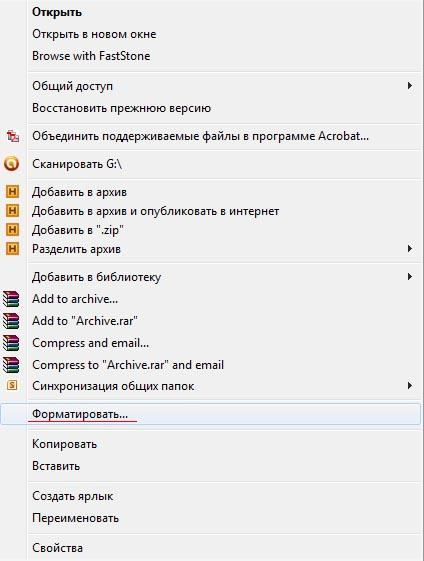
After that the following window will open:
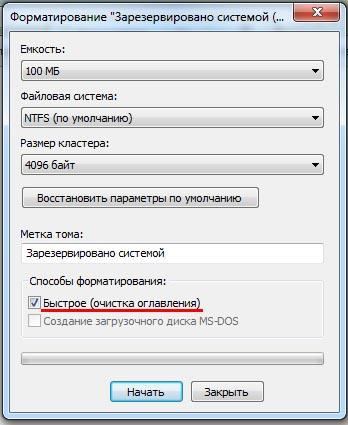
For better performance of this operation, you need to remove the checkbox "Quick (clear the table of contents)", then click on the "Start" and " Ok". The process of formatting in this mode can take quite a long time, so you need to be patient and wait for the process to finish.
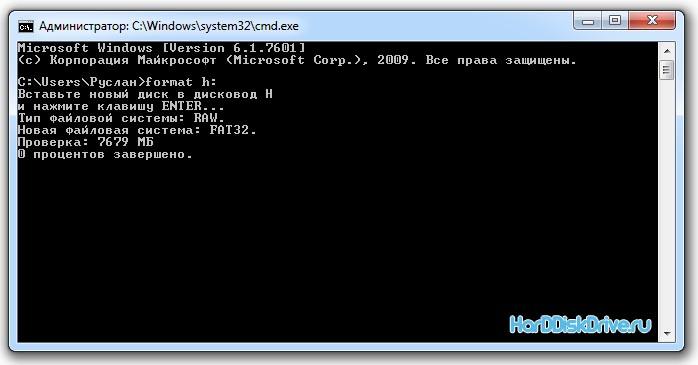
To format a hard disk with command line, you need to open the start and in the field "Find programs and files" type " cmd". In the proposed list choose the same name and click the left mouse button.
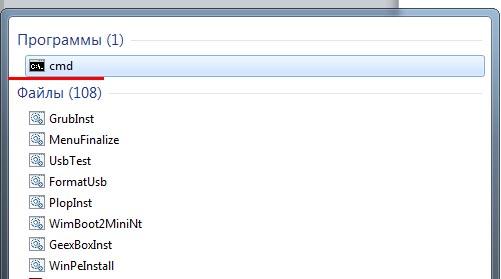
Thus, we open the command line:
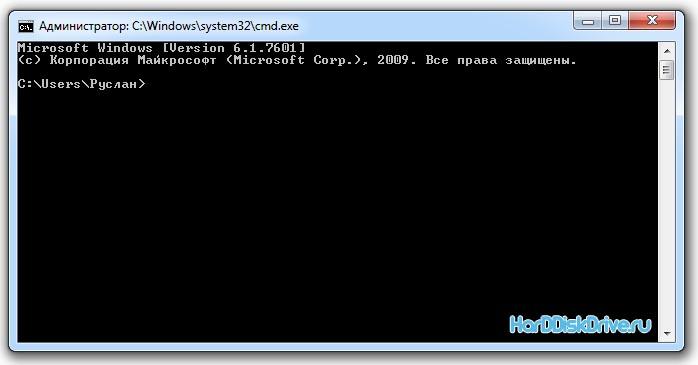
Register the following command:
Format x:
Where x is the letter of the section you want to format. Then 2 times we press "Enter" and wait for the end of the formatting process.
Programs for formatting hard disk
Format the hard drive quickly and efficiently also by using special utilities. For this you need to download free program To format a hard disk called Paragon Partition Manager.
This program is a professional solution for management hard drive, which can be used absolutely free of charge for home use. Not so long ago we already talked about this program and examined in detail the process of installing it, so below is just a link to download, and you can read about the installation in the article.
We want to note that the formatting procedure with Paragon Partition Manager is a little longer than with the standard windows tools, but in replacement we get formatting of incredible quality! Also with the help of this program you can try to repair a defective flash drive.
Run the program and get the following window:
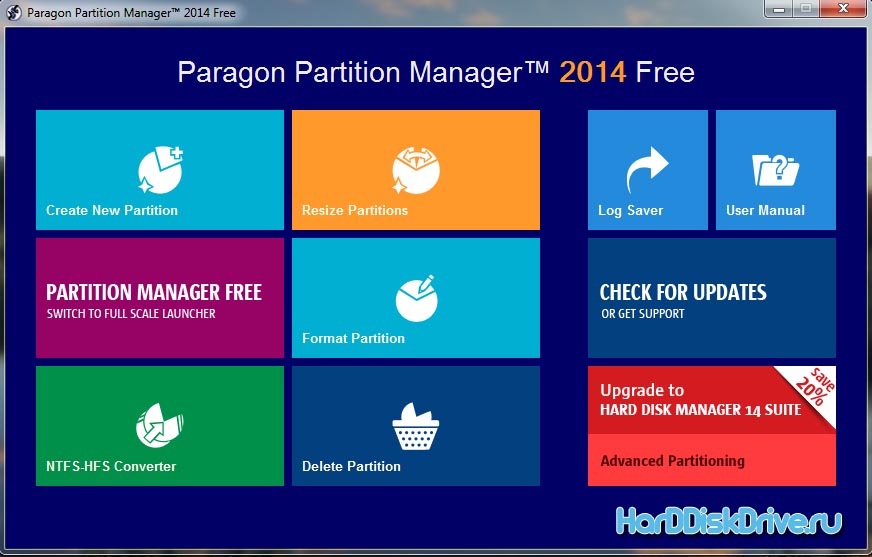
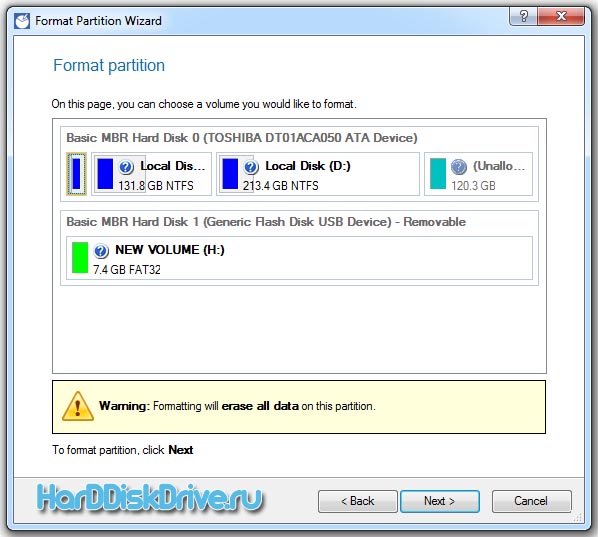
Choose " Format Partition". Then this window will open:

Click " Next».
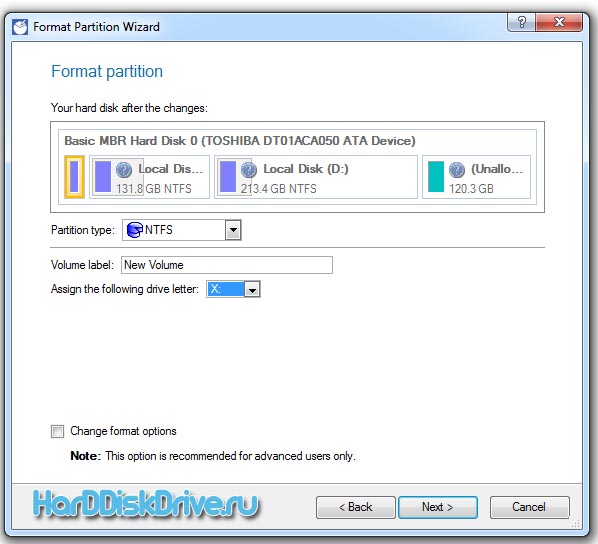
Here we can choose file system section, its name and letter.
Partition type - type of file system
Volume label - the name of the hard disk partition
Assign the following drive letter - the letter of the section
Having established the necessary parameters, click on the button « Next».
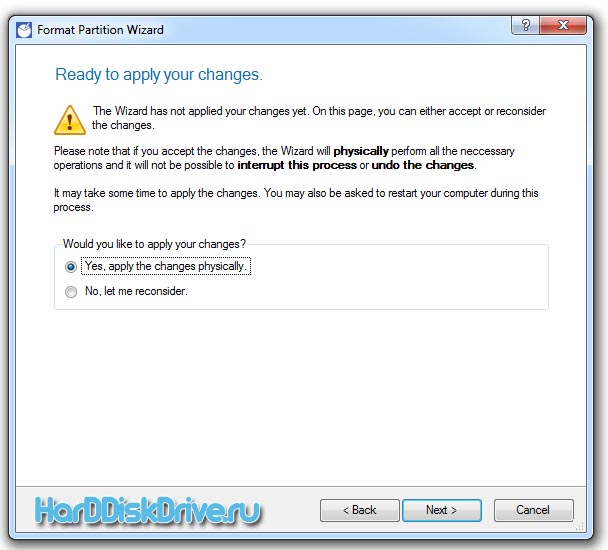
Here we choose " Yes, apply the changes physically"And click" Next».
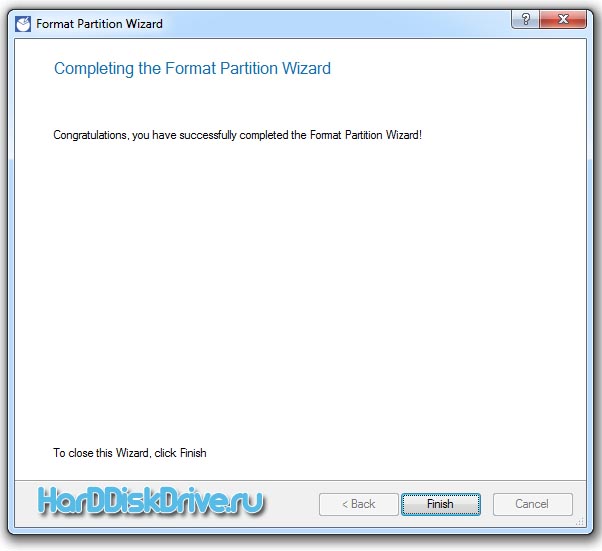
Click " Finish". Formatting is complete!
In this article, we described in detail how, how to format a hard disk completely. We considered 3 options for formatting:
- When you install Windows
- Using the built-in tools in Windows
- Using the utility to format the hard disk.