Greetings dear reader, in this article I will show you how to create a form feedback in the popup on your WordPress site. Often, when developing your own website or blog, it is necessary to establish the possibility of operational communication with visitors to the Internet resource. In this case, the pop-up feedback form for wordpress will come in handy, which will help to establish quick contact with users.
What is the wordpress popup feedback form for?
Reasons to use
Consider why such a form is needed
- Saving free space on the site. A contact form can be placed anywhere: in the footer or header, in the main page content, as a floating button, etc.
- Effective appearance. The animation of the appearance of a new window looks interesting and unusual
- Availability. You can leave notes in this form from anywhere on the site, users do not need to return to the home page.
An added bonus: the form is easy to modify and customize to suit the needs of your site. A pop-up feedback form for wordpress can be presented as an opening window for ordering a call, service or product, or subscribing. Optionally, you can add visual effects, various images, etc.
Popup form plugins
Let's take a look at the tools you need to design pop-ups in wordpress, a custom application for designing and building websites.
Contact Form 7
This plugin is used directly for constructing the form. To install it, follow these steps:

Easy FancyBox
This plugin is suitable for developing a pop-up window effect. The installation sequence for Easy FancyBox is the same as for the previous plugin.

Configuring plugins
You can configure the parameters of the Easy FancyBox add-on via media files. Use the options in the "Settings" -> "Media" menu.

In the block that opens just below standard settings the parameters of the plugin itself will be located. There is usually a checkmark next to the item "Images", which indicates the activation of the pop-up window when you click on the image. It is advisable to remove it, since in the presence of others additional tools creating a pop-up animation will double-open the images.

But that is not all. Check the box next to "Inline content"


Anyone can additionally delve into the plugin settings and set them at their discretion.
Tip: if you want the form to always be open, then uncheck the box next to the option "Close FancyBox when overlay is clicked" in the Easy FancyBox settings, which performs the function of closing the window when the mouse is clicked outside of it.
Step-by-step instruction
Well, we're done with the "boring" preliminary preparation, now let's move on to the most "tasty" part - how, in fact, the pop-up form of the feedback is being developed wordpress links.
Form window handling
Where do we start? Of course, with the preliminary configuration of the form itself. Select the "Contact Form 7" item in the right menu, and then the "Add new" option.

Think of a new name for the form, for example, "Experiment", type it into the input field of the window that opens, where the text "Title" is located, and click the "Save" button. You can change other parameters, including the form template itself, but we will not touch it. Our main goal right now is just to learn how to create pop-up forms.

Take a look at the result. As you can see, the plugin generated a special shortcode that is used for the subsequent display of the form. You need to copy it.

Form deduction
Now let's get down to programming. New program code can be inserted anywhere on the site, for example, in "Contacts", and others. In our example, the new form will be displayed in the widget. Select "Appearance" in the menu in sequence, then click on "Widgets", then in the window that opens, click on the "Text" option.

Now click on the "Add Widget" button

Paste the following program code into the "Content" text box:

This is how the result will look like:


Keep in mind that instead of the shortcode specified in the example, you will need to specify the one that was formed as a result of creating a new form.
Additionally, the form can be edited: add or remove input fields, enter starting and / or ending text before and after the form, convert the text into a heading or display it in a separate block, use different styles, placeholders, etc. There would be time and desire!
Styling a link
Let's also look at two ways to convert a link to a button to improve its visual display.
Method 1 - using additional theme styles.
The code below can be inserted as follows:

The program code itself looks like this:
| 1 2 3 4 5 6 7 8 9 10 11 12 13 14 15 16 17 18 19 20 21 22 23 24 | / *** Displaying a link as a button **** / .contact-us a (margin: auto; / * aligning the block in the center * / display: block; width: 199px; / * button size * / padding: 11px 22px ; / * padding * / border: 1px solid black; / * border tint * / background: # 3399ff; / * background pattern * / text-decoration: none; / * converting the caption to unlined * / text-align: center; / * centering the caption * / color: #ffffff; / * shade of the caption * / -moz-transition: all 0.6s ease; -webkit-transition: all 0.6s ease; transition: all 0.6s ease;) / ** Change color hover links ** / .contact-us a: hover (-moz-box-shadow: 0 0 7px # 111; -webkit-box-shadow: 0 0 7px # 111; box-shadow: 0 0 7px # 111 ; -moz-transition: all 0.6s ease; -webkit-transition: all 0.6s ease; transition: all 0.6s ease;) |
/ *** Displaying a link as a button **** / .contact-us a (margin: auto; / * aligning the block in the center * / display: block; width: 199px; / * button size * / padding: 11px 22px ; / * padding * / border: 1px solid black; / * border tint * / background: # 3399ff; / * background pattern * / text-decoration: none; / * converting the caption to unlined * / text-align: center; / * centering the caption * / color: #ffffff; / * shade of the caption * / -moz-transition: all 0.6s ease; -webkit-transition: all 0.6s ease; transition: all 0.6s ease;) / ** Change color hover links ** / .contact-us a: hover (-moz-box-shadow: 0 0 7px # 111; -webkit-box-shadow: 0 0 7px # 111; box-shadow: 0 0 7px # 111 ; -moz-transition: all 0.6s ease; -webkit-transition: all 0.6s ease; transition: all 0.6s ease;)
The result is a button like this:

The code already says which parameter is responsible for what. Now everyone can edit the code as they see fit, experimenting with different styles and colors and creating the most appropriate popup link.
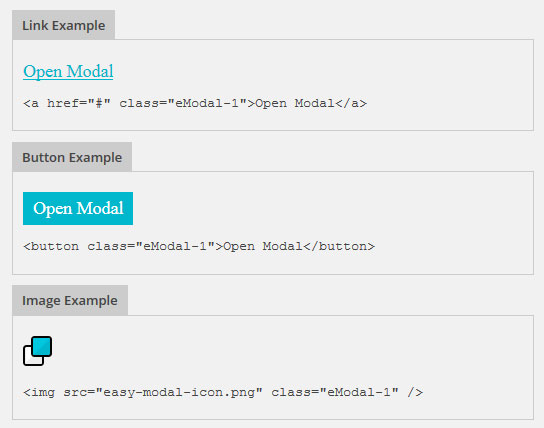
Method 2 - using an image in the form of a button. First, upload the necessary image to the site (any to your liking, not necessarily in the form of a button - it doesn't really matter). To do this, click on "Media" -> "Add new" and select the desired picture. A permanent link to the file will appear to the right of the image (in this example http://www.sait.ru/wp-content/uploads/2017/04/depositphotos_2169498-E-mail-internet-icon.jpg), copy it and add it to the code (do not remove quotes):
Add the resulting code to the main output code of the form instead of the text "Write a letter".
| 1 | |
![]()
The button shown in the screenshot below is displayed on my site:

And this is how the button will look if you leave the additional style described in the first method:

Adding to the menu
In order for the pop-up feedback form for wordpress to be called directly from the menu, you must use the following code
| 1 2 3 | Write a letter |
First you need to figure out exactly where you need to insert this code. Go to the "Editor" through the "Appearance" and among the templates select "Header (header.php)"

Now find the place where the menu code is located. Find the following information:
| 1 2 |


