Greetings to all!
If earlier, to draw a picture, you needed a brush, easel, paints, etc. things, but now you can create without leaving your computer! Moreover, I want to note that the pictures created in some editor on a computer also cause great delight (as if it were a picture on canvas)!
I will add that many mistakenly believe that it is easier to draw a picture on a computer than on a canvas. Moving the cursor (or even drawing with a graphics tablet) is no easier or faster!
Actually, this article is about tools - to draw a picture, you need special programs for drawing (note: graphic editors). Here they will be discussed below. (by the way, I will add that I chose free programs with support for all popular Windows: 7, 8, 10 (32|64 bits)) . So...
By the way!I have another article on my blog about drawing. There is a special sites that allow you to create paintings online, meet other artists, find common ideas. See this article for more on this:
List of the best programs. Let's start drawing?
Before moving on to programs, I would like to dwell on one important issue - the type computer graphics. In general, there are two main types - vector and raster charts.
Raster drawing It is a canvas on which there are many multi-colored dots (pixels). Together, all these points look to the human eye, like some kind of picture (or photo).
Vector drawing consists of entities: line, segment, square, ellipse, etc., which are all interconnected. All these entities also form the most diverse pictures.
The main advantage of a vector drawing over a raster one is the ability to transform it in any way (for example, increase it) without losing quality. The computer, in fact, only needs to recalculate your picture according to the mat. formulas.
Raster graphics are convenient for creating high-quality photos and digital drawings. The most popular bitmap formats JPEG images and PNG. It is raster graphics that are most popular in our time (and that is why, in my article, the main focus is on programs for working with it).
Vector editors in the article: Gravit, DrawPlus, Inkscape.
Raster editors in the article: Paint, Gimp, ArtWeaver and more...
Paint
Raster editor
Basic program in Windows
How to run: find it in the START menu, or press the Win + R buttons, enter the mspaint command in the open line and press Enter.

A very simple graphics editor designed not even for drawing, but for easy editing of pictures (add an inscription, an arrow, wipe something, cut one piece of the picture and paste it into another, save the screenshot, etc.).
Professionally, of course, you can hardly draw anything in Paint, but if we are talking about some very simple drawings, then the program can be used. At least if you are only at the very beginning of the journey, then why not try? ☺
gimp
Raster editor (partly vector)

The GNU Image Manipulation Program (or GIMP for short) is a very powerful free and multi-purpose image editor. This editor is very versatile: it can be used for drawing, or as a program for retouching digital photos, as a program for processing a package of pictures and publishing them (+ converting one format to another).
In addition, there are very interesting opportunities for creating step-by-step commands (scripts) that will automate routine tasks(moreover, scripts can be really complex)!
Main advantages:
- drawing pictures and posters;
- support for graphics tablets (Wacom, Genius, etc.);
- draw web designs for websites, edit ready-made layouts from Photoshop;
- you can refresh your old photos, make them more juicy and bright;
- or poster;
- remove from photos extra elements(a bad shot can become a good one!);
- a huge collection of plug-ins for GIMP will allow you to solve a variety of different tasks;
- program support Windows, Mac, Linux.
ArtWeaver
Raster editor (some analogue of Photoshop)

This program repeats many of the tools of such a popular editor as Adobe Photoshop. To edit ready-made pictures and draw new ones, there are a bunch of ready-made brushes of all types and sizes, different modes, imitation pencil, ink pen, oil brush, etc.
Main advantages:
- support for all popular graphic formats: GIF, JPEG, PCX, TGA, TIFF, PNG (including PSD and AWD);
- a huge number of tools for editing pictures: gradients, selections, fillings, etc.;
- plugin support;
- the presence of convenient tools for drawing: brushes, pencils, etc .;
- support for a graphics tablet (a BIG plus for those who like to draw);
- many different filters: spot, blur, mosaic, masking, etc.;
- working with text layers;
- the possibility of consecutive undoing of their actions.
- support for all popular versions of Windows.
MyPaint
Raster editor

MyPaint - painted portrait of a girl
A popular raster graphics editor designed more for digital artists (those who like to draw). Represents an unlimited canvas (sheet) and a relatively simple interface on GTK +, without distracting the artist from the creative process - drawing.
Unlike the same Gimp, MyPaint has much less graph functionality. editor, but to your attention a huge dimensionless canvas; big number brushes, for a variety of tasks and for different functions (there are a lot of brushes, see the screen above).
MyPaint is a tool for painting with brushes on a PC screen in much the same way as you would on a real canvas. In addition to brushes, there are: crayons, charcoal, pencils, etc. It is difficult to resist if there is a craving for drawing ...
Main features:
- the program is specifically designed for drawing, so it has fewer options for editing existing pictures (that is, there are no functions such as selection, scaling, etc.);
- a huge set of brushes that can be customized: create and change groups, blur, mix colors, etc.;
- the program supports graphics tablet;
- the boundless canvas is very convenient in the process of drawing - nothing holds you back while creating;
- layer support: copy, paste, transparency settings, etc.;
- supported by Windows, Mac OS, Linux.
SmoothDraw
Raster

A free program for painting and those who like to draw by hand on a computer. The interface of the program is very simple, designed so that anyone who has just started as an artist can immediately start creating, without wasting time studying.
I want to immediately note that the program has a lot of brushes (pen, brush, airbrush, pencil, etc.), there are tools for retouching, working with layers, you can change the brightness, contrast, colors of pictures, add some effects .
Program features:
- many types of brushes for drawing: pencil, chalk, pen, airbrush, brush, spray, etc.;
- works with tablet PCs, supports graphic tablets;
- works with the following image formats: PNG, BMP, JPEG, JPG, TGA, JIF, GIF and TIFF;
- there are photo retouching tools;
- work with layers;
- the possibility of color correction;
- compatible with Windows 7, 8, 10.
Note! For SmoothDraw to work, you must have in Windows NET Framework not lower than version v2.0.
Paint.NET
Raster
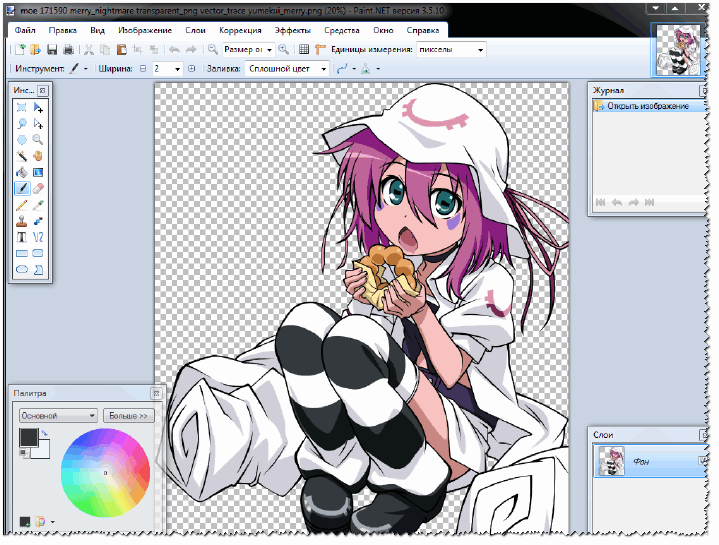
Paint.NET- free editor pictures and photos for Windows. The main difference from other programs is that it uses an intuitive and innovative interface with support for layers, a dimensionless canvas, special effects, useful and powerful editing tools (analogues of which are only in paid products).
Active and growing online support will help in case of non-standard problems. In addition, a lot of instructions have been written for the program, add. plugins to expand the possibilities.
Peculiarities:
- free for distribution and use;
- user-friendly interface (somewhat similar to Photoshop);
- you can work with multiple documents at the same time;
- support for working with layers;
- a large number of instructions;
- the program is optimized to work with 2 and 4 core modern processors;
- supported by all popular Windows: XP, 7, 8, 10.
livebrush
Raster

livebrush(translated from English "live brush") - a powerful graphics editor that allows you to draw with brushes. Moreover, I want to note right away that the “drawing tool” is not simple, with its help you can create quite interesting pictures, decorate art with beautiful strokes and lines, etc.
In the process of work, you can pick up and adjust the brush so that while it is moving, the line under the brush will change its thickness, color, transparency, tip rotation, depending on your mouse movement speed, pressing speed, etc.
By the way, those who have a graphics tablet will be able to fully experience the benefits of Livebrush, because it also understands the force of pressing and its inclinations.
The set of the program has a lot of brushes of different shapes: from simple lines to patterned gothic ornaments. By the way, any pattern can be corrected by yourself by switching to pencil editing.
In addition, you can draw a pattern yourself and save it as a template. You can import ready-made brush sets, projects, decorations into the program. By the way, they can be found in huge numbers on the official forum of the program.
In general, my verdict is that the program is very convenient, interesting, and deserves the attention of all drawing lovers!
Inkscape (Inkscape)
Vector editor (one of the few)
Free analogues: Gravit, DrawPlus
Paid analogues: CorelDRAW and Adobe Illustrator

Inkscape - Free vector editor, one of the few that can partially replace such monsters as Corel Draw and Adobe Illustrator. The application has a fairly standard interface: a color palette, menus, tools. The program supports all major graphic formats: SVG, PDF, AI, PS, EPS, CorelDRAW.
By the way, Inkscape has tools from bitmap editor- for example, it supports different types of blending. In addition to drawing some geometric shapes, the program supports extensive work with text: you can write text along curved lines. Looks very cool and unusual.
The application has a fairly large number of filters, extensions, etc. in its arsenal. All this is available at the office. program website.
Gravity
Vector editor (online version)

Gravity- quite an interesting vector editor. Of course, he will not be able to replace Adobe Illustrator, but he will be able to argue with the previous program (Inkscape).
Of the tools, there is all the most basic: feathers, lines, intersection and carving of shapes from each other, alignment, layers, fonts, etc. Works can be exported to SVG format, to several bitmaps. Also in the program you can open the work made in Adobe Illustrator.
What is somewhat surprising is that Gravit looks like a real program while running in a browser window, and without using Flash. Of the main shortcomings, I would single out the lack of the Russian language.
By the way, Gravit has an interesting implementation of the canvas selection: you can choose both standard formats for sheets, business cards, postcards, as well as create covers for popular social networks, phone screens, and other gadgets.
In general, an interesting editor that deserves attention.
Draw Plus
Vector

A very flexible and powerful graphics editor that allows its users to create high-quality illustrations. This program will allow you to fully reveal your abilities in drawing.
DrawPlus has many tools that will allow you to easily and quickly create a variety of shapes, strokes, lines. Each of the elements can be combined with others and gradually everything in the complex will become a rather complex, but beautiful illustration.
By the way, DrawPlus has a 3D module - it will allow you to turn your creativity into real 3D design elements. You can apply a wide variety of effects when creating logos, isometric projections, flowcharts.
A huge number of formats can be imported into the program: PDF, AI, SVG, SVGZ, EPS, PS, SMF, etc. Own format for projects - DPP.
graffiti studio
Website: http://www.vandalsquad.com
Raster graphics

One of the most the best programs for drawing graffiti, looks as realistic as possible!
To start drawing: you need to select a piece of canvas (car, walls, bus), and, in fact, start creating (there are just heaps of ready-made options for selection!). The artist's arsenal includes a large palette of colors (more than 100 pieces), several types of caps (skinny, regular and fat), a marker. The distance to the surface is changed manually, it is possible to make streaks. In general, for fans of such graphics - the scope is huge!
Those who do not believe that real masterpieces can be created in the program, I recommend that you look at the official website and see best work- look will change a lot!
PixBuilder Studio
Raster editor

Powerful program for processing and editing graphic images and photos. In addition to editing, it is quite possible to draw and create (however, there are fewer tools for this than in previous similar programs).
PixBuilder Studio has quite interesting tools that allow you to finely work with color, brightness, contrast, and layers. In addition, there are built-in effects (for example, dithering (when processing digital signals is the mixing of pseudo-random noise with a specially selected spectrum into the primary signal) ), blur, sharpen, etc.
Peculiarities:
- support for popular raster formats: BMP, PNG, JPG, GIF, TIFF, etc.;
- there is an opportunity and tools for drawing (though very limited);
- great opportunities for editing finished photos and pictures;
- the ability to work with layers;
- professional work with color: balance adjustment, brightness, contrast, etc.;
- setting "hot" keys;
- Availability ready effects(you just need to apply them);
- preview (to evaluate the result);
- support for popular Windows OS: 7, 8, 10.
Krita
Raster editor

An excellent and convenient raster graphics editor for artists (by the way, at the time of writing this review, the program is free even for commercial use). Krita works on both Windows and Linux.
As for the most important thing: there is a good brush motion stabilizer, layers, masks, dynamic brushes, animation, a large number of blending modes, paper and pastel imitation, an "infinite" canvas, etc.
By the way, there is even portable version a program that can be run from a regular USB flash drive on any PC. The program has also been translated into Russian.
PS: the article will be supplemented ...
Thanks in advance for tips and advice in the comments!
Probably, anyone who has ever entered the simplest graphic editors, for example, the built-in Paint, tried to draw the simplest ideas with the mouse. Most likely, he either abandoned the work, or an unsuccessful image was obtained. And it's not at all that a person draws badly. And the fact that the computer mouse they are trying to draw with is not quite adapted for creating illustrations. The mouse is not able to accurately convey those hand movements that are transmitted to paper through a pen or other instrument. Then the question is brewing: "How to learn to draw on a computer with a mouse?". You can learn, but you need to find your own approach to such a computer device.
Graphic tablet and computer mouse
Nowadays, a graphics tablet is not nonsense at all. He appeared in hardware stores a long time ago and managed to fall in love with many artists, designers, architects and lovers of just painting. But, however, many are not ready to pay money for a device that they may stop using in the future due to loss of interest or inspiration. To test their abilities, novice artists think about how to draw with a mouse on a computer. Sometimes there are cases when a person masters the art of drawing with a mouse so well that he no longer wants to switch to a graphics tablet.
Programs that are best for drawing
In fact, any editor is quite suitable, even the same Paint. To draw on a computer with a mouse, like some professionals who are great with it, you need to decide in what format you will work. Either it will be raster graphics, or Vector graphics. For the first case, Adobe Photoshop is suitable, and for the second, you can use programs such as Corel Draw and Adobe Illustrator. The main difference is the graphics itself and the format in which the programs will function, and the tools are the same everywhere.
How to learn to draw with a mouse on a computer?
The main tool for the user will be the "Brush" with all its settings and subtleties. In addition to this tool, you will need the "Eraser", "Fill" and "Increase / Reduce" modes. In order to learn how to draw with a mouse on a computer, you need to have patience and desire, since this process is quite laborious.

The main problem will be the rotation of the lines when drawing. For example, if you want to make a smooth rounding, then you may end up with an angular bevel. This can be corrected by a strong increase in the area in order to draw each pixel better and more accurately. Therefore, it is worth working on an enlarged scale so that the lines appear smooth and accurate.
Try to use the "Line" and "Curve" tools to make the drawing more precise. If you need to draw a long line, then on an enlarged scale, make separate strokes instead of a continuous command with the mouse.
Small subtleties and nuances
It is worth paying attention to working with layers. This is very convenient when drawing with the mouse, as the user will not be able to go beyond the edges of the layer when painting. If you wish, you can delete unnecessary layers and avoid unnecessary work with the eraser.

If it is difficult for a beginner to learn how to draw on a computer with a mouse, like some artists, then you can draw an image on paper, then take a picture / scan and upload it to a graphics editor, and then draw over the drawn image. In the same way, you can load any picture into the program and draw based on it.
There are some accessories for computer mouse which can make your drawing process easier. They can be ordered from online stores. Watch video courses with topics similar to this one: "Learn to draw with a mouse on a computer." Thanks to them, you can quickly learn how to work with the mouse and, in general, improve your creative data.
Drawing on a computer is a very exciting and interesting activity. In order to immerse yourself in the process as much as possible and not be distracted by various trifles, it is best to use a graphics tablet. If there is no such gadget, but you want to draw, then you can get by with a mouse. This tool has its own characteristics that interfere with the quality of your work. We will talk about how to use the mouse for drawing in this article.
As we have said, the mouse has some features. For example, with its help it is almost impossible to draw a smooth line if it is not an arbitrary stroke, but a contour drawing. This is what makes our job difficult. There is only one thing left: to use some tools graphic programs. We will consider different options using the example of the most popular drawing software. However, most of the techniques can be transferred to other programs.
Actually, we will be engaged in a little deception, since in its pure form “drawing” it can only be called with some stretch.
Shapes and selections
These tools will help you draw the correct geometric shapes, such as the character's eyes, various spots and highlights. There is one trick that allows you to deform the created ellipse without resorting to transform tools. You can read about the figures in the article below.

The selection tools also help to create correct geometric objects.

lines
Using Photoshop, you can create lines of any configuration, both straight and curved. In this case, we will use the mouse quite a bit.
Outline stroke
Since we cannot draw a smooth contour line manually, we can use the tool "Feather" to create a foundation.
By using "Pera" we can already simulate real brush pressure, which on the canvas will look like a stroke made on a tablet.
- First, let's set up the brush. Select this tool and press the key F5.

- Here we check the box next to the property "Form Dynamics" and click on this item, opening the settings in the right block. Under parameter "Size Fluctuation" select from the dropdown list "Pen pressure".

- Click on an item "Brushprint Shape" in the header of the list. Here we set the required size.

- Now we take "Feather" and create an outline. Click PKM and select the item indicated in the screenshot.

- In the dialog box that opens, check the box next to "Imitate pressure" and choose "Brush". Click OK.

- As you can see, the stroke is very similar to hand drawing.

Training
In order to increase your level of mouse control as a drawing tool, you can use ready-made outlines. They can be downloaded from the Internet by typing in search engine corresponding request. Another option is to draw the outline on paper, then scan it and upload it to Photoshop. Thus, by tracing the finished lines with the mouse, you can learn more even and precise movements.

Conclusion
As you can see, there are tricks to smooth out Negative influence mouse on the drawing process. It should be understood that this is only a temporary measure. If serious work is planned, then you still have to purchase a tablet.
In today's world, computers are increasingly penetrating our lives. Many areas are already simply unthinkable without the use of a PC: complex mathematical calculations, design, modeling, Internet communications, etc. Finally, it came to drawing!
Now not only artists, but also simple amateurs can easily try to draw some kind of “masterpiece” using special programs. That's about these special programs for drawing on a computer and I would like to talk in this article.
*I note that only free programs will be considered.
1. Paint is the default program…
It is with Paint that I would like to start a review of drawing programs, because. it is included in the OS Windows XP, 7, 8, Vista, etc., which means you don’t need to download anything to start drawing!
To open it, go to the menu " start/programs/standard", and then click on the "Paint" icon.
The program itself is extremely simple and even a complete novice who has recently turned on a PC can understand it.
Of the main functions: resizing images, cutting out a certain part of the image, the ability to draw with a pencil, brush, fill an area with a selected color, etc.
For those who are not professionally engaged in images, for those who sometimes need to correct something in pictures, the program's capabilities are more than enough. That is why I recommend starting your acquaintance with drawing on a PC with it!
2. Gimp is a powerful graph. editor
Gimp is a powerful graphics editor that can work with graphics tablets* (see below) and many other input devices.
Main functions:
Improve photos, make them brighter, enhance color reproduction;
Easily and quickly remove unnecessary elements from photos;
Cutting website layouts;
Drawing pictures with graphics tablets;
Own file storage format ".xcf", which is able to store texts, textures, layers, etc.;
Convenient ability to work with the clipboard - you can instantly insert a picture into the program and start editing it;
Gimp will allow you to archive images almost on the fly;
Ability to open ".psd" format files;
Creating your own plugins (if you have programming skills, of course).
3. MyPaint - artistic drawing
Website: http://mypaint.intilinux.com/?page_id=6
MyPaint is a graphics editor aimed at beginner artists. The program has a simple interface, coupled with unlimited canvas sizes. There is also an excellent set of brushes, thanks to which, using this program, you can draw pictures on your computer, just like on a canvas!
The program captivates with its simplicity, realism - the pictures come out from under the pen almost like the best hits on the walls of professionals.
In the program, you can choose canvases, for example, wagons, walls, buses, on which to work your creative miracles in the future.
The panel provides a choice of a huge number of colors - more than 100 pieces! It is possible to make smudges, change the distance to the surface, use markers, etc. In general, a whole arsenal of graffiti artist!
5. Artweaver - replacement for Adobe Photoshop
A free graphics editor that claims to be Adobe Photoshop itself. This program simulates drawing with oil, paint, pencil, chalk, brush, etc.
It is possible to work with layers, convert images to various formats, compress, etc. Judging by the screenshot below, you can't even tell it from Adobe Photoshop!
SmoothDraw is an excellent graphics editor with a lot of options for processing and creating images. Basically, the program is focused on creating pictures from scratch, from a white and clean canvas.
You will have a large number of design and artistic tools in your arsenal: brushes, pencils, pens, pens, etc.
The work with tablets is also not bad, coupled with the user-friendly interface of the program - it can be safely recommended to most users.
7. PixBuilder Studio - mini photoshop
This program on the network, many users have already dubbed mini photoshop. It has most of the popular features and functionality paid program Adobe Photoshop: brightness and contrast editor, there are tools for cutting, transforming images, you can create complex shapes and objects.
A good implementation of several types of image blur, sharpening effects, etc.
It's probably not worth talking about such features as changing the size of the picture, rotations, reversals, etc., probably. In general, PixBuilder Studio is great program for drawing and editing on the computer.
8. Inkscape - analogue of Corel Draw (vector graphics)
This is a free vector image editor, similar to Corel Draw. This vector drawing program - ie. directed segments. Unlike bitmaps, vector images can be easily resized without losing quality! Typically, such a program is used in printing.
It's worth mentioning Flash here - it also uses vector graphics, which can significantly reduce the size of the video!
By the way, it is worth adding that the program has support for the Russian language!
9. Livebrush - painting with a brush
Website: http://www.livebrush.com/GetLivebrush.aspx
Very simple program for drawing with good image editing capabilities. One of the main features of this editor is that you will draw here brush! There are no other tools!
On the one hand, this limits, but on the other hand, the program allows you to implement a lot of things that in no other - you will not do this!
A huge number of brushes, settings for them, strokes, etc. Moreover, you can create brushes yourself and download from the Internet.
By the way, the “brush” in livebrush means not “just a simple” line, but also models of complex geometric shapes ... In general, it is recommended for acquaintance with all fans of working with graphics.
10. Graphic tablets
A graphics tablet is a special device for drawing on a computer. Connects to computer via standard USB. With the help of a pen, you can drive on an electronic sheet, and on the computer screen you immediately see your picture online. Great!
Who needs a tablet for what?
The tablet can be useful not only for professional designers, but also for ordinary schoolchildren and children. With it, you can edit photos and images, draw graffiti in in social networks, easily and quickly submit manuscripts to graphic documents. In addition, when using a pen (tablet pen), the hand and wrist do not get tired during prolonged work, such as when using a mouse.
For professionals, this is the ability to edit photos: creating masks, retouching, editing and editing complex image contours (hair, eyes, etc.).
In general, you get used to the tablet very quickly, and if you often work with graphics, the device becomes simply indispensable! Recommended to all graphic lovers.
This concludes the review of the programs. Good luck and beautiful drawings!
Text: Viktor Bespaly
The computer has changed its role more than once during its evolution. If earlier it was bought in order to create, now it has turned into a multimedia entertainment center. On a computer, you can watch movies, listen to music, play games - and for most people this is enough. But not for those who want to create. Today we will talk about how you can draw on a computer - and at the same time draw beautifully.
A real designer is unthinkable without art education, he must be fluent in the technique of drawing (pencil, charcoal), graphics (watercolor, gouache, pencil, ink, etc.), painting (gouache, watercolor, tempera, acrylic, oil). But everyone can master computer graphics. A computer in the hands of an ordinary person can turn into an obedient tool for the embodiment of his artistic thought - the very one that he cannot translate on paper.
The first thing to remember is that there are two types of graphic files: vector and raster. The set of tools and programs you need will depend on which graphics you prefer. In vector files, the picture is formed by a set of curves and shading functions. Each time you open this picture, the editor program draws the image from scratch. IN bitmap files the picture is a set of dots with a color parameter, and the picture is generic but takes up more space.
USEFUL IRON
One of the most important parameters of a computer is the amount of RAM.
Contrary to many claims, a very fast processor is not needed to draw on a computer. A real frequency of 1.5-2 GHz is quite enough, it will be Intel or AMD - it doesn't matter, it all depends on the means and preferences you have. The most important parameter of a graphics computer is volume. random access memory; the more it is, the better. Our working applications, such as Photoshop, Painter, OpenCanvas (or even 3DS MAX), are very fond of having a lot of RAM. And if you are going to create complex multi-layer compositions (and you are definitely going to?), then you can’t get away with standard 512 MB DDR. You can recommend to put at least 1 GB; the speed of RAM affects performance less noticeably.
An ultra-modern video card is not needed for drawing, the brand also does not really matter. However, there is an established opinion that best cards for drawing and graphics is released by Matrox.
Now the main thing: the periphery. And we'll start with the good old scanner- without it, the artist will have a very difficult time, but he is needed, first of all, to enter background blanks into the computer. For example, you have drawn a palm tree, and now you need to place it on an island by the sea. Take a similar illustration on paper, scan it, style it like a painting and place it as a layer under a palm tree. Compensate for the lack of a scanner digital camera, but in this application he will cope with the task for C grade. You can make sketches by hand on plain paper, and then correct them on the computer, having previously scanned them. A decent scanner will cost you 2 - 2.5 thousand rubles.
Step by step drawing for kids and adults
Drawing for children
Drawing a person in full growth is not so difficult if you do it in stages. main feature here is to respect the proportions of the human body. Now let's move on to the actual drawing steps.
Step 1. Draw the outline of the human body. To do this, draw a rectangle, where the aspect ratio is 3:4. Draw a straight line through the center of the figure. The length of the line is slightly more than twice the height of the rectangle. From above we draw an arc - these will be the shoulders of a person. From the bottom of the rectangle, we also draw an arc - this will be the outline of future clothes (t-shirts).
Step 2. We make the markup of the rest of the body. We take into account that we are drawing a person in full growth. First, draw an oval of the head and neck with a pencil. In small circles we mark the future shoulders and knees. You should not be zealous when drawing at this stage, since we will erase all auxiliary contours in subsequent stages.
Step 3. We continue to draw a person in steps. At this stage, we add the contours of the figure, but first we select the location of the elbows and feet with circles. Now draw sinuous lines along the torso with a pencil and smoothly bring them to the knees.
STEP 4 In this step we will draw the arms and legs. This process is not difficult, since you just need to draw lines between the corresponding circles. For simplicity, we depict the hands removed behind the back. The feet are turned in different sides, pay attention to it. Now make sure the person's body parts look proportionate and move on to the next step.
Step 5. Now we remove all unnecessary contours from the sketch. And the drawing of a person is already acquiring more correct features. Extra lines should be erased carefully, but there is nothing to worry about if any main outline is erased. It can be easily drawn with a pencil again.
To make the stage more complete, let's draw the neck of the T-shirt, sleeves and part of the trousers from below.
Step 6. Let's move on to the final drawing steps. Now we draw the face and clothes. We will tell you how to draw a person's face in another lesson, so we will not focus on this here.
For greater realism on the clothes, you should draw folds and add shadows.
Step 7. Add minor details to the drawing and you're done. As you can see, if you draw a person in stages, then even a child can do it. Of course, not everything will turn out perfectly the first time, but over time, the drawings will turn out better and better.
Graffiti drawings
In this article we will talk about how to draw graffiti
Nowadays, graffiti is very popular among young people, but not everyone can draw graffiti in a beautiful and stylish way. "Vkontakte" even has a special program, but we will try to learn how to draw graffiti on paper with a pencil, then coloring the resulting inscription with paints or colored felt-tip pens.
1. Choose a style for your word
Probably, almost every one of us has seen graffiti-style graffiti on the streets. Sometimes the city authorities even allocate special places for them. If not, then look on the Internet, there is a lot of such information and images. It is difficult to talk about all styles of graffiti in a short article. It can only be noted that the most popular and rather light style is graffiti with rounded letter shapes. This style is called Bubble. You can choose rounded or sharp edges of the letters, letters that are the same size or large letters and some of them are smaller, etc. It's easier to imitate a style than to invent it, but once you learn how to draw graffiti correctly, you can develop your own style.
2. Write down the word on paper
You can choose any word for graffiti. The main thing is to leave enough space between the letters, since you will expand them, and fill the space between them later. Make the space big enough to make room for the other layers, but not so big that there are big gaps.
3. Making a graffiti style from the letter structure
You need to draw graffiti with light pencil strokes, as you may have to correct some lines and make small mistakes. This activity will require a lot of time and patience so that all the letters turn out according to the chosen style. Remember that in graffiti you need to draw words in an original way, if possible without copying anyone, without this there is no way in graffiti. Don't be afraid to change letters beyond recognition.
4. Line thickness options
You can make all lines the same thickness, but you can make shading and 3D effects if the lines are thicker in different places. For example, the top and one side of the "C" letters can be very thick, while the bottom and other side are tapered. Use a pencil to vary the thickness if you're going to darken with ink or marker later, so you don't want the color to be pitch black. This way you can imagine how the thickness of the line will change the look of the letter.
5. Add effects as desired
How to Draw Graffiti - Effects Once you've finished drawing the letters, you can add more details to your graffiti. Perhaps one of the letters will depict lightning or a drop, experiment. The letter with peeping eyes in the letter "R" looks very impressive. You can place a bubble around the word, just like in the comics. The possibilities are only limited by your imagination and fantasy.
6. Copy the picture
If you have made any serious mistakes while coloring the graffiti, then you will not be able to continue drawing it correctly. Be sure to copy the drawing made in pencil before the final drawing or coloring. Use the scanner settings so that all shades and effects are reflected correctly on the copy paper.
7. Darkening Pencil Lines
How to Draw Graffiti Shadows Use a pencil or marker to darken lines drawn in pencil. These lines are more or less permanent, so be extremely careful. Don't be discouraged by small mistakes, you can fix them so they don't show up. Let's say if the line was too thick or you went outside the line, just fill it in to get extra volume.
8. Add Graffiti Color
How to Draw Graffiti Color To fill your words with color, you can look at other examples first, but don't fill in the letters with a pencil. The pencil makes only one-color drawing, despite the abundance of shadows and shades. And graffiti must be bright and catchy, which can only be achieved with paints. Almost no work in graffiti is done in one color. You can also fill in each letter different colors or make it just a slightly different color. You can only make additional parts of a different color. But do not draw graffiti too colorful. Bright colors will detract from the main graffiti effect and not focus on the word.

Draw Winx
Winx are popular cartoon characters. Their outfit is very bright and contrasting, and some of the heroes have very complex clothes. Numerous and complex details of clothing can complicate the drawing of Winx cartoon characters. But on the other hand, it is easier to draw a general distinguishing feature Winx - their figure. They have it "too" slender, like a fashion model, with excessively elongated legs. All this must be taken into account in order to draw the Winx correctly. To make the Winx drawing more impressive, it can be colored with colored pencils. In this lesson, let's learn how to draw Flora from Winx, step by step with a simple pencil.
1. How to draw the outlines of the Winx figure
How to draw Winx, step 1 First you need to highlight the main contours of the Winx figure using circles. And to make it easier for you to navigate where to place them, draw a barely noticeable grid of squares. Divide the entire sheet into twelve squares, you can use a ruler. Transfer all the contours of the first step to your Winx drawing and move on to the next drawing step.
2. Draw the general outline of Flora
How to draw Winx, step 2 In this step, draw the general outline of the Winx. This will be easy to do, since you have landmarks that you just need to circle. Next to the primary circles, draw lines outlining the thin and graceful figure of Flora, with a very slender waist. Draw the legs, slightly bent at the knees and high raised shoulders, outline the outline of the arms. All girls from the Winx group have shoes with high heels, so draw high shoes, but still without heels and soles.
3. Winx heroes should look like people
How to draw Winx, step 3 At this stage, first of all, delete the old contours and carefully erase the marking grid with an eraser. And now let's clarify the details of the drawing of Flora from the Winx. Although the Winx girls are fictitious and have distorted proportions, they still need to look like real people, so you need to pay a lot of attention to detail. Draw the arms in detail, make the head the correct and proportional shape, the shoulders and other parts of the body should be of real proportions. Only unnaturally long legs and wings distinguish the Winx from ordinary people.
How to draw Winx, step 4 Winx girls' clothes consist of numerous decorative elements - bows, wings, fasteners, ruffles. Which of them to draw Winx and how many, decide for yourself. Make a fastener line on the dress, mark the buttons and a ribbon bow with a rose, a long glove on your hand. Add a few more elements as you see fit. Next, you will need to draw the face of Flora. Add two elongated eye contours to the oval of the face on both sides, draw the contour of the lips and nose.
5. Draw the contours of Flora's hair
How to draw Winx, step 5 Flora's hair is long and almost to the floor, so it's easy to draw. Make the shape of loose hair at your discretion, the main thing is not to make the contour lines straight, but slightly wavy.
6. Let's continue to draw hair
How to draw Winx, step 6 Hair is one of the main decorations of Flora from Winx, so let's pay more attention to it. In this step, we will be adding lines to draw the girl's long and voluminous hair with numerous curls and curls. Make most of the lines wavy, and some twisted inwards.
7. The main difference between Winx and people is wings
How to draw Winx, step 7 At this stage, you need to draw Winx light, transparent wings. First we need to draw only their general outline. Next, gradually add internal contours dividing the wings into segments, and make veins in them, the same as those of a dragonfly or a bee. Winx wings are very similar to the wings of a bee, not very large and just as transparent with streaks inside.

what word is encrypted?
In today's world, computers are increasingly penetrating our lives. Many areas are already simply unthinkable without the use of a PC: complex mathematical calculations, design, modeling, Internet communications, etc. Finally, it came to drawing!
Now not only artists, but also simple amateurs can easily try to draw some kind of "masterpiece" using special programs. These special programs for drawing on a computer are what I would like to talk about in this article.
*I note that only free programs will be considered.
It is with Paint that I would like to start a review of drawing programs, because. it is included in the OS Windows XP, 7, 8, Vista, etc., which means you don’t need to download anything to start drawing!
To open it, go to the menu " start/programs/standard", and then click the "Paint" icon.

The program itself is extremely simple and even a complete novice who has recently turned on a PC can understand it.
Of the main functions: resizing images, cutting out a certain part of the image, the ability to draw with a pencil, brush, fill an area with a selected color, etc.
For those who are not professionally engaged in images, for those who sometimes need to correct something in pictures, the program's capabilities are more than enough. That is why I recommend starting your acquaintance with drawing on a PC with it!
2. Gimp is a powerful graph. editor
Gimp is a powerful graphics editor that can work with graphics tablets* (see below) and many other input devices.
![]()
Main functions:
Improve photos, make them brighter, enhance color reproduction;
Easily and quickly remove unnecessary elements from photos;
Cutting website layouts;
Drawing pictures with graphics tablets;
Own file format ".xcf", which is able to store texts, textures, layers, etc.;
Convenient ability to work with the clipboard - you can instantly insert a picture into the program and start editing it;
Gimp will allow you to archive images almost "on the fly";
Ability to open ".psd" format files;
Creating your own plugins (if you have programming skills, of course).
3. MyPaint - artistic drawing
Website: http://mypaint.intilinux.com/?page_id=6
MyPaint is a graphics editor aimed at beginner artists. The program has a simple interface, coupled with unlimited canvas sizes. There is also an excellent set of brushes, thanks to which, using this program, you can draw pictures on your computer, just like on a canvas!
 Main functions:
Opportunity quick commands using the assigned buttons;
A huge selection of brushes, their settings, the ability to create and import them;
Excellent support for the tablet, by the way, the program, in general, was developed for it;
Limitless canvas size - thus nothing limits your creativity;
Ability to work in Windows, Linux and Mac OS.
4. Graffiti Studio - for graffiti fans
This program will appeal to all graffiti lovers (in principle, you can guess the direction of the program from the name).

The program captivates with its simplicity, realism - the pictures come out from under the pen almost like the best hits on the walls of professionals.
In the program, you can choose canvases, for example, wagons, walls, buses, on which to work your creative miracles in the future.
The panel provides a choice of a huge number of colors - more than 100 pieces! It is possible to make smudges, change the distance to the surface, use markers, etc. In general, a whole arsenal of graffiti artist!
5. Artweaver - replacement for Adobe Photoshop
A free graphics editor that claims to be Adobe Photoshop itself. This program simulates drawing with oil, paint, pencil, chalk, brush, etc.
It is possible to work with layers, convert images to various formats, compress, etc. Judging by the screenshot below, you can't even tell it from Adobe Photoshop!

SmoothDraw is an excellent graphics editor with a lot of options for processing and creating images. Basically, the program is focused on creating pictures from scratch, from a white and clean canvas.
You will have a large number of design and artistic tools in your arsenal: brushes, pencils, pens, pens, etc.
The work with tablets is also not bad, coupled with the user-friendly interface of the program - it can be safely recommended to most users.

7. PixBuilder Studio - mini photoshop
This program on the network, many users have already dubbed mini photoshop. It has most of the popular features and capabilities of the paid Adobe Photoshop program: the brightness and contrast editor, there are tools for cutting out, transforming images, and you can create complex shapes and objects.
A good implementation of several types of image blur, sharpening effects, etc.
It's probably not worth talking about such features as changing the size of the picture, rotations, reversals, etc., probably. All in all, PixBuilder Studio is a great program for drawing and editing on a computer.

8. Inkscape - analogue of Corel Draw (vector graphics)
This is a free vector image editor, similar to Corel Draw. This vector drawing program - ie. directed segments. Unlike bitmaps, vector images can be easily resized without losing quality! Typically, such a program is used in printing.
It's worth mentioning Flash here - it also uses vector graphics, which can significantly reduce the size of the video!
By the way, it is worth adding that the program has support for the Russian language!

9. Livebrush - painting with a brush
Website: http://www.livebrush.com/GetLivebrush.aspx
You can delete everything drawn in another way. Click "Edit, Select All", then click "Del" key on the keyboard. Give it a try, then redo the drawing using the Edit, Undo method. Click "Edit, Select All" again, the cursor looks like a cross. Put a cross on the picture, click left button mouse and, without releasing, drag the entire picture to a free field. To remove the selection (dotted line around the picture), click on the free field outside the dotted line.
To delete one of the shapes, click on the "Selection" rectangle on the toolbar, place the cursor in the upper left corner above the shape and drag to the lower right corner, release. The figure is highlighted with a dotted line, press the "Del" key. cancel two recent actions: Delete and move the pattern. Save the document: "File, Save".
Now click the "View, View Picture" button. In order to restore the previous state, left-click on the picture field.

If you have artistic abilities and skills, you can draw a portrait of yourself, or an animal, or a flower, and then use it as an avatar, for example, in a real-time chat program. To create your own avatar (in the absence of a photo in the computer), you can draw some kind of geometric pattern or symbol.

Select your pattern with a rectangular selection, click "Edit, Copy to File", your "My Pictures" folder will open, give a name to the file, for example "avatar_1", click "Save".
The system will add a dot and the letters "bmp " to the name. You already know that these letters are called an extension and are used to tell the computer which program to open the given . The "bmp" extension corresponds to the Paint editor.
The file "avatar_1.bmp" is in the folder. To see how it turned out, click "File, Open", click on the avatar image, then "Open". How to insert an avatar read in lesson number 10.
If you want to draw a picture or draw a sketch of the layout of your garden plot, but in the process of working you are afraid of spoiling everything already drawn, I recommend that you save intermediate work options under different names from time to time, for example, "plan_1, plan_2, plan_3" etc. The final result of the site plan can be called "plan_done", and after review, when you are sure that the sketch is finished and correct, delete all intermediate options.
To delete an unnecessary intermediate file, enter the "My Documents, My Pictures" folder, select the file, click on it, then press the "Del" key.