You can create separate accounts and configure for all users of the computer. This separation of the working environment allows each user to store their data separately and customize the computer according to their own preferences.
To correctly load the target work environment, the operating system must identify the user sitting in front of the computer screen.
To uniquely identify yourself as the user who manages the computer, you need to log in by clicking on the corresponding account in the list at the bottom left of the screen. After the operating system has finished loading, you will see the Start menu and the desktop on the screen in the state they had in the previous session on the computer. After making sure that you are logged in with your credentials, you can start working on the computer.
Having worked out enough, you will sooner or later decide to take a break and move away from the computer. To prevent unauthorized users from accessing your computer during your absence, you need to log out.
When you later log on to the system with the same user name and password (How to create a password for the account), you will find all the working data in the places of their creation and the last editing. None of the other computer users will know what your work environment looks like - you are solely responsible for setting up and managing it. After logging in, all working documents and other files will be located in the folders to which you placed them earlier.
Another user is unlikely to be able to remove them if they log in to their account. Each user has not only their own folders for saving working documents, but also their own lists of favorites, system settings and much more. Of course, your mailbox remains unavailable to everyone except you, as well as you can not unauthorizedly view other people's letters.
How to create an account avatar
Until you specify that you use your own photo or other graphic image as your avatar, account In the lower left corner of the login window, you will see an "empty" silhouette. To add your own photo to the account, click its name at the top of the Start menu, and then click Change Account Settings.
In the account setup window, go to your account and click in the right pane on the Camera icon located under the Create avatar icon. To create a photo, the camera currently connected to the computer (built-in laptop or tablet) is used. Does your portrait depress you? Put yourself in order not to look like in a passport! Now click on the Browse button and specify the newly created snapshot, which by default is saved in the Images folder of your account.
In today's tutorial, let's look at how to create a new user on Windows 10 by all available in operating system methods. Also, let's look at ways to give it administrator privileges or to do the opposite - to turn an account into an account with limited rights.
Most likely, all windows users 10 are familiar with both types of accounts from which you can work in the "dozens" environment. The first are local user accounts, which are no different from the accounts previous editions operating system. The second are Microsoft accounts that require registration on the operating system developer's site. Having such an account, all parameters will be regularly synchronized with the soft-server stored on the server.
If you do not want Microsoft to keep all of your account information, or vice versa, you want to use the privileges of your Microsoft account, in Windows 10, you can convert one account type to another in any direction.
Unlike previous editions of the OS where accounts were created and edited through a special Control Panel applet, in the "top ten" its functionality actually replaces the menu section "Options", called "Accounts."
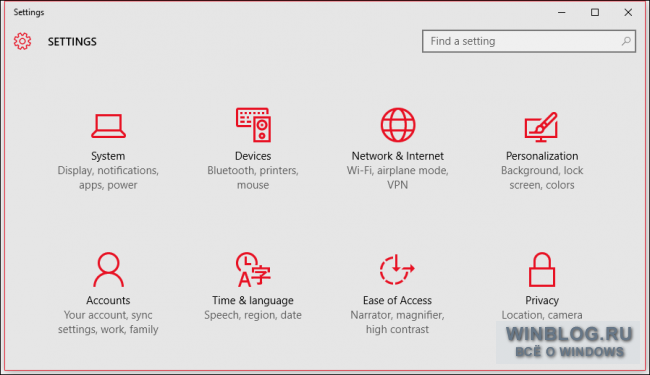
1. To access the "Settings" menu, use the combination of the hot keys "Win + I".
2. Go to the "Accounts" section.
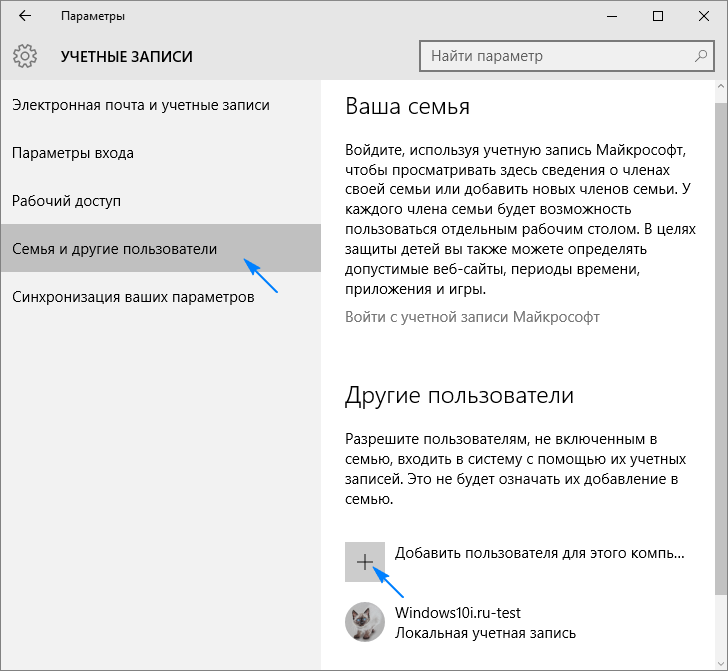
3. Activate the tab "Family and other users", located in the vertical menu.
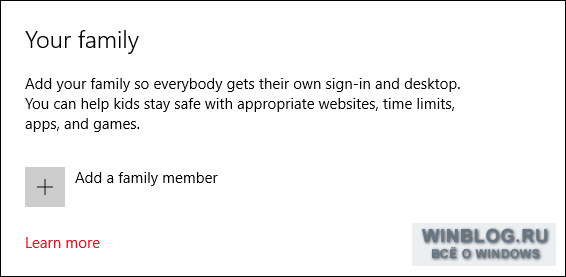
The first section "Your family" with a Microsoft account will allow you to create accounts with limited rights for other family members, for example, for children.
The following section provides the ability to create a local account with administrator privileges or common rights. We will consider this variant below.
4. We go down the right frame and click on the icon for adding a new user for this computer, located in the "Other users" section.
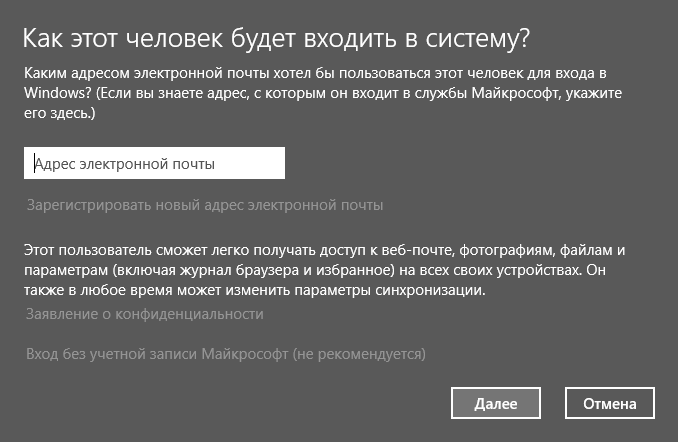
5. If you do not intend to create a Microsoft account (or you want to acquire a Microsoft account, but do not have one yet email for him), go to the link below "I do not have information to enter this user".
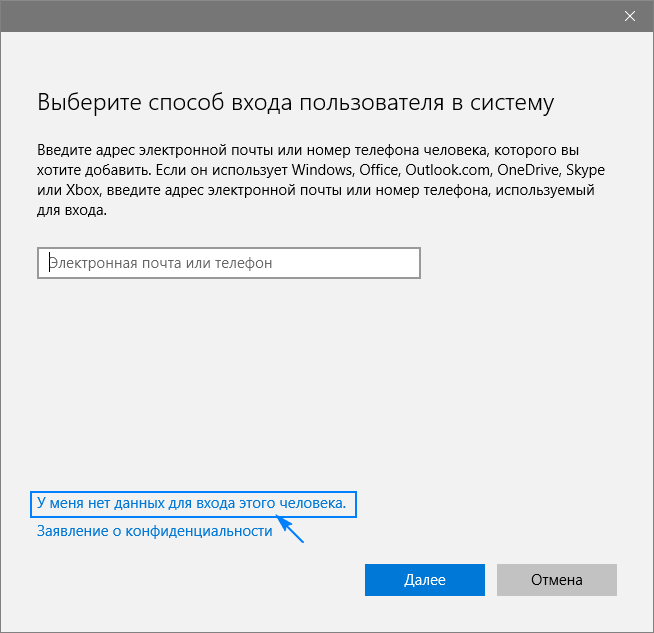
After that a new window opens with a suggestion to create a Microsoft account.
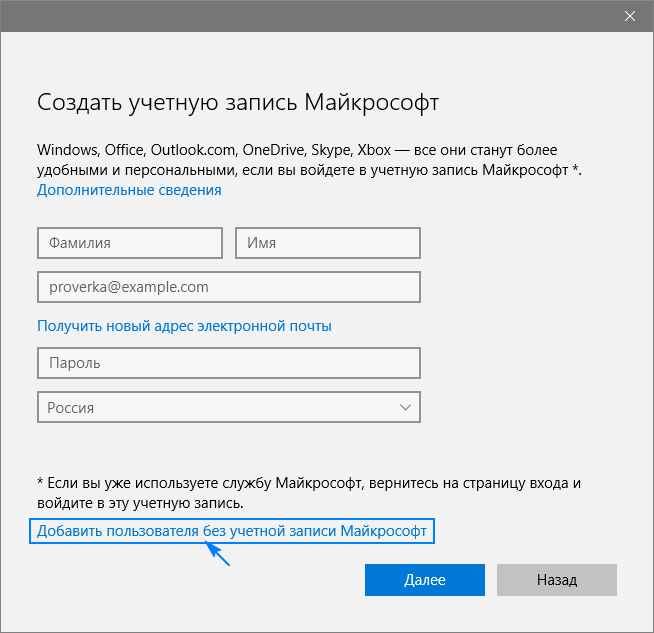
6. If you want to create it, fill out all the forms and click "Next", otherwise go to the link "Add a user without a Microsoft account", which is located at the bottom of the window.
In Windows 10, any new user has the usual (limited) privileges. To obtain administrator rights for the computer, you must perform several actions.
- We go to the subsection "Family and other users", located in the "Accounts" section of the "Settings" menu.
- In the bottom part of the right frame of the window we find the right user and click on its icon or name.
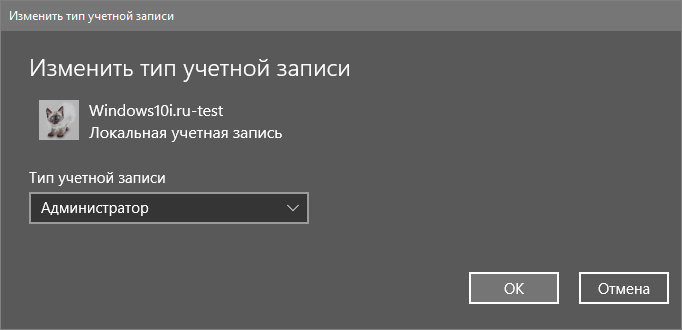
- Click on the "Change account type" button.
- In the drop-down list with account types, select "Administrator" and click "OK" to save the new settings.
Creating a new account through the command line
There is also an easier way to acquire an account in Windows 10. To do this, we use text commands executed through command line.
Note that all actions will be similar to the first option, with the only difference being that the commands will be executed in text mode.
To gain the ability to create and edit existing accounts, you need administrator privileges.
1. Run the command line with extended privileges, for example, through the search string.

2. Enter the command "net user UserName Pass / add" and launch it by clicking "Enter".
Here UserName is the name of the new account, Pass is the password for authorization in the system.

After completing all the steps in the windows environment 10 appears new account with limited privileges. To give it administrator rights, execute the following command in the command window: "net localgroup Administrators UserName / add".
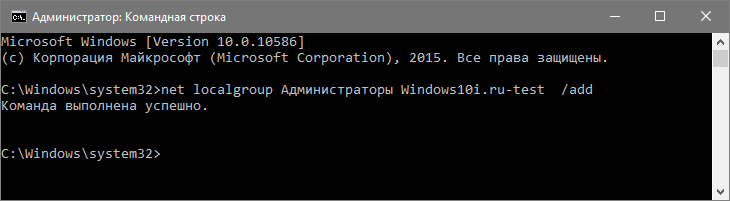
For people using an unactivated or unlicensed copy of Windows 10, it is recommended that the word "administrators" be replaced with its English equivalent "administrators" in case of an error.
Create a new account through the MMC snap-in
Back in XP, there was a system console with a lot of snap-ins for creating system management consoles. One of them is the element " Local Users and the group ".
1. Run the tool with the command "lusrmgr.msc", executed in search line or the "Run" window (it is launched via "Win + R").
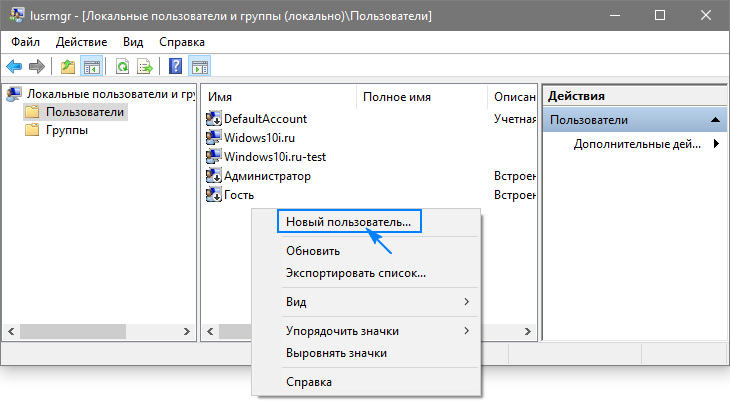
2. Open the "Users" directory.
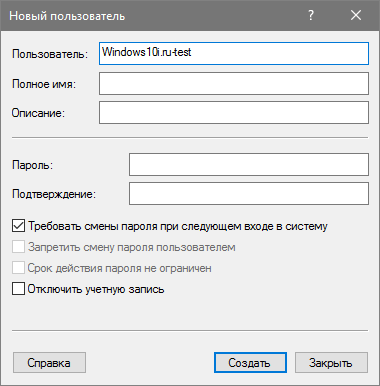
3. Calling context menu free area of the right frame and select the command "New user".
4. Fill out all the forms and click "Create".
5. Call the "Properties" of the newly created account through the context menu of its icon / name.
6. Go to the "Membership in the Groups" tab and click "Add".
7. In the field for entering object names, enter "Administrators" and save the parameters.
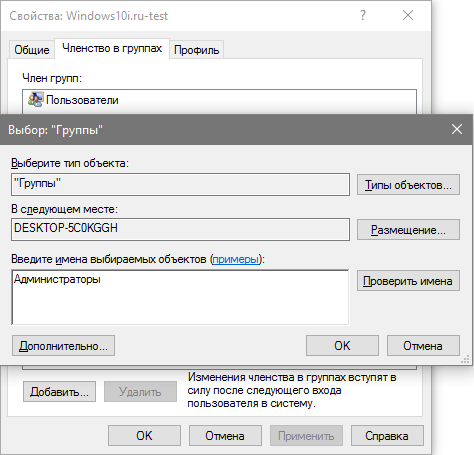 Now the selected User has administrator privileges.
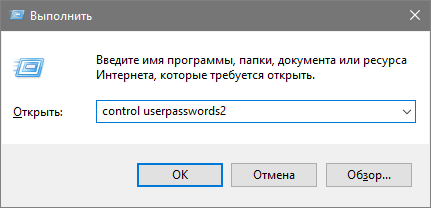
The command "control userpasswords2"
The last method to acquire an account in Windows 10 is to run the command "control userpasswords2" in the "Run" window.
Click "Add".
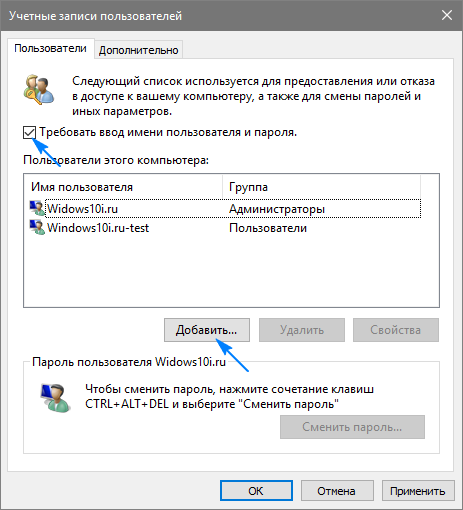
All further operations will be similar to the first of the considered ways of adding an account in Windows 10.
There were only three options for setting up accounts, but there are already five in Windows 10, and in general the system has become much more thoughtful.
To configure accounts, open the "Settings" interface and select the "Accounts" section there.
The very first item in this section is "Your account". Here you can, among other things, go to manage your Microsoft account, change your avatar and other settings.
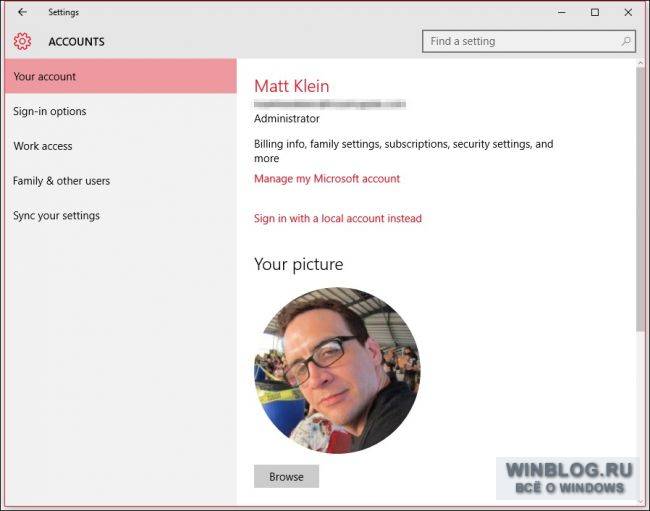
To manage a Microsoft account, you must go to the site - you can not change the settings locally. However, you can create a local account, as below.

Accounting microsoft record allows you to synchronize settings between different computers. Applications, profile picture, choice of colors and other settings are loaded into the cloud and when you enter from any other device they are applied to it. At the same time, of course, a lot of personal data gets to Microsoft, which some users may not like.
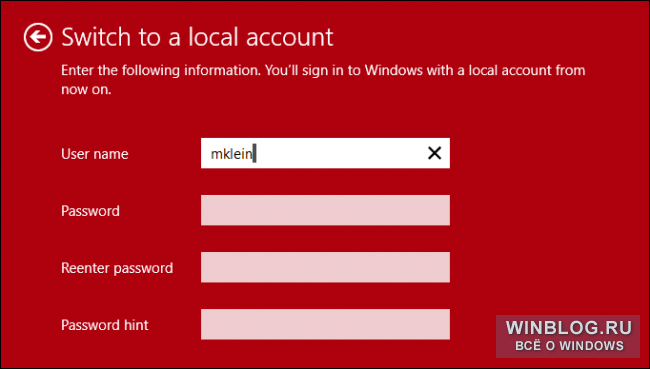
Fortunately, there is still a possibility to create a local account. Just click on the "Sign in with local account instead" link.
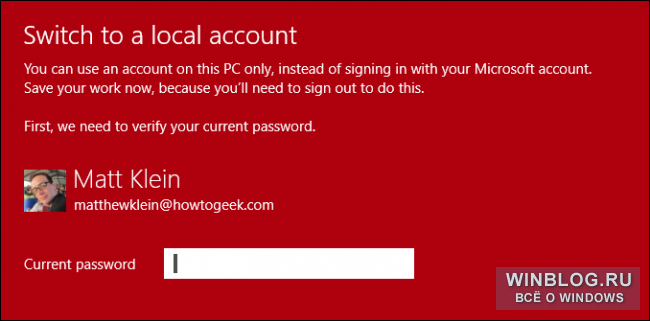
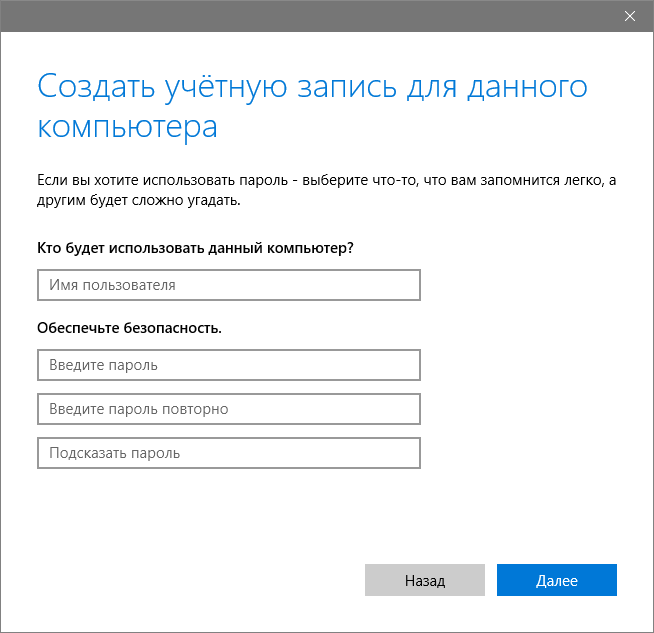
No email address, no phone, no other data will be needed - it will be enough to come up with a username and password. To switch to the created local account, you need to exit the Microsoft account, so do not forget to save any open documents beforehand.
In the section "Your account" you can not only create a new account, but also make a new photo for the profile, if there is a webcam.
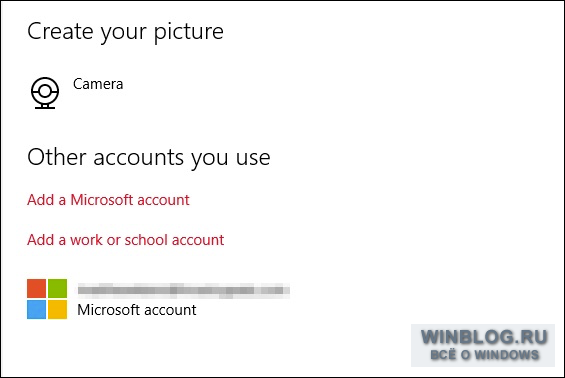
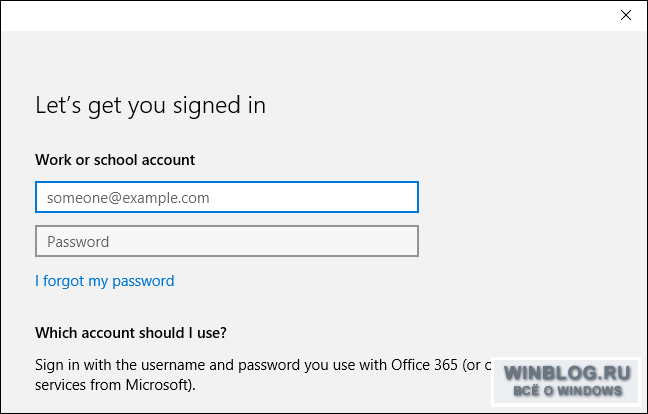
To add another Microsoft account or work or training account, follow the links at the bottom of the "Your account" section.

About the workers and training accounts, we will briefly describe a little later, but for now let's dwell on the parameters of the entrance.
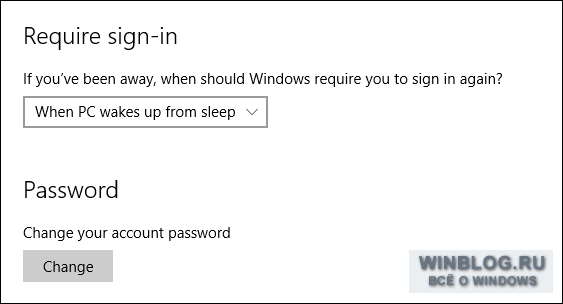
Login options
In the "Sign-in options" section, you can configure whether you need to enter the password when you exit the hibernation mode. You can also change the password from your account - remember this useful fact.
To facilitate the entry, you can come up with a PIN, but it's less than reliable way protect your account, so we advise you to use it with great care.
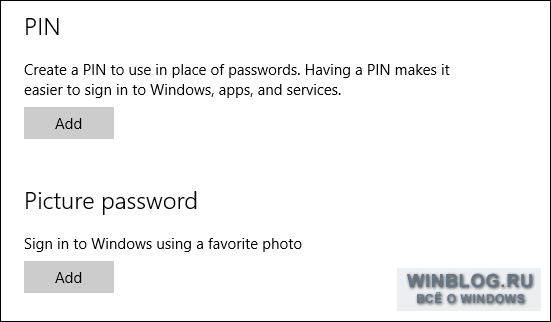
You can also create a graphic password, which is a series of gestures (smearing, circles, etc.) on top of the selected photo. This is very convenient with a touch screen.
Finally, if your computer is equipped with a fingerprint reader or a smart card reader, you can also use the same section to configure the input.
Work Access
The item "Work access" (Work access) for most users, most likely, without the need, but we still briefly talk about it - just for information.
At this point, you can connect your computer to a work or school network to have access to applications, network resources, and organization mail.
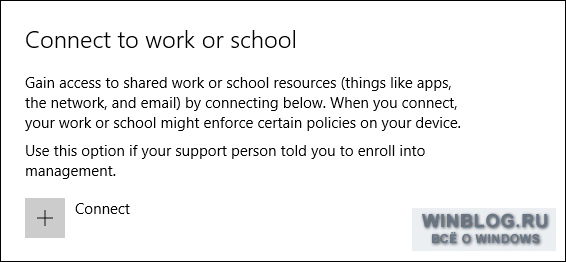
To connect, you must specify the data of a work or training account.
Most likely, the help of the employee technical support at work or in an educational institution. He will be able to tell in detail how to connect.
Family and other users
If you need to quickly add accounts to family members or other users, you can do it in the "Family and other users" item (Family & other users).
If you have children, you can create for them children's accounts and monitor their use with the help of tools parental control Microsoft. This will allow you to control which sites a child visits, how much time he spends on the computer, what games he can play and what applications to use.
Here you can add other users who are not family members. They can log in with their accounts, so you do not have to share your account with them.
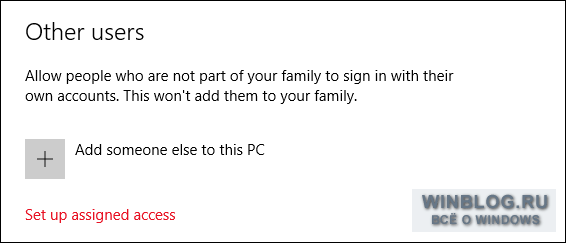
Here you can also configure limited access, which allows you to use only one application from the Windows Store. It turns out something like a digital kiosk. You can exit the restricted account with the ++ keys.
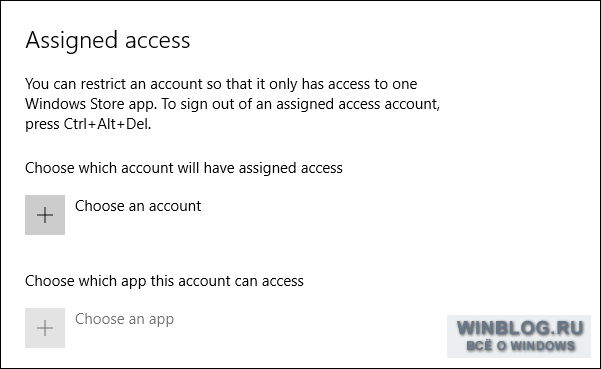
Limited access can come in handy if you want a child to use only one program or game. Also, such an access mode is relevant in any other situations where it is required to limit the functionality of the system to one application. You can, for example, serve the restaurant menu on tablets. Or use a computer to fill out the questionnaires. In such situations, limited access is the ideal solution.
Synchronization
The last item in the "Accounts" section is "Sync your settings". Here you can specify which settings of this computer will be synchronized with other devices.

You need a Microsoft account to synchronize. You can turn off synchronization completely or select individual data.
The new account settings in Windows 10 differ from Windows 8.1 not radically, but important changes are still enough. You can still choose between the local account and the Microsoft account and there are three logon options left. But those who missed Windows 8, it is necessary to understand the new settings as soon as possible.
Account settings in the Control Panel are now almost not used. There are almost no actual settings left. Most users will be enough to have a new interface to manage not only their own, but also other people's accounts.
If you have additional information or recommendations on this topic, share them in the comments!
| Materials |
Hello, friends! I understood the questions. Denisky's dog, too, will understand. Undoubtedly, an ordinary home user will only need to create for himself and for his little hackers a simple account with the usual rights and not go into the details of the local security policy. In general, the operating room windows system 7 has three types of accounts and they all give users different rights to manage the operating system.
Retreat: If you need to find out,! Why do I need a Microsoft account? What is the difference between a local Windows 8 user account and a Microsoft account. Read our new article!
My article would be incomplete if I did not say why I should even create an account. At first, create an accounting windows entry 7 very simply, it can protect your system from infection malware. For example, we have an article about how an account can help you fight a virus or banner with an extortionist, you can read "". Well, if several people use your computer, creating each user their account, corresponding to the level of preparation for using the computer, will greatly prolong the life of the operating system as a whole.
What are the types of accounts?
- Regular access is a very good type of account for a person who has just begun to comprehend the computer world, that is, for a beginner. Working under the user account with the usual access, you can install some programs, but antivirus program you can not install, for this you need to know the password of the administrator of the computer or enter the operating system under the account of the administrator.
- The administrator is an experienced pilot, taking on the complete management of a modern airplane the name of Windows and who understands all responsibility for this. A user with administrator rights can perform all aerobatics, including the most complicated "Cobra". It can modify any operating system settings, including editing critical registry values and editing settings affecting all users in the system. He is also responsible for other participants in the flight (other PC users).
- Guest is a built-in account that does not need to be created. Applied for drunk guests who want to be drawn on your computer during the party. And if it's serious, it's specially designed for temporary access to the computer and is severely restricted in rights. Working under this account, you will never spoil anything in your operating system, but it will greatly reduce your level of security, so I advise you to include it only if necessary.
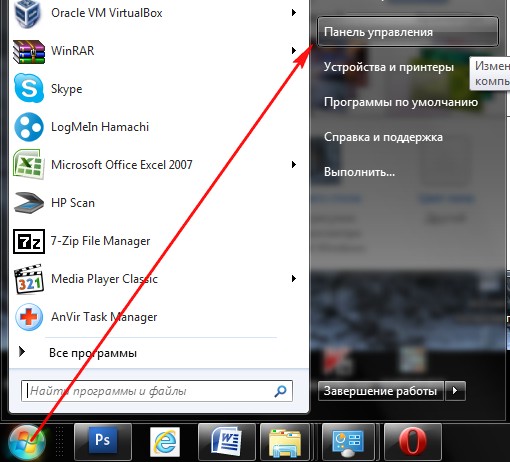
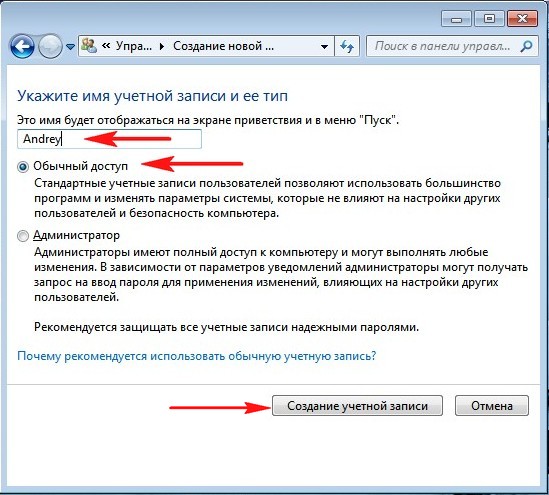
For example, create an account with Normal access. Open the Start -\u003e Control Panel->
->Creating an account.
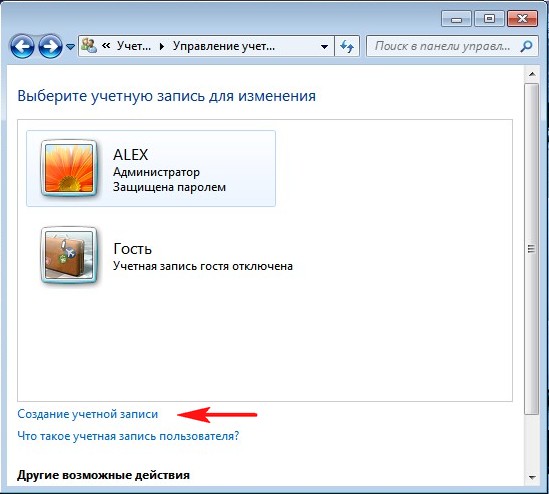
Mark the item Normal access, then enter the name of our account, for example Andrey and click on the button "Create an account".
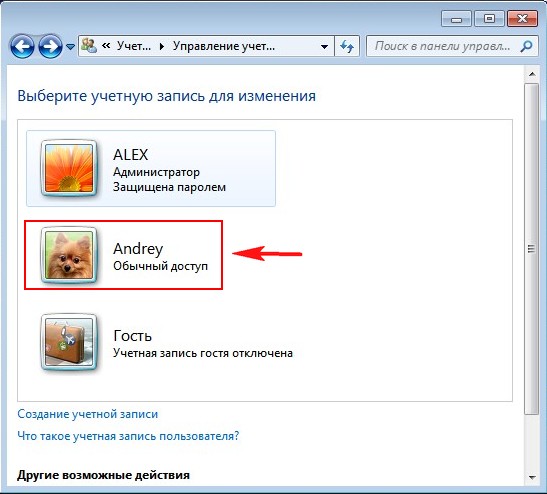
Changing the account picture
Everything, our account Andrey is created. Change the picture of the account. Click the left mouse button on your account
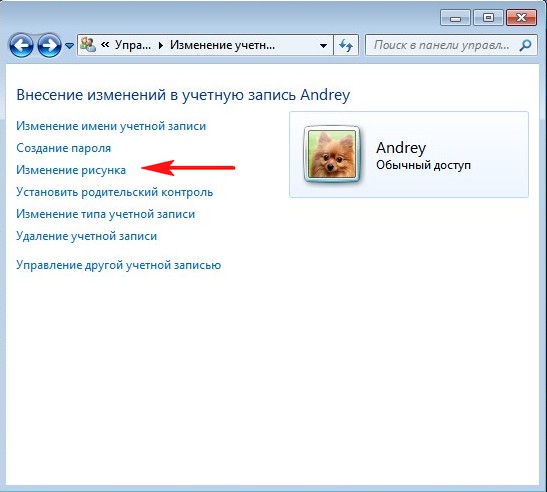
And click Change Picture.
If none of the drawings suggested by the system you like, then click the "Search for other drawings" button
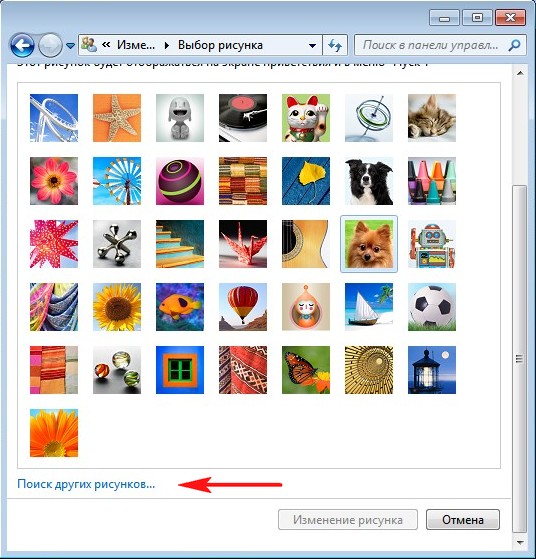
The "Image Library" opens and a guide, in which you can find all the pictures on your computer, for example on the desktop.
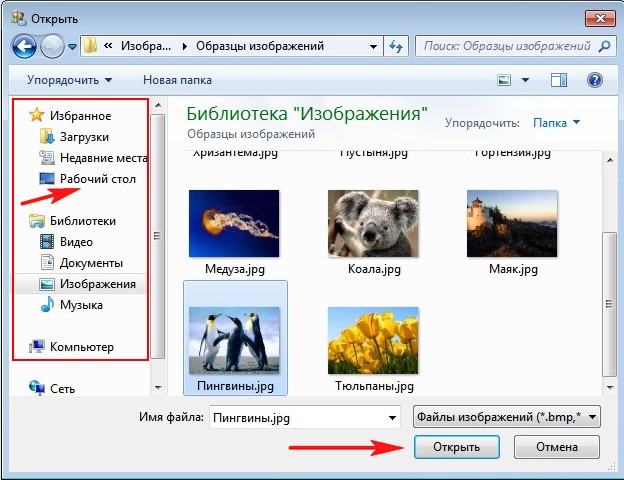
Select the one you need and click Open. Everything, the necessary picture is appointed.
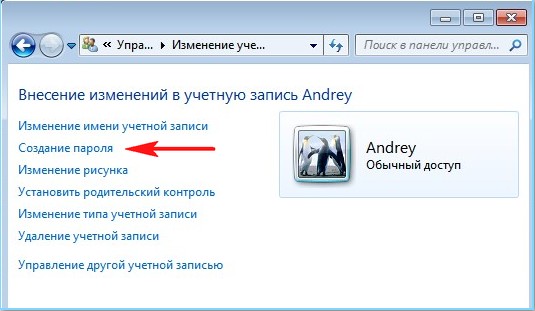
Assigning an Account Password
Now we assign a password to the account, it's necessary to do this. We click on the account of Andrey by double click of the left mouse. Select "Create a password"
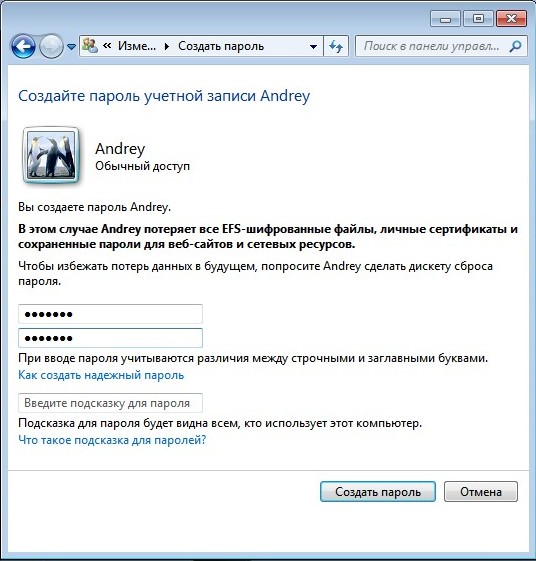
Assign a password and click "Create a password".
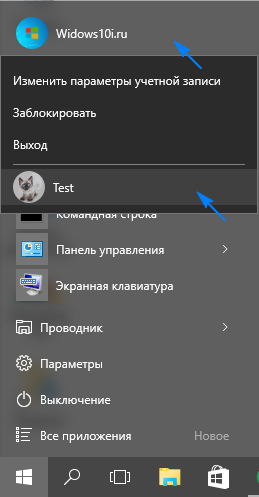
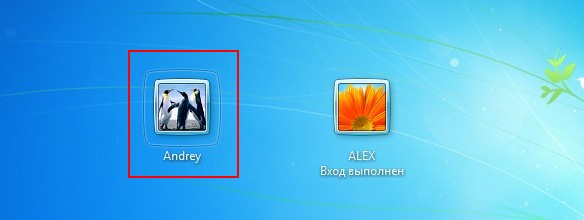
To log in to the account you just created, you do not have to restart the computer. Select Start-\u003e Change User.
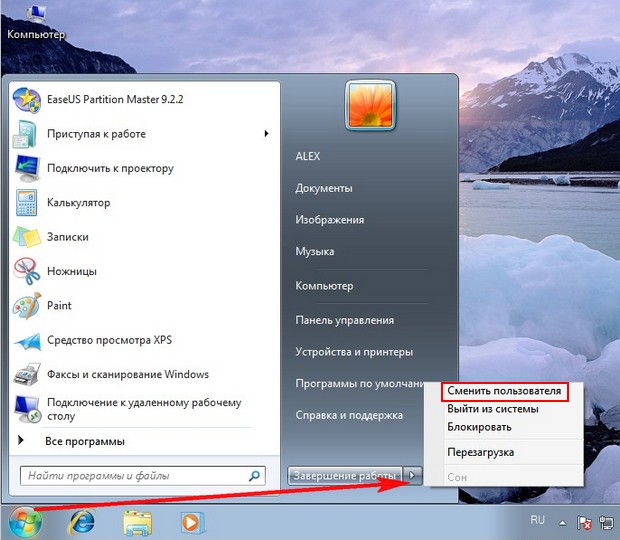
We click on our account,
enter the password
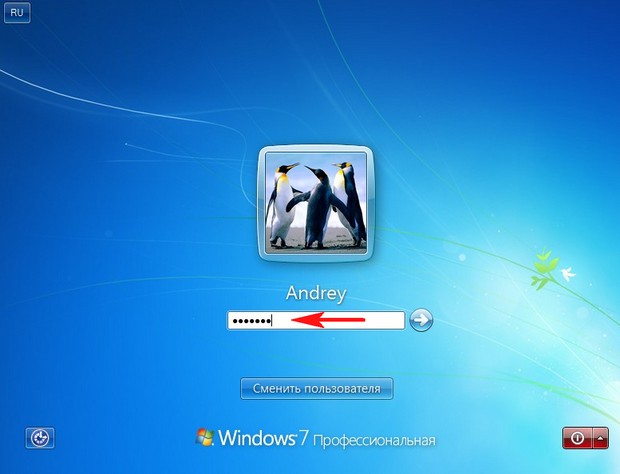
And now, please, our individual desktop.
Or, if you restart the computer, again this login menu will appear, in which you need to select the account and enter the password.
Change account type
If you have an account with administrator rights, then you can change the account type of any user. For example, a user with regular access, you can make a full administrator of the computer. But you need to do this carefully, if the user is not experienced enough, then with such rights, he can do serious things on your computer. Also, the administrator can deprive any user of administrative rights. How it all happens.
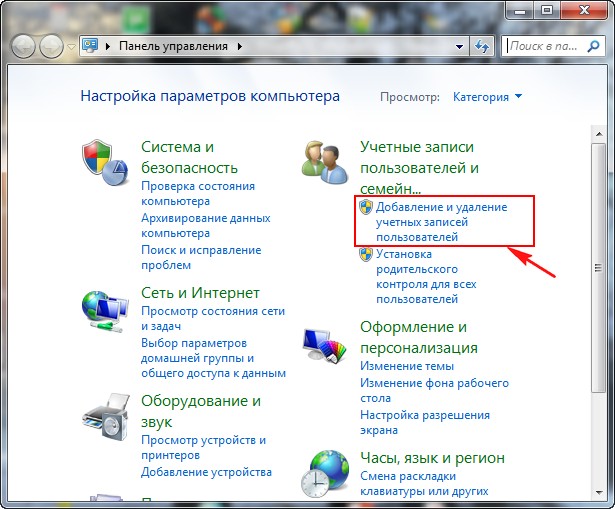
Open the Start menu -\u003e Control Panel->Adding and Removing User Accounts.
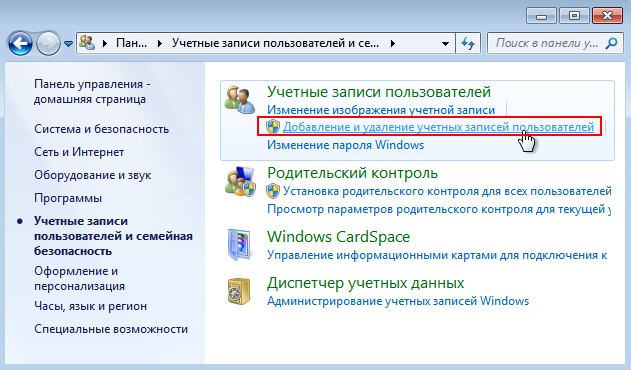
Click the left mouse button on any account.

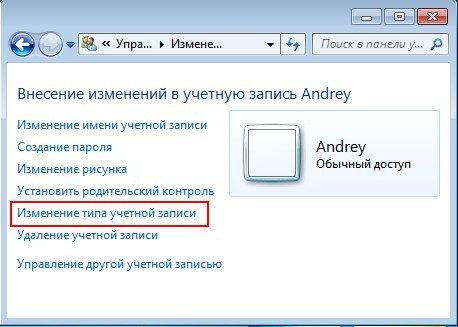
We mark the item Administrator and Change Account Type.
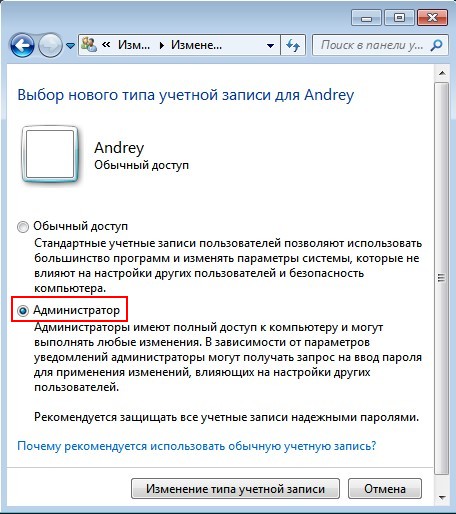
Our user Andrey becomes a user with administrator rights.
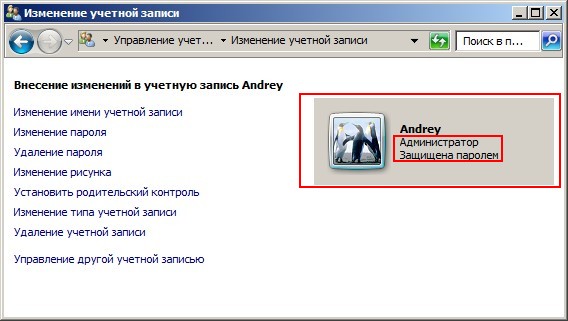
In exactly the same way, you can make his account an ordinary one.
How to work under a restricted account
Friends! If you want to install or remove a program, or delete any files that do not belong to you, working with a limited account, this will naturally affect other users of your computer. In most cases, you will have the following User Account Control window in which you must enter the administrator password. "To continue, type the administrator password and click" YES "
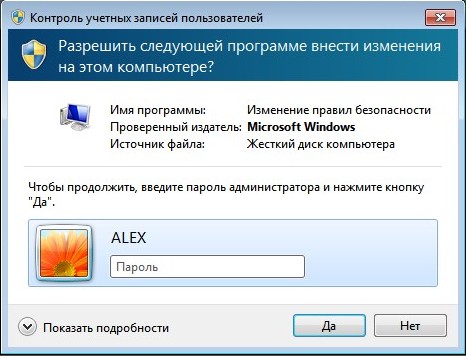
By entering the administrator password, the process of installing or uninstalling the program, or files will continue. If you do not know the password, then you will have to contact the user with administrative rights and he will already decide whether you can delete or install this or that program. And nothing can be done here. Once again I remind you that there is nothing insulting here and it was done specially for those cases when a computer is used by several people with different levels of training or when your computer is used by children.
Create children your own account with limited rights, but do not tell the administrator's password when they want to install 100 games on your computer right away or delete them wINDOWS folder, you will learn about it first, as the administrator of the computer. By the way, you have an assistant "Parental Control". With the help of parental control, you will monitor the activities of children at the computer. Assign the time children use the computer, allow in which programs and games they can work. How to do this, is written in detail at the end of the article. What errors can occur when working in a restricted account
If you install the program on your computer, even if you select the "Run as administrator" option in place of the User Account Control window in which you must enter the administrator password, you may get this error. "To install this program. You must log in as Administrator. "