The Nokia account is used in devices that work based on technology operating system "Windows Mobile". We are talking, of course, about the devices that are part of the line called "Lumiya". A user profile is required for many things and services that the corresponding operating system is equipped with. It is possible that when you first start account Nokia was not created or activated. But do not worry, because you can do this operation at any time, when you only want.
What if the first start was already done?
If you have already started using the phone some time ago, and the Nokia account has not yet been created up to this point, you can proceed as follows. By touching the central touch control element (window) we go to the desktop of your device. In principle, you can do this by being in the application. Nevertheless, it will probably be more convenient. So, draw your finger from top to bottom on the screen to bring up a kind of menu. In the right corner we can see the inscription "All settings". Click on this button. After that the device will forward us to engineering menu phone. Here you can find an item called "Mail + Account." Click on it and then look for a feature called "Add service." When this operation is completed, Nokia Lumia will be added to your device. So, after we have entered the corresponding menu, select the "Microsoft Account." You will only have to create a new profile or enter an existing one. new record the user can follow the instructions displayed on the screen. At the same time, to enter an existing profile, you will need to enter a user name, as well as his / her personal password to identify and confirm access.
Why do I need a Microsoft account on Nokia?

User profile is required to use separate services. For example, such as OneDrive. Each owner of the device running the operating system "Windows Mobile" is given a separate amount of space in which the user can put multimedia data in order to save long-term memory on his phone. At the same time, by creating a Microsoft account, you can always take part in using the functions of the "My Family" section. Activating the profile will also enable you to quickly exchange data and information with your friends and relatives who have accounts.
What should I do if you first include "Lumiya"?

Creating an account will make the handling of the phone much more comfortable and colorful, as new features will be opened before the user. A profile is required to fully enjoy the benefits that the phone provides. Initially, note that you will need an Internet connection to create and confirm the activation of the Microsoft account. Pay attention to this. The connection can be made either via a point wi-Fi access, and with the help of the tariff plan on the SIM card inserted into the phone.
Sequencing
First of all, we turn on the device. In this case, it is necessary to install a SIM card in advance. After this is done, we proceed to the initial setup of the device. To do this, you can simply follow the instructions linearly, which will be displayed on the smartphone's display. After that we create an account in the system. Or, we enter an existing profile by entering a username and password. As you can see, there is nothing particularly complicated in this process. The company took care to start working with the device as quickly as possible.
Version: 3.1.1.80
Manufacturer: Nokia
Method of distribution: Free
Language: multilanguage (including Russian)
Developer's site: http://www.nokia.ru/support/product-support/nokia-ovi-suite
Competitors of the program: Nokia PC Suite
Introduction
Nokia OVI Suite A convenient tool for Nokia phone owners, designed to synchronize mobile devices with OVI services, as well as to exchange data with personal computer the user. Basic capabilities programs:- - synchronization mobile phone with Ovi services
- synchronization of mobile phone and PC via infrared, Bluetooth or cable
- backup files from the phone with the ability to later restore them on the phone
- transfer to a mobile phone of various kinds of files
- Install Java and Symbian applications (.sis and .sisx)
- use your phone as an internet modem
- update software phone and Nokia Ovi Suite
- download maps for Nokia Maps
- the ability to manage music, messages, contacts and pictures
Installation
Download installation file you can from the official site of Nokia, as well as from our portal. Be careful when downloading: make sure your PC meets the following minimum system requirements:
- Microsoft Windows 7 (32- and 64-bit versions, except for Starter Edition), Windows Vista (32-bit and 64-bit versions, with Service Pack 1 or later), or Windows XP (32-bit, with Service Pack 2 or more new version)
- 2 GB disk space on the computer
- 1 GHz processor
- graphics card with video memory 64 MB
- 1 GB random access memory
- the resolution of the screen is 1024x576 at a color depth of 24 bits
Note: high-quality video clips require a 2 GHz processor and a 128 MB video memory.
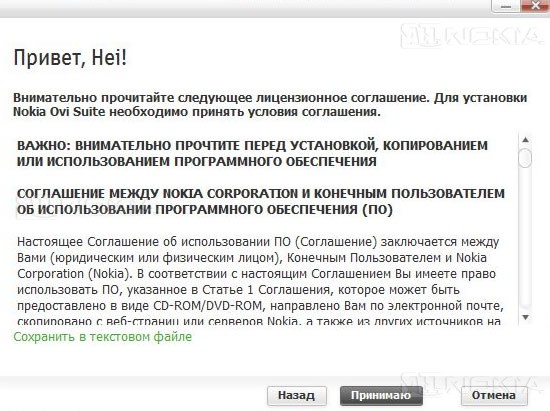
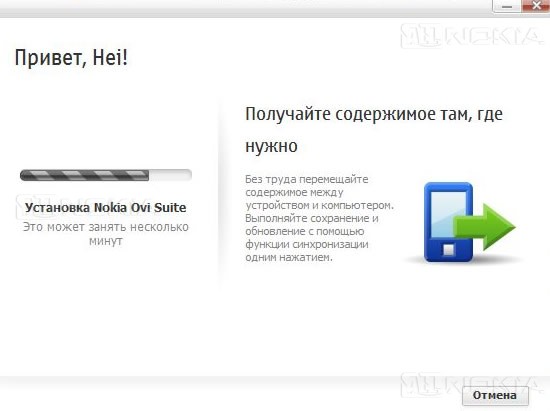
When you start the installation package, a window with a choice of language appears, and the program will automatically check for a new version on the Internet. If an update is detected, the program will prompt you to download it, but we can always refuse and continue installing the current version. So, the interface language is selected, click the "Install" button. Accept the terms of the license agreement:
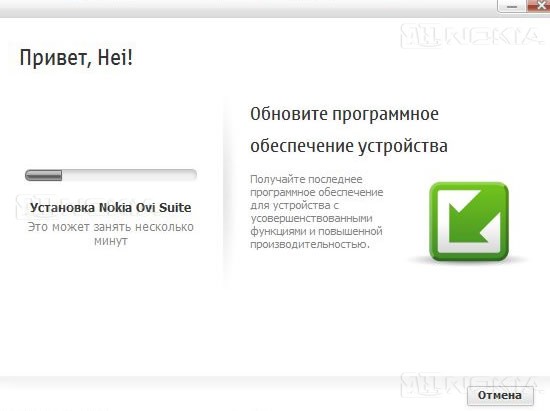
After that, the program will be installed directly on the PC. The process is accompanied by a brief description of the program's features and lasts several minutes.
End of the installation process:
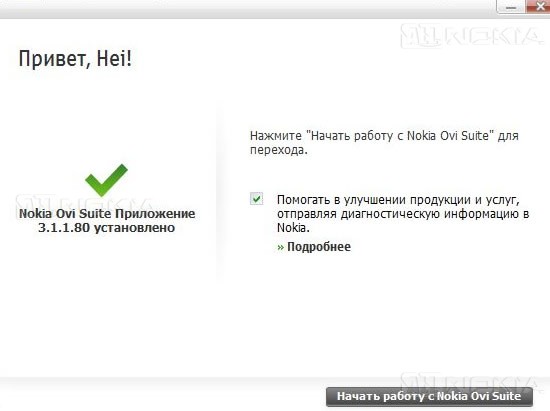
Congratulations, the installation process has been successfully completed, you can start working with.
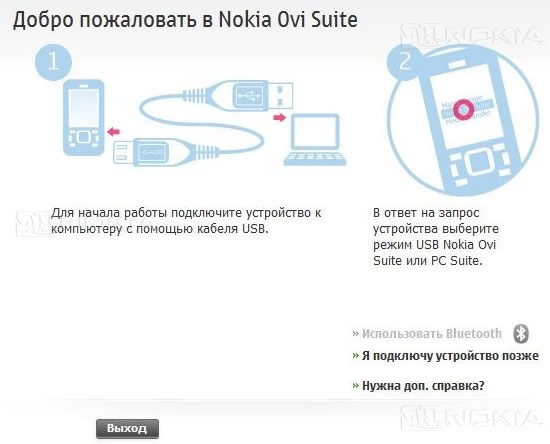
Connecting your phone to your computer
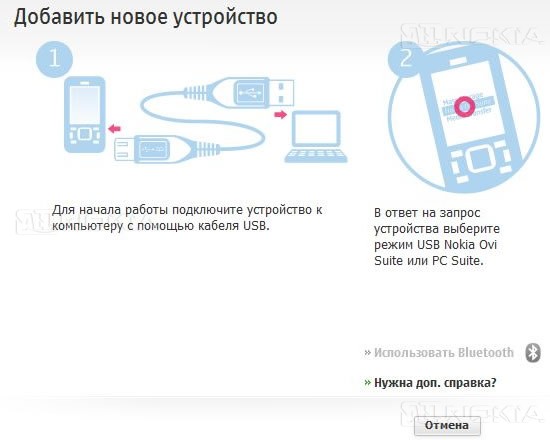
When you first start the program, you will be asked to connect your Nokia mobile device to your computer using a USB cable. Connect the cable to the PC, and then to the phone, on the device screen, select Nokia Ovi Suite or Nokia PC Suite mode.
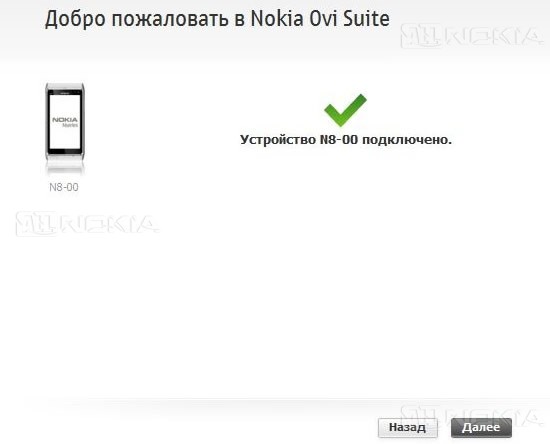
When successful installation driver for the device, we will see the information about the connected device. Click "Next".
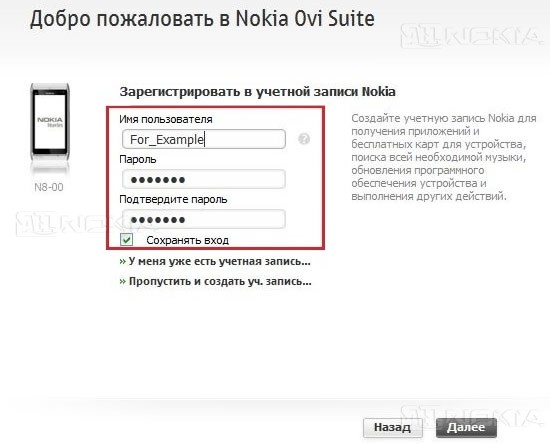
A window with a suggestion appears. register a Nokia account. If you do not have an account, then enter the desired nickname and password in the appropriate fields and continue the registration.
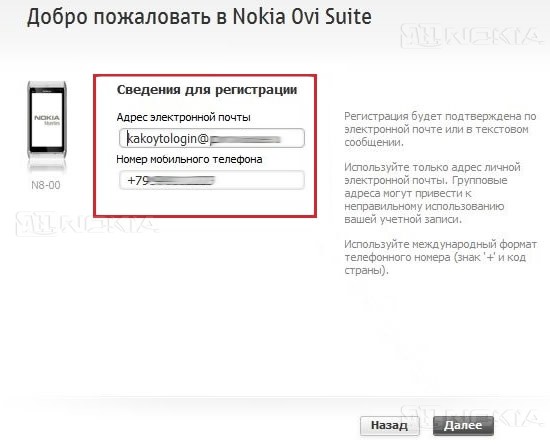
Then enter your email address and / or mobile phone number to confirm the registration.
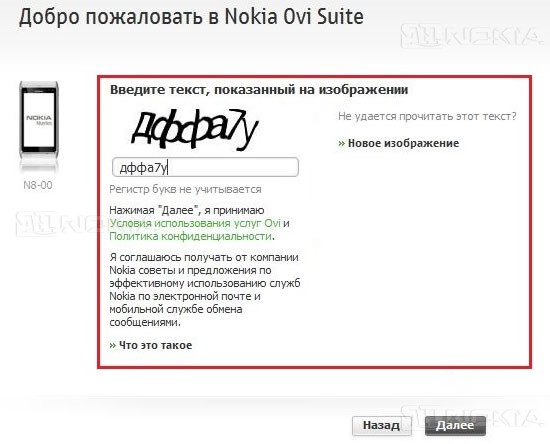
Registration is completed, we finally get to the main program window.
Note: if you already have an account, then you do not need to register again, just do the following:
- A) Select in the first window the link "I already have an account ..."
B) In the next window enter your login and password.
C) Click the "Next" button to go to the main program screen.
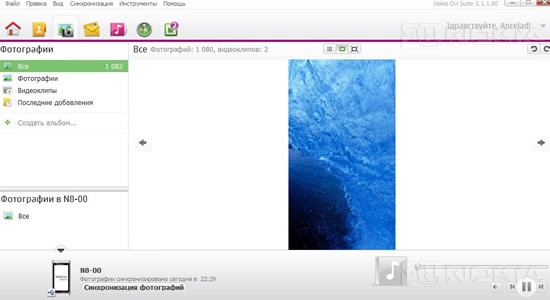
Description of the program
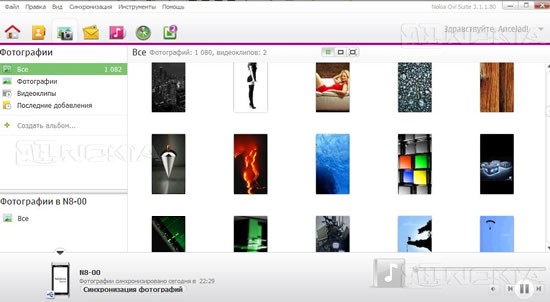
The main screen of the program can be conditionally divided into several zones.

- 1 - the main menu items.
2 - upper navigation panel.
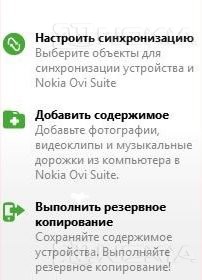
3 - tips on using Nokia Ovi Suite. Here you can see useful tips about using the program and get easy access to Ovi Suite tools.
4 - the main areas. Clicking on any of the main areas opens the corresponding screen (Contacts, Photos, Messages and Music).
5 - "Synchronize all" button to synchronize all Nokia Ovi Suite content that was specified for synchronization in the device's synchronization settings ( Tools -\u003e Options -\u003e Device sync).
6 - information about the music, here during the playback, track information and playback controls are displayed.
7 - Ovi recommendations, here you can see the recommended service (if any) and the suggestions of "Ovi Store" and "Music store".
8 - login to your Nokia account.
Main menu items
Tabs File, Edit and View contain commands that are different for different elements of the top navigation bar, so first consider the menu tabs common to all the elements of the top navigation bar. They are:
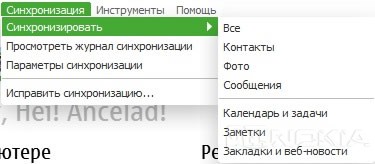
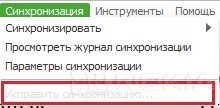
Synchronization, which contains:
Synchronize - allows you to synchronize with your computer Contacts, Photos, Messages, Calendar and Tasks, Notes, Bookmarks and Web News, as well as all of the above at the same time.

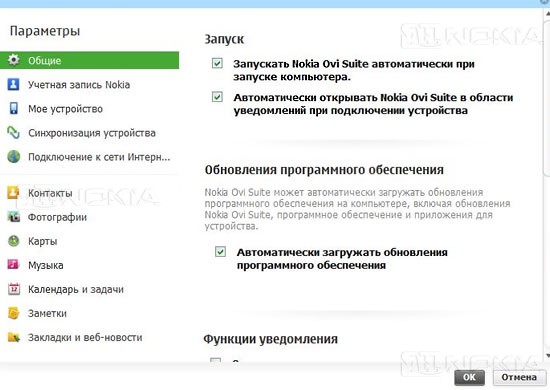
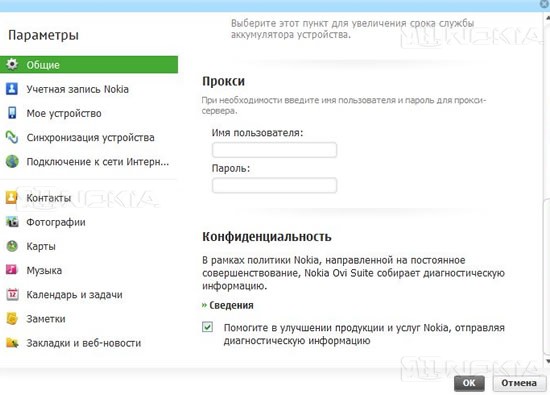
- General - contains the general parameters of the program, such as autorun program, automatic update programs, notification functions, proxy server settings and privacy policies. All items are intuitively clear, so we will not explain anything.
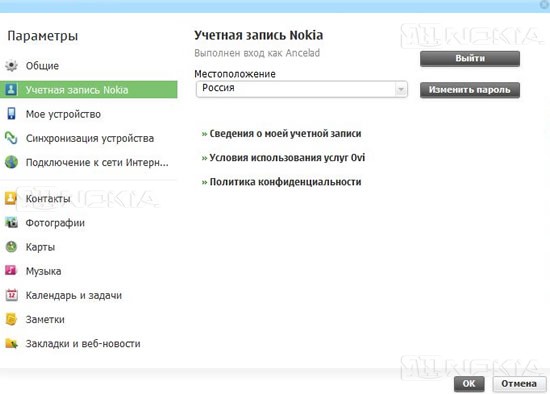
Account - contains the settings for the Nokia account. Here you can change the settings of the current account, view information about it, and also read Ovi Terms of Use and Privacy Policy.
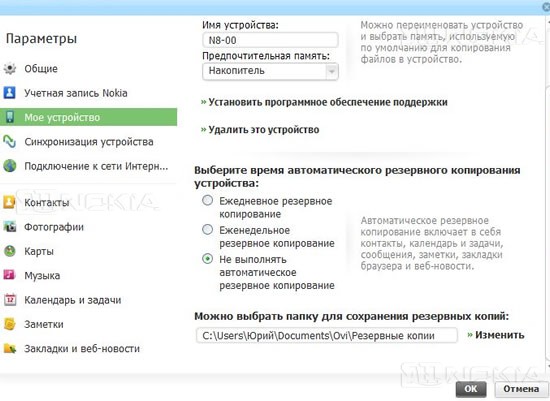
My device - displays information about the connected Nokia device, allows you to select the preferred device memory, install support software and remove the device. In addition, you can configure the time options for the backup and select the folder where these same backup copies will be saved.
- Device sync - allows you to select the data to synchronize when you click the "Synchronize All" button, and configure automatic synchronization. Please note that clicking links under Contacts, Calendar and Tasks, Notes, Bookmarks and Web News will lead to redirection to the corresponding items at the bottom of the window (marked with arrows).

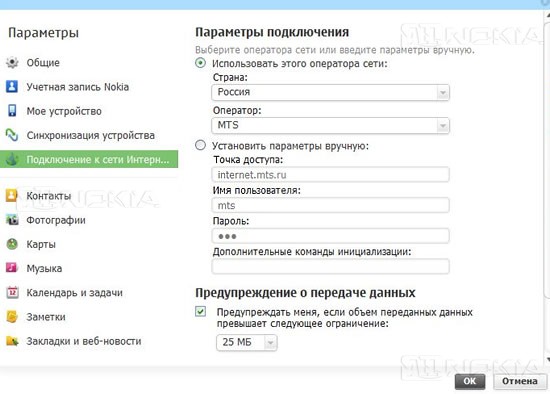
- Connecting to the Internet - allows you to configure the device for use as a GPRS / 3G modem to connect to the Internet on your computer. In the parameters you can specify the country and the operator, then the settings will appear automatically, or enter the settings of your operator manually. Also, there is a possibility to notify about the number of transmitted data - when a certain amount of downloaded information is reached (options 1, 5, 10, 15, 20, 25, 30, 50, 100 megabytes of data are available) the program will notify you about it. Be careful when using this function - the transfer of a large amount of data can cost a lot of money.
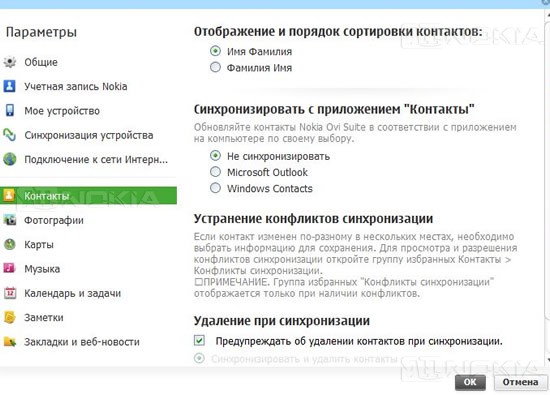
Contacts - here you can set the display options and sort order of contacts, synchronize contacts with the selected application on your computer, delete contacts settings, and eliminate synchronization conflicts.
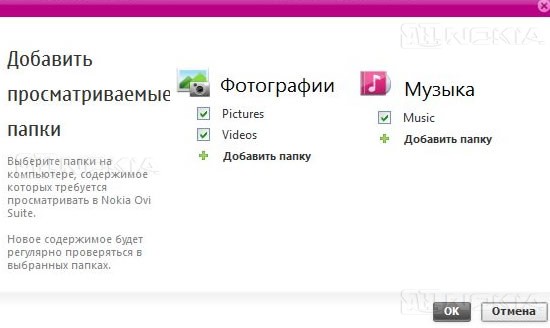
Photos - setting up folders containing photos and video files.

Maps - here you can select memory for loading maps and voice guidance files.

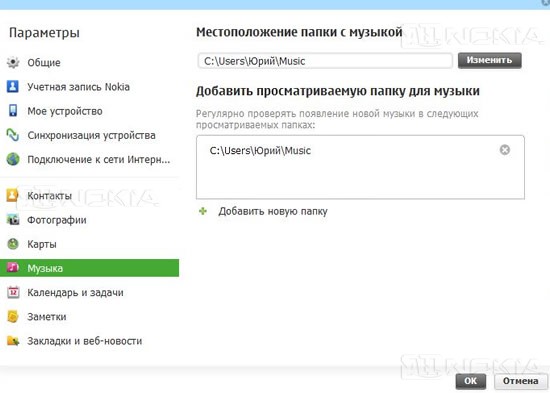
Music - adjust the location of folders with music, add browsing folders.
- Calendar and tasks - settings for synchronizing calendar and tasks with the computer. To use this option, you need a Microsoft Outlook account. All settings are intuitive, so we will not explain anything further.


Notes - options for synchronizing notes.

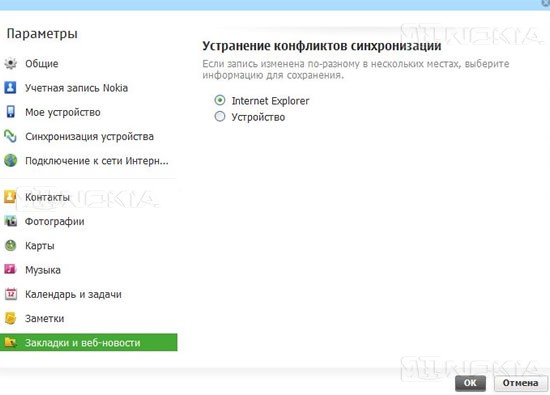
- Bookmarks and Web News - elimination of synchronization of bookmarks synchronization Internet Explorer and devices.
Fix synchronization - fixes errors and conflicts of previous synchronizations. The item is active only when there are errors or conflicts.
A) Add a new device - allows you to add a new Nokia device besides the one already connected.

When this item is selected, the device connection window that is already familiar to us appears. Further actions are also already familiar.
B) Backup copy - With this sub-item you can save data on your PC from the phone (Contacts, Calendar and Notes, Messages, Device Settings and Applications, Photos, Video Clips, Music and Recorded Sound Bites, Documents).
To create a backup copy, go to Tools -\u003e Backup. In the window that appears, click "Next."

Select the necessary data for copying and options - copy the contents from the memory card, select the backup folder, then click "Start".

The backup process starts. If successful, the following window will appear:

Click "Finish".
AT) Recovery - restores the contents of the phone from the previously made backup. To restore the data, go to Tools -\u003e Recovery. In the window that appears, click "Next".
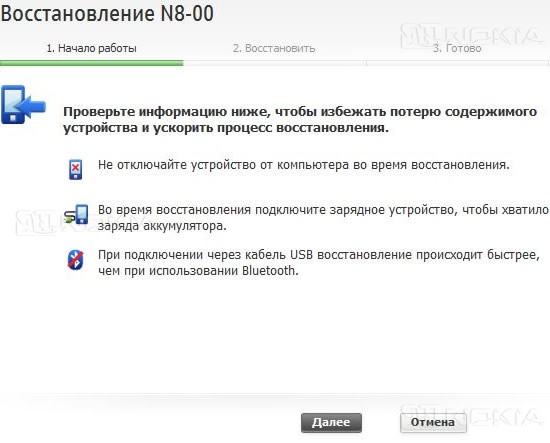
Choose the right one backup copy, as well as the data that needs to be restored, click "Start".
![]()
The recovery process starts, at the end of which the program prompts you to restart the device. We do the proposed, but in no case do we detach the phone from the computer!
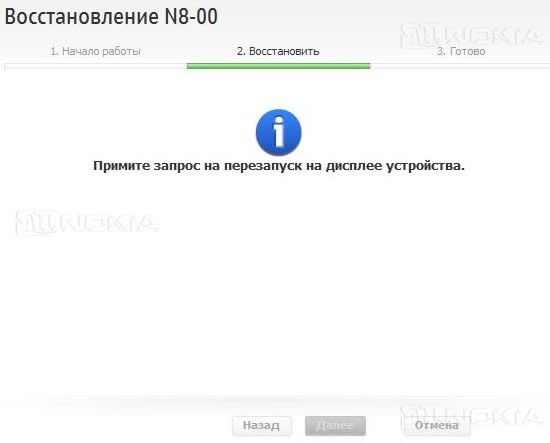
After restarting the device, a message appears indicating that the recovery was successful, then click "Done".

One important point is that backups do not fit Nokia Ovi Suite and vice versa, so be careful.
D) Connecting to the Internet - allows you to use your phone as a modem to access the Internet from your computer.
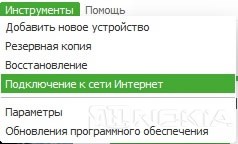
To connect to the Internet, go to Tools -\u003e Internet connection. In the window that appears, click "Yes", it is assumed that the connection parameters are in the settings (see above). Note: the connection settings for large operators are determined automatically.

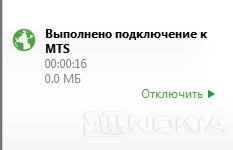
If the connection is successful, a notification will be displayed in the system tray.

The information on the connection is displayed on the left side of the main window: the connection time and the amount of information received. In the same place, you can disconnect the connection.
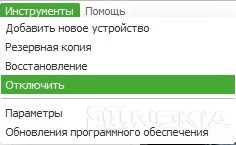
You can also disconnect the connection by going to Tools -\u003e Disable.
E) Options - the sub-item is absolutely identical to the sub-item "Synchronization parameters" of the "Synchronization" item, so we will not disassemble it.
E) - here you can check for updates to the program Nokia Ovi Suite and for the connected Nokia device software.

If there are available updates, you can install them. Check for updates, click "Install".

A list of available updates will appear, select the required one (in this case, brief information about the update will be displayed in the right part of the window), click "Install".
The update process will begin, and when finished, click "Finish".

A) Nokia Ovi Suite Help - here is the background information and recommendations for using the program.
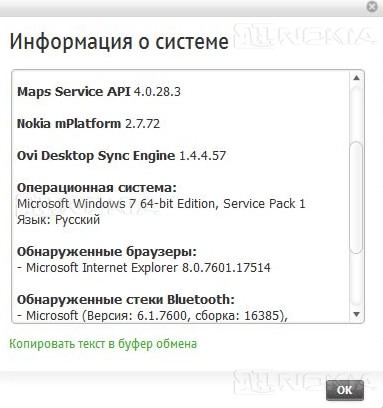
B) About Nokia Ovi Suite - contains information on installed version programs, official notifications and system information.

Upper movement panel
The upper navigation bar consists of several shortcuts, with which you can switch between the main windows.
The first of them - main screen of the program. The main elements of the main window are considered in the beginning of the review. The File tab contains two sub-items:
- Exit.
The View tab contains two sub-items:
- Transition - you can make a transition between different windows.
- Device Information - information about the connected Nokia device.

To change the contact information, we click the "Change" button, enter the necessary data and save the changes.
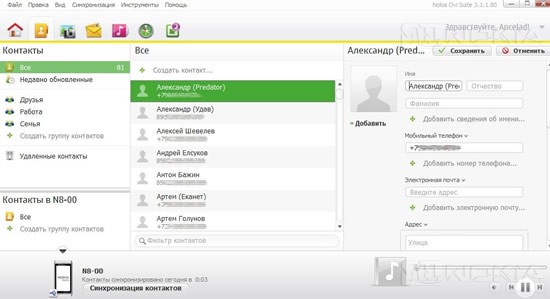
Tab File contains three sub-items:
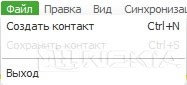
- Create contact
- Save contact
- Exit
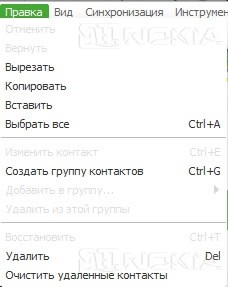
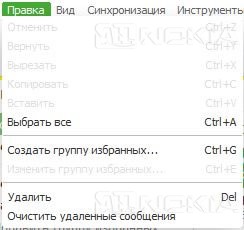
- Cancel.
- Return.
- Cut.
- Copy.
- Insert.
- Choose all.
- Edit contact.
- Create a contact group.
- Add to group.
- Remove from this group.
- Restore - restores the remote contact.
- Remove.
- Clear deleted contacts - clears the list of deleted contacts.
By right-clicking a menu appears, allowing you to perform various actions.
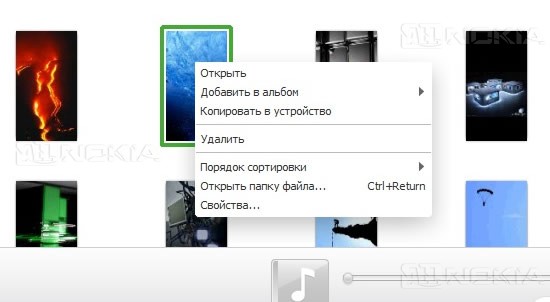
Double clicking with the left mouse button increases the picture (the same can be done with the transition View -\u003e One element), with the arrows on the right and left to switch between the pictures. Right click on the enlarged picture also brings up a menu with various actions. Repeated double-click with the left mouse button returns us to the original view of the mini-pictures.

You can also change the appearance using the following element:
From left to right: viewing mini-pictures, viewing one object, displaying the entire screen.
Tab File contains the following sub-items:
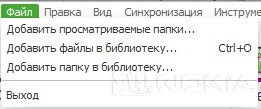
- Add browsing folders

- Add files to the library - adds the selected files to the library.
- Add a folder to the library - adds the selected folder with all the graphic content to the library.
- Exit - closes the application.
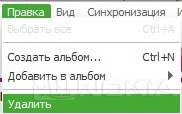
- Select All - selects all the items.
- Create album - creates an album for graphic files.
- Add to album - allows you to add selected items to a previously created album.
- Remove.

- The transition is an already familiar item (switching between windows).
- Mini-pictures - display contents in the form of small pictures.
- One element is an enlarged image.
- Full screen is full screen.
- Sorting order - sorting files by different criteria.
- Open the file folder - opens the folder containing the file.
- Properties - shows the properties of the selected item.
- Refresh - refreshes the window.
- Information about the device is already familiar to us.

Clicking the right mouse button on various elements activates various context menus:

![]()
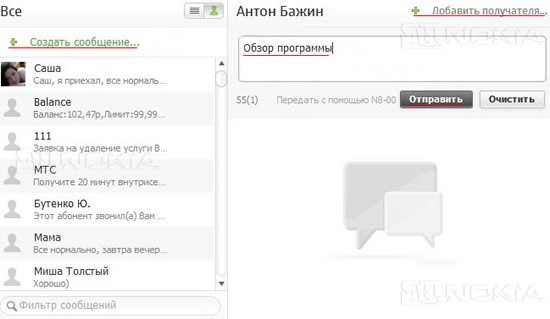
To create a message, click on the button create a message, a window will appear on the right side, where you will enter the subscriber's number (select it from the contacts) and the message text, and then press the " Send».
Tab File:
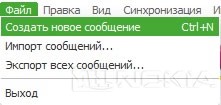
- Create a new message.
- Import messages - transfer messages to your computer in a file with the extension .csv ( text format, intended for the presentation of tabular data - each line of the file is one row of the table).
- Exporting all messages is a procedure that is the reverse of the previous one.
- Exit - closes the program.
 Tab View:
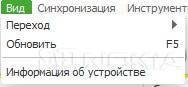
We already know all the points. In addition, two items are added to the Tools tab: Reply and Forward.
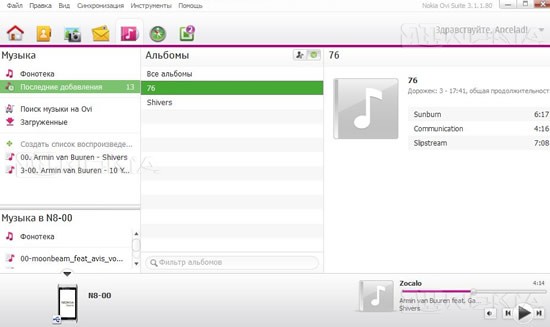
Music
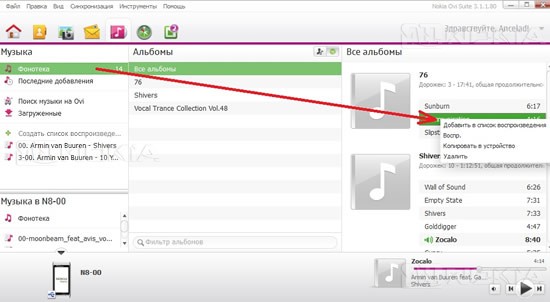
Again, the window is logically divided into three parts: the left is the general information about the library (both on the PC and not the phone), the list of downloaded files, the last added files, playlists (both on the PC and on the phone), there is the possibility search music on a special Ovi service; in the center is the list of albums from the selected item on the left side of the window; the list of the selected album items is located on the right. In the lower right corner is the player control interface.
Right-clicking on the items brings up various context menus:
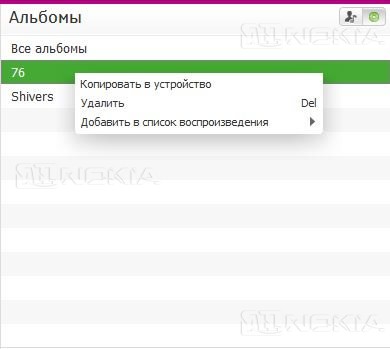

Playing files through the built-in player is possible only if the files are on the computer and are in the library. Playback from the device is not possible.
To copy a file from the device to the computer, you need to perform a number of simple manipulations:

Similarly, you can add a file from your computer to your device.
Tab File:

- Add browsing folders.
- Add a folder to the collection - adds the selected folder to the collection.
- Add files to the collection - adds the selected files to the collection.
- Exit - close the program.

- Shuffle - play files in random order.
- Remove.
- Create a playlist.
- Rename.
- Add to playlist - adds the selected files to the previously created playlist.
Cards.
When you enter this window, the program will automatically check for new navigation maps and voice guidance files, and then prompt you to download them.
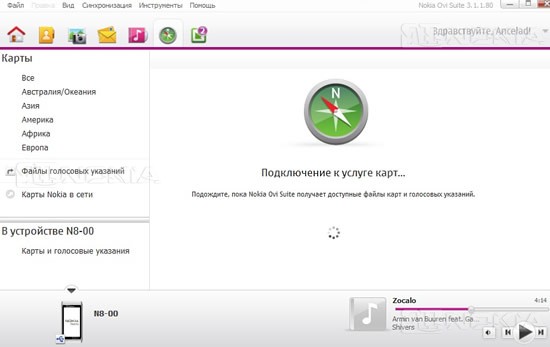
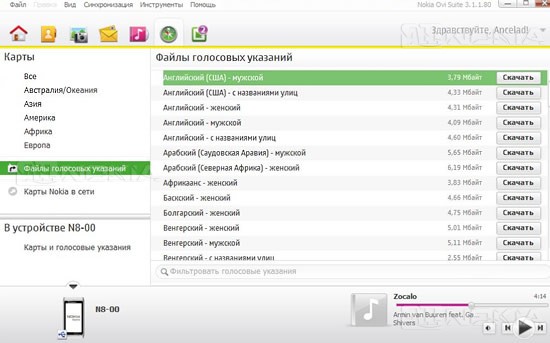
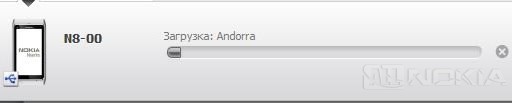
In case of successful download, a check mark will appear opposite the selected files. The link "Nokia Maps on the network" allows you to use the card service in your Internet browser.
Software Updates. The functionality is similar to the sub-item "Software updates" of the Tools tab.Here you can see useful tips on using the program and get easy access to Ovi Suite tools.
Synchronization
Configure content synchronization. To synchronize, you need to select the desired item and click on the " Synchronize". In case of successful synchronization, we will see the corresponding message.

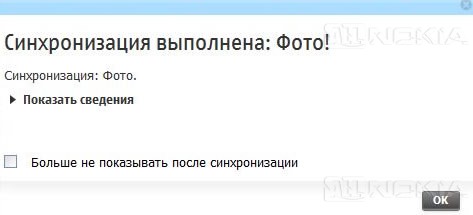
Also, when the synchronization parameters are configured, it is possible to synchronize the selected data with a single click on the " Sync all».
![]()
Music player
The interface is extremely simple, so we will not stay on it.
In this section, we are offered to download various applications from the Ovi store. To download the application, just point the cursor at the desired application and wait for the pop-up window. Details can be viewed by clicking on the link at the top of the window.

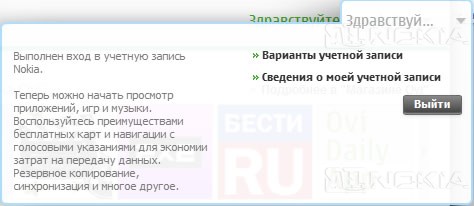
Sign in to your Nokia account
Allows you to use your Nokia account to download content, change account options, view account information, change password, or register a new user.
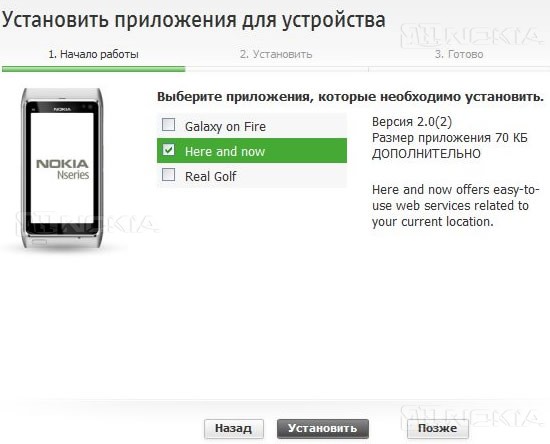
Installing applications on the device
To install the application on a device with a PC, it is enough to connect the device, double-click the left mouse button on the desired application to start the installation process, complete the installation on the device.

Conclusion
As you can see from the review, the program is a very handy tool with very rich functionality.
Pros of the program:
- convenient and intuitive interface
- good design
- multifunctionality
- ease of development
Minuses:
- lack of synchronization with browsers other than Internet Explorer
- the ability to play media files directly from the device
- lack of backup support from Nokia PC Suite
- the program sometimes "forgets" the login and password of the account, although this can be a particular problem Ancelad
Nokia Ovi Suite Overview
What does the Nokia account allow?
The Nokia account allows you to install, buy applications in the store, and use mailbox for everything and at once. Analogy can be done using android-smartphones. Until you create or tie an account to the Google system, you will not be able to synchronize your contacts, download legally downloaded applications from the market, send feedback to them, chat in branded chat rooms and so on. In addition, it is very convenient to have just one account for everything and immediately. You do not need to remember several passwords, e-mail for work, for personal messages - all in one. For this and it is worth starting an account.
How to start a Nokia account
Check if there is an active Internet connection (for mobile networks or via Wi-Fi - it does not matter), the record is created only via the Internet. Then go to "Options" ==\u003e "Mail and accounts" ==\u003e "Create a new one". Enter the required information and confirm the creation of the account. Wait a couple of minutes and, voila, - the account is created!
You will need to select a location, and also specify a date of birth. Date of birth is specified in order that minors can use a smartphone and a nokia account only with the permission of their parents. Little does it, what application children want to buy :).
The entered name will be the account to enter your newly created mailbox. The password should be carefully selected so that attackers can not use your mailbox and account for their own purposes, but you need to select it so that it is easy to remember.
In addition to the Nokia account, you will need to create or use the already created a Microsoft record. Without it, you can not install applications, download and give testimonials and tips to applications in Market Place.
The result
So we figured out what a Nokia account is. The recording is created per minute, creating requires a minimum amount of traffic and battery resources. The created Nokia account is freedom in choosing applications, instant messaging through built-in clients and via mail.
The account in Windows Phone is the logon parameters, with which you can use some Microsoft services, such as Offis, Skype, Xbox and others. Using the data created on your smartphone, you can use the necessary application on your computer. Initially, the profile is created when the phone starts, which performs identification of the owner and synchronization of the data.
When changing the owner of a smartphone, you may need to change the windows Records Phone.
If the device goes to another user, it appears necessary to change personal information. And, of course, there is a question about how to change the account on Windows Phone, and whether it can be deleted and restored without data loss, without resorting to the services of specialists.
- You have several accounts and want to use other login options on your phone.
- It is necessary to change the login and password in connection with the change of the owner of the equipment.
- You have changed your residence to another region or country.
What happens when you change your personal information?
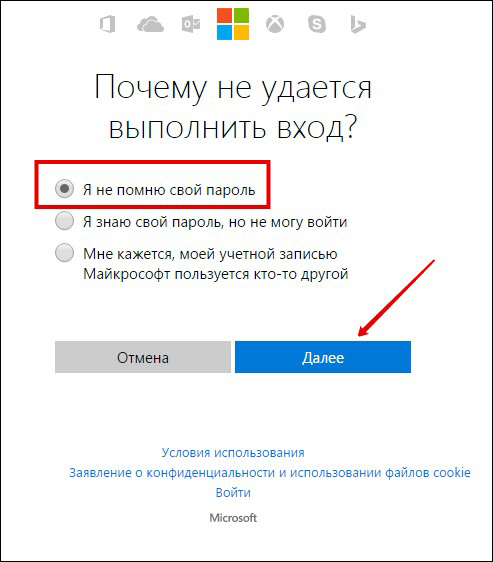
It should be understood that the main Microsoft account without knowledge of the login / password pair can not be deleted. Here, only reset the settings to their original settings. If there are any, then you can delete the accounting information in several stages from the Microsoft Live page, where you can restore it, if necessary.
But ordinary logins and passwords can be really changed through standard settings smartphone. This removes the content (music, photos, games, videos, installed applications and documents) and many phone settings are changed, which can not be restored. If you decide on these actions, then you can create a backup copy of the necessary information on the computer or in the cloud service OneDrive. If you use content with DRM protection, you will need to re-purchase the applications and games purchased from the previous profile.
How to change login information in Windows Phone
Changing your login and password will result in the creation of a new account. This is a fairly easy procedure, concluded in several stages. But before that, delete the previous entry.
Method number 1
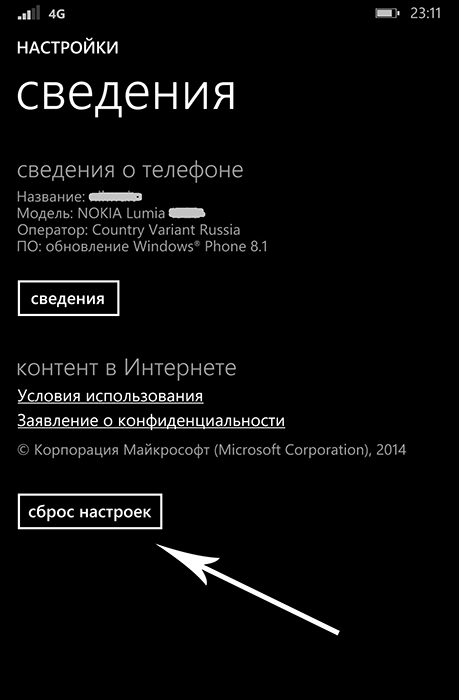
If the device works well, then you can do it in the phone settings by selecting the item "Device information" in the menu, press "Reset settings". Then you can restore the information on the official Microsoft website.
Method number 2
In the event that, in the context of a profile change, Windows requests a login and password that is known only to the previous user, you must delete the login parameters with the following actions:
- At the same time, press the power and the sound reduction button at the side of the device.
- After the phone vibrates, hold down the volume down key until the "!" Sign appears.
- Then click the "Increase the sound" - "Reduce sound" - "Power" - "Reduce sound" buttons in turn.
- Next, the smartphone will start the reset and reboot procedure.
IMPORTANT. The process of resetting parameters can have certain difficulties and is performed for quite a long time. If the phone hangs, you should try rebooting it and try to delete the account again.
Nuances related to changing the parameters of the account login.
- Purchasing games, videos, music and applications in the old Microsoft profile, you will not be able to restore and use them with the new name.
If you have a Nokia account, you can access a wide range of Ovi services:
Searching for routes using Nokia maps.
Purchase new applications and content for your mobile device at your local Ovi store.
Saving, updating and backup contacts and calendar.
Access to a free email account that you can use from your device and on the Internet.
For more information about Ovi services, see http://www.ovi.com.
For more information about using personal data, see the "Ovi Terms of Use" and "Privacy Policy" sections. To view them, select Tools\u003e Options and go to the tab Nokia account .
You can create a Nokia account when you first connect your mobile device to your computer.
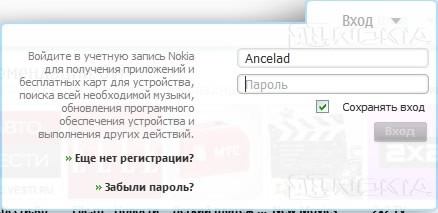
You do not have to create a Nokia account when you first connect your device to your computer. You can create an account anytime later. To do this, click To come in on the top navigation bar of the Nokia Ovi Suite. Note that you need an active Internet connection to create a Nokia account or sign in to your account.
When creating a Nokia account, consider the following:
Select your location from the drop-down list of countries. Then you can view local recommendations for music and applications from your local Ovi store on the Nokia Ovi Suite home screen. If you later need to check and possibly change the location information, select Tools\u003e Options and go to the tab Nokia account .
You are prompted to enter a date of birth. If underage children want to create a Nokia account, the child's parents must give their consent to create an account. The date of birth is not used for any other purpose and is not passed on to third parties.
The created user name for the Nokia account will be used as the Ovi email address. A free email address is automatically reserved when you create a Nokia account. The Ovi mail can be used from the device and via the Internet.
You will receive advice and suggestions on how to e-mail and in mobile communications. If you subsequently want to unsubscribe from these messages, change the device settings in your account profile on ovi.com.
To view the Nokia account information when you sign in, click the arrow next to the user name of the Nokia account on the top navigation bar of Nokia Ovi Suite, and select My account details . In this case, the web page of the Nokia account opens in a new browser window where you can view and change, for example, your contact information. To change the account settings (for example, to change the password), select the link Account Settings . This opens the Nokia account tab in the Nokia Ovi Suite settings.