Entering a network password does not act as a mandatory means of protecting your computer. But using it will provide you with network security. In order to open access to your personal network, an attacker need only know the username.
How to enter a network password?
If you try to connect to the network from a computer on a Windows 7 platform, the system will ask you to enter a network password. Windows 7 will allow input if a number of the following conditions are met:
- Classic configuration of the network access model;
- Authorization with the same credentials;
- The client computer is authorized in the system under an account that does not exist on the server computer.
Today, when the development of technology is not in place, the use of flash cards for data transfer is not relevant and outdated method. Transfer information from one computer to another, today, is as easy as downloading information from the Internet.
Widely use all the possibilities of data exchange between computers allow us wired and wireless network. However, the use of such capabilities require, in turn, certain knowledge. Nowadays, computers are often sold pre-installed operating system Windows 7, however, connectivity is mainly through Windows XP.
At the initial stage of configuration, it is recommended to use a passwordless connection scheme. Setting up a connection is quite simple - specific, special knowledge is not required here. If you need to create home network, change the settings in the control panel. It is only necessary to consistently go to the following directories:
- First go to the “Network and Internet” position;
- Find the folder "Select homegroup settings";
- Finally, select "Connection sharing with password protection" or "Disable sharing with password protection."
Then, configure the workgroup for all computers. If Windows 7 is installed on all computers, this setting will be done automatically. If you have a computer on the network on Windows XP, then you will receive access denied.
In Windows XP, shared folders contain symbolic names, and in order to create a shared folder, you will have to perform a number of actions. This can be done by clicking on the "Share this folder" option in the folder properties in the "Access" menu.
But this fact does not mean that you can use the connection at a high quality level. In this situation, you should not bother with special wisdom. You just need to remove some of the "barriers", which are set out in specially designed instructions for this.
For the implementation of the correct operation will be sufficient to create shared folder in the direct disk directory with the installed software. After that, all connection problems evaporate! And you can enter the network password in Windows 7.
How to remove the request for a network password?
If you want to remove the request for a network password, you just need to do the following:
- Open the “Start” menu;
- In the line “Run” enter “Controluserpasswords2” and click “OK”;
- Select the desired account and uncheck the box “Require a username and password”.
Windows 7 allows you to disable the network password by changing the computer security group policy. However, it is necessary to understand that negative consequences from such actions are possible. Performing these operations can significantly reduce the security level of your computer.
Today we will tell you how to open a folder for local network (popularly "share") and give other computers access to your files. Instructions on windows example 10.
Shared folder
1. Settings tab General access
To create a network resource on a computer with Windows 10, create a folder or select an existing one, right-click on it and call Properties:
Click the tab General access .
Select Advanced Setup:

Check the box Share this folder.
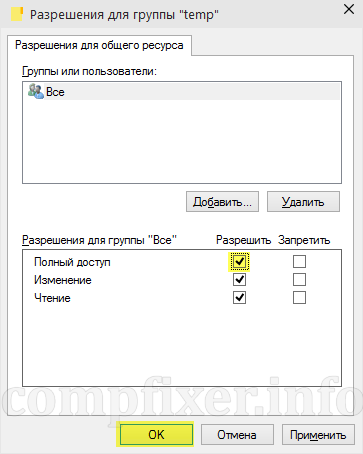
Press the button Permissions:

Set permissions for different users or groups. In most cases, here you need to allow reading for the group. Everything. In our example we allowed full access to network folder: for both reading and writing.
After setting click OK:
2. Settings tab Security
Click the tab Security.
Press the button Change:

Here you need to specify which users are allowed access at the level of NTFS rights. Again, in most cases you need to allow access to everyone. To do this, click To add:
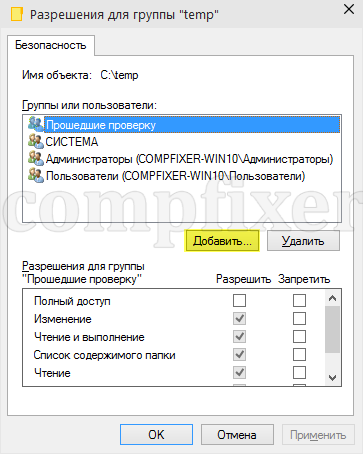
Enter the word “All” with a capital letter in the box and click OK:

Now group Everything appeared on the list. Click Save:

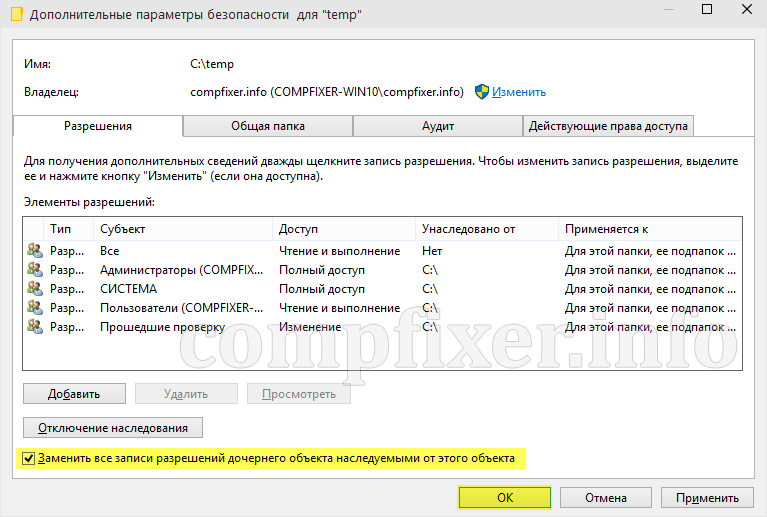
Now, in order to have access not only to the folder itself, but also to subfolders and files, it is necessary to replace the NTFS settings.
Click Additionally:

Check the box Replace all permission entries of the child object with those inherited from this object.
Click OK:
Click Yes:
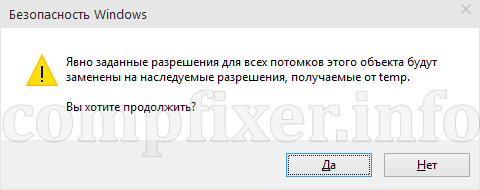
Wait until the rights apply to all attached objects. Than more files and folders within a given directory, the longer the application process may take.
Attention! While applying the parameters, an error may occur:
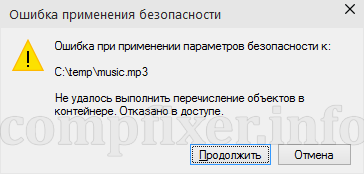
If you encounter it, read about how to fix it.
3. Setting sharing options
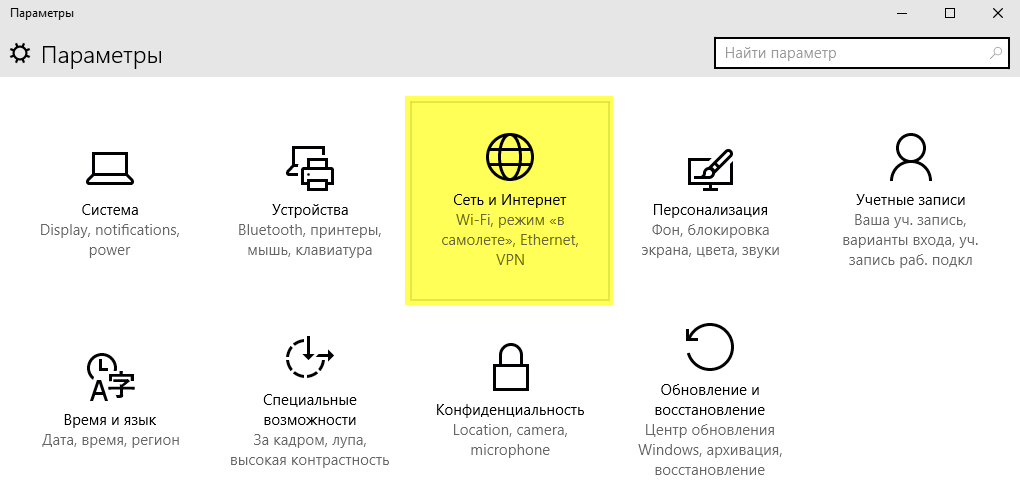
In Windows 10, click Start - Options and select Network and Internet:
Select item Change extra options shared access:

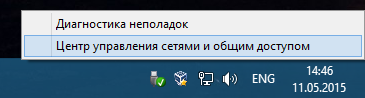
In Windows 7 and 8.1, it is best to right-click on the network icon near the clock, select Network and Sharing Center:
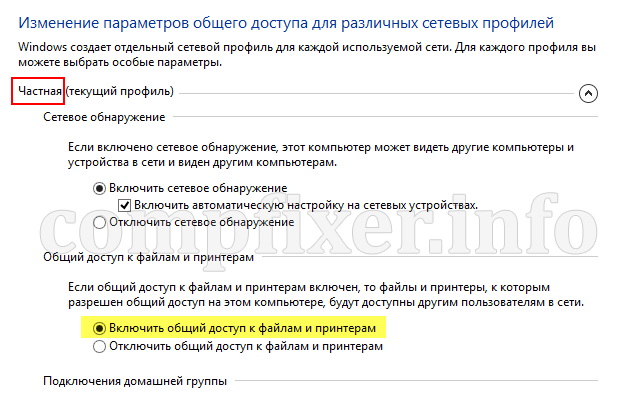
Expand the section Private.
Enable file and printer sharing.:
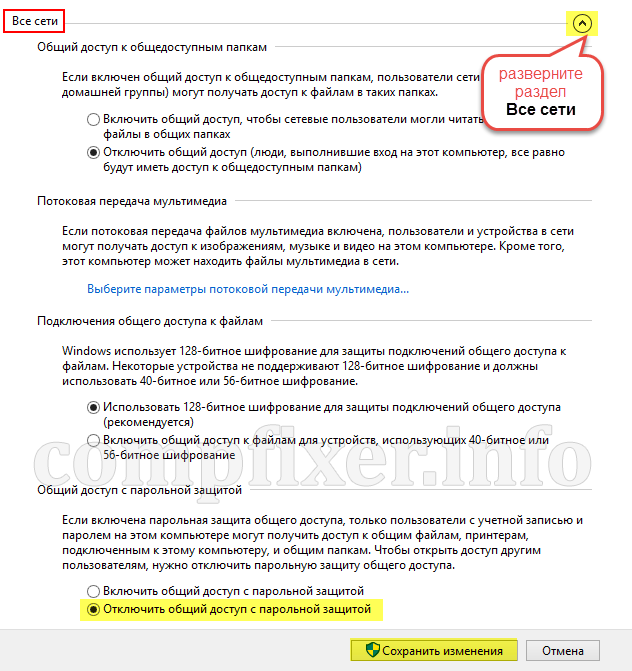
Now expand the section All networks.
Set the switch to Disable password sharing sharing..
4. Configure Firewall
To make connecting to a PC via a network possible, it is necessary to allow incoming connections in Windows Firewall.
Here you have two choices:
- disable it completely (which is NOT recommended);
- create a rule allowing network access (in a separate article)
Now many users at home, besides the main computer, have laptops, media players and other equipment connected to the network. In order to conveniently transfer data between these devices you need to open. In this article we will talk about how to share a folder in Windows 7 or Windows 8.
So, the process of sharing a folder in Windows 7 can be divided into two stages: opening access to the folder and disabling access with a login and password. Let's start with the first.
Sharing a folder in Windows 7 is quite simple. To do this, find the desired folder and open its properties. In the window with the properties of your folder, go to the "Access" tab.
Here you need to click on the "Sharing" button. After that, before you open the "File Sharing". In this window, you can configure access to the selected folder.

In the input field, type "All" or open the drop-down list and select the item "All" in it. After that, the “All” item will appear in the list of users who have access to the folder, and the access level will be indicated opposite it. By default, this is "reading."
If you want users who connect to a folder over the network to have the ability to edit and delete files in a shared folder, then change the value of "Read" to "Read and Write".
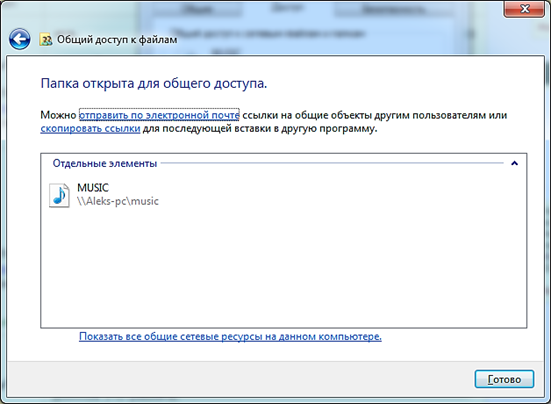
Click the “Finish” button to close the “File Sharing” window.

That's all, our folder is already shared. But, in order to access it from another computer, you will have to enter a username and password. In home use, this is very inconvenient, so you need to disable this feature.
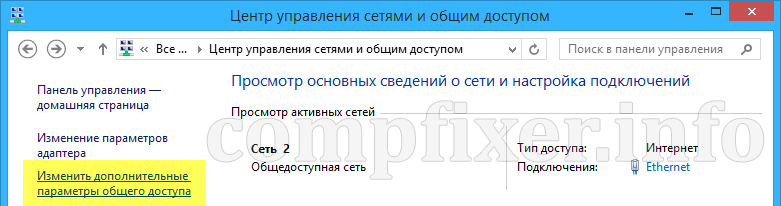
To do this, open the Control Panel and proceed along this path: Network and Internet - Network and Sharing Center - Change advanced sharing options (link in the left part of the window).
In the window that opens, you will get access to a large number of settings that relate to working with the network. Here you need to find the item "Shared access with password protection" and disable it.

After that you can connect to shared folders without having to enter a password.