When buying a new hard drive and reinstalling the system, it often becomes necessary to break the hard disk into partitions or repartition it. To do this is simple enough, besides there are a lot of ways for this procedure. So, let's consider how to partition, create new section, as well as how to unite the partitions of the hard disk.
How best to break a hard drive?
Why you need to break the hard drive
If you are a beginner, for a convenient and safe work with data, the hard disk must be partitioned. For what? First, it is very convenient when the operating system is installed on one partition of the hard drive, and all documents and media files are on another section. Secondly, if you infect files with viruses on one partition of your hard drive, they will not be able to get to another partition, unless you copy the infected file to that other partition.
How to correctly allocate a hard disk space
Before you break a hard drive, you need to think carefully about how to allocate space on it.
As for the operating room windows systems, then for the system drive "C" it is best to allocate a minimum of 25-30 GB. If the volume of your hard drive does not save space on the hard drive, then we recommend to allocate 100 GB for the "C" disk. What for?
Thus, you can install a large number of volumetric programs, not being afraid that there will not be enough space for them on the system disk. In addition, you can install a large number of games, and at the same time, not being afraid that their storage will not fit on the C drive either. Another nuance: the freer the system partition, the better will be the speed of the OS.
We recommend downloading files downloaded from the Internet to system disk, so as not to infect all your media files on the "D" disk, if there is a virus in the downloaded file. And to upload files, you also need to allocate space. As you can see, there are a lot of arguments for allocating large amounts for the system partition. But you do not need to allocate too much space for the partition with the system, it's useless.
As mentioned above, you need to split a hard one into at least 2 sections. In case you have data that you want to select in a separate section, you can create another and third partition, with the necessary volume for these files.
All sections must be created in file system NTFS.

How to partition a hard drive and merge partitions in Windows 7 and in Windows 8
How to divide hDD to sections
To use the standard disk partitioning utility, you need to call "Manage" from context menu "A computer". In the left panel, select "Disk Management". After selecting a line, all the disks connected to the computer are displayed in the right pane. After we activate it, selecting it with a mouse, it will be highlighted with a stroke on the bottom panel. Click on it with the right mouse button and select the item from the context menu - "Compress Volume".
While the system performs the appropriate actions on the disk, the user does not have anything else, just wait patiently. Finally, a message will appear on the screen, warning that the disk will be divided into two approximately equal parts. Confirm your choice by clicking on the "Compress" button. On the panel along with the disk, an unallocated area shaded with black color now appeared. Click on the shaded area and select "Create a simple volume". When you configure a new disk in the Simple Volume Wizard, the user can assign a volume label, give the partition a name, and select the type of formatting. Once the "Simple Volume Creation Wizard" has completed its work, the disk will be formatted. After it, the user will have a newly made logical disk.
If you are not satisfied with the partitioning of the disk into two equal parts, and this happens quite often, since with a hard disk of 500 GB (and even more so in 1 TB), half of the system is not allowed luxury. For system and program files, 60-100 GB is enough. All the rest of the space is better used for storing personal files. The standard means of the operating system can not be done. For this purpose, third-party programs are used that can work with disks, or you can partition the disk through the operating system installer.
How to merge a broken hard disk
In order to merge the broken partitions of the hard disk in Windows, you need to re-save the data on these partitions, they can be written to disks or temporarily sent to cloud storage. Then open the disk management menu, as described above, and delete the data sections that you want to merge. To delete a section, right-click on it and select "Delete volume ...", do the same with the second partition. Then, on the unallocated blank area, right-click and select "Create a simple volume". Everything, two sections turned into one.
How can I break the hard drive when installing the system
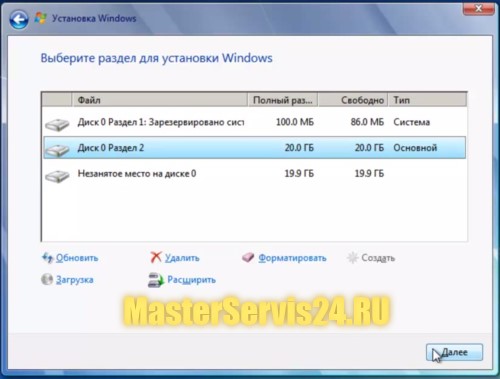
In order to split the hard disk into partitions when installing the system, you need to go to the selection of the partition to install. Then click on the "Disk Setup". In the menu that appears, you will see all the necessary buttons for splitting and merging sections.
To split a new hard disk into partitions, select the existing partition and click on the "Delete" button. Then select the free area and click on the "New" button, where you will enter the desired volume of the partition and click on the "Apply" button. To create other partitions, select again free place and click the "Create" button.
In order to distribute the remaining free space, if it turned out, select one of the hard disk partitions and click the "Extend" button, then you will need to specify the final size of the expandable partition.
To merge partitions, delete one partition and use the extension to add the freed volume to it.
The new operating system from Microsoft, which passed a loud stage of release, caused conflicting feedback from users. This is not surprising - the company from Redmond for about two decades is a monopolist in the market software home computers, and with the growth of its popularity, the number of criticism also regularly grows. We want it or not, but eventually Windows 10 will become the new dominant operating system in the market, so it makes sense to adapt to it now.
One of the most demanded aspects of working with any operating system is disk management - here to acquire knowledge stands both for the pros and ordinary users - the need to split the hard disk arises in all. Fortunately, Microsoft has diminished its ardor in the desire to stuff their new OS with a lot of innovations, abandoning their own successful solutions. In many respects this manifested itself in the management of such an element as hard drive - perfectly organized interface was borrowed from previous version 8.1. In the currently ranked first place in the popularity of Windows 7, work with memory is similar in version 10, so this article will be useful to a much larger circle of users.
Only the adherents can object third-party software, but, as practice shows, its use (as well as purchase of a license) is not justified for the average user, and for most of them the share of the used possibilities remains extremely low - the need to share a hard disk is rare.
To start working with media (it does not matter if you want to share, redistribute or delete the volume), you need to open the built-in program, whose name in the 10th edition of the OS has not changed since the "seven" - "Disk Management". To do this, perform the following manipulations:
- In the search bar of the Start menu, search for the Control Panel;
- We click on the item "Administration";
- In the window that appears, select the shortcut "Computer Management";
- Then choose "Disk Management".
Below are the slides showing the above steps
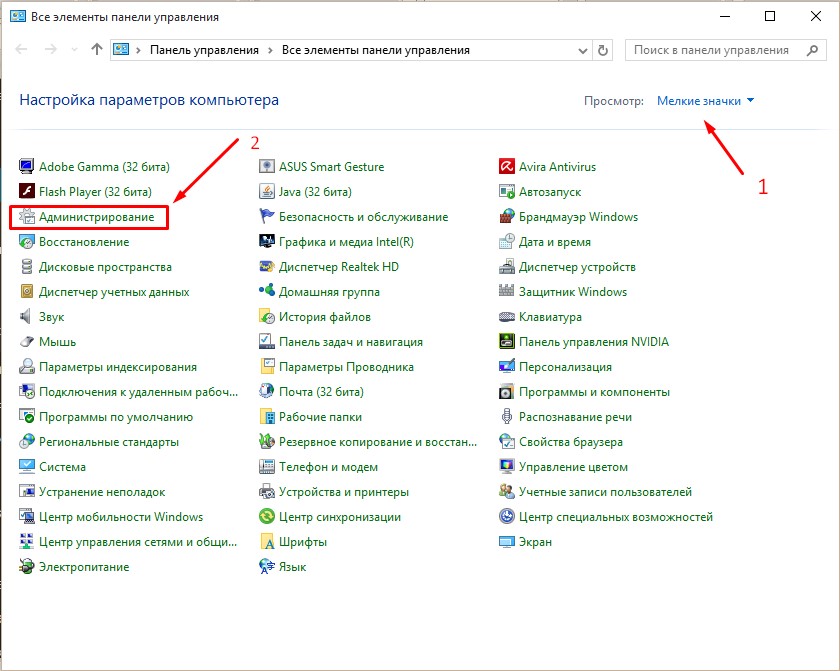
Control Panel - Administration
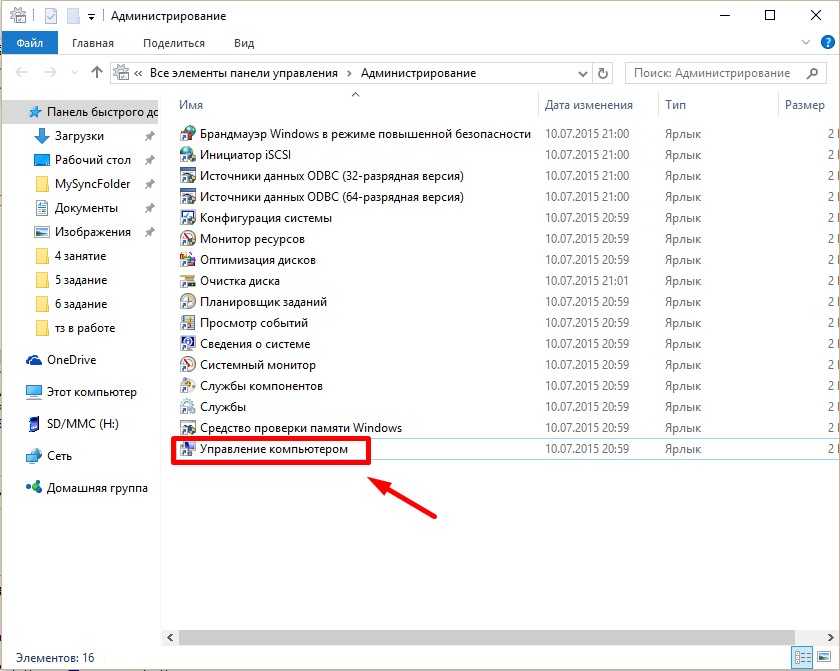
Computer Management
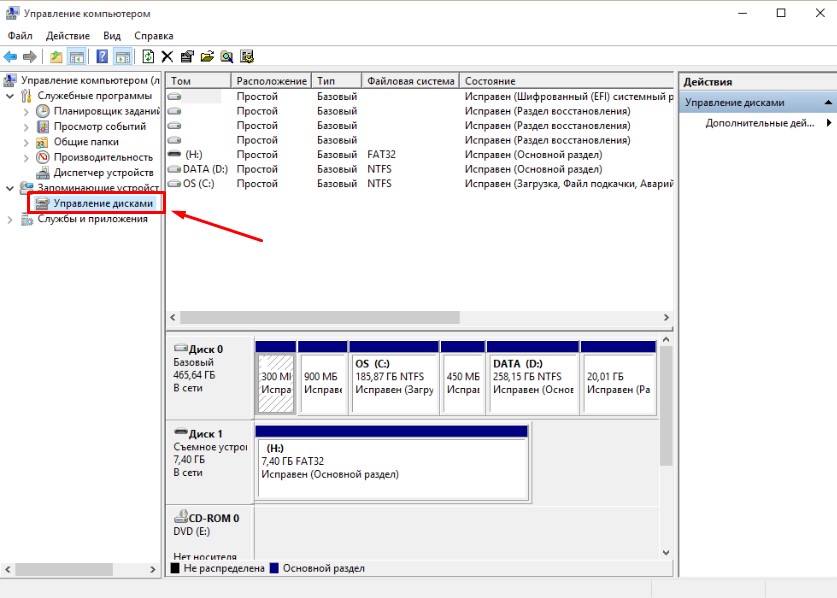
Disk Management
Creating a new volume on the free space
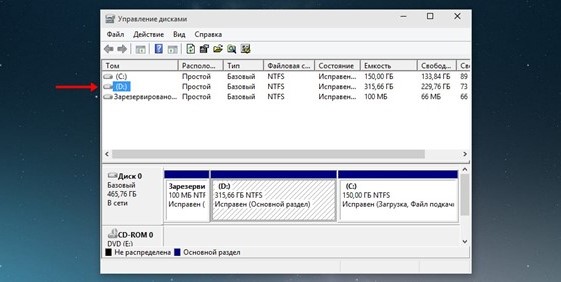
The screenshot shows open window program and a list of available to change sections. To create a new one, you need to click on the disk icon and in the drop-down list select the item " Compress volume". In our case, it is possible only to compress the volume "drive D:" - it has more space on it, and it is not recommended to do such manipulations with the system partition.
Why "compress volume"? The space on the disk is limited, it can not be taken from the air. Since we have a hard carrier completely divided between existing disks, this is the only option - to share memory for the partition. Another way is to take advantage of the free space in the unallocated area (it is also displayed in this list), or format one of the sections, delete it and create two new, acceptable size for you in the newly unplaced area. It is worth noting that in the latter case all the data stored on this volume will be lost, so the method presented in the screenshot is the most convenient and fastest.
After activating the item "Compress volume", a window opens, in which the system asks you to be patient to wait a few minutes. After this time, the information on the maximum volume for the new volume will be displayed on the screen - in our case it is slightly less than 77 GB. The user will be asked to choose the size of the new partition, which will lie within the limits of the previously mentioned 77 GB. We choose 51200 MB - this is exactly 50 GB.
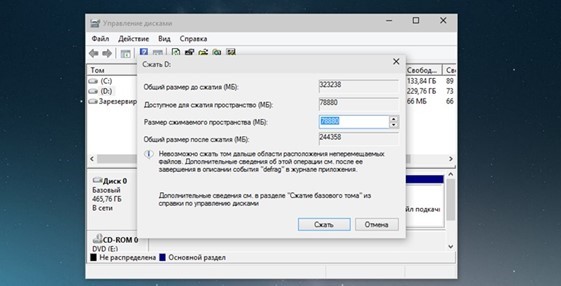
The space can be used for the convenience of cataloging your data or for the parallel installation of another operating system.
After setting the value, we press the "Compress" button and wait. The waiting time can vary very much - on SSD-disks the process will take a few minutes, on older machines - a couple of times longer (because the hard drive is much inferior in speed). At the end of the process, you will see noticeable improvements on the diagram from below - among the blue bars indicating the existing disks, a black one will appear with the label "Not Distributed".
Creating a section
After compressing the free memory on the hard disk, it's time to start creating a new partition. In Windows 10, control is performed by right-clicking on the unallocated area and activating the " Create a simple volume».
![]()
The " Create Simple Volume Wizard", With which the user will be offered to manage the size of the volume. By default, the disk set value will be equal to the size of free space - it should be changed only if you have more than one disk in your plans. You will also be prompted to select the name and label of the volume, and then the formatting options for the partition will open. It is recommended that you use the default values in windows and click "Format". Now you have at your disposal a new volume.
Since the management of disks in Windows 10 is similar to the "seven", we offer a visual look at the video how to partition disks in Windows 7.
In contact with
Logging in with administrator rights, you can redistribute partitions hard drive using the "Compression" function in the "Disk Management" program. You can compress an existing partition or volume in order to create an unallocated disk space, on which you can create a new partition or volume (note that the terms "partition" and "volume" are often interchangeable).
- Open the "Computer Management" section. To do this, click the button Start, select the components Control Panel, system and safety, Administration, and then double-click Computer Management. If you are prompted for an administrator password or confirmation, provide the password or provide confirmation.
- In the left pane, under Storage devices click Disk Management.
- Right-click the volume that you want to compress, and then click Compress volume.
- Follow the instructions.
Notes:
Here, under the "Compression" function Windows means changing the size of the partition (volume). Before you begin to compress, review the list of conditions necessary to perform compression. For more information, go to reference select item Calling Help, click the tab Search, enter Compress the base volume and click the Sections.
If there are several partitions on the disk, you can delete one of them and create new partitions on the released unallocated space. When you delete a section, all information stored on it will be destroyed.
You can also redistribute partitions using third-party program partition management. Some third-party vendors offer programs that allow you to re-partition hard disk partitions without deleting information.
Below is an example of deleting and creating partitions
As described above, we are entering Disk Management.
Picture 1
On Drive 0 the size of 465.76 GB can see 4 sections. Note that the fourth section F is a logical drive that is located in an additional section. An additional partition is the container in which the logical disk resides F.
For clarity, let's set a task, - delete partitions D and F and in their place create one section D.
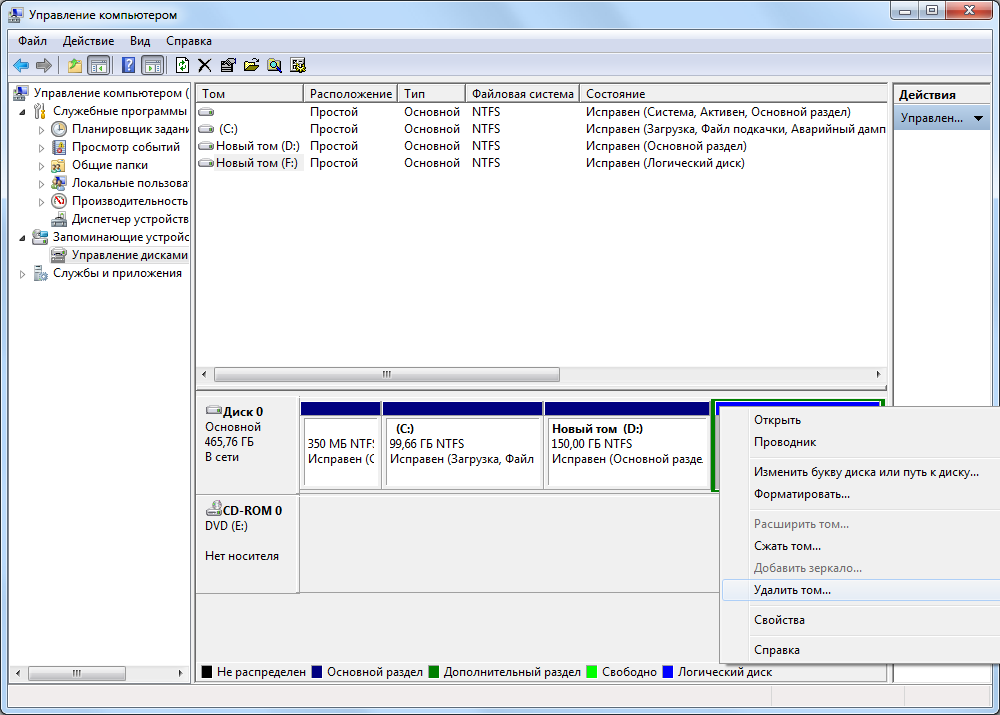
Figure 2
Move the mouse cursor over the section F and click the right mouse button. In the menu that opens, select "Delete volume".
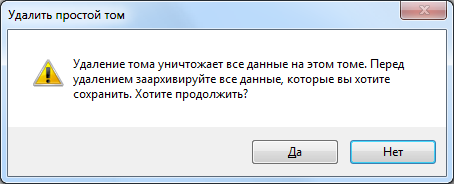
Figure 3
A window opens with a warning "Deleting a volume will destroy all data on this volume". Before deleting, archive all the data you want to save. Do you want to continue? "If you agree, we press the button Yes.
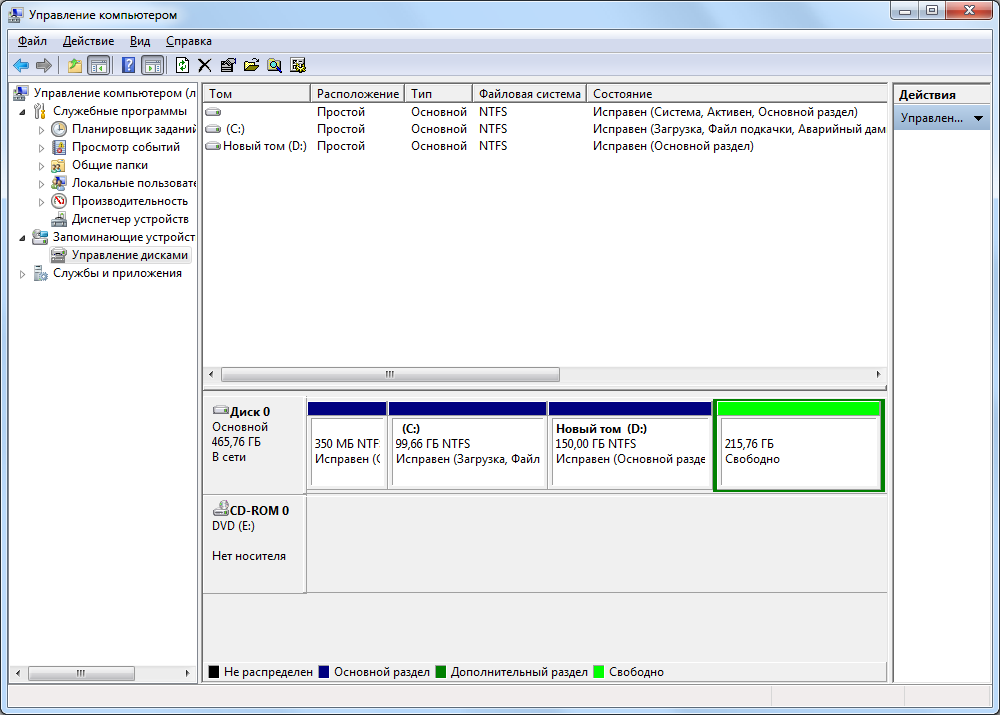
Figure 4
Logical drive F left - there was free space for the additional partition. We proceed to delete this additional section.
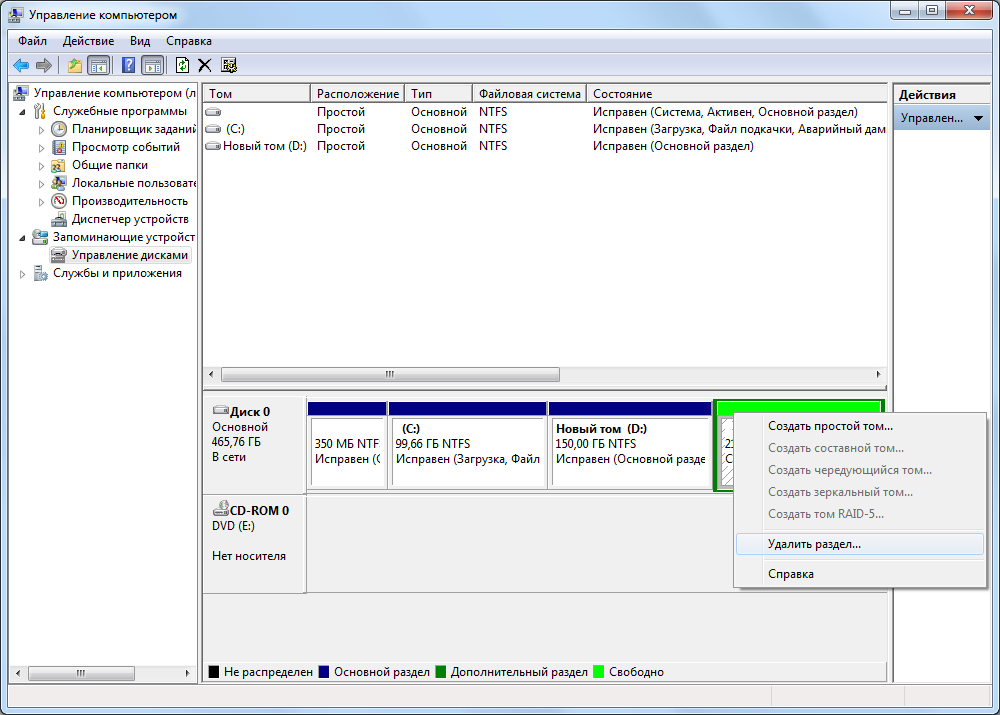
Figure 5
Move the mouse cursor over the free space of the secondary partition F and click the right mouse button. In the menu that opens, select "Delete Partition".
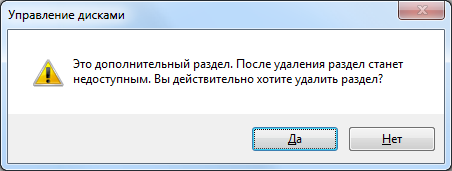
Figure 6
A warning window opens. "This is an additional section. After deleting, the partition becomes unavailable. Are you sure you want to delete the partition? ". In case of agreement, we press the button Yes.
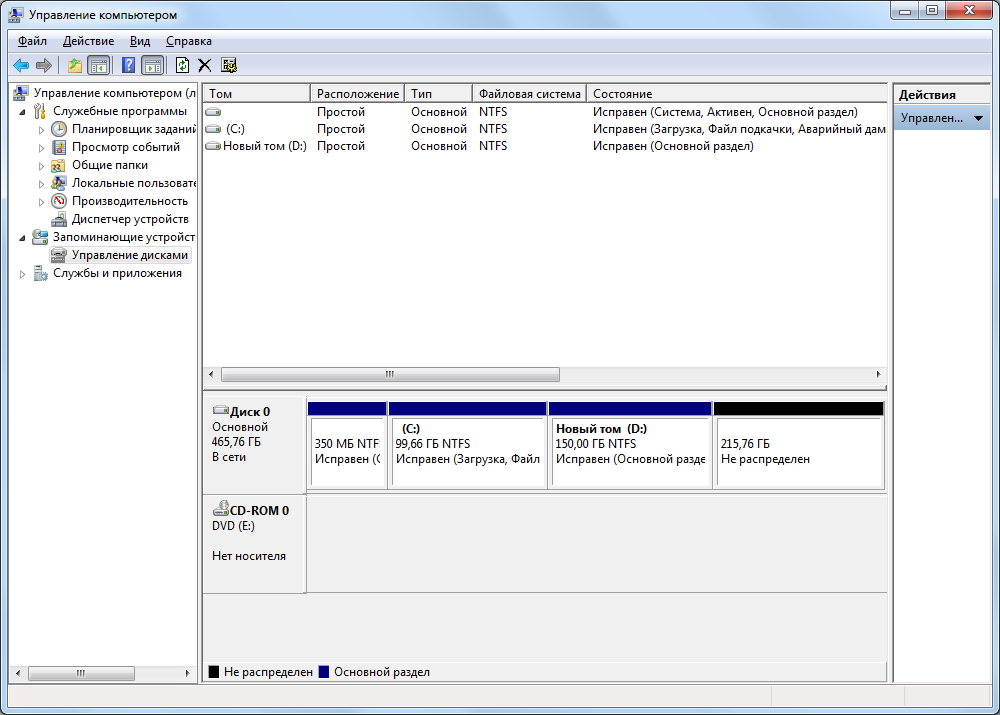
Figure 7
The additional partition was deleted, - in its place there remained not the distributed space of the hard disk. Similarly, delete the main partition D.
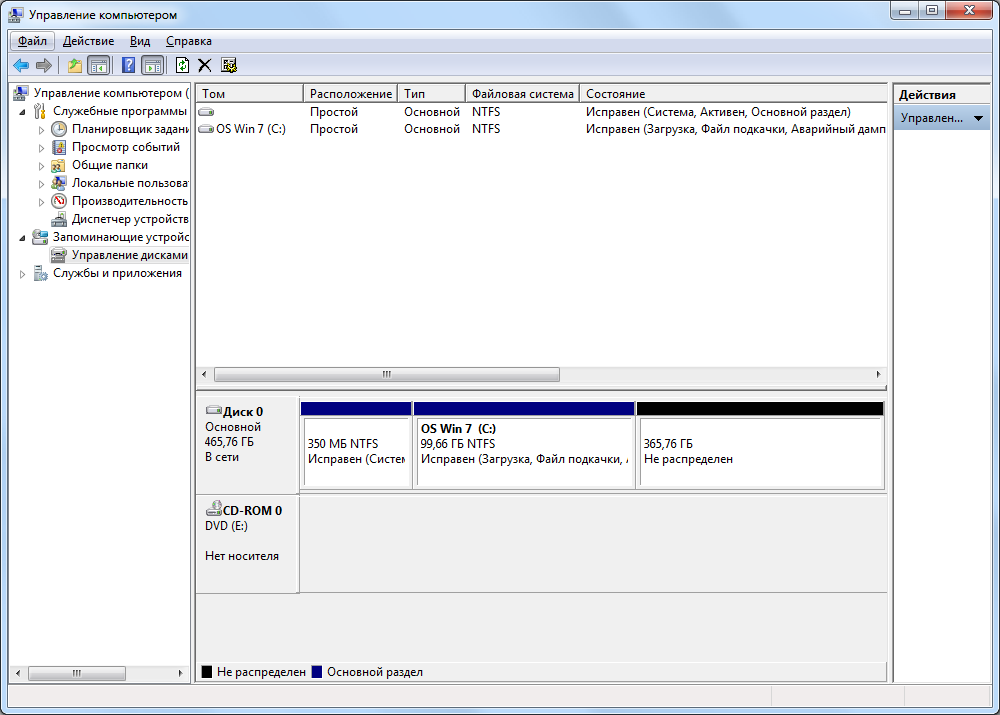
Figure 8
As a result, we get the unallocated space of the hard drive, on which we are breaking the creation of a new main partition.
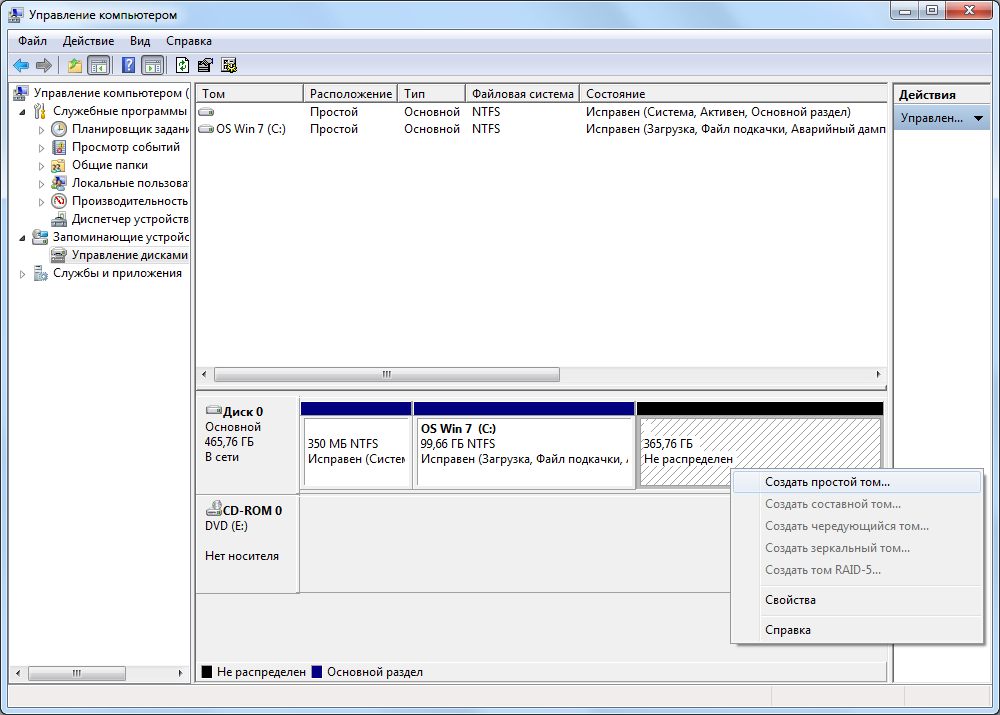
Figure 9
Point the cursor over the unallocated space of the hard disk and click the right mouse button. In the menu that opens, select "Create a simple volume".

Figure 10
The "Create Simple Volume Wizard" window opens, - we press the button Further.
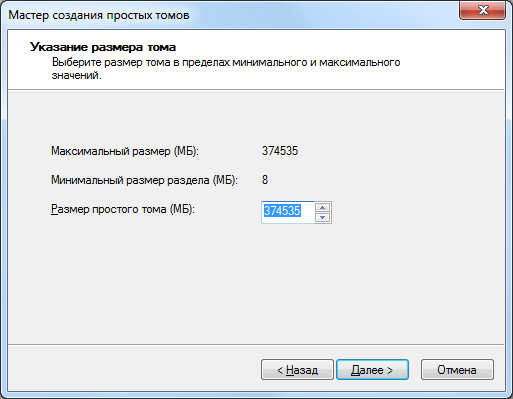
Figure 11
Since it was decided to occupy the remaining unallocated disk space under the partition being created, we leave the default "Simple Volume Size (MB)" unchanged) - press the button Further.
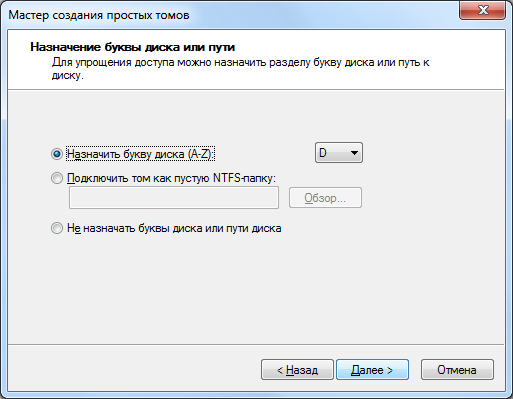
Figure 12
Assign the letter of the section (if not assigned, the section in the "My Computer" window will not be visible), - press the button Further.
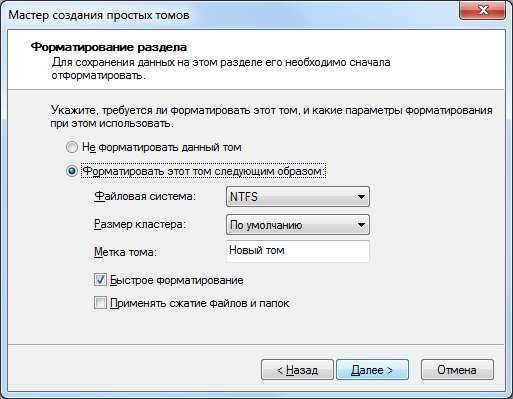
Figure 13
Set the formatting parameters and press the button Further.
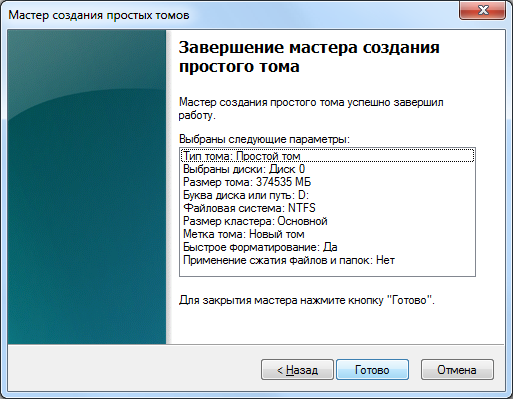
Figure 14
Push the button Done.
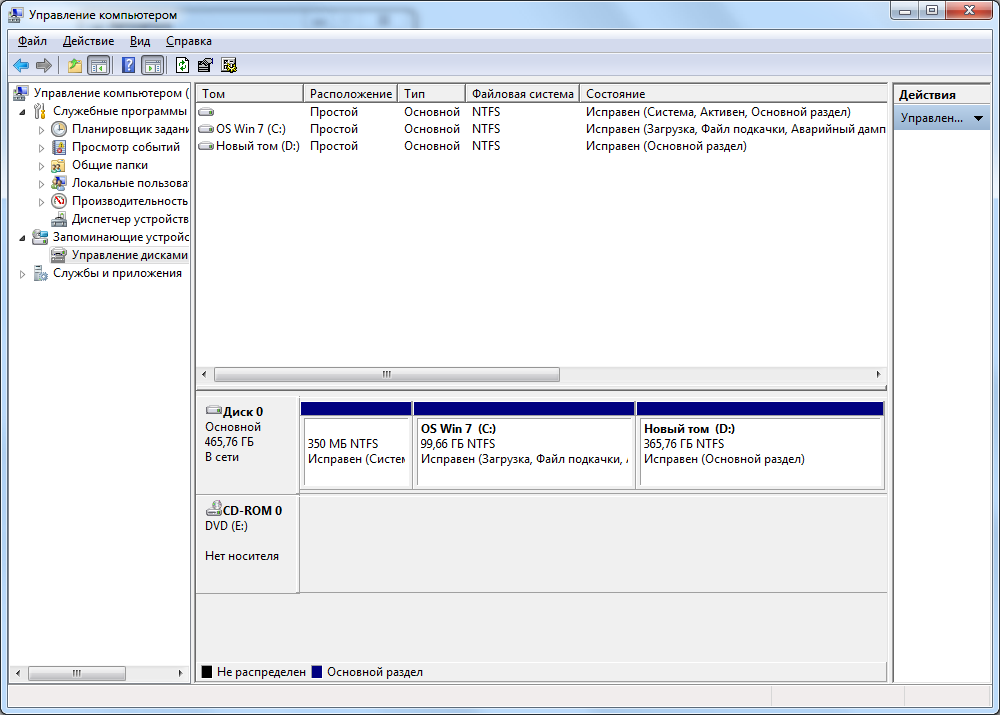
Figure 15
And we admire the result.
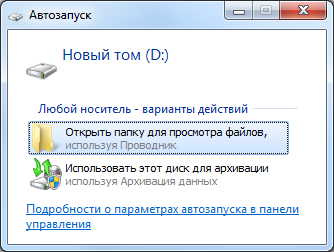
Figure 16
Opens the autoplay window, - open and use.
And in conclusion I want to note the features of expanding and compressing partitions.
Before performing these operations, make sure that the "Disk Defragmentation" service settings are set to the "Manual" startup type. If this service is disabled, then when you try to change the size of the partition, you receive an error: "The specified service can not be started because it is disabled or all connected devices are disabled."
The partition can be expanded only due to the unallocated area on the hard disk being adjacent to it.
An unregistered area can be obtained by removing or compressing existing partitions.
Note that an unallocated area can be used to expand only those partitions that are on the same physical hard disk.
For example, to expand the section C (when it is not adjacent to the unallocated area), you need:
Compress section D as much as possible, create a new partition in the appeared untagged area, move the information from section D (if it is located there), delete partition D, and then expand to the desired size section C, then assign a new partition to the letter D and extend it to the remaining unplaced area. This is such a complicated process ...