AMI BIOS of all versions inform the user of the successful completion of the self-test procedure with a characteristic "squeak" - one long beep, after which control is transferred to the loader operating system.
In order for you to hear this sound signal, the system unit of your computer or laptop must be equipped with a system speaker - an integrated "pyschalka". Alas, this condition is not always fulfilled. Sometimes the manufacturer saves on a penny accessory, and loading takes place in complete silence.
If something went wrong, during the POST procedure, some or other problems were identified, Computer BIOS will report this by using a combination of several audio signals indicating the failed component. In most cases, when problems do not affect the video card, you will see an error message on the computer screen. But if the video card failed to initialize (for example, it itself is a source of problems), the audio signals remain the only way to localize the problem.
Old versions of AMI BIOS used a sufficient large number of various combinations. All of them are summarized in one table.
| Description | ||
| 1 long | - | |
| 1 short | ||
| 2 short | ||
| 3 short | Recommendations are similar to the above. | |
| 4 short | ||
| 5 short | Error in the processor. | |
| 6 short | ||
| 7 short | ||
| 8 short | Memory of the video card is defective. The error is not fatal and it is possible to continue booting the computer. | |
| 9 short | ||
| 10 short | ||
| 11 short | Cache memory is defective. | On older motherboards (Pentium / Pentium MMX and earlier times) that have separate cache chips, you can try to replace these chips with known good ones. In more modern solutions (when the cache "migrated" to the processor), the cause of the problem is most likely the central processor, although it is impossible to exclude the malfunction of the motherboard. |
| 1 long, 2 short | Error BIOS of the video card or the video card fails to synchronize the horizontal sweep. | Check the operation of the video card with another monitor and, if the problem is repeated, replace the video card with a working one. |
| 1 long, 3 short | An error occurred while accessing random access memory (basic / advanced). | Most probably one or more RAM modules are faulty, or the motherboard is not compatible with these memory modules (does not support operation with them). To test this assumption, replace the memory modules with known good and compatible ones. |
| 1 long, 8 short | A monitor or video card that is not connected can not synchronize the horizontal sweep. | Check the operation of the monitor. If the problem is not in it, test the video card with another monitor and, if necessary, replace it with a new one. |
| Dual Signal | One or more tests of hardware components during the POST procedure failed. The error is not fatal and it is possible to continue booting the computer. | Replace faulty components or adjust their operating modes, if possible. |
Do not forget, all the manipulations with the hardware components of the computer, such as the replacement of memory modules, the extraction and addition of expansion cards, etc. It can only be carried out if the computer is completely de-energized - it must be physically disconnected from the mains. Before opening the case of the system unit, it is recommended to remove the power plug of the system unit from the socket. This will ensure that there is no power on the motherboard, plus, protect yourself from possible electric shock.
Modern versions of the AMI BIOS are much "more modest", the number of signals has decreased significantly: only simple combinations of short signals are now used.
| Sequence of sound signals | Description | Recommendations for troubleshooting |
| 1 long | POST passed successfully. | - |
| 1 short | Can not regenerate RAM. | Most probably one or more RAM modules are faulty, or the motherboard is not compatible with these memory modules (does not support operation with them). To test this assumption, replace the memory modules with known good and compatible ones. |
| 2 short | Parity error in the first 64 kbytes of RAM. | Recommendations are similar to the above. |
| 3 short | An error occurred while testing the first 640 KB of RAM. | Recommendations are similar to the above. |
| 4 short | Error in the operation of the system timer. | First, remove all expansion cards, except the video card, and try to boot the computer. If the error has disappeared, one of the expansion cards is to blame (adding cards one at a time can reveal the problem). Repeating the error indicates a malfunction of the motherboard, as the most likely reason. |
| 5 short | Error in the processor. | Recommendations are similar to the above. Also, the cause of this error may be a processor that is not compatible with this motherboard. |
| 6 short | The keyboard controller line A20 is defective. | First try to replace the keyboard with another one. If the error occurs again, remove all expansion cards except the video card, and try to boot the computer. A successful start indicates the malfunction of one of the expansion cards, otherwise the mother of the motherboard is most likely responsible for the problem. |
| 7 short | The interrupt controller is defective / not functioning properly | First, remove all expansion cards, except the video card, and try to boot the computer. If the error has disappeared, one of the expansion cards is to blame (by adding maps one at a time it is possible to identify the faulty one). Repeating the error indicates a malfunction of the motherboard, as the most likely reason. |
| 8 short | Memory of the video card is defective. | Replace the graphics card with a working one. |
| 9 short | BIOS checksum error. | To begin with, try flashing the Flash memory with the BIOS code, "bay" the latest revision of the BIOS for your motherboard. If the error occurred just after installation new version BIOS, roll back to the revision that worked steadily before. Saving the problem signals a malfunction of the Flash memory chip on the motherboard and the need to replace it. |
| 10 short | Error reading / writing to CMOS memory. | Most likely the motherboard is faulty: the non-volatile CMOS memory chip failed. |
| 11 short | Cache memory is defective. | The cause of the problem is most likely the CPU, although it can not be ruled out that the motherboard is faulty either. |
Moreover, in the last revisions of AMI BIOS there were sequences of 1 long, 1, 3, 6, 7 or 8 short beeps, the remaining combinations are no longer used.
Separately it is worth noting the ever-changing, continuous tone of the sound signal, reminiscent of a siren. It can be caused by two reasons: power supply failure, or computer overheating. If you have access to the inside of the system unit, check all the power connectors on the motherboard, check the normal fit of the radiators, the operation of all fans on the coolers.
When you turn on the serviceable PC after a few seconds, one short beep sounds, which should delight the hearing of any user ...
This speaker of the system unit signals to you that the self-test has passed successfully, no faults have been detected, the operating system starts downloading.
If any problems are found, the BIOS chip will generate corresponding sound signals in the system dynamics.
The nature and sequence of these signals depend on the BIOS version.
What do the beeps mean when the computer is turned on?
1. No signals - the power supply unit (PSU) is faulty or not connected to the motherboard.
Clean it from dust.
Check the connection of the power supply to the motherboard.
If it does not help, replacement or repair is required.
2. Continuous signal - the power supply unit is faulty. See paragraph 1.
3. 1 short signal - no errors detected, PC is working.
4. 1 short repeated signal - problems with BP. See paragraph 1.
5. 1 long repeated signal - a faulty memory. Try to remove the RAM module from the slot and insert it again. If it does not help, replace it.
6. 2 short signals - minor errors are detected. Check that the cables and cables are firmly attached to the motherboard connectors. Set the BIOS to the default values (Load BIOS Defaults).
7. 3 long signal - malfunction of the keyboard controller. Check the integrity of the keyboard cable and the quality of the connections. Check the keyboard on a known good PC. If it does not help, you will need to repair or replace the motherboard.
8. 1 long and 1 short signals - a malfunction of the main memory. See paragraph 5.
9. 1 long and 2 short signals - video card malfunction. It is recommended to remove the video card and insert it again. Check the integrity and quality of the monitor cable connection. If that does not work, replace the video card.
10. 1 long and 3 short signals - keyboard malfunction. See paragraph 7.
11. 1 long and 9 short signals - an error when reading data from the BIOS chip.
It is required to rewrite (flashing) the microcircuit. If it does not help, replace the microcircuit.
AMI BIOS:
1. No signals - the power supply unit (PSU) is faulty or not connected to the motherboard. Clean it from dust. Check the connection of the power supply to the motherboard. If it does not help, replacement or repair is required.
2. 1 short signal - no errors detected, PC is working.
3. 2 short signals - a malfunction of the main memory. Try to remove the RAM module from the slot and insert it again. If it does not help, replace it.
4. 3 short signals - the error of the first 64 KB of main memory. See point 3.
5. 4 short beeps - system timer malfunction. Restart the PC. If it does not help, you will need to repair or replace the motherboard.
6. 5 short signals - a malfunction of the CPU. Restart the PC. If this does not work, you will need to replace the processor.
7. 6 short signals - keyboard controller malfunction. Check the integrity of the keyboard cable and the tightness of the connections. Check the keyboard on a known good PC. If it does not help, you will need to repair or replace the motherboard.
8. 7 short signals - a malfunction of the motherboard. Restart the PC. If it does not help, you will need to repair or replace the motherboard.
9. 8 short signals - a fault in the RAM of the video card. Restart the PC. If that does not work, replace the video card.
10. 9 short signals - an error while checking the checksum of the BIOS chip. It is required to rewrite (flashing) the microcircuit. If it does not help, replace the microcircuit.
11. 10 short signals - it is impossible to write to the CMOS memory. Zero the contents of the memory (to do this, turn off the PC, remove the network cable from the socket.) Find the switch next to the CMOS battery, set it to Clear CMOS. network cable!! - Power button for PC. Set the switch to its original position. If there is no switch on your motherboard, remove the battery for half an hour-hour). Set the BIOS to the default values (Load BIOS Defaults). If it does not help, replace the microcircuit.
12. 11 short signals - a malfunction of the main memory. See point 3.
13. 1 long and 2 short signals - video card malfunction. It is recommended to remove the video card and insert it again. Check the integrity and quality of the monitor cable connection. If that does not work, replace the video card.
14. 1 long and 3 short signals - video card malfunction. See No. 13.
15. 1 long and 8 short signals - video card malfunction. See No. 13.
Phoenix BIOS signals:
1-1-3. Error writing / reading CMOS data.
1-1-4. A checksum error has occurred in the contents of the BIOS chip.
1-2-1. The motherboard is defective.
1-2-2. Error initializing the DMA controller.
1-2-3. An error occurred while trying to read / write to one of the DMA channels.
1-3-1. Memory regeneration failed.
1-3-3. An error occurred while testing the first 64 KB of RAM.
1-3-4. Similar to the previous one.
1-4-1. The motherboard is defective.
1-4-2. Error testing the RAM.
1-4-3. System timer error.
1-4-4. Error accessing the I / O port.
2-x-x. Problems with the first 64k of memory (x - from 1 to 4)
3-1-1. Error initializing the second DMA channel.
3-1-2. Error initializing the first DMA channel.
3-1-4. The motherboard is defective.
3-2-4. Keyboard controller error.
3-3-4. Error in testing video memory.
4-2-1. System timer error.
4-2-3. Line A20 error. The keyboard controller is defective.
4-2-4. An error occurred while working in protected mode. The CPU may be faulty.
4-3-1. An error occurred while testing the RAM.
4-3-4. Real time clock error.
4-4-1. Serial port testing error. Can be caused by a device that uses this port.
4-4-2. An error occurred while testing the parallel port. See above.
4-4-3. An error occurred while testing the math coprocessor.
Attention!!!
1. If you do not feel well-prepared, if you have problems, contact a specialist.
2. All the manipulations with the "iron" produce with the power off!
3. Before starting repairing the PC, it is necessary to remove the electrostatic charge (for example, by touching the nickel-plated surface of the faucet with both hands).
4. Even after removing the electrostatic charge, try, if possible, not to touch the terminals of the central microprocessor, video adapter processor and other microcircuits.
5. Do not clean the oxidized gold-plated contacts of the video card and RAM modules with abrasive materials! For these purposes, you can use a paper eraser such as "eraser".
6. Remember that most of the "faults" of the PC are "treated" by a simple reboot!
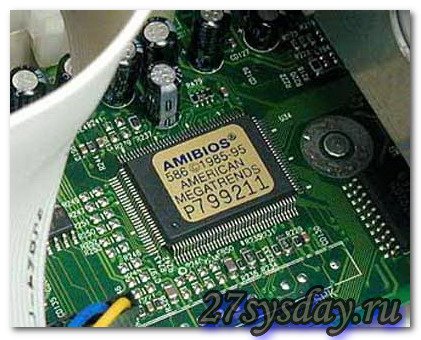
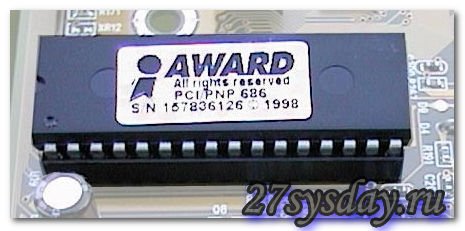
7. If you do not know which vendor BIOS is installed on your PC, see when loading the top line on the monitor screen, for example, for the Award there will be an Award Modular BIOS line, for AMI - American Megatrends, Inc. The BIOS version should also be listed on the passport of your PC.
The theme of this article is BIOS. First, we'll figure out what the BIOS is and what it's for? And after as much as possible we will describe sound bIOS signals.
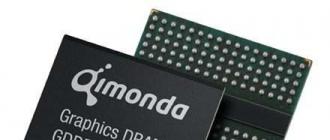
BIOS (Basic Input-Output System, basic system I / O) is a special program that is stored in a ROM chip (read-only memory). Frequently there is an English-speaking designation of this type of memory - Read Only Memory, or abbreviated ROM. In practice, for a long time, instead of regular ROMs, flash memory is used, which is rewritable, which allows the user to independently update BIOS versions.
BIOS functions
As for the BIOS functions, they are very extensive.
First, as soon as the PC power is turned on, the control immediately goes directly to the BIOS. This program performs initial testing of the components of the system unit. After a successful check, the BIOS transfers control of the computer to the next program that is written to the boot sector (the boot sector) on the boot disk (as the boot disk can act hDD, CD-ROM, floppy disk, flash drive, etc.). The procedure for initial testing of equipment is called POST (English Power-On Self Test - power-on self test).
Secondly, thanks to the BIOS in the special CMOS chip, the hardware configuration of the computer remains. During the power-up of the PC, the current hardware configuration is compared and stored in the chip. If the program has found differences between these two configurations, then the CMOS data will be updated and, if necessary, will be prompted to enter the BIOS Setup to specify the new parameters of the detected equipment. If no differences in configurations are found, or the configuration can be updated without user intervention, the program performs the necessary configuration (configuration) of the hardware components of the computer.
CMOS-memory (Complementary Metal Oxide Semiconductor) - a small, in terms of its RAM memory chip (RAM or RAM - Random Access Memory). But since there is a need to store information in it even after the power is turned off, the CMOS memory is additionally powered by its own battery. There are several problems with this battery itself. One of them is a limited service life, which is 5-6 years. After the expiration of this period of time, the battery can no longer supply the required power level, which leads to loss of stored information in the chip. Although this problem is solved quite simply - a new battery is installed.
Thirdly, with the help of a special the BIOS Setup, the user can set various parameters and select operating modes for individual PC components. Here, the user can turn off equipment that is not used, or its use is undesirable in order to ensure the safety of the computer. Fourthly, with help with BIOS I / O operations are processed. Actually, for this purpose, this system was originally developed. Due to the presence of the BIOS, for example, the hard disk understands that the head needs to be placed on a specific track or counted as a certain sector, etc.
If all programs had to include instructions of this kind in their composition, then they would be huge, and their work was very inefficient. In addition, with the advent of each new device, they would have to be modified. Therefore, in order to avoid such problems, a significant part of the work related to the processing of I / O operations was assigned to the BIOS. Naturally, the BIOS did not completely remove all the problems, but greatly simplified the solution of most of them. It is worth noting that today it is not as relevant as it was in the days of the MS-DOS operating system. Modern operating systems, such as Windows XP, Windows Vista or Windows Seven practically do not use the BIOS capabilities to handle I / O operations. But here we must necessarily say that all that is said is very conditional. In fact, all tasks are performed by the operating system in close interaction with the BIOS, complementing each other functionally.
An ordinary user often has to deal with that part of the BIOS, which is called the BIOS Setup. BIOS Setup is a special subroutine that allows you to configure the operation of individual hardware components of the computer. The main difficulty of its configuration lies in the incomprehensible names of options, which little can be said about the not-too-advanced user. In addition, the problem is aggravated by a lack of reference material on these settings. And if you look at the whole, nothing special about BIOS Setup is representative of itself, the only thing that distinguishes it from other programs is its rather archaic interface compared to modern operating systems. All the settings made by the user during setup of the computer through the BIOS Setup are saved to the CMOS memory chip, where they are stored together with the information about the hardware configuration of the system.
How to reset BIOS settings
Below we give several ways that help solve the problems with zeroing BIOS, that is, returning it to the initial statein which all settings will be the same as they were before the changes made by the user. Often, such a simple operation as resetting BIOS settings, allows you to eliminate a number of problems with starting the computer, and also helps to avoid visiting the service center.
Method 1
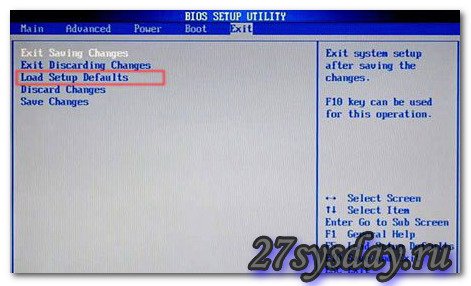
Return the BIOS to the factory default settings, using the interface BIOS setup, which will allow us not to disassemble the system block once again. It should be noted that this method is feasible in cases where the BIOS boots. To reset the BIOS, you need to find the menu item load bios defaults or load setup defaults, as shown in the figure and press Enter.
Method 2
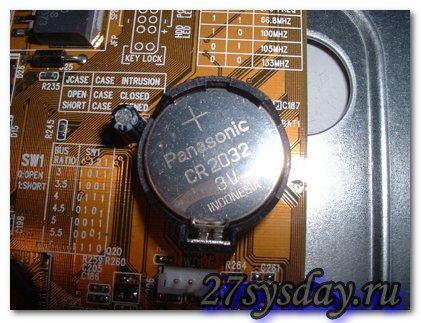
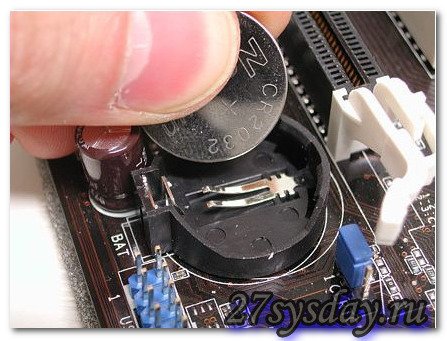
Reset bIOS settings with the help of a battery. Before starting, you should completely disconnect the power from the computer. After you make sure that all cords from the sockets are removed, you need to remove the side cover of the system unit. Next, find the same battery and take it out for 5-10 minutes. After this period you can return it to the place. The BIOS should be reset.
Method 3
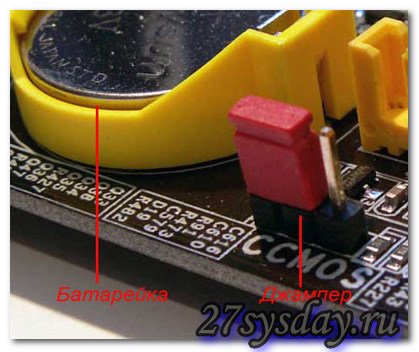
Reset the BIOS settings with a jumper (jumper). Find a jumper on the motherboard is simple, it is almost always next to the battery. It is designated as Clear CMOS or Clear RTS. Sometimes to facilitate access to it, motherboard manufacturers place it at the edge of the board. To reset the BIOS settings, the jumper must be reset for a few seconds from position 1-2 to position 2-3, and then return it to its place.
If everything is done correctly, after turning on the computer after a few seconds, one short signal will be heard - this indicates that the system is OK and then the operating system will start to boot. If the system has hardware problems, the signal will have a different appearance. By type of signal, you can determine what kind of character the fault is detected, and what further actions should be taken. All BIOS signals (provided by the speaker) are distinguished depending on the version and, of course, depending on the nature of the detected malfunction. The BIOS version is determined based on the documentation that comes with the motherboard. If documents are missing for some reason, you can determine the version of BIOS with the help of special utilities, which are available in surplus on the Internet. Another version of the BIOS is usually displayed on the monitor screen when the computer starts in the lower left corner. Of all the BIOS vendors on the market, there are two main competitors, software which is equipped with the vast majority of modern PCs. These are two such well-known brands, such as American Megatrends (AMI) and Award Software. So, first consider the sound alarm AMI.
Beeps BIOS: AMI BIOS
- - Two short signals of the speaker mean any malfunction in the computer's RAM. Troubleshooting options: it is necessary to remove the memory module from the slot, wipe it with a dry brush and insert the module into place, if after the PC starts the signals are repeated, it may be necessary to further test the memory or completely replace it;
- - Three consecutive short speaker signals mean a reading error of the first 64 KB of main memory of the PC. Troubleshooting options: it is necessary to remove the memory module from the slot, if there is dust, wipe the bar with a dry brush and insert the module into place, when repeating the signals, it may be necessary to further test the memory or completely replace it;
- - Four consecutive short speaker signals indicate a malfunction of the system timer. Troubleshooting options: restart the PC, and if the signals are repeated, then repair or replace the system board;
- - Five consecutive short speaker signals indicate a malfunction of the CPU. Options for troubleshooting: restart the PC, when repeating the signals - CPU replacement;
- - Six consecutive short speaker signals indicate a malfunction of the keyboard controller. Troubleshooting options: check cable and keyboard connection to the system unit, check the keyboards on another computer. If after checking that the keyboard is working, then there is a version of the motherboard repair, or its replacement;
- - Seven consecutive short speaker signals indicate a malfunction of the motherboard. Troubleshooting options: reboot again and if the signals are repeated, you will need to repair or purchase a new motherboard;
- - Eight consecutive short speaker signals indicate a memory fault graphics card. Troubleshooting options: if you repeat the signals after a reboot, you will either need to repair the old one or purchase new video card;
- - Nine consecutive short signals indicate a malfunction of the BIOS chip itself. Options for troubleshooting: flashing the chip or replacing it completely;
- - Ten consecutive short speaker signals indicate the impossibility of recording in the CMOS memory. Troubleshooting options: Clear CMOS memory with one of the above options. If, after setting the BIOS default values, the signals are repeated, the CMOS memory module must be replaced;
- - Eleven consecutive short speaker signals indicate a malfunction of the RAM. Troubleshooting options: it is necessary to remove the memory module from the slot, if there is dust, wipe the bar with a dry brush and insert the module into place, when repeating the signals, it may be necessary to further test the memory or completely replace it;
- - One long and three short signals of the speaker as well as one long and eight short signals again indicate a failure of the video card. The options for troubleshooting are the same as in the previous case.
- - The absence of speaker signals may indicate a malfunction of the power supply. Troubleshooting options: check the attachment of the power supply plugs to the connectors on the motherboard, clean the power unit of the dust. In case these actions do not work, try to test the PSU on another computer if possible. With such symptoms, you will either need to repair it, or purchase a new power supply.
BIOS audio signals: Award BIOS
- - One short signal of the speaker means no errors in the system and the computer is in a fully functional state;
- - Two consecutive short speaker signals indicate the detection of "non-essential" errors. Troubleshooting options: it is necessary to check the reliability of mounting components and cables to the PC board, then try to set the BIOS default values;
- - A short repeating speaker signal indicates a failure of the PSU. Troubleshooting options: check the attachment of the power supply plugs to the connectors on the motherboard, clean the power unit of the dust. In case these actions do not work, try to test the PSU on another computer if possible. With such symptoms, you will either need to repair it or purchase a new power supply;
- - A long repeating speaker signal indicates a malfunction of the RAM. Troubleshooting options: it is necessary to remove the memory module from the slot, if there is dust, wipe the bar with a dry brush and insert the module into place, when repeating the signals, it may be necessary to further test the memory or completely replace it;
- - Three long speaker signals indicate a malfunction of the keyboard controller. Troubleshooting options: check cable and keyboard connection to the system unit, check the keyboards on another computer. If after checking that the keyboard is working, then there is a version of the motherboard repair, or its replacement;
- - One long and one short speaker signals indicate a malfunction of the RAM. Troubleshooting options: it is necessary to remove the memory module from the slot, if there is dust, wipe the bar with a dry brush and insert the module into place, when repeating the signals, it may be necessary to further test the memory or completely replace it;
- - One long and two short signals of the speaker indicate a malfunction of the video card. Troubleshooting options: you need to check the cable from the video card to the monitor, if the cable is OK, you need to remove the video card from the slot, wipe it off if necessary, and insert it back. If these actions do not work, you may need to repair or purchase a new video card;
- - One long and three short speaker signals indicate a malfunction of the keyboard controller. Troubleshooting options: check cable and keyboard connection to the system unit, check the keyboards on another computer. If after checking that the keyboard is working, then there is a version of the motherboard repair, or its replacement;
- - One long and nine consecutive short speaker signals indicate a malfunction of the BIOS chip itself. Options for troubleshooting: flashing the chip or replacing it completely;
- - The absence of speaker signals may indicate a malfunction of the power supply. Troubleshooting options: check the attachment of the power supply plugs to the connectors on the motherboard, clean the power unit of the dust. If, as a result of the actions taken, there are no signals when trying to turn on the computer again, the power supply unit needs repair.
Separately, it is necessary to note the continuous sound signals of the BIOS, which vary in tone. This can be caused by either a faulty PSU or overheating of the PC.
Computer crashes and errors
Turning on the computer ... and it does not turn on. All panic! Many do so, immediately panicking, and thinking it is unclear what. But here it is important to remember this.
When the computer is turned on, the diagnostic program runs every time Power-On-Self-Test (POST), which checks the most important components of the computer (starting from the CPU and ending with the keyboard controller).
The test results are output to the computer's speaker in the form of a special sound signal. I think at least one peak you heard, but did not attach importance to it. So these signals and allow you to see the direction where to dig, where to look for the problem.
Since the manufacturer BIOS not one, then the sound signals vary from each of them. Further I result decoding of signals of some manufacturers.
Award BIOS
| 1 short beep | no errors found |
| No Signals | |
| Continuous signal | the power supply is defective |
| 2 short beeps | minor errors. It is necessary to check the reliability of the contacts of the loops in the IDE / SATA controllers on the motherboard and on the hard disks |
| 3 long beeps | keyboard controller error. You may need to replace the motherboard. |
| 1 long and 1 short signals | |
| problems with video adapter are detected | |
| keyboard initialization error | |
| 1 long and 9 short beeps | error while reading data from the permanent memory chip |
| 1 long repeating signal | improper installation of memory modules |
| 1 short repeating signal | problems with the power supply |
AMI BIOS
| 1 short beep | no errors found |
| No Signals | the power supply unit is defective or not connected to the motherboard |
| 2 short beeps | problems with memory are detected |
| 3 short beeps | error in main memory (first 64 KB) |
| 4 short beeps | system timer malfunctioning |
| 5 short beeps | cPU is defective |
| 6 short beeps | defective keyboard controller |
| 7 short beeps | the motherboard is faulty |
| 8 short beeps | problems with the video adapter |
| 9 short beeps | |
| 10 short beeps | can not write to CMOS memory |
| 11 short beeps | external cache memory malfunctioning |
| 1 long and 2 short beeps | defective video adapter |
| 1 long and 3 short beeps | defective video adapter |
| 1 long and 8 short beeps | a problem with the video adapter or a monitor that is not connected |
Phoenix BIOS
| 1-1-3 | error writing / reading CMOS data |
| 1-1-4 | checksum error of the contents of the microcircuit BIOS |
| 1-2-1 | the motherboard is faulty |
| 1-2-2 | dMA controller initialization error |
| 1-2-3 | error while trying to read / write to one of the DMA channels |
| 1-3-1 | a memory problem is detected |
| 1-3-3 | |
| 1-3-4 | error when testing the first 64 KB of RAM |
| 1-4-1 | the motherboard is faulty |
| 1-4-2 | problems with memory are detected |
| 1-4-3 | system Timer Error |
| 1-4-4 | error in accessing the I / O port. An error can be caused peripheral deviceusing this port for its work |
| 3-1-1 | initialization error of the second DMA channel |
| 3-1-2 | initialization error of the first DMA channel |
| 3-1-4 | the motherboard is faulty |
| 3-2-4 | keyboard controller error |
| 3-3-4 | error while testing video memory |
| 4-2-1 | system Timer Error |
| 4-2-3 | error with the A20 line. Defective keyboard controller |
| 4-2-4 | error when working in protected mode. The CPU may be faulty |
| 4-3-1 | error while testing RAM |
| 4-3-4 | real-time clock error |
| 4-4-1 | error testing the serial port. Can be caused by a device using a serial port for its operation |
| 4-4-2 | parallel port testing error. Can be caused by a device that uses a parallel port for its operation |
| 4-4-3 | error while testing the math coprocessor |