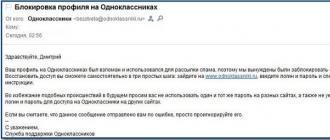
Contrary to the opinion of some users, not all owners of smartphones at least understand something in operating system Android Often they do not even know the basic things. If you also feel like such a "teapot", then our material is written just for you! In today's article we will discuss how to create a folder on Android. This allows you to group multiple applications at once, making it easier to navigate desktops.
When is it required?
Of course, not everyone needs to create folders. If you only occasionally install something on your smartphone, then you can easily do without folders. Their creation is necessary if a very large number of applications that you regularly use have accumulated on your device. You can combine shortcuts by program type. For example, one folder will contain games, while the other will consist of antivirus and various system utilities.
We must not forget that lately, smartphones, which have nothing besides desktops, have begun to receive more and more distribution. That is, in such devices there is no separate menu containing the labels of all applications. Now imagine a situation when seven or eight dozen programs and games are installed on such a device. All their shortcuts will be located on desktops. Without the function of combining into folders, this would greatly complicate navigation - sometimes you would have to search for a few tens of seconds or even more than the right application! Fortunately, creating a folder on your desktop is easy.
Creating a folder
Some manufacturers are introducing several ways to create a folder. But most often, users prefer to create a folder on the phone using the following method:
Step 1. Decide in advance on which two applications you want to merge into one folder.
Step 2. Hold your finger on the first program shortcut.
Step 3. Now drag this shortcut to the second application shortcut until a black circle or some other folder creation symbol appears.
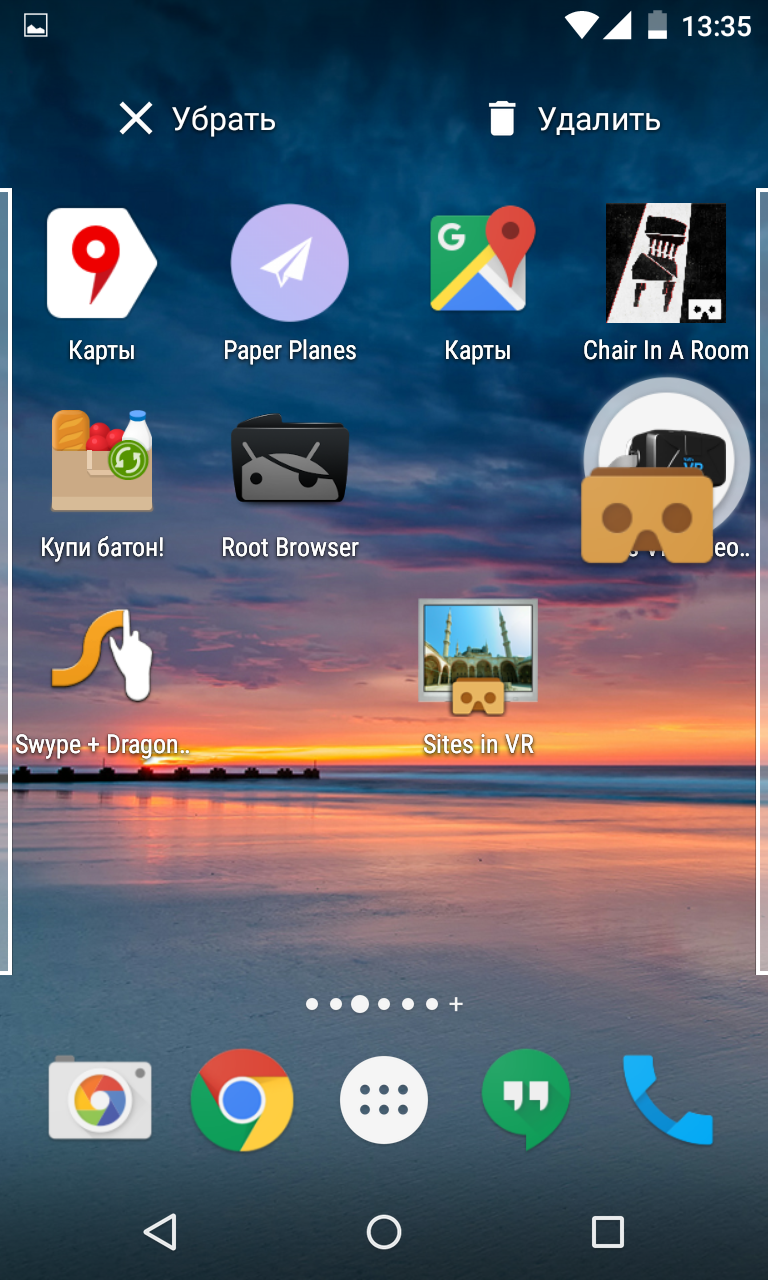
Step 4. Release your finger. In most cases, the system then suggests giving the folder a name. Sometimes do without it - then you can assign the name at any other time.
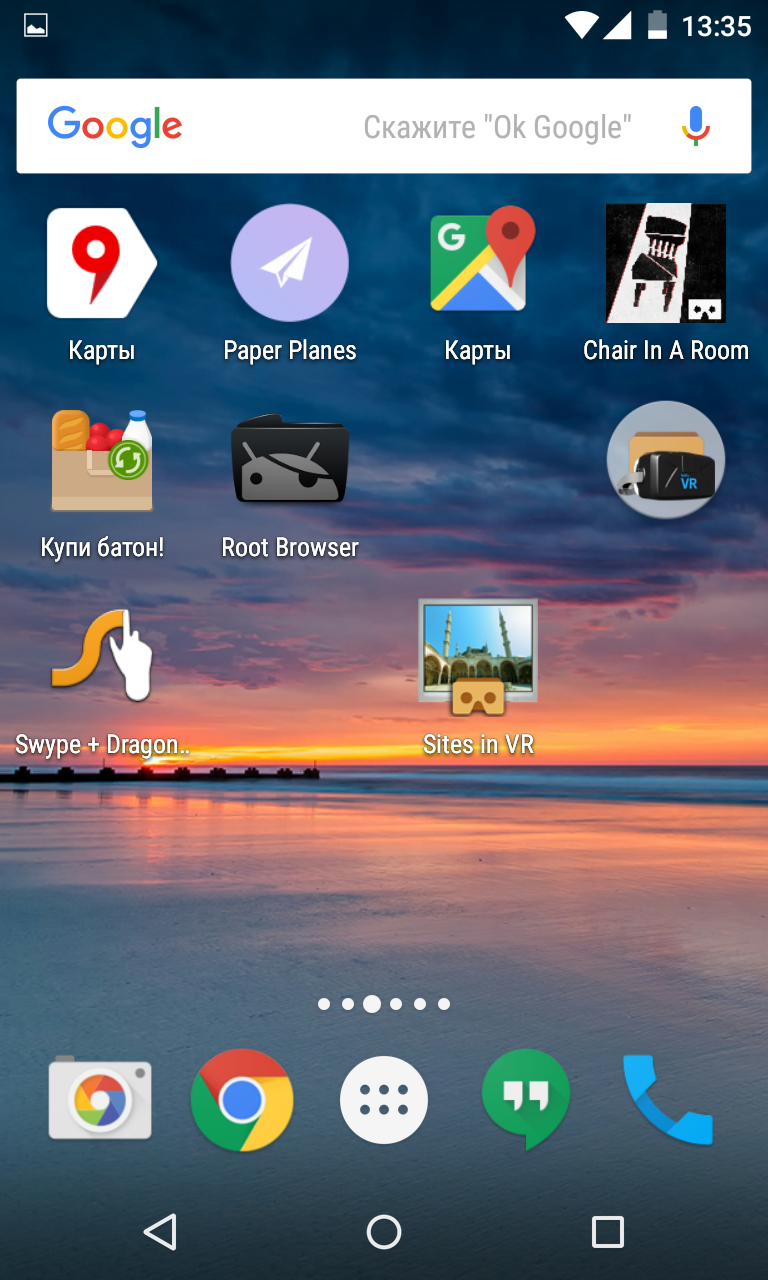
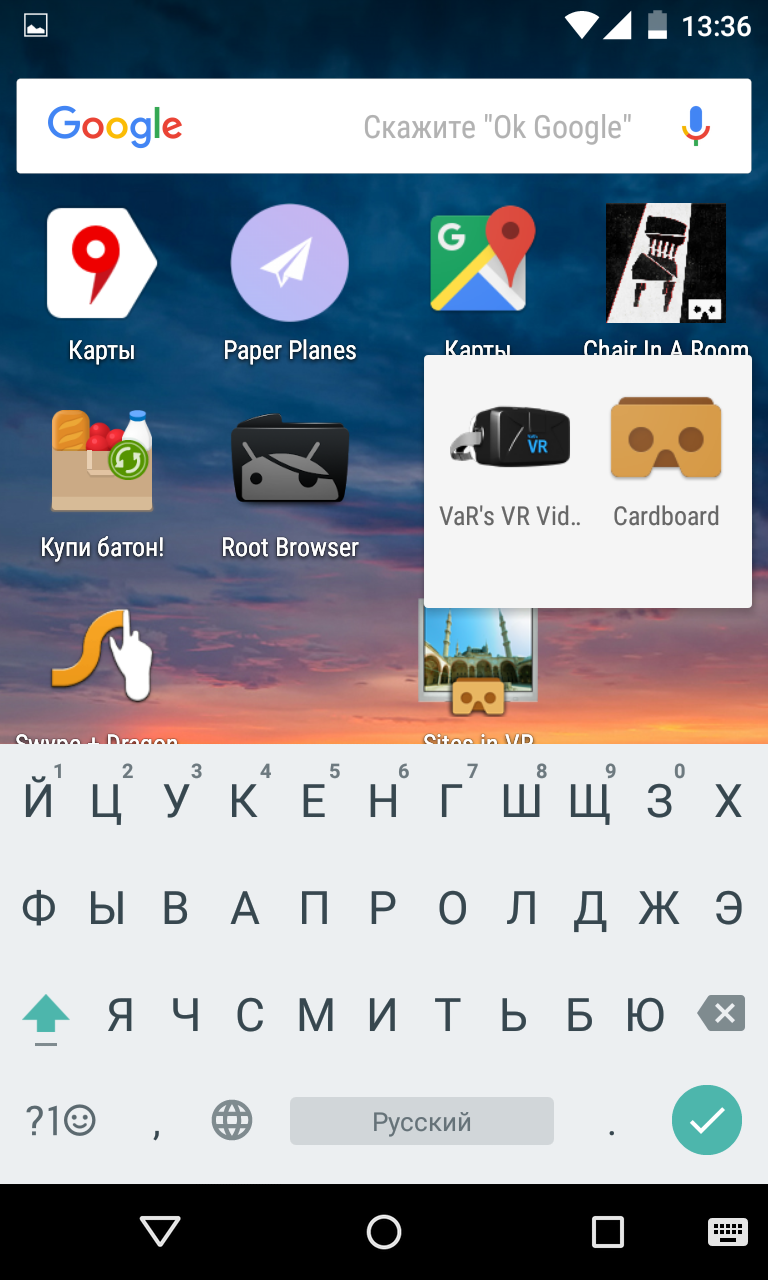
Step 5. In the future, you can add other applications to the folder. To do this, simply transfer the program icon to the image folder.
Note: Recently, many manufacturers allow you to create folders not only on the desktop, but also in the menu. In particular, it is possible on devices from and some other companies.
It should be noted that this feature appeared in the Android operating system not immediately. If your device is very old, it may not be able to create folders. For example, such a function is not in Android 1.6 and even some subsequent versions of the operating system.
If you analyze disk space on your Android device, you may be surprised to find that photos take up several gigabytes more than they actually are. How is it possible and what needs to be done to free up memory?
The problem lies in the collection of thumbnails of your device files, which are stored in the Thumbnails folder.
The fact is that for each image file that is stored on the device, the Android OS creates a thumbnail so that they load faster in the gallery when you open it for viewing. Third-party applications such as WhatsApp and Viber can also create their own thumbnails when they scan image files. Usually the folder where these thumbnails are stored is called Thumbnails.
In order to get rid of unnecessary files, you need to do the following:
1. Open the file manager on Android or connect it to the PC.
2. Make sure the file manager can display hidden files and create new ones. Otherwise, it is better to use the standard windows Explorer after connecting the device to the PC.
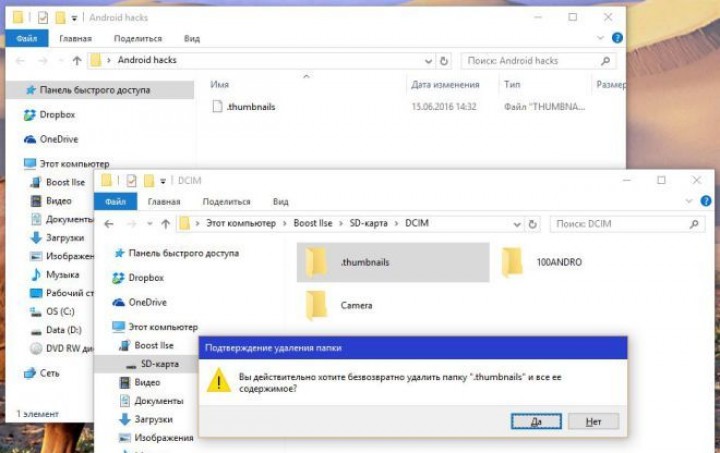
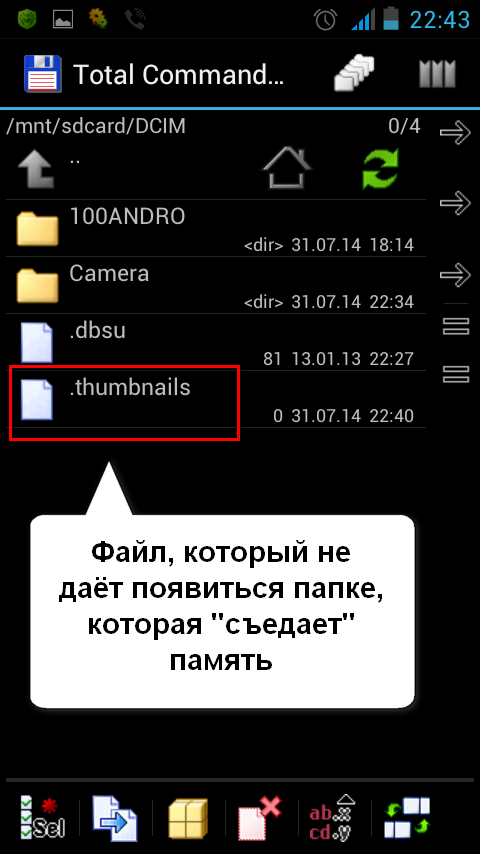
3. Go to sdcard \\ DCIM \\ .thumbnails. By the way, DCIM is the standard name for a folder that contains photos and is standard for almost any device, be it a smartphone or a camera.
4. Select and delete the .thumbnails folder, it can take up to several gigabytes.
After you do this, you will not notice a particular change in the speed of viewing images in the gallery.
Since .thumbnails are system file, Android again recreates it. Moreover, you can find several copies of the same file in the .thumbnails folder if you reinstalled Android.
To protect Android from creating a bulky folder again, we need to create a dummy file that is cheating on Android. For this, we create text file in the DCIM folder. You need to give this file the name of the thumbnails, and then give it the "Read Only" attribute in Properties. After that, you need to erase the extension txt. As a result of all these actions, an empty and undefined file should remain without an extension.
This dummy file will now prevent Android from creating a huge amount of useless files. You now have a free memory space that you can use to your advantage.
Again, back to the Android operating system and its "features." These unpleasant features come out at the wrong time. You yourself know about it. But have you had that the applications did not want to be installed on the phone or, suddenly, did the memory turn out to be crammed with something completely incomprehensible? Have you heard anything about thumbnail files? Not?
In my case of a sudden lack of space for installing applications and incomprehensible errors, I blame the mechanism for creating thumbnail files. Several times I could not install the necessary applications due to the fact that an error occurred during installation or the application refused to be installed due to the small number free space on disk. And I also did not make a lot of interesting shots. Unfortunately, some tips from the Internet to solve this problem are contradictory or do not work at all.
It is clear that I was angry. Under the cut, I'll tell you how I looked for a memory eater and got rid of him. Baseline Reference Data:
- Photo archive of the Camera application by default is located on the phone at / mnt / sdcard / DСIM / (you can save phone memory by installing applications and storing photos on a memory card. I wrote how to do this in a post about the main questions about Android - "" ).
- The files of the thumbnails of the Camera application are located on the phone at / mnt / sdcard / DCIM / .thumbnails /
I did not set the super user rights (root) (everything is done in two seconds with the root - the access rights change directly in the phone), but I installed two applications and connected the phone to the computer once.
Attention! Further 3 ways. You can run all eyes. They work for me correctly on all devices. On Android 6.0.1, the .thumbnails folder is deleted and the space is freed up (see the bottom of the post). The third way is simpler.
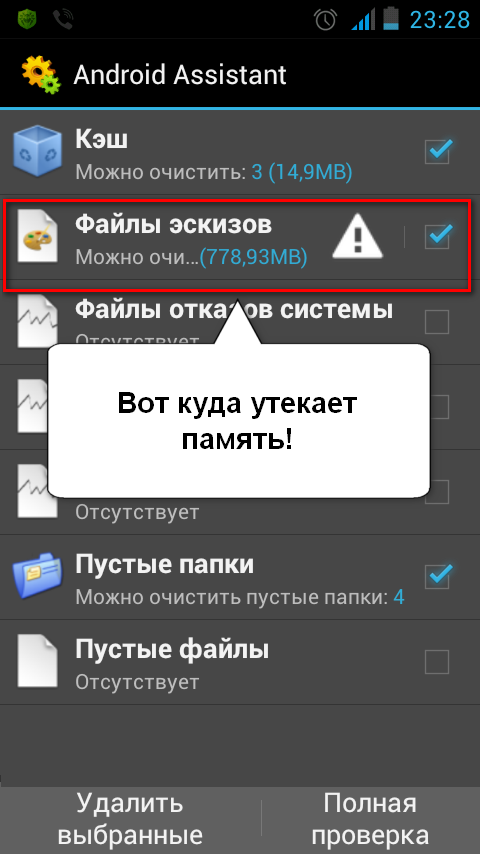
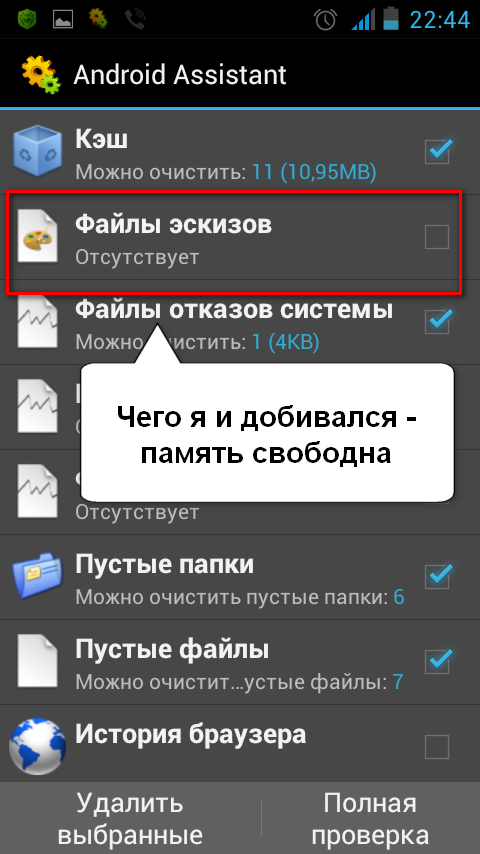
Cooking I first installed android application Assistant and Total commander. Launched Android Assistant. On the tab “Toolkit” I chose the item “Clean the system”. In the line "Files of sketches" I had the amount of 778.93 MB. Not so weak, huh? Clicking on the exclamation point in the triangle, I saw the contents of the folder (copies of photos from the gallery) and the file directory. Here they can be deleted selectively by checking the box next to each file or by checking the “Thumbnail files” item, you can clear the entire thumbnail folder at once. This help is temporary. After viewing the gallery, shooting, installing applications folder again filled with files.
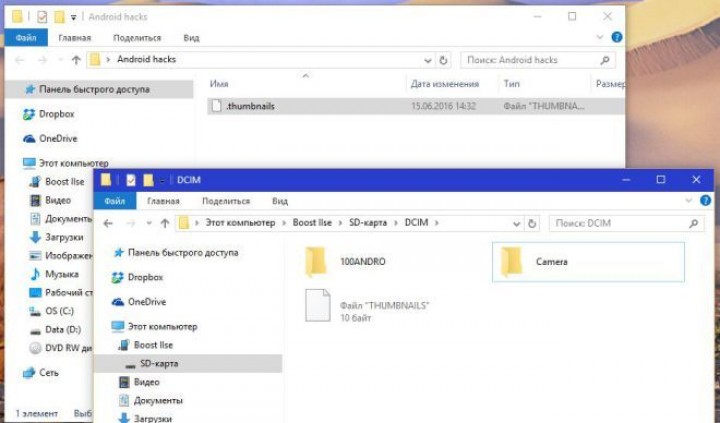
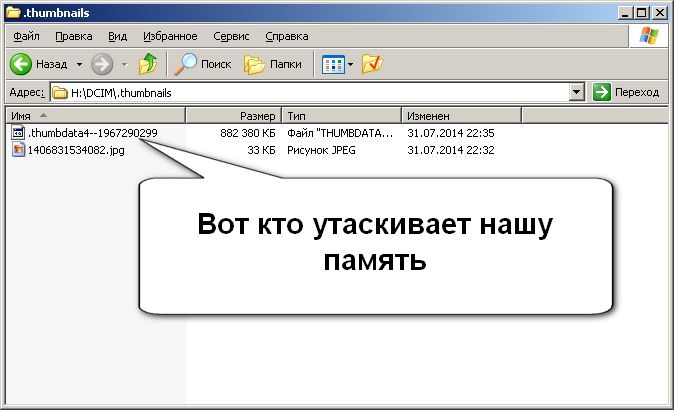
Method 1. Then I connected the phone to the computer (two new disks appeared in the explorer: inner memory phone and a memory card installed in the phone) and found the folder DCIM in the root of the first disk of the phone - Sdcard / DCIM / path (The DCIM folders contain photos and videos from the phone’s camera). Also in the DCIM folder there is a .thumbnails folder in which these same sketches are stored, which so suddenly prevent me from living. In addition to the photos in the .thumbnails folder, there was also a .thumbdata4-1967290299 file (you will have other numbers). Here is what it looked like:
First I deleted the .thumbnails folder.

Instead of a .thumbnails folder, I created an empty text file, which I renamed as thumbnails for which I set Read Only to properties.
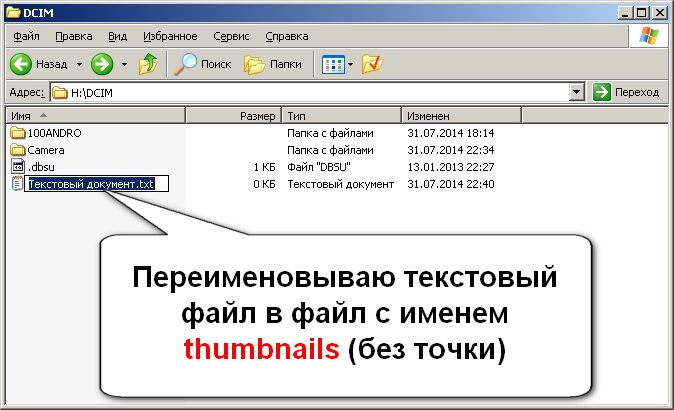
Why did I create the thumbnails file? The fact is that I will make a folder with the same name as the .thumbnails file with a zero size, but I will prohibit writing anything to it. And why didn’t I put an end to the thumbnails? Because the operating room windows system does not allow working with files whose names begin with a dot. From her point of view, such a file does not have a name, but only the extension .thumbnails. Android, like its progenitors Linux and Unix, perfectly transfers the dot at the beginning of the name and considers such a file hidden. This is me distracted. In short, the point is not set, and in the file properties, specify the attributes "Read Only." Now no one can write to this file.
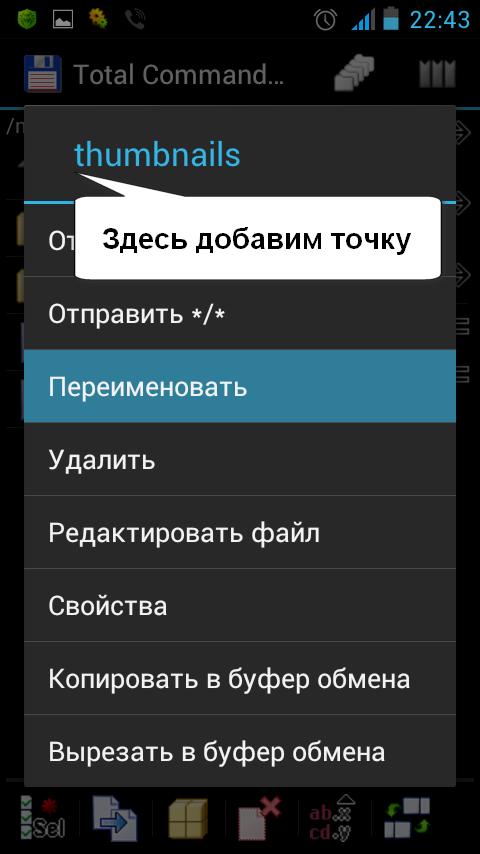
Then I disconnected the phone from the computer, otherwise I would not have access to the DCIM folder from the phone. Now I launched Total Commander on the phone and switched to the SD card and there already in the DCIM folder, and in it I found the file thumbnails. A slightly longer press on the row thumbnails caused context menuwhere I chose "Rename".
Fotkal, surfing in the internet, put applications, but the folder.thumbnails no longer appeared, which is what you want. Good luck and take care of your memory.
Method 2
Hello! The topic turned out to be very popular, but questions remain. Therefore, I propose to try the second option of deleting the folder of the thumbnails files - without a computer. I think that you have read the material above and do not dwell on the details.
From the play Google Market to the smartphone I put and
1. Opened ES Explorer and moved to the folder at / mnt / sdcard / DCIM (the path in my case). Created a file thumbnails (without a point).
2. I launched Total Commander, went to it at / mnt / sdcard / DCIM, there are folders: 100ANDRO, Camera, .thumbnails and the newly created thumbnails file. Removed the .thumbnails folder, then renamed the thumbnails file (added point).
Pofotkat, video shot, but the folder did not appear.
Method 3.
I launch Total Commander, go to it at / storage / sdcard0 / DCIM, there are active folders of the Camera application: 100ANDRO, Camera, .thumbnails. Removed the .thumbnails folder. With a long tap (long press) on the Camera folder I called up the menu, where there is the “New text file” item, selected it and created the .thumbnails file.
![]()
That's what happened at the exit. The result is similar to the previous one - thumbnails are not created, the memory does not suddenly end. 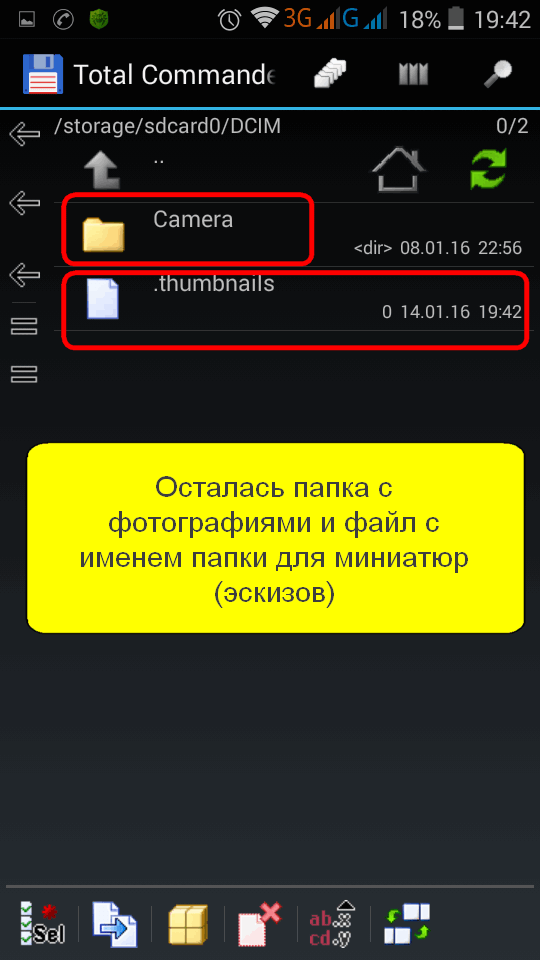
Popular questions on the topic and answers to them:
- Is the path only / mnt / sdcard / DCIM a path for storing photos?
No, each disk can have its own path sdcard, sdcard2 and so on. The active is the one that is designated in the settings as the “default recording disc”.You can check it by taking a photo and looking at which folder / mnt / sdcard / DCIM or mnt / sdcard2 / DCIM is in. There will be an active thumbnail file. The path can be registered as storage / sdcard0 / DCIM or storage / sdcard1 / DCIM
UPD. 6/11/2016In the comments to this post, readers write that deleting a folder on devices with Android 6. Thumbnails do not lead to the release of space. In this regard, I have one hypothesis. Immediately I will say that my folder on Android 6.0.1 is deleted and the place is freed. Just checked. So, I deleted everything and watched the free space through Total Commander. I suspect that if you delete a folder through ES Explorer, you will not notice an increase in free space. Why? Because the ES Explorer application has its own recycle bin for the files to be deleted, where it moves the files, but does not delete them. For the final removal you need to empty the basket. Wrote about this in a post.
I don’t see any reason to take screenshots, but mine android 6.0.1 folder. Thumbnails is deleted and the place is released. I propose to continue the discussion in the comments.
Save for memory, share with friends and leave comments.
Everyone knows about the Android operating system today. Almost everyone has a smartphone or tablet based on this OS, so the basic principles of Android work are familiar to most modern users.
However, Google's OS is not as obvious as Windows and in its depths holds many different settings and functions, which give us certain additional amenities. About such secrets Android and will be discussed below.
Just want to warn everyone reading this article. Some secrets may already be familiar to you, so do not rush to write in the comments something like: "I already knew it!" It is better to write about what is not written in the article. So you can supplement it and earn gratitude (at least in words) from other readers;)
Preliminary preparation
If Windows was originally designed to work with files, then Android is a more Internet-oriented system. This affects the pre-installed set of applications, among which often there are no necessary tools. Therefore, I recommend immediately expanding the functionality of your device by installing the necessary one.
And in the first place I would put a normal file manager:
I would recommend the application, however, you can use any other that you find on Google play. For example, good file managers Root Explorer, Total Commander (he used it at first), ES File Explorer, etc.
File managers will allow you to conveniently create files and folders on the device’s memory card, as well as partially view the contents of the root folder even without root-rights and between a PC and a device via Wi-Fi.
However, there is one sad nuance. Starting approximately from version 4.4.4, Android has become to hash (encrypt) passwords in the configuration file, so in new devices a simple text editor can no longer be decrypted. Alas, I didn’t come across any applications that allow decrypting this hash, so if you know this, be sure to write in the comments - add a link to it.
The most famous "Easter eggs"
Finally, I would like to recall a rather well-known "" about which many have heard, but perhaps not everyone knows how to get to it. We are talking about the hidden pictures that are in each version of Android.
To see this picture you need to go to "Settings" - "Details of the phone" (or "About the device"), find the item " Android version"with the version number and quickly press on this item from seven to ten times:
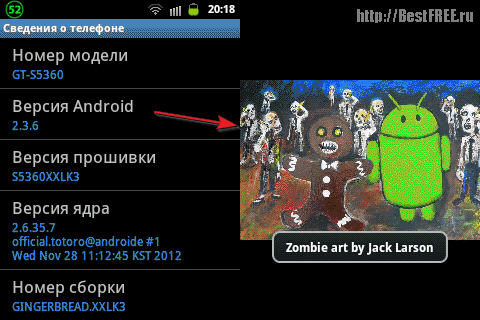
In some versions, pictures can also be interactive. If you press and on them several times in a row, then some action may occur. For example, on Android Jelly Bean (4.1.x - 4.3.x), an image of a jelly bean appears, clicking on it causes it to fly apart into many smaller beans, which can be dragged around the screen and scattered in different directions :)
And this is what Easter eggs in Android KitKat looks like (for the provided video, thanks to our regular reader Yuri):
Results
In fact, the hidden features in Android are much more than we described in the article. Using special decompilers, you can, for example, literally "by bone" disassemble the entire interface of the system and "blind" something from it. The only problem is that all more or less serious actions require root-rights and an understanding of what you want to achieve.
In the article, I selected only those chips that almost all users can perform (except for the "focus" with getting a Wi-Fi password, although once I managed to watch it without a root on a Lenovo tablet). If you know any more convenient non-obvious methods of working with Android, feel free to write about them in the comments - we will replenish the collection :)
P.S. Permission is granted to copy and cite this article provided that the active link to the source is indicated and the authorship of Ruslan Tertyshny is maintained.