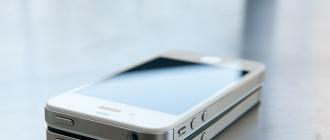
Malfunctions of the sensor of a smartphone based on Android - frequent problem not the most accurate users. It is enough to drop the phone once, spill something on it or sit down without noticing it, and there is a significant risk of damaging the touchscreen. Damaging it, you will no longer be able to use the screen normally, dialing a message or simply answering a call will no longer be possible. Such a smartphone is absolutely useless. That is why it is necessary to calibrate the screen in order to fix any problems. However, not all so simple.
To begin with, you should make sure as much as possible of the state of the sensor's sensitivity. To do this, remove the protective film, if any, and try to type some letter.
If touch recognition is not correct, for example, instead of one letter, a completely different one is typed, then screen calibration is simply inevitable. This can be done in different ways, depending on the phone model, brand, and the version of the Android operating system.
Today we will look at all kinds of calibration methods for different devices, you can try everything, depending on the situation.
How to do it through the settings of the device itself?
Due to the fact that calibration problems are a common problem for users, the Android OS developers have added the ability to carry out it without installing unnecessary applications.
In order to go directly to the settings, you need to open the general "Settings", go to the "Display" section, and there we find the item with the name Screen Calibration... If there is no such item, then find a similar one, the name may differ on different devices and versions of the Android OS.
The calibration process itself is a small test where you need to touch the screen in different places. After completion, the device will automatically remember the touches, after which the calibration can be considered complete.
Important. Upon completion of all actions, you should make sure that the touchscreen is accurate, depending on the result, the calibration can be performed again.
We carry out the procedure through the engineering menu
If you are not very familiar with smartphones, then for sure you hear about this mode settings.
Engineering menu - this is a whole storehouse of the most different configurations of your Android. Once in it, you can access all available configurations. This mode is suitable for users who like to completely customize a particular device for themselves.
So, what does it take to get into this very menu? First, you need to open the dialing window, and enter the following combinations there:
- * # * # 3656633 # * # *
- * # 15963 # *
- * # * # 4636 * # *
Which combination is right depends on the smartphone itself.
If suddenly nothing happened, then in order not to suffer with the input, you can simply download a special application from, it is called MTK Engineering Mode Start. With it, you can perform various manipulations with the phone.
Closer to the point. Here we are in the engineering menu. Now you need to do the following:

Using apps
There are many programs that are designed specifically for performing sensor calibration. There are both paid and free versions... Some of them require Root rights on the device. Below we will tell you about several such applications.
To use this program, you need root rights, so before proceeding with the settings, we need to take care of this. We have already described how to get root rights on the pages of our site, information about this is freely available.

Designed primarily for tablets. The procedure is carried out using the same test, but in addition can significantly improve not only the accuracy of touch recognition, but also improve overall performance, as well as responsiveness. This program indispensable for some Android tablets with handwriting or drawing functions.
The interface is designed in such a way that you can figure it out at an intuitive level, there are no complex settings, the most ordinary user can figure it out.
Able not only to calibrate the touchscreen, but also to measure the tilt angle, tilt height, as well as the tilt of the object relative to gravity.

An application for Android that can optimize the functioning of the smartphone sensor well.

There are also more fine tuning, such as the:
- The period before touch recognition;
- Touch filtering;
- Minimum pressing force;
- Change the number of simultaneous touches.
The program has ready-made settings that you can choose. However, it is best to configure it manually.

A fairly simple application that has one active button "Calibration" and a section for it. The interface is also extremely simple and straightforward.
Although sensory devices and are very convenient, over time the operation of the sensor may lose accuracy, and this, in many cases, does not depend on the type of screen, or on the brand and model of the device.
In this regard, any such sensor (and screen) sooner or later needs debugging or calibration. This article describes how to calibrate and customize the screen on Android.
The essence of the problem
It is known that while the phone or tablet is new, the quality of the sensor is very high.
It reacts quickly enough to touches, quite accurately determines the point on which the user pressed, etc.
But over time, as the actual life of the device increases, it decreases significantly, and errors and inaccuracies begin to occur.
So how do you know when you need to calibrate the display on your mobile device?
Usually, you have to do this when they start errors appear next typesignificantly interfering with work:
- The sensor does not always work - some actions are not recognized and the device does not react in any way;
- Some types of actions are not recognized or work poorly, but not all (for example, tap can work fine, while swiping does not work every time, or vice versa);
- The actual place where the action was performed is not accurately determined (for example, the button you pressed is not the one you actually touched);
- The waiting time for a response after performing an action has significantly increased on the touch screen;
- The display became worse only when using the stylus, or, on the contrary, only;
- IN graphics applications such a problem can manifest itself as line break etc.
The occurrence of such a problem, in fact, is a normal and logical process, the consequences of which can be easily eliminated by basic means, that is, without involving a service.
When does it arise?
Long-term use of the device - the first reason that the quality of the sensor on a phone or tablet will gradually decrease.
it normal processto which all are subject modern phones the more the less high quality screen installed on the device.
Also, such a phenomenon also occurs, on the contrary, when the device, which was previously actively used, is inactive for too long.
In some cases, such screen debugging is required immediately after purchase, since it happens that initially the sensor is configured incorrectly.
After changing the display, it is also almost always necessary.
Changes in software settingsalso affect the quality and speed of the sensor. It can be any, or it can be settings, deliberately or accidentally, changed by the user. For example, the sensitivity of the sensor can be changed for convenience in the phone settings.
But, a decrease in the quality of the device can occur for other reasons.
For example, this happens when scratches and scuffs appear on the screen, protective film or while maintaining bubbles under it, etc.
In this case, the calibration will not be effective enough and the problem will not be eliminated.
Definition
What is calibration, and how does it solve the problem of an unresponsive or inaccurate sensor?
Calibration is the adjustment of the touch screen performed by the device based on the user's actions on the sensor.
The standard calibration procedure is as follows: Dots, circles or crosses appear on the screen in random order and the user must click on them.
On the basis of such a process, the system builds a certain scheme of points and sections on the screen, thus determining which of them are more responsive, which are less, at which the accuracy is higher, at which - lower.
Based on the data of such diagnostics, the system makes adjustments and troubleshooting.
Calibrate exactly with the device you use it most often. If you use the stylus more often, then calibrate the screen with it, but if you usually use the phone manually, then use your finger to calibrate. This is due to the fact that different objects have different thermal conductivity and the display may react to them slightly differently from a technical point of view.

Calibration methods
This debugging can be done in several ways. The simplest and most effective ones are described below.
If, after applying one or another method, there have been no significant changes for the better, then it is advisable to try another method.
Device settings
Since device calibration is a necessary process, the creators of the majority have incorporated such a function into the device settings. How can you use it?
1 Go to Device settings;
2 Go to the section Screen or Display (may be called differently, depending on the device model, Android version or the nature of Russification;

3 Go to the section Screen Calibration/ calibrate the screen or the like (note that there is no such section at all on some devices, this means that debugging will have to be performed in a different way);

4 If there is such a function, then after clicking on it, a special test will be launched, in which you need to click on certain points as they appear or in a certain order (on different devices, the order of the test may change slightly, but the essence remains the same);

5 After completing all the necessary steps, the system will show you a notification that the test is over, now section Settings can be closed.
Sometimes significant improvements in sensor performance are seen right after that. But in most cases, the tablet or smartphone needs to be rebooted.
Engineering menu
Engineering menu - this is a special section of settings, where you can carry out more complex and more accurate debugging and adjustments. In any case, there is a calibration function in it, for example, on those devices that have this test not included in the simple device settings menu.
Download and Install Touchscreen Calibration
In order to this application appeared on your phone, do the following:
- Open the app Play Market on your device;

- In the search engine, enter Touchscreen Calibration and open the application with the phone and wrench icon;
- Click the Install button;

- After that, it will automatically download and installand a shortcut will be created on the desktop of your device.

After clicking on the Install button, the application will automatically download and install on your device. You can find the shortcut to launch it on the main Desktop.

The application is distributed, focused on the English-speaking user, therefore it does not have Russification, just like the previous one.
It has a fairly wide functionality and helps to carry out high-quality customization. In order to debug the sensor using it, do the following:
1 Start the application from the shortcut to Desktop;

2 Find the item in the main menu of the program Display Calibration and click on it;

3 Now you have to wait a bit, because this process presented not in the form of a test by points, but in the form automatic search malfunctions, and then - automatic screen debugging;
4 When starting the process, a notification will appear on the main screen of the app showing the progress of debugging;

5 When the process is complete, you only need to restart your phone.
After turning on again, there should be no difficulties with the operation of the sensor.
During use mobile devices, there may be problems with various functions and then you have to calibrate the Android device and return it to normal life. Let's learn to do the same.
Basically, the calibration in Android is the battery and touch screen (touchscreen), but still have to calibrate various sensors, such as the " proximity sensor”, “brightness sensor”And others, and sometimes it is necessary to calibrate the navigation by GPS satellites. We will try to address the most common problems and their solutions using Android calibration.
Calibrating Android Battery

How to understand that you need to calibrate battery android? Most likely you should be experiencing the following problems:
- Your Android device is running low on battery power too quickly
- The% of the remaining battery charge changes very dramatically
- It takes too long to charge from the mains
- Self-shutdown with sufficient battery charge

If you have at least one of the listed symptoms, then it is worth trying to calibrate the Android battery, perhaps this will solve your problem. let's consider step by step instructions Battery Calibration:
- The first step is to completely discharge the battery, for this, by any means, load your device until it turns off completely, and then try to turn it on until it stops responding at all.
- Remove the battery if it is removable and keep it outside the device for at least 5-10 minutes. (If the battery is not removable, do not connect the device to the mains for at least 2-3 hours)
- Insert the battery and connect charger, do not turn on the device!
- After fully charging (preferably left overnight), remove the battery and after 1-2 minutes insert it back, again connect to the charger.
- We turn on your device.
That's all, battery calibration Android finished! For better results, you can repeat the procedure up to 5 times, but more often than not once is enough. If the battery problem persists, it is most likely the battery itself.
Calibrating Android Screen

The touch screen on Android devices is quite a finicky thing, especially after falls and bumps. It happens that the accuracy of pressing or the sensitivity drops so that pressing desired button can be 3-4 times. Of course, such a situation can be very annoying and interfere with the comfortable use of the device. In such cases, it is most likely necessary to calibrate the Android screen.
What is Android Screen Calibration?
This is the setting of the display sensor to correctly and clearly execute commands with your hands or stylus. In order to understand whether you need to calibrate the Android screen, it is best to use special application of Play Store... For example, you can download Simple Touchscreen Tester other similar programs... In it you will find all the non-working parts of the screen sensor.
How to calibrate the Android screen?
There are many calibration methods, but we will cover 2 basic and simplest ones. The first way is to simply download the app from the Play Store, but unfortunately I cannot guarantee that at least one of them will actually be able to calibrate your display. But still I will recommend a couple of programs: TouchScreenTune and Display Calibration... The second method is more reliable, so take a closer look at it.
Calibrating the screen via the menu:
- Go to the settings of your Android device
- Select "Display"
- At the bottom there will be an item "Calibration of the G-sensor", press
- Place your device on a flat (!!!) surface
- Click the "Calibrate" button
- After finishing screen calibration, restart your device
That's all, the Android screen calibration procedure is complete! If a this procedure did not help get rid of problems with touch screenyou will most likely have to replace it.
Proximity Sensor Calibration Android

Another common problem on Android devices, typical mainly for smartphones, is the incorrect operation of the proximity sensor. This is manifested in the fact that the screen does not go out when you bring the phone to your ear during a call or, on the contrary, does not turn on at the end of the call. Also functions may not work Air Gesture,which is present in many modern smartphones.

Let's resort to ourselves again easy way Calibration is the installation of a special application from the Play Store. It is worth mentioning that in order to use the calibration program, you need to have Root rights on your device.
So let's proceed to the very calibration of the proximity sensor:
- Download the app “ Proximity Fix”In the Play Store
- Run it
- The program will require you to grant it root rights - provide
- Further no messages will follow, but the program has already done its job.
You can do a check using another application (Proximity Sensor Finder) or a regular call. If the sensor calibration did not help, then the sensor may need to be replaced at the service center.
Many owners of Android devices consider the sensitivity of the sensor to be a pain point of their gadgets. It happens that the screen of a phone or tablet does not respond correctly to taps. For example, the user clicks on the bottom left of the screen, while the sensor interprets this as a tap on the top right corner.
But the emerging problem is not at all a reason for despondency and an urgent trip to the service. It is possible to try harnessing your sensor at home by applying screen calibration.
Screen calibration (aka: sensor calibration / sensor calibration) refers to adjusting the display, the purpose of which is to optimize the operation and improve the response of the sensor to taps and touches with fingers or a stylus .
And although sensor calibration on Android is generally not necessary, it is recommended for all users of devices, both with resistive and capacitive touch displays. It is advisable to calibrate the resistive screens immediately after purchasing the device. With a capacitive sensor, the situation is somewhat different, since it is possible to check whether calibration is necessary, or the display will work clearly and without such an operation.
To do this, remove the film from the screen of the gadget, wipe it with a damp cloth (preferably a special one), and then check the reaction of the sensor. The best way checks - set text message... If there are frequent typos when typing, this is a sign of the need to calibrate the touchscreen. It should also be noted that it is quite possible that this procedure will have to be done more than once.
Before proceeding with the screen calibration procedure on Android, you need to find out what caused the sensor to malfunction.
- It is possible that the pie eaten with tea left you a reminder of yourself in the form of traces left on the screen when you answer an urgent call.
- Proximity sensor or Air Gesture is not working properly.
- Using custom (not official) firmware.
- Installing applications from questionable sources.
- Dropping, hitting, or getting wet on the device.
- Replacing the touchscreen, etc.
As we well know, it is necessary to eliminate the cause, not the effect. Obviously, if your smartphone has "left" firmware installed, which caused the failure, you can calibrate the sensor before the "carrot corral" only the desired result in this case, alas, will not be achieved.
Nevertheless, even if the device does not need to be calibrated, its owner will not hurt to know the intricacies of setting up the touchscreen, since this is a fairly simple manipulation that does not require much time, and even more so a huge layer of knowledge.
To calibrate the screen of any device running on operating system Android, you can use special programs and utilities, of which there are a sufficient number, and, moreover, absolutely free. You can also refer to the standard services found in the device menu.
Manual setting
Here it is necessary to clarify that the setting options, including the screen sensitivity, differ greatly depending on the model of your gadget, and it is quite possible that it will not work in your case. The fact is that manufacturers mobile devices over standard settings The Android OS, as it were, install its own shell, while changing (or completely excluding) the possibility of one or another setting. The calibration method for devices with standard settings is described below:
- Go to the settings menu.
- Select the item "Phone settings".
- Go to the "Calibration" menu, where a window will open in the form of a cross-target with a dot inside
- Press the center of the target three times
- Calibration completed. Next, you should check the sensor using the manipulations indicated earlier.
If these steps are not relevant for you, then you need to check on the manufacturer's website exactly how you can calibrate your device, or use a special application (read about this method below).
Application of special software
On this moment There are countless utilities and programs to help customize the touchscreen of an Android device. Of the proven programs that really helped a lot of users, the following programs can be noted:
Touchscreen Calibration - simple and free toolto help you calibrate the sensor quickly and easily. Step-by-step actions:
Download the application, open it, press the "Calibrate" button:

Then, we start the calibration process by clicking on the gray field in the screen:

After that, in the gray field, we execute the commands that appear in the green squares:

Unfortunately, the utility is not Russified, but what and how to do it is shown quite clearly. Just in case, we suggest you watch the video again.