Many have thought about restoring old black-and-white photographs at least once. Most of the pictures from the so-called soap dishes were transferred to digital format, but did not find color. The solution to the problem of converting a desaturated image to a color one is very difficult, but to some extent affordable.
Converting a black and white photo to color
If making a color photo in black and white is easy, then solving the problem in the opposite direction becomes much more difficult. The computer needs to figure out exactly how to color this or that fragment, consisting of a large number of pixels. Recently, the site presented in our article has been dealing with this issue. So far, this is the only quality option that works in automatic processing mode.
Colorize Black is developed by Algorithmia, which implements hundreds of other interesting algorithms. This is one of the new and successful projects that has managed to surprise netizens. It is based on artificial Intelligence based neural networkthat selects the necessary colors for the uploaded image. Quite frankly, the processed photo does not always meet expectations, but today the service shows amazing results. In addition to files from a computer, Coloriz Black can work with pictures from the Internet.

- Save the image split in half with a purple line (1);
- Save the fully colored photo (2).
Your picture will be downloaded to your computer via your browser. It looks something like this:

The results of image processing show that artificial intelligence based on a neural network has not yet fully learned how to turn black and white photos into color ones. However, it works well with photographs of people and paints their faces more or less qualitatively. Although the colors in the example article were chosen incorrectly, the Colorize Black algorithm nevertheless selected some shades successfully. So far, this is the only actual option for automatically converting a desaturated image to a color one.
If you want to drastically change a photo with just one simple action, then nothing beats here. converting it to black and white... Grayscale can also save an image that won't be helped by color correction, or make a person more beautiful who needs to seriously whiten their teeth or do their own skin. These problems almost disappear when you find yourself in the black and white kingdom.
But does this mean that it is necessary to install in digital camera black and white shooting mode? No no and one more time no! It is much better to shoot in color and then desaturate the images in Photoshop. In this case, you get a huge number of possible creative solutions, for example, the effect of partial discoloration, achieved by discoloring not the entire picture. And since I'm talking about color, there are several tools in Photoshop to change the color of everything from the car to the hair on the head. You can also give new life old photographs by adding color to them.
You've probably heard the expression "As they pay, we work!" In the Photoshop program, this expression is converted to "The fastest way is not always the best"... In other words, for some receptions - these include converting a color image to black and white - you will have to spend a little extra time, but the result is worth it.
Let me explain with an example. Open a color image. I'll take a photo of Daska.
Select the command Image \u003d\u003e Adjustments \u003d\u003e Desaturate (Image \u003d\u003e Adjustments \u003d\u003e Desaturate) from the menu.
Desaturation means removing all colors from the image.

Photoshop can easily convert the image to black and white, but the result is unlikely to inspire you.
2. Create a Black & White adjustment layer.
Open the palette Correctionby selecting Window \u003d\u003e Adjustments from the menu, and clicking on the Black & White layer icon (looks like a rectangle diagonally divided into black and white halves).

Photoshop will render the image in black and white and display several sliders and other controls on the palette that you can use to fine tuning the created layer.
3. Move the sliders until you get a contrasting black and white image.
Although the program has desaturated the image, there is still room for improvement. Move the sliders of the different colors to make things look even better in the image. Dragging to the right paints areas that were previously painted in the color corresponding to the slider to a lighter shade of gray; moving to the left paints areas in a darker shade of gray.


In addition, a drop-down list at the top of the palette contains a ton of presets - select items one at a time to see how they affect your photo. If you click on the Auto button, Photoshop will show you what it thinks your grayscale image should look like.
4. Save your photo in PSD format if you want to edit it later.
Lightning fast touch-up
You probably already noticed the Tint checkbox at the top of the Adjustments palette when you created the Black & White adjustment layer. If you check this box, the program will add a brown tint (called sepia tone) to the entire image. If you want to use a different color, click on the colored square to the right of the checkbox to open a dialog box for choosing a color. This technique allows you to create so-called false two-tone images.

Channel Mixing Adjustment Layers
Using Black and White adjustment layers is the quickest and easiest way to desaturate images, but layers are also suitable for this purpose. They have no advantage over adjustment layers.
First, make sure the Background layer (or the image layer you want to work with) is selected in the Layers Palette, then click the button with the half black, half white circle at the bottom of the palette and in context menu select team Channel Mixer... When the Adjustments palette opens, check the box. Monochrome at the top of the palette, then move the sliders Red, Green and Bluehowever you like, or choose one of the presets from the drop-down list at the top of the palette.

If you want to darken or lighten the entire image, move the Constant slider at the bottom of the palette to the left or right.

Channel "Brightness"
As noted in the article about, lab mode got its name from the names of three channels. The letter "L" stands for the Lightness channel, in which the program stores all light values \u200b\u200band thus all visible contours and image details. (The letters "A" and "B" denote channels a and b, which store color information.) This means that the Brightness channel, taken separately from the others, is a black and white version of the image.
To see what a channel looks like, open an image and select Image \u003d\u003e Mode \u003d\u003e Lab (Image \u003d\u003e Mode \u003d\u003e Lab Color) from the menu. In the Channels palette, highlight Brightness. If you like the resulting image, select the command Image \u003d\u003e Mode \u003d\u003e Grayscale from the menu and click the OK button when Photoshop asks for permission to remove the color information.

In my case, it turned out too bright and pale. This option is not suitable, but you need to know about it. On different photographs, he will play differently.
Convert to grayscale in the Camera Raw plug-in
If you take pictures in Raw, you can also use an external module to convert them to grayscale. This module is easy to use and does a good job of converting. To open an image in this format, double-click on its file icon and it will automatically open in the module Camera raw.
1. In the Camera Raw window, open the HSL / Grayscale panel.
To open this panel, click on the button of the same name. Then on this panel, check the box Convert to Grayscale... A group of sliders appear on the right side of the Camera Raw window. To add contrast to an image, you can lighten a color by moving the slider to the right, or darken it by moving the slider to the left.

2. Open the Basic panel and move the Exposure slider to adjust the black and white image. Also move the sliders with various other settings in this tab and you will be pleasantly surprised how your black and white photo will play!

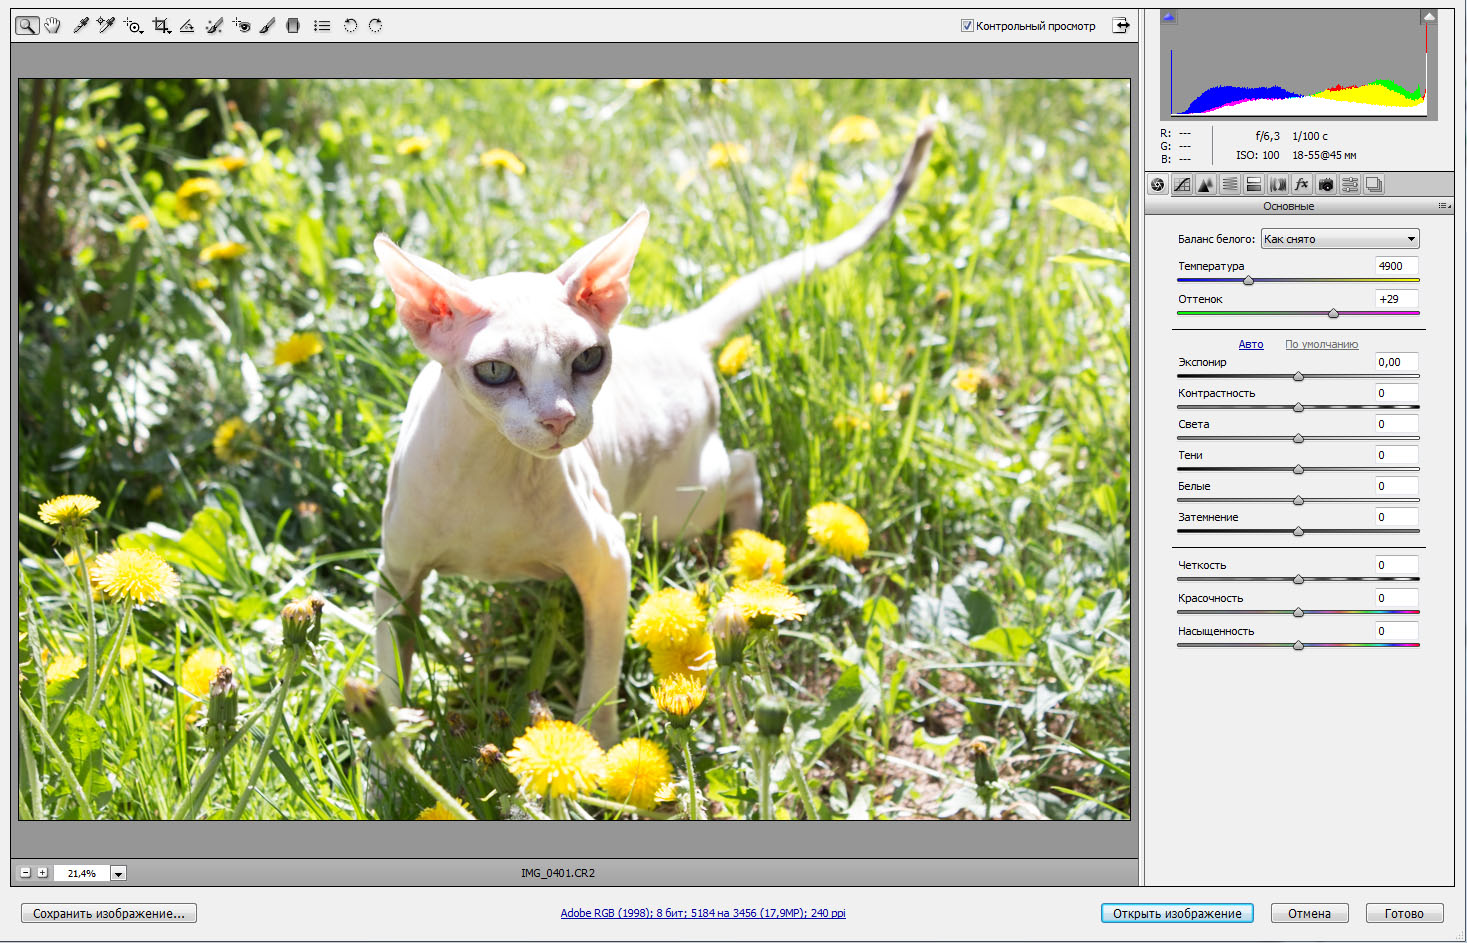
Even dandelions look like dandelions!
If you spot an error in the text, select it and press Ctrl + Enter. Thanks!
Good day to you, my dear readers. I recently looked through my childhood photos (up to 6 years old) and how many of them were black and white. It used to be a common thing, but now there are no pure black and white cameras, but it is still sometimes very pleasant to look at a photo without color. In some cases, it is even more pleasant to look at it. Don't you think so?
Many cameras have a non-color shooting function (b / w, sepia, etc.), but in this article I would like to tell you how to make a picture in black and white in Photoshop. And it doesn't matter what kind of picture it is. The main thing is that this function has remained anyway and no one is going to give it up. By the way, in my article about I just used the effect of turning a color photo into black and white. Remember?
So let's get started! What do you want to convert to b / w color? Personally, I want to discolor the car that I showed you in the lesson about that.

The easiest way to desaturate an image is through the Image menu. To do this, go to the "Image" - "Correction" - "Desaturate" menu. After that, the photo instantly removes all colors.

Grayscale
This method is similar to the first one and will be just as easy to perform. You need to enter the "Image" menu, then select "Mode" from the drop-down menu, and only then "Grayscale".

Voila! Your black and white image is now complete.

Both are the easiest, but not the best. For more subtle transformation, it is better to use other methods.
Black and white
This method is convenient because we can correct the image as we need it, so the quality of the output photo will be better.
Go back to the "Image" menu, then choose the familiar word "Correction", and at the end feel free to choose "Black and White ...".

As you can see, our image has become black and white, and at the same time various sliders with the name of the colors appeared. With the help of them, we will correct our b / w image. Try moving different sliders in turn and you will see that the contrast and image quality change, and in some areas. Each site has its own color.

Thus, adjust all colors until the image has the best saturation and contrast. Voila.

Just don't click on "Tint", otherwise you won't get any black and white image. If you don't want b / w, but want it in yellow or other colors, then please.
Adjustment layer
Most the best way to create a black and white image from a color one - create an adjustment layer. But there are several different ways such a transformation.
Channel mixing

Black and white
I will skim over here, as this method is identical to the Black & White method we did above. Only here everything happens through an adjustment layer.

Well, in general, these are the ways I wanted to show you. I hope you have enough of them). If you have any questions, then ask. I will be happy to answer them.
Also, I would like to recommend the wonderful photoshop video tutorials for beginners... Everything you need for a beginner is collected here, the material is presented magnificently and everything is described in great detail. Each element is disassembled by the bones, thanks to which you will know Photoshop completely. So be sure to check it out.
Well, for today I say goodbye to you. Tomorrow will be a new day and new lesson... Get a good night's sleep today. Most importantly, do not forget to subscribe to update my blog articles. Good luck with learning and everything else. Bye Bye!
For over a century, monochrome photography has been dominant. Until now, black and white shades are popular among professionals and amateur photographers. In order to make a color picture discolored, it is necessary to remove information about natural colors from it. Popular online services presented in our article can cope with this task.
The big advantage of such sites over software is ease of use. In most cases, they are not suitable for professional purposes, but they will be relevant for solving the task at hand.
Method 1: IMGonline
IMGOnline is an online service for editing images in BMP, GIF, JPEG, PNG and TIFF formats. When saving the processed image, you can select the quality and file extension. Is the most simple and fast way applying a black and white effect to the photo.

Method 2: Croper
Online photo editor with support for many effects and operations for image processing. Very handy for multiple use of the same tools, which are automatically displayed in the panel quick access.
- Open the tab "Files", then click on the item Load from disk.
- Click "Select a file" on the page that appears.
- Select the picture for processing and confirm with the button "Open".
- Submit the image to the service by clicking "Download".
- Open the tab "Operations", then move the cursor over the item "Edit" and select an effect "Convert to b / w".
- After the previous step, the tool used will appear in the Quick Access Toolbar at the top. Click on it to apply.
- Open the menu "Files" and press "Save to disk".
- Load the finished image using the button "Download file".


If the effect has been successfully applied to the picture, it will turn black and white in the preview window. It looks something like this:


Upon completion of this process in quick panel downloads a new label will appear:

Method 3: Photoshop Online
More advanced version of the photo editor, endowed with the basic functions of the program. Among them there is an opportunity detailed setting color tones, brightness, contrast, and so on. You can also work with files uploaded to the cloud or social networks, for example.
- In the small window in the center of the main page, select "Upload image from computer".
- Find the file on disk and click "Open".
- Open the menu item "Correction" and click on the effect "Bleaching".
- On top panel select "File"then press "Save".
- Set the parameters you need: file name, format, quality, then click "Yes" at the bottom of the window.
- Start downloading by clicking the button "Save".


With a successful application of the tool, your image will take on black and white shades:


Method 4: Holla
Modern popular online service for image processing, with support for Pixlr photo editors and. IN this way the second option will be considered, since it is considered the most convenient. In the arsenal of the site there are more than a dozen free useful effects.
- Click on "Select a file" on home page service.
- Click on the picture for processing, and then on the button "Open".
- Click the item "Download".
- Choose from the presented photo editor "Aviary".
- In the toolbar, click on the tile that says "Effects".
- Scroll to the bottom of the list to find a suitable one using the right arrow.
- Choose an effect B&Wby clicking on it with the left mouse button.
- Confirm applying the effect with the step "OK".
- Finish the image by clicking "Done".
- Click "Download image".


If everything went well, your photo will appear in black and white in the preview window:


Method 5: Editor.Pho.to
A photo editor that is capable of performing many online image processing operations. The only site on which you can adjust the blending intensity parameter of the selected effect. Knows how to interact with cloud service , social media Facebook,
At the beginning of the nineteenth century, when mankind first invented photography, all photographs were in black and white. They look mysterious and charming. Although high-quality photographs can be taken in a wide range of tones these days, black-and-white pictures are still popular. In addition, experts say that if you transform a color photo into black and white picture, you can hide minor skin defects and imperfections. Let's take a look at how to take a grayscale photo using paint programs, Photoshop or the Internet.
How to make a picture black and white in Paint?
Paint is one of the simplest image editors out there. There is nothing difficult in converting an ordinary color photo to black and white using this program. The following instructions will help you to complete the procedure:
- Since Paint - standard program in operating rooms windows systemsyou don't have to install it. It is enough to open the image in the program by clicking right click mouse on the picture and select the item "Open with Paint";
- The toolbar has a "Adjustments" menu. Click on it, and select "Make black and white";
Figure: 1
- To save the converted photo, you need the "File" and "Save As" tabs;

Figure: 2
- Enter a file name and select a folder or location on your computer where you want to save the photo.

Figure: 3
How to make a photo in black and white using Photoshop?
In Photoshop, you can turn a picture or photo into black and white in no time. To do this, you need to have this program on your computer. If it is not there, you must first download and install it on the device, following the instructions. And to convert a color photo to black and white, follow these steps:
- Here's the easiest way to make a picture black and white in Photoshop: desaturate it. First, upload a photo to the program. After that, duplicate the image layer by pressing the following key combination: CTRL + G;

Figure: 4
- On the toolbar, select the item "Image", then "Adjustments" and ultimately "Desaturate". After that, the color photo is painted in shades of black, white and gray;


Figure: 5, 6
- We save the photo to the computer. To do this, on the toolbar, find the item "File" and select "Save As". Experts recommend saving images in jPEG format, since the pictures will be in clear expansion and retain the full range of black and white tones.


Figure: 7, 8
How to make an image black and white online?
There are many resources on the Internet that allow you to convert a photo, including changing the color scheme to black and white. I chose the “Editor.Photo.to” service, which I liked with its simple and stylish interface. Below is the instruction on how to make a picture in black and white with it:
- Log in to the site, select "Upload a photo from computer" and open the photo you want to edit in the editor;

Figure: nine
- Find the "Effects" section. It's in the control panel, on the left;

Figure: ten
- Apply the Black & White effect. With the help of the white circle, you can change the intensity of the colors.

Figure: eleven

Figure: 12
As we can see, there is nothing difficult in making a color photo in black and white. You don't even need to have a photo editor on your computer for this.


