Removing the background from a photo can be a really difficult task, especially if the subject you want to cut out has an extremely complex background. In this tutorial, we will walk you through the process of removing the background from an image step by step to help you overcome this difficult task.
First you need to open the image you want to remove the background from in Adobe Photoshop. To demonstrate the technique, I chose a photo of a giraffe taken at the Colchester Zoo that has a very clear line between the bits we want to keep (the giraffe itself) and the background.
I'm using Adobe CC, but the background removal technique described here will work in Photoshop CS5 and older, although some elements may look slightly different:
Step 1
So, we need to make a selection of the desired area. There are various selection tools, but for beginners, the easiest to use are the " Quick Selection» ( Quick Selection) And " Magic wand» ( magic wand). There is also a Lasso tool ( Lasso), it is more accurate, but also takes more time.
For our example, we will use the " Quick Selection”, which is located on the toolbar. Make sure you use this tool with a plus in the middle by pressing and holding the Shift key.
Select the area of the background that you would like to remove by holding the left mouse button and dragging the cursor over the desired area. If you accidentally selected something superfluous, you can use the option " Subtraction"Tool" Quick Selection”, while holding down the Alt key, and thereby remove the extra area from the selection. Don't forget to hold Shift again before continuing with the background selection.
You don't have to be too careful with things like hair and fur because you can refine the edges later ( we will discuss this in a minute).
When you're happy with the selection you've made, right-click and select the " Invert Selection» ( select inverse):
Step: 2
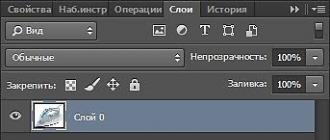
Now click on the " Add layer mask» ( Add Layer Mask) at the bottom of the Layers panel ( it is a rectangle with a black circle in the center) and you will immediately see that the background is gone.
It might not look great yet, but don't worry, you can use the mask refinement tools to improve it:
Step: 3
Double-click the mask in the Layers panel ( this is a black and white image following your photo preview) and then select Mask Edges ( mask edge) from the drop down menu. You will see the Refine Mask menu ( Refine mask):
Step: 4
In this step, you can make adjustments to the mask to improve its appearance. First, check the box next to the option "Show radius" ( Show Radius).
You won't see any change, but by moving the slider for this setting, you can make sure that the radius captures all of the loose strands of hair and gets rid of the background in between.
If you move the cursor over the photo, you will see a circle with a plus in the center. You can use it to capture complex, hard-to-reach areas by holding down the left mouse button and dragging the cursor over problem areas:
Step: 5
Uncheck the option " Show Radius” to return to the mask preview. Now use the sliders to adjust the mask until you are happy with the result.
You can change the view mode by clicking on the small arrow next to the thumbnail image and selecting a mode from the drop-down menu.
How to remove or cut background in Photoshop?
Our lesson will be based on a photo of an iron. The fact is that this item is easy to highlight, even a novice user can handle this task. After going through the basics, you will quickly understand how to cut out the background in Photoshop and in a picture with a person. It just takes a little more time.
In our example, the background is completely painted white. But in fact, it does not matter at all, it can be painted in any color. It can even be some kind of flowering meadow, it will not become more difficult to cut out the background from this. It is only necessary that the object be clear, with an easily defined contour. If the camera was out of focus at the time of shooting, then only then problems may arise with the selection.
Solving the problem of how to remove the background in Photoshop begins with a selection. But the first step is to unlock the current layer. Now it has the name "Background". Go to the Layers panel and double click on this name. A dialog box will pop up asking you to name the layer differently. Take advantage of this opportunity and click OK.

Now we need to select our iron. To do this, you can use one of two tools. The first is the "Magnetic Lasso". A good option, but it is more suitable for those objects that are difficult to separate from the background. Also, this tool is indispensable for highlighting a person. In our case, it is better to use the Quick Selection tool. Select it and then adjust the brush size. Now you need to click on the object until it is fully selected. If you accidentally drove into an area with a background, then click on it while holding down the Shift key. Gradually, the item you selected will be highlighted.

But it's still not perfect. If now without hesitation to invert the selection and cut out the background, then the result will obviously not suit you. Along with the background, some pieces from the contour of the object of interest will disappear. Therefore, the selection should be made as accurately as possible. But it would take too much time to refine it manually. Luckily, Adobe Photoshop has the ability to adjust the selection to suit your needs. To do this, you just need to launch a special tool using the Refine Edge button. It is due to this function that you can quickly remove the background in Photoshop, spending a minimum of time on selection.
how to remove background in photoshop cs5
Pressing the button will suddenly turn the white background black. Don't be scared, it's just easier to keep track of changes. The dotted selection line will disappear, now it does not interfere with viewing the outline of the object. And after pressing the button, a dialog box will pop up. In it, you immediately need to check the box next to the "Smart radius" item. Below is a slider that adjusts the value of this radius. Set the value so that the outline of the object is without bald spots. Also in this dialog box, you can adjust the smoothing and feathering of the edges. This way you can achieve the perfect result.

When the result suits you - press the "OK" button. After that, you will return to the previous picture, when a dotted line runs across your object. Now we could copy it, move it, perform other actions ... But we need to remove the background in Photoshop cs5 (or later). To do this, you need to invert the selection. This is done very simply. Go to the "Select>Invert" path.

How to quickly remove or remove the background in Photoshop?
You could guess the next steps yourself. The background is now selected. To delete it, just press the Delete key. Immediately the background will become transparent. If you want to save just such an option, then you need to choose the format that supports the alpha channel. When you save the picture in JPEG format, the transparent area will turn white again. The PNG format seems to be ideal for saving such an image.

We figured out how to remove the background in Photoshop. The simplicity of this action depends on the complexity of the contour of the main object. The easier it is to select, the faster you will remove the background.
How to cut an object from the background in Photoshop?
But sometimes a complete removal of the background is not required. Sometimes you need to cut out some object from the Photoshop background, and this program has recently been able to do this too. For example, you can remove some garbage from the image. With some skill, you can even get rid of telegraph poles and wires. Let's take as an example a photograph where traces from previously flying planes look objectionable.

To delete an unwanted object, you must first select it. However, it is not necessary to select it as accurately as possible. On the contrary, precision is not needed here. Just use the lasso tool and select the object along with a piece of space surrounding it. But you need to remember that the object must be small in size. Otherwise, the program will not be able to understand how exactly to fill the empty area.

Once selected, press the Delete key. In the pop-up dialog box, pay attention to the "Use" item. Select "Content Aware" from the list provided. After that, click on the “OK” button. Then it remains only to go along the path "Select> Deselect" or use the keyboard shortcut Ctrl + D.

This concludes our lesson. Today you have learned how to quickly cut out the background, as well as remove only part of it. Now it will not be difficult for you to improve existing photos by getting rid of all kinds of garbage.
When working with images, very often you have to remove background in photoshop at the picture. The ability to do this is one of the basic basic skills in Photoshop. There are several ways to do this. In this tutorial, we will get acquainted with one of the easiest and fastest ways to perform this kind of operation. You will probably ask how to remove background in photoshop fast and easy? So let's get started.
Before proceeding to the lesson, First, let's get acquainted with the tool with which we will remove the background from the image. This tool is called the Magic Eraser. The principle of this tool is as follows: "Magic Eraser" removes pixels that are similar in color at the point of mouse click, it also automatically converts the background layer to normal. This tool is great for instantly removing large areas of solid color.
To competently and skillfully use the Magic Eraser tool, let's get acquainted with its parameters:
http://website/
1) Tolerance.This parameter sets the sensitivity of the tool and determines the range of similar colors (in percent). The higher the tolerance, the wider the range of colors that will be erased.
2) Smoothing.Softens the borders of the area being erased.
3) Adjacent pixels.If you want to erase pixels that are in contact with each other, leave this box checked. If you want to erase pixels of a similar color no matter where they are in the image, clear this check box.
4) Sample from all layers.Check (Use All Layers) to have the Magic Eraser erase areas of the active layer based on the color of the pixels on all visible layers. If this option is disabled, the tool analyzes only the colors of the active layer, only the pixels of the active layer will be erased.
5) Opacity.Sets the transparency of the eraser. If you want to control how effective the Magic Eraser is, you can enter a value (in percentage) in this field. For example, entering the number 50 will cause it to erase 50 percent of the image's opacity, entering 100 will remove the entire image.
My settings for the parameters of this tool, you can see above in the screenshot, highlighted in red.
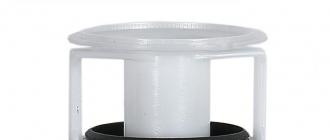
So, let's move from words to deeds. To remove the white background from the alarm clock, take the Magic Eraser tool and left-click 2 times on the white background. Once outside the alarm, the second time at the top inside the alarm. For example, I highlighted in red the places where I clicked with a magic eraser.

http://website/
P.S. That's all for today. I hope you learned something new for yourself and this lesson will be useful to you. Liked the article? Then tell about it on social networks by clicking on their buttons below.
Many Photoshop users use rather complicated methods to remove the background, while they could do it much easier with the Background Eraser tool. This tool is able to automatically recognize edges and has various settings for feathering the selected area, so that the result of the tool is excellent. In this Photoshop tutorial, we will learn how to remove the sky from the background and replace it with some other sky from the set with sky gradients.
Preview of the finished result
Step 1: Choose an image to work with
Open in Photoshop the image you want to remove the background from. For this tutorial, I'm going to use a scene with two trees against a blue sky. You can successfully use the methods and techniques described below in any other situations with other images.

Step 2: How the tool works
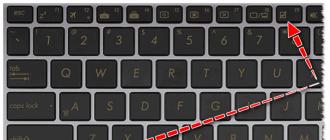
Despite its name “Background Eraser”, this tool has much more powerful erasing capabilities than simple background removal. In fact, his work is more like erasing color. So let's get started with choosing a tool. You can hold down Shift and repeatedly press the E key to cycle through the tools in the eraser panel. Or directly click on the tool icon on the toolbar.
After you select a tool, the options on the top bar change and the mouse pointer changes to a circle with a crosshair in the center. With a crosshair we indicate the color to be removed, as a result of which, everything inside the circle that has the same color will be removed. Right-click anywhere on the canvas to open the tool's settings window.

Remember that the value of Hardness (Hardness) should always be as high as possible, otherwise the tool may leave incomplete background fragments. Set the desired brush size, and set the intervals relatively small, in the range of 1-50%, so that the removal is smooth and even.
On the top options bar, activate the Sampling Once mode, so that we can process a large area by setting the desired color once. For now, set the Limits settings to Contiguous and Tolerance to 50%.
Step 3: Getting Started with Tyranny
Click anywhere in the sky, hold LMB and drag across the canvas, erasing the sky area.

As you can see in the image above, the background between the ropes and leaves remains intact. This is due to the Limits settings you have set. Go back to the top options bar and change Constraints to Edge Selection (Discontiguous). Now repeat the erasing process and observe the effect.

You will notice that in the Edge Selection mode you can remove the background even if it is in an isolated area, such as between branches and leaves.
Step 4: A Few More Options
In my case, when I ran the tool at 50% Tolerance (set by default), the result was quite acceptable. But don't worry if you suddenly end up with something like this:

If this still happens, then the background color is too close to the color of the object itself, and you just need to reduce the Tolerance levels. In the event that the background color is quite different from the color of the object itself, which is located on this background (as, for example, in my case), then the Tolerance can be increased to get an even more perfect result. With the right tolerance value, you should end up with something like this:

Step 5: Even more settings!
If after several attempts to find the right Tolerance level, the tool still gives you problems by erasing the objects themselves along with the background, activate the Protect Foreground Color option by checking the Protect Foreground Color box.
This will allow you to specify a base color swatch (you can swatch the color by clicking on the desired area while holding Alt), which Photoshop will not erase while working with the Background Eraser tool. Below is an example of how this option works.


Step 6: Different Background Colors
After applying the Background Eraser tool to the entire area of the background with one given color, you can get the following result:

Even though the background looks completely blue in my case, it actually contains various shades of blue, and in places even white areas. To fix this, you just need to set another, different color from the previous one, and repeat the process. You can also try enabling the Sampling Continous option on the top bar.
But I do not recommend that you do this, as you run the risk of getting too close to your objects (in this case, trees), accidentally capturing a color sample from them, and thus erasing parts of the image that were not intended to be erased at all. Therefore, it's better to just move the crosshair over the area with a different background color, and repeat the erasing process. And so on until the image is completely cleared of the background.

Step 7: Final Step
Once the background has been removed, you have two paths you can take next. You can select the newly cleared objects and use them in a project to create another composition, or replace the removed background with something else, getting a new image (which is exactly what we will do). Download the celestial gradient set and choose one of your choice. I decided to replace my previous background with a clear blue sky:

Here is the result:

Finished result:
I hope you liked the lesson, and in your luggage of tricks and tricks there is one more that will facilitate your creative process.
Often, when working with graphic files, it becomes necessary to remove the background around some object. This may be due to the desire to change the background of the picture or insert this element of the photo into some kind of composition. As a result, a completely logical question arises: how to remove the background of a photo in Photoshop?
Removing a plain background
When considering the issue of cleaning up the background in a photo, it is necessary to consider separately the question of how to quickly remove a background in Photoshop that has a uniform hue. This will allow you to avoid the extra work that is required when removing the multi-colored part of the picture. Before deleting the desired fragment of the photo, you must first select it. This can be done using various methods. If you need to highlight a specific shade, then Photoshop has a special tool for this purpose that helps speed up this process. To do this, select the "Select" menu item in the Quick Access Toolbar, and then find the "Color Range" item. In the window that opens, you will need to select the Eyedropper tool, and then click on the background that you want to select. With the help of the sliders, all that remains is to adjust the selected area and click "Yes". As a result of these actions, all areas of the photo containing the selected color will be selected. To delete them, you must press the "Del" key on the keyboard. This method allows you to simply and efficiently solve the problem associated with removing the background in Photoshop.
cleaning
As an analogue of removing the background, you can use the Eraser tool. It will allow you to complete the action even faster. It is enough to select the "Magic Eraser" and double-click on the background. As a result, a chess background will appear, which will symbolize the presence of a transparent part of the photo. The disadvantage of this approach is that there is no control over the area that will be removed. To provide control over background removal in Photoshop without affecting the rest of the photo, you can use another “magic” tool that works like an eraser, but instead of removing it, it makes a selection. There are two such tools in Photoshop, and both do the same thing. We are talking about "Quick Selection" and "Magic Wand". The only difference in this case is that the Magic Wand requires a step-by-step hue selection. Selection allows you to move the cursor over a large area of the picture at once.
Quick mask mode
The approaches described earlier allow solving the issue related to the removal of the white background. In addition to single-color backgrounds in Photoshop, there is the possibility of cleaning and multi-color. Such a need may arise if the background depicts a landscape that does not meet the requirements. How to remove the background in Photoshop? There are several methods you can use to precisely remove the part of the photo you want. The first way is to use the Quick Mask. A mask is a special mechanism that allows the user to use the drawing tools to paint over the area that needs to be selected. To access the Quick Mask tool, just press the letter Q on your keyboard. After that, with the help of an eraser and a brush, you need to paint over the part of the photo that should be deleted. By switching to normal mode by pressing the same key, you will be able to notice that the required area of the picture will be selected. To delete it, just press the Del key that you already know.
How to remove the background using Lasso?
If the object around which you want to highlight the background has fairly clear boundaries, then there is one very convenient way to remove the background. To do this, you need to use the "Lasso". This tool is provided to the user in three versions. The first option has the same name. The Lasso tool makes it possible to arbitrarily draw lines for the future selection of an area. With this tool, it is quite difficult to select the necessary part. Therefore, users usually use the other two variants of this tool. The next option we'll look at is the Rectilinear Lasso. With it, you can draw a selection area using only straight lines. This way you can draw a clear border around angular geometric shapes and buildings. For more complex elements, such as silhouettes of people, it is better to use a tool called "Magnetic Lasso". This tool, thanks to a special algorithm of actions, can move along the contour of an object, determining the difference in colors. You only need to approximately move the mouse cursor around the photo element. As a result of using the Lasso tool, you will be able to select the element itself. To remove it, you need to invert the selection by pressing the key combination Ctrl + I. Now you can remove the background of the photo.
other methods
It is worth noting that there are other ways to remove the background in Photoshop. Most of them are very difficult to perform, but they allow you to more clearly carry out the removal. At the same time, a good result can be achieved by simpler means, spending more effort and perseverance for this purpose, and perhaps even saving a little time.