In order to make a good first video and it looked attractive on the YouTube channel, interested as many people as possible, you need to try and make everything perfect. In principle, there is nothing difficult in this work, everything is simple, if you follow several recommendations.
Video Equipment
Equipment for shooting can be very diverse. To remove the material for YouTube outdoors, one equipment is needed; for rooms, a slightly different set of equipment is needed; if shooting is carried out from the monitor (screencasts), special programs are needed.
If you have limited opportunities, it will be enough:
- video, camera, phone with video recording function;
- video editor;
- selected place or items for shooting.
Stages of creating a video for YouTube
The first thing you need to do before shooting for YouTube is to choose a theme that you intend to cover in your video. It is necessary to understand that the competence on the chosen subject plays an important role. Topics that are familiar and you can bring their essence to each of your subscribers, guarantee a high attendance of your page.
If you have an excellent sense of humor, take the theme of an entertainment video.
Today, on the Internet, especially on the YouTube channel, users are actively looking for a video that can practically help you, benefit in practice. This can be a variety of useful lights, reviews of products, services, descriptions of something.
Video mapping
After choosing a theme that you’ll be shooting for the YouTube channel, you need to make a plan according to which you’ll be implementing your idea. This is necessary to avoid confusion of the sequence of presentation of ideas and thoughts, or the execution of some works that will be shown in your video. Call it a script.
Write for yourself on paper what you intend to tell YouTube viewers so as not to miss important points.
Superfluous words, repetitions should not be. You can practice before video filming, speak through or do everything you have planned. You can shoot a video for youtube, view it before putting it on YouTube. After that corrected material can be brought to the court of its guests and subscribers.
It is important that the first video for YouTube carries the maximum information, but it was without difficult to understand expressions and inconsistent stages. Express your thoughts should be simple and interesting. Scripting can help.
Preparing for video shooting
When everything is written, worked out, you can start shooting a video that is intended for the YouTube channel. Before you start shooting, you need to check the availability of all the necessary items and things.
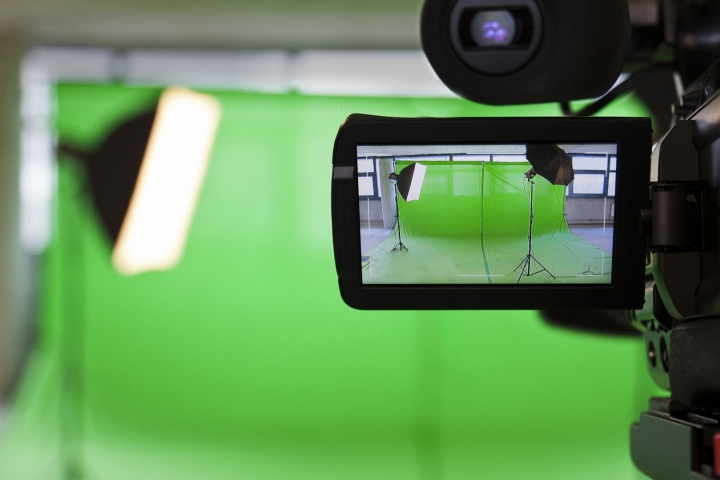
The camera is installed so that, if possible, there is a solid light background opposite it. With this arrangement, the viewer is not distracted when viewing from the main subject. It is desirable that the room in which the shooting work is done has good lighting. If it is not enough, you need to install additional lamps.
Try to make sure that during the shooting, if possible, there were no extraneous noises, so that the speech of the person in the frame was distinct and perceived by the listener's ear.
Shooting a video for Youtube
During the shooting to hurry to express their thoughts is not necessary. Not always beginners manage to shoot high-quality video the first time. Repeat the shooting as many times as you want, so that the footage for YouTube is as good as possible.
Before the camera you need to behave naturally, without straining and not worrying. Often this is the main reason why a good video is not working. Excitement leads to forgetfulness, confusion, the view of the main character becomes ridiculous.
You need to try to shoot a video for posting on YouTube when you are in a great mood. The viewer is well perceived favorable emotional mood. A slight smile and natural mobility will help make the video worthy of a positive perception by those for whom it is intended.
Sound effects during video shooting
If you need to shoot material indoors, the sound quality will be high if external noises do not make their way into the room. If you have a microphone, you can use it. If your hands need freedom, this option will not work. There is an exit. If your YouTube video is a tutorial, the blogger may be out of sight of the camera and record the sound under the microphone separately, after the video is taken. This method of sounding will allow not to make a second survey, if something was said in the frame or not.
Editing footage
Editing material for a page on YouTube can consist of several points:
- cropping unnecessary fragments that are unnecessary or do not fit into the overall picture;
- adding a title that accurately represents the topic of the video
- registration of musical accompaniment;
- save the edited video in a format that supports the YouTube channel (MPEGPS, WebM, WMV, MOV, AVI, FLV, 3GPP, MPEG4).
Do not be discouraged if negative comments appear on the youtube in the comments to your video. You must pay attention to criticism that will help you improve your skills. Many people tend to try to piss off or upset people who are doing something and not sitting still. These critics only do what they are discussing, speak negatively to everyone. Eminent bloggers on YouTube at the beginning of their development had such moments, they achieved good results in part because they were selective in criticizing themselves.
The video below describes how to make a quality video:
The first time, do not strive to shoot long videos. It is enough to shoot a video up to 10 minutes long. Subscriber perception of such material is much easier. Most simply do not have enough time to watch long videos or just laziness, so interest in such materials is quickly fading away.
Hello! Almost every day I am asked questions about how exactly I shoot a video: which programs are needed to capture and edit, which one I use with a microphone and other similar ones. I decided to write a small article and tell about everything I know.
Frankly speaking, I am not a master of video editing and even I’m far from an amateur; besides my father helps me in editing videos. So, summing up my own little experience and explanations of my father, I will try to tell you most clearly and in detail.
Capture video from the screen
The shooting of a flysplay or construction process begins with capturing video from the monitor and saving it to the hard disk of a computer. This requires a special software, for Windows I know two of the most famous programs - Bandicam and Fraps. For shooting Sims 3, both are good, but I use Bandicam for two reasons. The first is both paid, and Bandicam was already with my father, so I didn’t have to pay the money; the second - Fraps, unlike bandikam, can only work in applications, that is, you can shoot games, but the desktop is not.
You can download bandicam from bandicam.com, you can easily find it, it costs about $ 40, you don’t have to pay money right away, the unregistered version works, but with the restriction of video recording up to 10 minutes and the logo will be displayed on the screen.
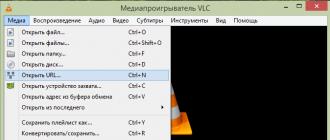
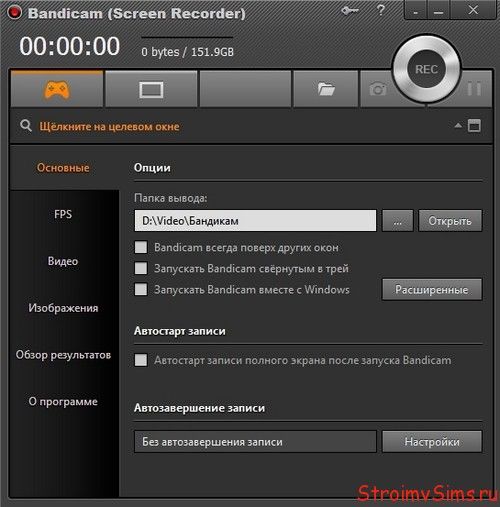 Bandicam program interface.
 The program settings are very simple, I think anyone will figure it out, I’ll say the most important thing - you need to turn on the program before starting Sims 3 and select the recording mode for video games. If you record your voice through a microphone, do not forget to specify the sound recorder in the settings. And yet - the video files are very large (Bandicam does not know how to compress video), so you need to select a folder on your computer where there is enough space. By default, the settings are set to drive C, which does not suit me, so I created a new folder on drive D, which I designated as the location for storing files for bandicam.
Editing the captured video
Well, the video was filmed! What to do next? In fact, you can immediately post it on YouTube, as I did before, but I do not advise you to do so. Look carefully at the footage - do you like everything in it? - I'm talking about the quality of the image, sound, and other things that did not work out, the viewers would not want to show this, right? Therefore, if you want your videos to be watched by people, they need to be brought into “human form”, that is, edited.
With this we will help programs such as Corel Videostudio, Sony Vegas pro, Pinnacle Video Studio and other video editors. I use Corel Videostudio, again, for the reason that my father has it (almost all worthwhile video editors are paid), you can choose any one you like. You can also edit videos in YouTube itself, but the capabilities of the built-in editor are very limited. In Corel Videostudio, I can change the lightness, contrast, saturation of the video, add a screensaver, impose music, cut out too much, and so on. In general, no editing at all.
Briefly about sound recording
And finally, a few words about the sound quality: it is very dependent on the microphone. Ideally, you need a professional studio microphone for recording. If you allow financial opportunities - be sure to buy. I still use a simple cheap microphone. The sound of it turns out terrible, with noises. To remedy the situation, I improve it with the help of the free program Audacity - remove noise and change frequencies slightly.
Still, I bought a good USB microphone: Samson Meteor Mic, it's a condenser with built-in sound card. Why did not you do it before? Now I understand that no matter how you process the sound from a cheap microphone, it will still be disgusting.
That's all - I told her that I know, all this is the result of my own experience, unfortunately, I don’t have anyone to learn from, I am looking for all the information on the Internet, over time I learn something new and try to improve the quality of my videos. I'm glad if the article helped you somehow, if you have questions, ask them in the comments. And one more thing, thank you for your attention to the channel, I hope to see you more often and on the site!
P. S. In addition to the above, you can read about.
Hello friends!
Want to learn how to shoot video in games?
There is nothing complicated about it.
You will learn how to do this without giant files, FPS drawdowns.
There is a special program for recording video games Play Claw, which allows you to record without a drop in computer performance.
Moreover, it does not flood a hard disk with large files. You become your own operators and in a cozy atmosphere you can make a video in the game!
How hard is it?
Many gamers think about how to make a video in the game. But they do not dare to do it.
For many players, such a process seems to be the hardest, almost from a ritual like “voodoo” or, at a minimum, a master's degree in programming is needed for this.
It scares downloading some obscure programs, settings, codecs and so on. In short, dancing with a tambourine shaman seems simpler than all this fuss.
Friends, in fact, each of you can record video from the game easily. For this you only need to have a suitable tool.
Program for recording video from Play games Claw
Until recently, Fraps was considered a more or less normal working program. She mainly suited the owners of top-end computers.
The rest had no choice but to put up with gigantic files, eerie FPS drawdowns - this led to the fact that such a record weighed more than the game itself.
What was typical of Fraps? Wild gluttony to the system, gigabyte files at the output, the minimum number of settings.
Quite another thing with the Play Claw program! It is much more convenient, more technological, more accessible. This program for recording video from games has been specially developed and optimized to be used on a multi-core processor.
With the Play Claw utility, you can forget about such a problem as computer performance. If you started the game, then you can record the video without any problems and side effects.
The utility has a clear, simple interface. It is made in a tiled style, borrowed from the modern Microsoft product.
The tests showed that in the PlayClaw program, the frame rate is about ninety, whereas with FPS in the game - about 120, and in Fraps - decrease to 60.
And that's not it. If one processor core is allocated for Full HD encoding, the FPS increases to one hundred. In fact, in terms of performance, the Play Claw utility does Fraps almost 50 percent.
This is not all the advantages of the program - there are many other features that make it an indispensable tool for gamers.
Main advantages
- Now you can record FullHD video.
- You can shoot video without strong FPS transplants.
- No need to create giant files.
- Setting overlays allows you to show any overlays on top of the game screen.
- You can display not only the timer, CPU temperature, stopwatch, load sensor readings, but also your image.
- Multi-channel sound is supported.
- The program is calmly perceived by the two most popular anti-cheat systems: ValveAnti-Cheat and Punkbuster.
- You can write your own overlay plugins.
- Play Claw captures video not only from the drivers, but also from the desktop.
The program’s arsenal is impressive, and you yourself were convinced of this. You just need to download the program Play Claw and you can start shooting video in the game.
You can now create small videos, make videos of the passing game of your favorite game - in general, make your dream come true!
More convenient program to make a video in the game, no. Use a quality tool, become operators and have fun.
And Play Claw will be able to ensure that all seconds of your favorite game are immortalized!
Success, fame, a sea of fans and money - fame can give all this to those who dare to achieve it. Today, everyone can try their hand at creativity and get recognition by posting videos on Youtube and similar sites.
Many people do not know how to start shooting videos on Youtube, and our guide will help you find your niche, record your first videos, edit and publish them. It does not require professional skills, only the desire to try something new.
The most successful people always do what they like themselves. Therefore, in search of ideas worth looking back at their interests. Do you enjoy motor sports? Tell viewers about the champions, the fastest and most expensive motorcycles, tell the stories of different brands that produce this technique. Do you like to cook? Shoot a cooking show with the process of cooking popular dishes or exotic delicacies. Computer games, knitting, archery - in any subject there is something that you can tell interesting stories that will find its grateful viewer.

The main theme for the YouTube channel is defined, but what to do next? The quality of the start will depend on all further development, so the creation of the first video should be approached with all the responsibility.
People like positive and dynamic videos - the success of the channels “This is Good”, “+100500” and many other projects is a clear confirmation of this. No need to pull words and mumble, your speech must be confident and emotional to catch the viewer. Write the script, rehearse and only after that remove the final version.
When thinking, do not forget about further releases. They should look like a logical continuation of the initial video, so that it would be interesting to watch them one by one. In addition, it is important to regularly publish videos, otherwise you can easily lose the interest of subscribers. An excellent solution would be to create a schedule that will allow viewers to know when the new release will be.
Selected format assumes the presence of the lead in the frame? You can't do without a good camera, you also need to work on the lighting and background to make the videos look decent. For shooting on the street, in a crowd of people or in nature, only a camera is enough. And for recording from a computer screen, you can do without special equipment.
The footage in most cases requires additional editing. Today there are many programs for video processing, the possibilities of which are fundamentally different. It is rather difficult to try them all out because of the high cost - the cost of popular distributions reaches tens and even hundreds of thousands of rubles, which is a very heavy price for a regular user.
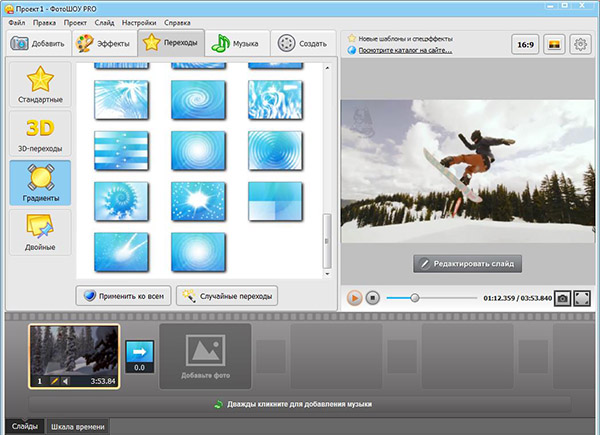
The Russian version of ProShow Producer differs from its foreign counterparts at a reasonable price and simple interface, and in its capabilities it is not inferior to the best of video editors. Put several files in one clip, change the voice acting, apply transition effects, make captions? It will not cause any difficulties for users of the program.
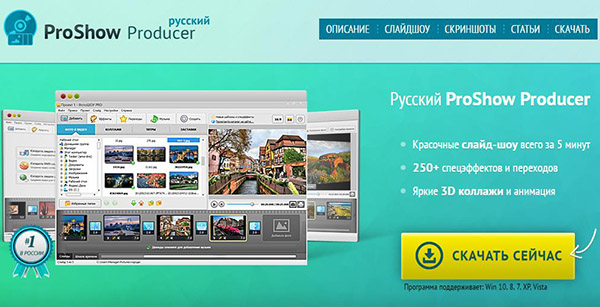
In order to start working with Russian ProShow Producer, you need to install it on your computer. The trial version is completely free, and with its help you will be able to test the capabilities of the program by recording your first videos.
By understanding how to start shooting videos on Youtube, you will be one step closer to success. And thanks to the Russian version of ProShow Producer, it will be easier for you to create and publish videos, since the program can optimize them for uploading to video hosting sites!
To remove the game with sound and your own comments will need speakers, and the installed program Bandicam. Often, users complain that the sound is recorded incorrectly - with pauses, noise, or too quiet. To prevent this from happening, you need to properly configure the program before recording.
The first thing you need to remember is that Bandicam will record the game only if the “game” recording mode was initially selected (the joystick icon is pressed). If you leave the "on-screen" mode or recording from a webcam, then only a black screen will be recorded.
How to shoot games using Bandicam - basic settings.
All video and audio quality settings are made in the "Video" tab. The first step is to check whether the speakers are connected. For this you need:
- Click on the top button "Settings".
- In the window that opens, go to the "Sound" tab.
- Select in the section "Main devices" the main speakers through which the sound is played. To check the correctness of the choice you need to click on the "Settings" button next to the list, turn on the sound and see if there are any changes on the volume scale. If there is, then the device is selected correctly.
- Click OK and exit.
Life hacking: In order for the sound from the game not to be too loud or too quiet, you need to turn on the game, turn on the sound check window and follow the scale change. If the sound rises to a maximum of 1-2 divisions, then this is quite quiet, you need to increase the volume in the game itself. If the scale jumps to the very top, then vice versa, make it quieter.
Details of the video quality settings for recording games.
The lower “Settings” button allows you to select the video size, codecs and set the frame rate. Choose AVI format if you do not care that the output video will weigh a lot, and you need to have perfect quality.
Perfect video quality and high weight files.
In this case, you need to leave the full screen size, set the FPS to 60, the H264 or MPEG-1 video codec for PCM audio and the quality to 100. These settings will help you to make excellent video from games, but only if the PC is powerful enough . If not, there will be stripes or ripples on the screen, the sound will float and during a long recording, the program may refuse to work.
Normal video quality and low weight files.
Therefore, if the computer configuration leaves much to be desired, it is better to choose MP4. It compresses the video, but if the purpose of the recording is to show the gameplay, not the details of the graphics, then the quality will not suffer much. The optimal size is usually 1280x720, but you can experiment and choose another. If you set the quality to 80, then the visual changes will not be visible, but the output video itself will weigh less. Codec select - H264. “The higher the frame rate, the better the quality” is an erroneous opinion and the FPS 30 will be enough to support the remaining settings. As for the sound, then everything must be left by default.
To recapitulate all of the above, in order to make a video of the game using the Bandicam program, the following steps need to be done:
- Run the program.
- Select the "game" recording mode.
- Check speaker connections.
- Set the necessary settings.
- Run the game.
- Press the REC button.
The finished record can be viewed in the “Results Overview” tab. Before you record the main video, it makes sense to make a test recording lasting 3-5 minutes.