Today, there is an Internet connection in almost every home. Some people are limited to one computer. Others buy routers and create a home local network on several devices (including smartphones). In any case, in order to do everything correctly, you need to know how to correctly configure the local network in Windows 7. It is this topic that is discussed in this article.
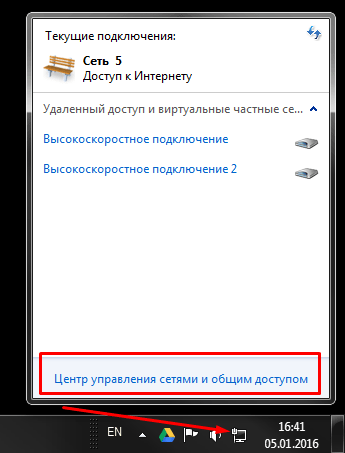
Network and Sharing Center
This menu is the heart of all network connection settings in Windows. Set up a local network, change the IP address, find out the MAC address of your network card, create a new PPPoE connection - all this can be done here. Of course, all actions can be performed through the Windows command line, but for most users this method will be very inconvenient.
To call the "Control Center" in Windows 7, you can go in several ways:

Connecting to new network equipment
Suppose you are connected to a provider and purchased a new router. The configuration of the router itself is not considered in this article - there is too much variety. When the device is fully configured and ready for use, you need to connect your personal computer to it.
You connect the router and the PC using a patch cord, and the network connection icon in the Windows tray changes its appearance. This means that everything is fine with the network card and cable. If your router is in DHCP mode, i.e. independently assigns IP addresses to new devices - most likely, you will not need any additional settings.
The operating system will ask you to select the type of connection: “Public”, “Home” or “Work” network. For an ordinary Windows user, this step does not matter. For example, select your home and click “Ok”. Try to go online - if everything worked, you don’t have to do anything else. 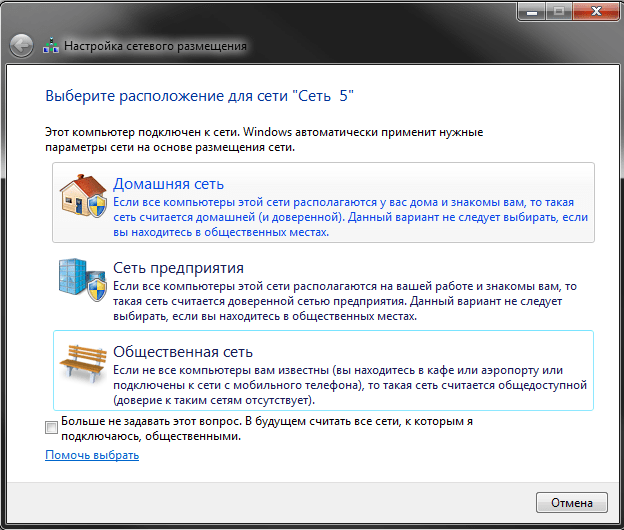
If not, you need to configure the adapter, which is described below.
Note! If you don’t have a router and you are connecting a cable from your ISP to your computer, then probably nothing will work for you. Modern providers rarely use DHCP technology, preferring PPPoE or Static IP. In this case, follow the instructions below.
Configure adapter settings
This section of the manual is intended for those users who need to configure the properties of the adapter (network card). If, according to the contract with the provider, you need to assign a specific IP or mask, specify a specific gateway, proceed according to the instructions. If the agreement contains a login and password for connection, skip this step and go to the section devoted to PPPoE.

New home connection
If you connect the cable directly to the provider, bypassing the router, most likely you will need to do the following.
Updated - 2017-02-14
Local area network with internet access. If you have several computers at home and all of your households are constantly working behind them, and only one of them has Internet access, then you probably wondered more than once: - How to connect all these computers to high-speed ADSL Internet through one modem?
That's what we’ll talk about now. Moreover, not all desktop computers are required. This can be done with laptops. I will describe all the settings for Windows XP. Although the same thing can be done for other systems. The only difference is access to the network card settings. In all operating systems, the network card settings are hidden in different ways.
The difference is only in the way to them, because different systems have different control panels. No matter how good and sophisticated new operating systems are (Vista and Windows 7), but I prefer Windows XP. Its settings (especially for the local network) are the most flexible and simple.
I have three computers at home, and everyone is constantly busy. And for a long time Internet access was only on one computer, which is very inconvenient. But then came the moment when we realized - it's time to do something. They gathered a little home advice and decided to create their own small local network with shared Internet access.
What we need to build a local area network with Internet access
We bought a switch for five ports,

and three network cables: one - 3 meters and 2 to 10 meters.

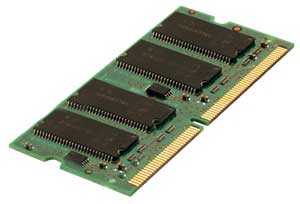
Network cards in all three computers built into the motherboard, so we bought only one - to connect a modem.

We already had a modem.

In general, everything cost “little blood” - a little more than 700 rubles.
Connecting equipment for a local network
WITH INTERNET ACCESS
- Installed a new network card in PCIslot A computer that has direct Internet access. This computer we will have a server. The system immediately detected it and installed the necessary driver itself (if your system could not install the driver, then install it yourself from the disk that is sold with the network card).
- We connected a modem to this network card.
- We will connect a cable to the second network card of the same computer, which will be connected to the switch with the other end.
- They connected network cables to the network cards of each computer.

- The other ends of the cables were connected to the switch and turned it on. The LEDs blinked on the monitor screens, messages appeared that the network cable was connected.

LAN setup
WITH INTERNET ACCESS
Then they started to configure the local network.
- Started with server settings which has direct access to the Internet. To do this, select - Start — Customization — Control Panel — Network connections .
- First, we renamed the network card to connect the network so as not to get confused in the future. They called her solidly - " LAN " (local computing network).
- Now we have an icon called " LAN "Is a network card into which we have a LAN cable connected. Let's look at the settings of our network card for the local network. To do this, right-click on the " LANProperties ».

- The window " LAN - properties ". If you named your network card in a different way, then you will have a different name, only the word Properties does not change. Roles, this does not play any, so you can not dwell on this.

- In this window, on the tab " General "Double-click the left mouse button on the entry" Internet Protocol (TCP/ IP) "Or highlight this entry and click on the button below Properties ».
- The following window will open: TCP/ IP) ».

- In it we make active (set the point) opposite the entry “ Use nextIP-address: ».
- We assign to our computer on which there will be an Internet connection directly through a modem IPAddress: 192.168.0.1 (if you have never set up a network, then it’s better to write what we have). The last digit must be 1 . The server must be the first on the network.
- Subnet Mask: 255.255.255.0 (points do not need to be registered anywhere). Nothing else to write anywhere. Save everything (press the button " OK «).
- Put the checkmarks below « When connected, display an icon in the notification area "And" Notify when there is a limited or no connection ”, That would be immediately visible if the cable is loose or for some reason there is no network. And once again we save everything.
- We configured all the network card of the first computer named “Server”. Now let's move on to setting up the network itself.
- Select the icon " LAN ».

- And we click on the icon of the house "on the left in Network Tasks" Set up a home or small office network ».

- The “ Network Setup Wizard ". Click on the button " Further ».

- In the next window, again press the button " Further ».

- In the next window, put a dot on the entry " Other "And press the button" Further ».

- In this window, set the point to " This computer belongs to a network that does not have an Internet connection. "(It’s easier to set up a network).
- And again, press the button " Further ". The next network setup window opens, where we are asked to give a name and description.

The description can not be written, and the name should be clear to you. Better change it at this step. For everything to work without problems, all names must be spelled in English letters, and large or small - it does not matter.
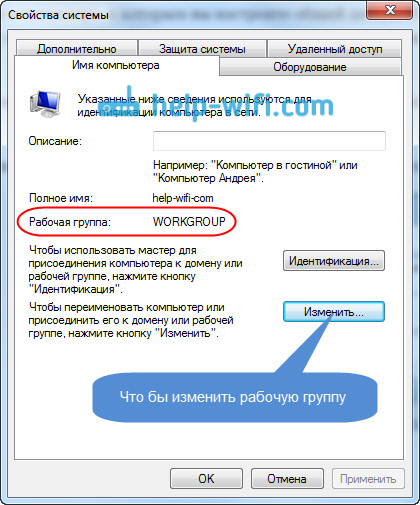
We first called the computer STELLA so he writes the current name STELLA, and now we will rename it to SERVER . And again, press the button " Further ". In the next window, you need to specify the workgroup.

You can leave the name of the working group as it is, or you can change it to the one you like. This also does not affect anything. Click the button " Further «.

On this page, it's best to leave it as it is.
On the next page you will see all the data that you entered to configure your network. If something doesn’t suit you, you can return by clicking on the “ Back »And change what you need. If everything suits, then press the button " Further ».

In this window, it is better to set the point to " Just complete the wizard… ».

Next, click the " Done »And the system will prompt you to reboot. Follow this tip. In exactly the same way, we configured network cards on the other two computers. The only difference is only in a different name, and the group name for all should be one (i.e. the same).

On another computer, as you see, the name of the icon has not been changed, since there are no other icons, and you will not confuse it with anything. There is only one network card.
AT " Internet Protocol (TCP/ IP) "For the second computer, write:
IP Address: 192.168.0.2
Main Gateway: 198.162.0.1
PreferredDNS -server: 192.168.0.1
AlternativeDNS -server: do not write anything

AT " Internet Protocol (TCP/ IP) "For the third computer, write:
IP Address: 198.162.0.3
Subnet Mask: 255.255.255.0
Main Gateway: 198.162.0.1
PreferredDNS -server: 192.168.0.1
AlternativeDNS -server: do not write anything

Everything is the same as on the second, only in IPaddresses last digit 3 .
The network we have configured. Now configure the network card to which the modem is connected (if you already have a modem connected and the Internet is configured, then you can skip this part of the article).
We go again to the first computer, which was called " Server ". We go in - Start – Control Panel – Network connections . Right-click on the network card icon " the Internet "And select" Properties ».

The “ Internet Properties ". In it on the tab " General "Select in the small window" Components used by this connection: "Record" Internet Protocol (TCP/ IP) "And open it with either a double click or the button" Properties ».

In the new window that opens, “ Properties: Internet Protocol (TCP/ IP) "Set the point on the record" Use nextIP-address: "And prescribe:
IP-address: 192.168.1.26
Subnet Mask: 255.255.255.0
Main Gateway: 192.168.1.1
(These numbers may be different for you. You can find them by technical support by your Internet service provider).
And press the button " OK ».

We get back to the window " Internet Properties ". Go to the tab " Additionally ».

We put a tick in it " Allow other network users to use this computer’s Internet connection. ” And uncheck the box “Allow other network users to control Internet connection sharing". Click the button " OK "And restart all computers. That's all. Now we have a network with all computers connected to the Internet.
- Main condition: The "server" must be turned on and connected to the Internet even if no one is working on it yet, otherwise other computers will not be able to access the Internet.
On other computers (Clients) you only need to start your browser (Opera or what you have installed).
Here is the connection diagram of our computers:

It is absolutely necessary to install an antivirus program on all computers, especially since it will be able to be updated regularly with you. Enjoy the benefits of a local area network.
Connect two computers to the Internet
Settings are no different from the connection that we reviewed above. Only difference - this is the lack of a switch, because we simply connect one computer to another using one network cable.
By the way, from my own experience I can say that you can take the same cable as for the local network, and not twisted pair cable. For two computers, it doesn’t matter. But when you connect a twisted pair cable to the switch, your network will not work.
So we examined the questions:
- xP LAN setup
- connecting two computers to the Internet,
- internet Connection Sharing
One of the most important abilities of computers is information transfer from one car to another. Thanks to this, almost endless possibilities open up for users, which everyone has long been aware of - entertainment, work, communication, and so on.
Many are well aware of the existence of global and local networks. If the first we use mainly to transmit information over vast distances, the second serves to transfer data among a small number of users. In this article, we will take a closer look at the local network, as well as describe its creation and configuration in Windows 7.
General concepts
Local network is called into which united 2 or more computers, usually located within an apartment or, say, a building. Machines can be interconnected by network cables or wireless channel (usually Wifi).
In order for each individual computer to "see" any other, also connected to the local network, two rules must be observed. Firstlyall machines must be n connected to one common communication device - to the router (you can do without him - more on that later), which receives information from one computer and transfers to another. Secondly, each of the machines must have unique network address. Compliance with these conditions is sufficient to combine multiple PCs into a simple local network.
It is also worth knowing that there are two ways (or types) of combining computers - star and ring.
The first involves the use of a router (router, switch, hub - as you prefer) as a communication device (the principle of operation was described above).
Type network ring"Does not require the use of such devices, however, for its operation, each computer must have at least two network cards. Roughly speaking, one of them will play the role of the receiver of information, the other - the sender.

This data will be enough for you to move on to the next part of the article.
Preparatory work
Before setting up a home or office LAN, you must first prepare all computers and a communication line for work. If you use wired router as a communication device, you will need connect network cables from each computer to it. If you are creating a home network using wireless router Wi-Fi, then just connect each machine to it.
Building a home network such as " Ring»Will require cable routing as follows (for example, 4 computers):
- Connect two cables to different sockets of network cards in computer No. 1;
- Pull one of the cables to PC No. 2, the second to PC No. 3;
- Connect the second cable in PC No. 2 to another free slot on the network board and drop it to computer No. 4;
- Do the same for PC No. 3 by connecting it to a free card slot from PC No. 4.
You may notice that when connecting type " Ring»Each of the computers is connected by wires to only two neighboring ones. In our case, PC No. 1 does not have a cable connection with PC No. 4.
By the way, setting up a network like " Ring" may be made without wires, i.e. over Wi-Fi. However, this will require that each computer can not only "be able" to connect to Wi-Fi, but also have the ability to create a virtual access pointso that the rest of the machines can connect to it. But we will not consider this option.
Customize Windows
After combining computers into a network using wires or Wi-Fi, you must perform certain settingsotherwise, such a home network will simply not function normally. The whole point of the setup is only to give each PC its own unique network address (connection settings will be considered using the example of Windows 7).
Start from any one computer:

Now, almost the same thing needs to be done for each computer connected to your home network. Differences in one - in the IP address field the value of the last number must be unique. For example, set the address on PC No. 2 to 192.168.0.2, on PC No. 3, specify 3 as the last digit, etc. to the very last computer on the home network.
By the way, if you want all computers on the network to be able to access the Internet, then in addition you need to fill in the fields “ Main gate"And" DNS server». The gateway and DNS at the same time can be, for example, the address of your Wi-Fi router in case the latter is configured to work in a global network. You can also specify in these fields the address of the computer connected to the Internet. In this case, the network settings of the latter should indicate that it allows other machines on the local network to use the Internet connection. But that's another topic.
Something else. When your computer connects to the local network, Windows 7 automatically asks where you would like it to be located. 3 options are offered - “ home network», « Enterprise network" or " Community network". Some Windows network settings depend on this choice - restrictions or permissions on the actions of other machines on the network in relation to yours. We will not paint everything - just choose the first option " home network».
How to check the connection
You can check whether computers “see” each other on the network using standard Windows tools, namely, using the command line. To open it:

Do the same on all computers.
Related videos
Sooner or later, you will need to connect your computer to the network or combine home devices. Firstly, this must be done in order to provide access to the world wide web. Secondly, when there are several computers in one apartment or house, it is very useful to combine them together. The necessary data will be accessible from any machine, and will also be available. In order to do this, you must enter the appropriate parameters. Which ones - you will know now.
Windows 7 is configured using this operating system. It makes it possible to configure the existing connection, as well as join the necessary network, which can be both home and worldwide. In Windows 7, the LAN connection is practically no different from the same procedure in the previous Windows. The main differences are only in the interface.
I draw your attention to the fact that IPv6 has been added to the IPv4 protocol. This made it possible to significantly expand the range of IP addresses used. True, such a connection on the local Windows 7 network is not used yet. And providers are not particularly keen on this.

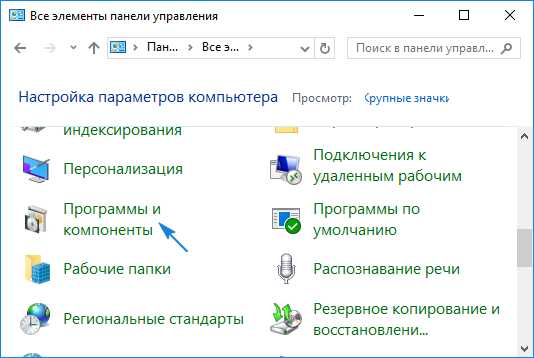
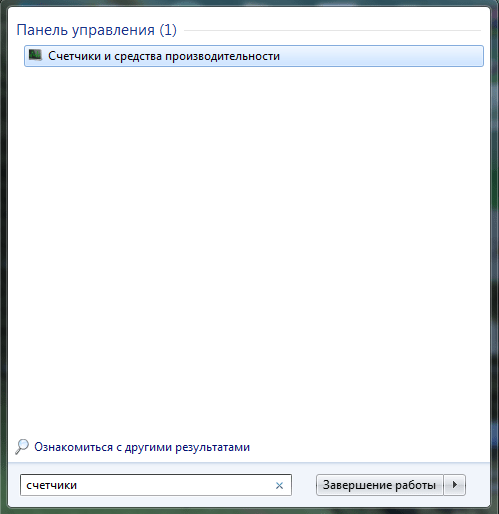
So, let's get down to setting up. Press the familiar “Start” button, which will open the main menu. We find there "Control Panel" and run. When the settings window opens, select a method for viewing content called Category. Find the "Network and Internet" section, in which you will need to select the tab for viewing and network status and tasks. This will enable the computer to display the center responsible for managing your networks, as well as sharing. It contains the necessary information about existing connections. And thanks to him you can create your own.
At the very top of this window is a map of your existing connection. In order to create a new connection on the local Windows 7 network, you need to select the adapter settings in the center window. After this procedure, a window will open where you will need to right-click your manipulator to click on the connection icon. When you see the context menu, you must select the properties.
After you do this, the “Windows 7 Local Area Connection” window will appear. We again call the properties where you need to check the box opposite TCP / IPv4. Then we select “Properties” and fill in the fields with the values \u200b\u200bthat are specified in the contract with the provider or the IT service. But these parameters can be omitted. In this case, you will receive them automatically.
After all this, confirm your settings by pressing the "OK" button. Next, we need to make sure that our connection is correctly configured and functioning. To do this, we open. When they open, right-click on the icon on the manipulator, the name of which is “Local Area Connection Windows 7” - and in you go to the “Status” item.

In the window that appears, pay attention to its lower half. There will be two groups of values \u200b\u200bunder the inscriptions “Sent” and “Received”. Your connection is functioning normally when these values \u200b\u200bchange almost constantly. If they stand still or only one of them changes, this indicates that something has been done wrong. Go back to the very first point and double-check all your actions. Most likely, somewhere there was a mistake that needs to be fixed.
Now you know how to connect your device to a new network, as well as create your own.
How to connect several computers to each other and to the Internet, distributing the same speed to the Internet? Through such connections, you can not only use files located on another PC, the Internet, but also printers that are connected to any link in this network. Let's try to consider all the options for setting up a local network, from the simplest to the most complex.
We divide the sequence of actions conditionally into two stages.
To begin, we will analyze and discard the option when you only need to share the Internet.
Internet connection of 2 computers or more in one apartment without creating a local network
There are several ways to resolve this issue:
- Installing a router (router) - allows you to have Internet access to each of the computers without connecting a second to the network. Since the IP address (identification information of the computer on the network) is assigned directly to the router, you will have one tariff for the provision of Internet services, and you can use the Internet with two computers at once.
- Wi-fi technology - wireless network connection. It is possible when using a special set of equipment and its settings.
1st stage. LAN setup
How to connect two computers to a network (Network Bridge)
One of the computers connects to the Internet, the second computer connects to the first. The main drawback in this case is that to enter the network of the second computer, it is necessary that the first computer is also in the network. And also, if you have an Internet connection via a network card, you need an additional network card to connect the second computer to the first, because the built-in network card is already taken (it accepts the Internet).
To connect two computers to each other and to the Internet via the Network Bridge, you will need:
1. Special cable (twisted pair) and, possibly, an additional network card.
Twisted pair can be obtained at radio markets or in specialized stores. It is made independently, using a special tool called a "crimp" and based on the required length of the cable itself. Pinouts can be found on the Internet. Or you can ask to compress the “Vituha” directly on the radio market (tell the seller what you need to compress for the type of connection “by network cards” or “comp-comp”, there is also a “comp-switch”) or buy a ready-made cable (if any), but it may be short. There is no factory assembly of such a cable, there is only a “comp-switch” on sale, you can buy it, but then one end is cut off and crimped.
Twisted pair (twisted pair) is an 8-core cable (such as UTP-5) with RJ-45 connectors (connectors). The ends of the cables are crimped special. tool (special pliers) into the connectors in accordance with the colors of the ends. The crimping procedure for the network cable is as follows: BO-O-BZ-S-BS-Z-BK-K at both ends to connect to the hub. To connect a computer to a computer on one of the sides should be: BZ-Z-BO-S-BS-O-BK-K, where O-orange, Z-green, C-blue, K-brown, BO-white-orange, etc. .d. (do not particularly go into it, but let the knowing people crimp the cable).

Twisted pair (2-2.5 $ - 3 m)

Crimp tool
So, with the help of a "twisted pair" we connect computers card-to-card (connection type "comp-comp")!

Network Card ($ 3-6)
2. After connecting 2 computers via cable, you need to configure them programmatically.
Computers must be in the same workgroup, in the same address range, and with different network names. The settings for these parameters are shown in the graphic diagram:

It is also desirable to set the IP addresses and subnet mask manually (a subnet mask is generated automatically at the specified IP address). IP addresses can be selected in the range 192.168.0.xxx. Moreover, on all computers on the LAN, the IP address must begin with "192.168.0.xxx", and the last three digits (xxx) must be different (otherwise there will be a conflict, since this is equivalent to the fact that two different houses have the same same address), and be in the range 0 - 255. The IP address setting is shown in the graphic diagram:

2.2. Setup using the wizard
To do this, go to "Control Panel" -\u003e "Network Setup Wizard", and follow the instructions of the wizard.
You can also combine manual network configuration and configuration using the wizard, for example, after setting up the network using the wizard, specify the IP address.
After all this, you can give access to (share) some folders in the properties of the folder, in the "Access" tab. Shared folders can be seen by going to "My Computer" and in the "List of typical tasks" select "Network Places". Or, through Total Commander, go to "Network and Plugins" (the rightmost drive button) -\u003e "Entire Network" -\u003e "Microsoft Windows Network".
3. Setting up the printer.
3.1. Sharing a printer over a local network
To do this, go to Start - Control Panel - Printers and Faxes. We find the printer connected to this PC, click on it with the right mouse button and select "Sharing ..." in the context menu. After that, this printer will automatically detect on other PCs connected to this local network.
3.2. Using a shared printer on a local network
On other PCs, go to Start - Control Panel - Printers and Faxes. Click on "Install Printer", and then follow the instructions of the printer installation wizard.

I. Select “A network printer or a printer connected to another computer”
Go to the next step.
II. We put the choice on the “Printer Overview”
We do an overview of printers on the local network.

III. If you plan to use this printer frequently or continuously, set it to “Use this printer by default?” - “Yes”.
This completes the setup.
We connect 3 PCs through network cards like Network Bridge
It is not necessary to have a router or a switch to connect 3 PCs, it is enough to buy one more network card.
This option is cheaper than the switch, because a switch is 3 times more expensive than a network card. To connect 3 computers, you need to select one of them and make it a master, two other slaves. On the host computer you need to put 2 network cards. Then connect with 2 other twisted pairs and create a Network Bridge. Then share the Internet and local folders, while the slave computer must be constantly turned on and connected to the Internet.
We connect 3 computers or more (up to 20 PCs) through an external hub (switch or network hub)
How to connect 3 computers or more to each other and to the Internet, provided that everyone needs to distribute the same speed?

The simplest solution is to buy a switch (Hab), for 5 or more ports, N cables (taking into account the distance of each from the assumed location of the switch to each computer) with a crimped comp switch (this has already been mentioned above), where N is the number computers. After acquiring the necessary, you need to connect computers to the switch. After that, we configure computers in the same way as with a connection between two computers.
We connect 3 computers or more (up to 6 PCs) through an internal hub (Hub)
We create a lokalka using the internal 5 port 100 Mbit hub
This option is perfect for networking for the home and small office (up to 6 computers), using a hub (or, as they say, a hub), for example, Genius GF4050C. The advantage of this PCI hub is that it is installed inside the computer like a regular expansion card. And for very little money ($ 45) you will receive a 100 megabit high-speed network in your office. But it should be noted that when you turn off the server (the PC where the hub is installed), the network will not work. However, the hub does not require an extra power outlet and does not take up space on the table.

Internal hub
We connect 5-20 or more PCs through the Central PC server
We create a network with a central server computer that serves as a switch.
This option is intended for large offices and corporate organizations. You can connect more than 20 PCs. A central computer-server with a server-side OS installed on it, for example, FreeBSD + switch, serves as a hub.
After exceeding the number of computers in LAN than 20, you need to abandon the switch (hub) and put the central server, because with so many PCs, data transfer will slow down the computer. This is due to the extra load on the processor when transmitting / receiving data, because you have to process a lot, for example, when a movie is downloaded (resources go to create packets at the one where the data is read, and parse packets where the data is received). All this leads to a slowdown in the performance of both computers: the one who reads and most of all the one where they read data. If it’s worth the price. server, then he is engaged in this business, but not client computers. That is why they put the central server. The switch takes on some of the processing, but this is not enough with a large number of PCs connected to the network.
But it’s better, of course, to use the server with fewer computers, and there will be no braking, but in this case, you need to spend extra money on the server, i.e. to another pc. In addition, the server must be served by someone, for this there is such a position as "System Administrator". In general, if there is no money for an additional computer, you can start up to 20 computers through a switch.