The Android operating system, in most cases, is located on devices with a small amount of memory. Sometimes, 32 GB (and what about 16 GB) of internal memory becomes small for the average user. In order to somehow free up memory, many owners of Android gadgets are looking for folders and files that can be deleted. Eye catches. Thumbnails. What this folder is, what files it contains and whether it can be cleaned, read in the framework of this article.
About folder
Folder.thumbnails - This is a cache directory that contains thumbnails of all the photos and videos that you have ever had on your device. These sketches are used by the standard Gallery application, allowing faster loading of the image in tiles.
The folder is located in "/ sdcard / DCIM /" - A place to store photos and videos from the camera.
By default. Thumbnails is a hidden directory. By connecting it to a Windows computer, you may not see it through Explorer, even if you enable hidden files and folders.
A folder can occupy places in the device’s memory up to several GB (depending on how often you took photos and took videos).
There may be several folders. Since the kernel of Android is Linux, similar directories. Thumbnails can be in other folders of programs that interact with pictures and videos (for example, the cloud or instant messengers).

How to remove from an Android device?
Wondering if Thumbnails can be removed? Yes you can. And even necessary if you are sorely lacking space on your smartphone or tablet. There will be no harm from deleting files stored in the directory. The only negative - opening the "Gallery" after removal, the thumbnails will be loaded longer.
To remove .thumbnails, use the file manager. For example, ES Explorer or Total Commander. For an example of deletion, we use TC:

There is one caveat! In the .thumbnails folder, thumbnails of photos and videos that appear on your device will reappear as soon as you use the applications to view them. To avoid this, you need a lock.
Thumbnail Lock
So that sketch files are no longer written to the directory, create an empty file with the same name:

Now, Android OS will not be able to create the .thumbnails folder and place the contents in it, since this name is already taken by the file.
An alternative to locking thumbnails is to use an empty .nomedia file placed in the DCIM folder or in other folders where there is .thumbnails. You can create it through a text editor, by analogy with the method described above.
Contrary to the opinion of some users, not all smartphone owners understand at least something operating system Android Often they don’t even know the basic things. If you also feel like such a “teapot”, then our material is written just for you! In today's article, we will talk about how to create a folder on Android. This allows you to group several applications at once, which will simplify desktop navigation.
When is this required?
Of course, not everyone needs to create folders. If you only occasionally install something on your smartphone, then you can easily do without folders. Their creation is necessary if your device has accumulated a very large number of applications that you regularly use. You can combine shortcuts by type of program. For example, one folder will contain games, while the other will consist of antivirus and various system utilities.
We must not forget that in recent years, smartphones have begun to become more widespread, which apart from desktops have nothing. That is, in such devices there is no separate menu containing the shortcuts of all applications. Now imagine a situation where seven or eight dozen programs and games are installed on such an apparatus. All their shortcuts will be located on the desktops. Without the function of combining into folders, this would greatly complicate navigation - sometimes you would have to search for the right application for several tens of seconds or even more! Fortunately, creating a folder on your desktop is not a big deal.
Create folder
Some manufacturers introduce several ways to create folders. But most often, users prefer to create a folder on the phone using the following method:
Step 1. Decide in advance which two applications you want to merge into one folder.
Step 2. Hold your finger on the shortcut of the first program.
Step 3. Now drag this shortcut to the shortcut of the second application until a black circle or some other symbol for creating a folder appears.
Step 4. Release your finger. In most cases, the system then suggests giving the folder a name. Sometimes it does without it - then you can assign a name at any other time.


Step 5. In the future, you can add other applications to the folder. To do this, simply transfer the program icon to the folder image.
Note: Recently, many manufacturers allow you to create folders not only on the desktop, but also in the menu. In particular, this is possible on devices from and some other companies.

It should be noted that this feature appeared in the Android operating system far from immediately. If your device is very old, then it may not be able to create folders. For example, such a function is not available in Android 1.6 and even some subsequent versions of the OS.
If you analyze disk space on your Android device, you may be surprised to find that photos take up several gigabytes more than they actually are. How is this possible and what needs to be done to free up memory?
The problem is the collection of thumbnails of your device’s files, which are stored in the Thumbnails folder.
The fact is that for each image file that is stored on the device, the Android OS creates a thumbnail so that they load faster in the gallery when you open it for viewing. Third-party apps like WhatsApp and Viber can also create their own thumbnails when they scan image files. Usually the folder where these thumbnails are stored is called Thumbnails.
In order to get rid of unnecessary files , you need to do the following:
1. Open the file manager on Android or connect it to a PC.
2. Verify that the file manager can display hidden files and create new ones. Otherwise, it is better to use the standard windows Explorer after connecting the device to the PC.
3. Go to SDCard \\ DCIM \\ .thumbnails. By the way, DCIM is the standard name for a folder that contains photos and is standard for almost any device, be it a smartphone or camera.
4. Select and delete the folder. Thumbnails, it can take up to several gigabytes.

After you do this, you will not notice much change in the speed of viewing images in the gallery.
Since .thumbnails is system file , Android recreates it again. Moreover, you may find multiple copies of the same file in the .thumbnails folder if you reinstall Android.
To protect Android from creating a bulky folder again, we need to create a dummy file that fools Android. For this, we create text file in the DCIM folder. You need to give this file the name thumbnails, and then give it the Read-Only attribute in Properties. After that you need to erase the txt extension. As a result of all these actions, an empty and undefined file with no extension should remain.

This dummy file will now prevent Android from creating a huge amount of useless files. You now have free space in your memory that you can use for your own benefit.
Again, I return to the Android operating system and its “features”. These unpleasant features come out at the most inopportune time. You yourself know about it. But did it happen to you that the applications did not want to be installed on the phone or, suddenly, the memory turned out to be clogged with something completely incomprehensible? Have you heard anything about thumbnail files? No?
In my case of a sudden lack of space for installing applications and incomprehensible errors, I blame the mechanism for creating thumbnail files. Several times I could not install the necessary applications due to an error during installation or the application refused to install due to the small amount on the disk. And I also did not make many interesting shots. Unfortunately, some tips from the Internet to solve this problem are contradictory or do not work at all.
It is clear that it angered me. Under the cut, I’ll tell you how I looked for a memory eater and got rid of it. Initial reference data:
Photos archive of the application The camera is by default located on the phone at / mnt / sdcard / DСIM / (you can save the phone’s memory if you install applications and store photos on the memory card. How to do this I wrote in the post about the main issues on Android - ““) .
Camera application thumbnails are located on the phone at / mnt / sdcard / DCIM / .thumbnails /
I did not set the rights of the super-user (root) (everything is done in two seconds with the root - access rights are changed directly on the phone), but I installed two applications and connected the phone to the computer once.
Attention! Next 3 ways. You can run through everything. For me, they work correctly on all devices. On Android 6.0.1, the folder .thumbnails is deleted and the space is freed (see the bottom of the post). The third method is simpler.
Cooking. I installed first android app Assistant and Total commander . Launched Android Assistant. On the "Toolbox" tab, I selected the "Clean System" item. In the line “Thumbnail files” I had a volume of 778.93 MB. Not weak, right? By clicking on the exclamation point in the triangle, I saw the contents of the folder (copies of photos from the gallery) and the file directory. Here they can be deleted selectively by checking the box next to each file or by checking the box “Thumbnail files”, you can clear the entire thumbnail folder at once. This help is temporary. After viewing the gallery, shooting, installing applications, the folder will again be filled with files.

Method 1 Then I connected the phone to the computer (two new disks appeared in Windows Explorer: inner memory phone and a memory card installed in the phone) and found the DCIM folder in the root of the first disk of the phone - the path Sdcard / DCIM / (DCIM folders contain photos and videos from the phone’s camera). Also in the DCIM folder there is a folder. Thumbnails in which these thumbnails are stored, which so suddenly prevent me from living. In addition to the pictures, the .thumbnails folder also contained the .thumbdata4-1967290299 file (you will have other numbers). Here's what it looked like:

First I deleted the .thumbnails folder.

Instead of the .thumbnails folder, I created an empty text file, which I renamed to thumbnails for which I set Read-Only in the properties.

Why did I create a thumbnails file? The fact is that I will make the folder of the same name. The thumbnails file with zero size, but I will forbid writing anything to it. And why didn’t I put thumbnails before? Because operating windows system does not allow working with files whose names begin with a period. From her point of view, such a file does not have a name, but only the .thumbnails extension. Android, like its ancestors Linux and Unix, perfectly transfers the dot at the beginning of the name and considers such a file hidden. I was distracted. In short, we don’t put a dot, and in the file properties specify the attributes “Read Only”. Now no one can write anything to this file.
Then I disconnected the phone from the computer, otherwise I would not have access to the DCIM folder from the phone. Now I launched Total Commander on the phone and switched to the SD card and there already in the DCIM folder, and in it I found the thumbnails file. By slightly longer pressing a line thumbnails caused context menu where I selected "Rename".


Fotkal, surfing the Internet, installed applications, but the folder. Thumbnails did not appear anymore, which I also wish you. Good luck and take care of your memory.

Method 2
Hello! The topic turned out to be very popular, but questions remain. Therefore, I propose to try the second option to delete the thumbnail file folder - without a computer. I think that you read the material above and do not dwell on the details.
From the Google Market playlist into the smartphone, I put and
1. Opened ES Explorer and went to the folder at / mnt / sdcard / DCIM (the path in my case). Created a thumbnails file (no dot).
2. Launched Total Commander, went to it at / mnt / sdcard / DCIM, there are folders: 100ANDRO, Camera, .thumbnails and the just created thumbnails file. Deleted the .thumbnails folder, then renamed the thumbnails file (added a dot).
I took a picture, took a video, but the folder did not appear.
Method 3
I launch Total Commander, go to it at / storage / sdcard0 / DCIM, there are active folders of the Camera application: 100ANDRO, Camera, .thumbnails. Deleted the .thumbnails folder. With a long tap (long press) on the Camera folder, I called up the menu where there is an item “New text file”, selected it and created the .thumbnails file.
![]()
Here is the result. The result is similar to the previous ones - sketches are not created, the memory does not suddenly end. 
Popular questions on the topic and answers to them:
Is only the / mnt / sdcard / DCIM path the way to store photos?
No, each drive can have its own path sdcard, sdcard2 etc. The active one is the one designated in the settings as “default recording disc”.You can check by taking a picture and looking at which folder / mnt / sdcard / DCIM or mnt / sdcard2 / DCIM it appeared. There will be an active thumbnail .thumbnails file. The path can be registered as storage / sdcard0 / DCIM or storage / sdcard1 / DCIM
UPD. 11/11/2016In the comments to this post, readers write that on devices with Android 6, deleting the folder. Thumbnails does not free up space. For this reason, I have one hypothesis. I must say right away that on my Android 6.0.1 the folder is deleted and the place is freed. Just checked. So, I deleted everything and looked at the free space through Total Сommander. I suspect that if you delete a folder through ES Explorer, then you will not notice an increase in free space. Why? Because the ES Explorer application has its own recycle bin for deleted files, where it moves files but does not delete. For final removal you need to empty the basket. I wrote about this in a post.
I don’t see the screenshots, but I have on Android 6.0.1 the folder. thumbnails is deleted and the space is freed. I propose to continue the discussion in the comments.
Keep as a keepsake, share with friends and leave comments.
Probably everyone knows about the Android operating system today. Almost everyone has a smartphone or tablet based on this OS, so the basic principles of Android work are familiar to most modern users.
However, the OS from Google is not as obvious as Windows, and in its depths there are many different settings and functions that give us certain additional conveniences. About such secrets Android will be discussed below.
Just want to warn everyone reading this article. Some secrets may already be familiar to you, so do not rush to write in the comments something like: "I already knew that!" Better write about what is not written in the article. So you can complement it and earn gratitude (at least in words) from other readers;)
Preliminary preparation
If Windows was originally designed to work with files, then Android is a system more focused on working on the Internet. This affects the pre-installed set of applications, among which often there are no necessary tools. Therefore, I recommend immediately expanding the functionality of your device by installing what is needed.
And in the first place I would put the normal file manager:
I would recommend the application, however, you can use any other that you find on Google play . For example, good file managers are Root Explorer, Total Commander (he used it at first), ES File Explorer, etc.
File managers will allow you to conveniently create files and folders on the device’s memory card, as well as partially view the contents of the root folder even without root rights and between the PC and the device via Wi-Fi.
However, there is one sad nuance. Starting approximately from version 4.4.4, Android began to hash (encrypt) passwords in the configuration file, so in new devices a simple text editor can not do without decryption. Alas, I didn’t come across any applications allowing to decrypt this hash, so if you know this, be sure to write in the comments - add a link to it.
The most famous Easter egg
In the end, I would like to recall the rather famous "", about which many have heard, but perhaps not everyone knows how to get to it. We are talking about hidden pictures that are in every version of Android.
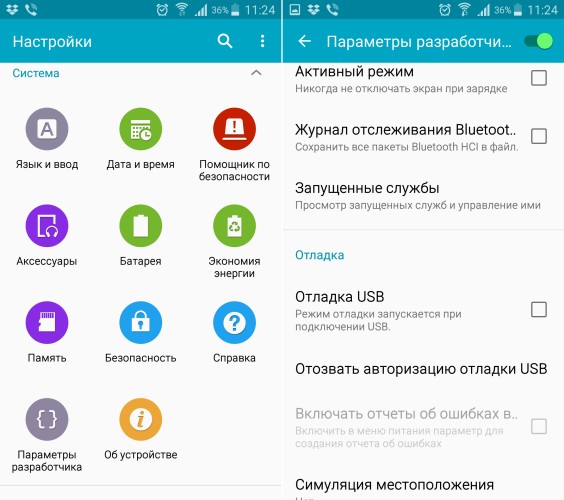
To see this picture you need to go to "Settings" - "Information about the phone" (or "About the device"), find the item " Android version "with the version number and quickly click on this item from seven to ten times:

In some versions, pictures can also be interactive. If you press them several times in a row, then some action may occur. For example, on Android Jelly Bean (4.1.x - 4.3.x), an image of a jelly bean appears, clicking on which causes it to fly apart into many smaller beans that can be dragged around the screen and scattered in different directions :)
And here is the “easter egg” in Android KitKat (thanks to our regular reader Yuri for the video provided):
Summary
In fact, there are more hidden features in Android than we described in the article. Using special decompilers, it is possible, for example, to literally "bone" to disassemble the entire system interface and "blind" something of its own. The only problem is that more or less serious actions require root rights and an understanding of what you want to achieve.
In the article, I selected only those chips that almost all users can perform (except for the “focus” with getting a Wi-Fi password, although one day I managed to see it without root on a tablet from Lenovo). If you still know any convenient non-obvious tricks for working with Android, feel free to write about them in the comments - we will replenish the collection :)
P.S. It is allowed to freely copy and cite this article provided that an open, active link to the source is provided and Ruslan Tertyshny remains the author.
Some Android applications used to view photos usually cache photos that are stored on the device, creating Thumbnails subfolders in each folder with image files. But before talking about how to delete this folder, let's figure out what it is and whether to get rid of it.
Applications for viewing are designed in such a way that thumbnails (or thumbnails) of photographs are automatically created in order to quickly view the icons displayed on the smartphone. But, as the number of photographs increases, these sketches are formed so much that they can take up a significant amount of space on the device. So they are contained in the Thumbnails folder, which you can safely delete.
Surely many have experienced situations where the applications being installed do not want to be installed, it seems that there should be enough space, and the memory appears to be occupied for some reason. With high probability, the problem lies precisely in those very miniatures that simply “ate” all the free space.
Of course, they can be cleaned from time to time, but since the folders with thumbnails are hidden, it is impossible to see them without the “Superuser” (root) rights in the device, cleaning in such cases can be done through connecting Android to the PC, in the removable disk, open the “DCIM” folder , select "Thumbnails" and delete it by moving it to the trash. True, this method does not work on some devices.
Thumbnails - how to remove in Android
For Android OS, you can use special utilities that perfectly clean smartphones. An example of one of these tools is Ccleaner, it has the position “ Thumbnail Cache»When selected, all thumbnails are deleted:

In addition, the program also provides for selective deletion, it is enough to tick off opposite unnecessary elements:

But such a misfortune! At the first viewing of a gallery or shooting, and even after installing the applications, all the thumbnails will return to their place. So it turns out that all these “gadgets” are invented by developers for the convenience of users, and users, in turn, are puzzling for their own convenience how to get rid of such care. Therefore, the question is so often asked in the comments - how to delete the Thumbnails folder on Android?
The most common mistake is that users, trying to get rid of the thumbnails, start to delete .thumbdata files, which just contain thumbnails from one to an almost unlimited number, while the Thumbnails directory in which they are contained needs to be deleted.
If your device does not have an option that allows you to view hidden ".thumbdata" files, then open it and press the menu button in the upper left corner, after which, scrolling down the program items, select the "Show hidden files" option:

Now we delete the .thumbnails directory but, in parallel, using the same "ES Explorer" create an empty file with exactly the same name. Thus, we seem to be deceiving the system, because files of the same name cannot be created:

The same way you can apply to other folders with thumbnails in the “DCIM / Camera” folder (in this case we are talking about the “.dthumb” directory). By the way, in the presented form, you can visually see the whole process. There are no Russian subtitles, but everything is clear without them. And the bonus in this video will be the removal of the Thumbnails folder using the Root Browser application, however, it is intended for rooted devices:
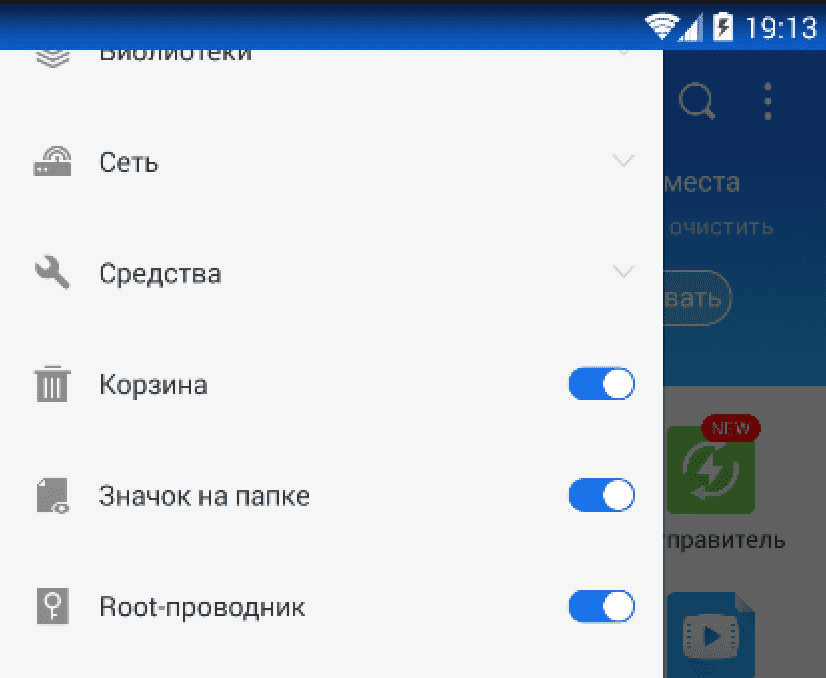
Another application that will help us solve the problem is. To use it, you also need root access:

This is an excellent file manager, fully providing access to the entire file system of Android OS, respectively, and to our hard-to-find folder. The video instruction is presented below:
That's probably all that I had for you on the topic "How to delete the Thumbnails folder on Android." If you still find a bore who finds that the material presented is not enough, or if some questions are not adequately addressed, we will gladly expand the topic of the conversation. In the meantime - bye! And as always - good luck!
In principle, the absolutely expected thing happened: many users have a little doubt in the applications used, or in those that the ads annoyingly advised them. In no case do I pretend to be the truth and remember that "everyone has their own truth," but many years of experience communicating with different software on different platforms, as well as experience in "post-purchase" settings, modding and editing skills of programs and firmware at the resource level, In my opinion, they allow me to fairly objectively evaluate this or that application. But! Each of you can, and should, have your own opinion (including the completely opposite), which I will be glad to see in the comments (and especially - in the form of reasoned arguments - for the purpose of constructive dialogue in an attempt to reveal the real state of things).
So, as I often write, let's get started!
Client No. 1 - CCleaner
The question about the opinion about the application sounded like this: "cashcleaner type programs." I believe that the best program in this area is CCleaner. For the first time, I came across this program about 15 years ago on a PC - Windows, it is like that — you need to clean the registry, then delete the cache, or something else. Over time, I got tired of these troubles, and, for example, the extreme system (Windows 7) has been living without any cleanings for more than two years ...
I note that back in 2012, the total number of CCleaner downloads exceeded 1 billion ...
In April 2014, the developers of the program did decide to release their application on Android devices. The manufacturer acted very competently and acted on the principle of "do no harm" - the program does not do anything automatically, it has no schedules, it does not delete anything and does not complete without the personal participation of the user. I like it - I already wrote that I fully believe that all these intelligent Siri, auto-cleanings and others - sooner or later lead to the appearance of the Matrix and Terminators ...
The first launch meets us with a request for root access. Of course, giving it is highly desirable, otherwise the entire application will be a complete fiction. After, we are offered a simple window:
Nothing complicated. We see the amount of occupied ROM and RAM memory. Below are two large buttons: analyze and clear. Click "Analyze". Analyzed:
Actually, we interrupt this review of the application and move on to the theory, but where would it be without it? It’s important for us to understand what exactly we are doing, and not just to remove something and go to bed with a sense of accomplishment.
Application cache In fact, this is the data of the applications that are used in the work. In fact, it looks something like this: a regular program is an archive in the .apk format, in which its resources (icons, pictures, etc.) are protected, in addition, many programs use third-party data (for example, any launcher will use icons in its activities -labels of other applications), and so, all this is taken out in a separate folder and is called the cache. Of course, this is exaggerated, just in human language. Accordingly, deleting this data will not lead to anything bad - the application only at the next start, instead of using ready-made data, will again create this cache and will use it. Thus, its cleaning gives an extremely short-term effect and causes a delay in the next application launch, and, of course, the consumption of system resources (albeit insignificant).
Files and folders. Everything is simple - supposedly all of our downloads and installations are here. As a matter of fact - we'll see!
Thumbnail cache. Practically - the thumbnails of the standard gallery, designed to speed up the preview of pictures. No third-party gallery creates such a cache. But let's see if this folder is so scary. Any application shows a huge file size - sometimes it can reach tens of gigabytes. In fact, this is a hoax. The fact is that thumbnail files are so-called sparse files that actually occupy on disk much less space than in their description, and are used as one of the types of archiving. You can read more about these on your Internet, I’ll just say that files with a total size of more than 3 GB according to the programs, in fact, occupy no more than a hundred meters ... This is a fact. Evidence further.
Processes. I already described the basic basics of memory management in Android. I repeat: the system will always try to maximize the loading of RAM in order to put programs from slow read-only memory into faster RAM and, thereby, accelerate application launch. And the memory is cleaned exclusively at the request of the system by the built-in OOM Killer, in accordance with the rank of applications and the real need for RAM.
All. We return to the application.
What are we invited to remove? If you remember, the “hero” of one of the previous reviews Clean Master tried to convince us to delete all of Viber’s correspondence under the guise of a cache ... CCleaner is more adequate - only 2 MB. Actually, the definition of exactly the old and really safely deleted files in the application is configured correctly, for example, he did not touch the Yandex.Maps cache in almost gigabytes, as he did not look at the game caches ... Umnichka. Well, since there’s nothing wrong with the list, let's clean it up!
Each user of a modern gadget equipped with Android OS has faced such a not-so-pleasant problem when at the most inopportune moment the phone’s memory is full and it is no longer possible to take pictures or install applications on it. Even a device with 32 GB of internal memory will sooner or later be full, and not to mention the volume of 16 GB or less.
When such a nuisance arises, the user begins to conduct an audit on his device, deleting photos, videos and more. And in the process of searching for files to delete, the owner of the Android phone can find a file with the name thumbnails. And practically no one knows what this folder is and why it is needed.
Thumbnails - translated from English as "miniature". Thumbnail is a cache directoryin which thumbnails of previously viewed images are saved. Each time the user enters the Gallery folder and opens any photo, picture or video for viewing, a thumbnail of this image is automatically saved in the thumbnails directory.
The main, and perhaps the only purpose of these miniature sketches is that they help to quickly load miniature photos in the tiles of the Gallery folder on the android. But the minus is that after a while thumbnail thumbnails can again take up to several gigabytes of internal phone memory. And what in such cases to do and can this folder be deleted, you need to understand in more detail.
But first, find the place where the thumbnail directory is stored.
Is it possible to delete
 The location of the thumbnails is “sdcard / DCIM /”. In order to delete this directory, you must first find it, sometimes it will take a certain amount of time, because if you simply connect the device to the computer through an explorer and turn on hidden files and folders, you can’t always see it. In addition, there may be several such folders in memory. Deleting a directory is not easy either, as it would seem, because a simple removal does not solve this problem in any way, since when you open the Gallery, the system will completely restore all the sketches after a while.
Some experts simply advise, generally, not to use the Gallery application, but to use other tools with great functionality and then there will be no problems. But not everyone is comfortable, so you should know how to delete a folder with copies of thumbnails.
There are several methods for deleting the thumbnails folder manually or using special applications, but you must not only delete it, but also block her further recovery.
Methods for removing thumbnails

How to lock folder recovery
Even after the thumbnail has been removed by any of the proposed methods, the system will restore it sooner or later, therefore, it is necessary block directory recovery thumbnails. And for this, the following actions should be performed to deceive the system:
- Use the explorer to connect the device to the computer.
- Find the thumbnails folder and delete it (you can delete it using any other of the proposed methods).
- Launch a text editor, such as Notepad.
- Create two empty files, one with the name thumbnails, the second with the name nomedia and when saving specify the file type “All files”
- Move both files to the location where the thumbnails folder has just been deleted.
The task of the nomedia file is put a ban on scanning the "Gallery", and the purpose of thumbnails is to block the recovery of the deleted directory.
Now the system will not be able to create thumbnails and they will not have to be permanently deleted.