Any housewife always follows the beauty of her home: home, villa or apartment. And nothing decorates so everything around like flowers, it's obvious. But to store flowers, too, is needed somewhere, that's why boxes for flowers are very actual. By the way, it's not difficult to make such ones yourself, even a woman can cope with it. But it is better to entrust the matter to your men, but how to do everything right, we will describe below.
Before we start to make various models of such devices, we want to understand what they are used for and what is the use of them. Purpose of boxes for flowersA good housewife knows what an important role for flowers is played by weather conditions, sunlight, so they take care that their plants at least sometimes enjoy the sun's rays, "breathe" fresh air. But that their transfer on street, in a garden or under a window was simple, not to do without special boxes for colors. In such adaptations, flowers can calmly stand on the street and enjoy fresh air, and in case of bad weather or cold snap, they quickly and without any problems get into the house. Advantages of boxes for flowersSpeaking about the advantages of such adaptations, first of all their simplicity of production is highlighted. To create street boxes for flowers, almost any material is suitable, this is:
You can choose almost any material that is available at hand and put it into play. Well, as well as advantages should be noted cheapness. Of course, you can buy design solutions in specialized stores, but if you make boxes for flowers with your own hands, you can save a lot, but on originality it will not be reflected. It can even be even greater. Universality of boxes for flowersFinally, one can note the versatility of such products, in fact, along with their practicality, they also differ and quite attractive properties that perfectly fit into any design. If you work hard to produce a container for flowers, you can create a real work of art, which will not be far from being the pride of the courtyard in your private home. Plastic and wooden boxes for flowersNow it's time to dismantle those wooden and plastic boxes, which you can do at home. But first, let's compare them. What's better?Almost every person who has set himself the goal of creating original flower boxes, raises the question of which materials to make his choice in favor of. Speaking of such devices made of plastic, an obvious advantage is the possibility of their purchase in the city stores. You can buy an already finished product, then give it a little personality, decorating with some or other devices. You can always buy such a product, paint it, repaint it, paint it at your discretion and use it. But not everything is so good, because there are minuses. About those in the following list:
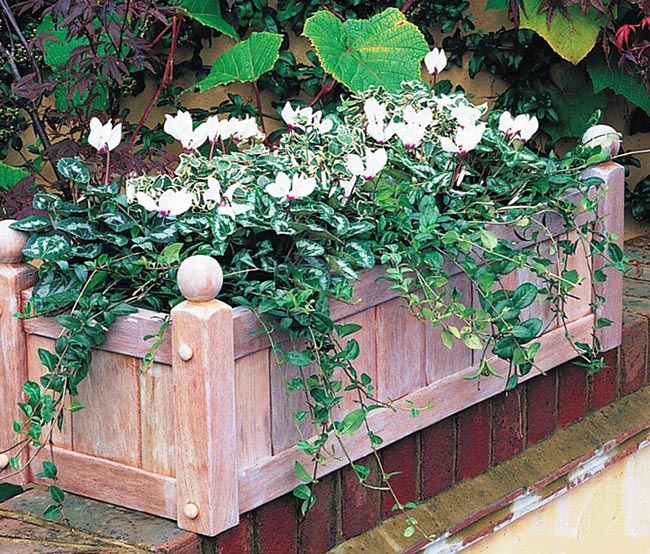
Due to the presence of such drawbacks, plastic boxes for flowers are inferior to wooden ones, because their opponents are more durable, comfortable, versatile. The only thing is that wooden appliances must be made by themselves. But this is not a very big problem. Wooden box for flowersProceeding from the above, we decided that the best solution would be a wooden device. Such a solution will be easy to use, easy to manufacture, and the design role that a box in your garden will play is not easy to describe.
Checking the availability of all the tools, you can take up work. But be careful and follow the instructions carefully. Although, some of your adjustments can also be made. Here is the work plan:
Improving the plastic boxAs we have already said, plastic products are abundantly sold in local stores, but this does not mean that they can not be made unique, add some zest to their appearance. In advance, take care of the availability of the following items:
Let's start the works:
As a result, you will get a completely original, though a purchase, box for flowers. Having looked at photos of such boxes for flowers, you will surely understand that this is a good option.
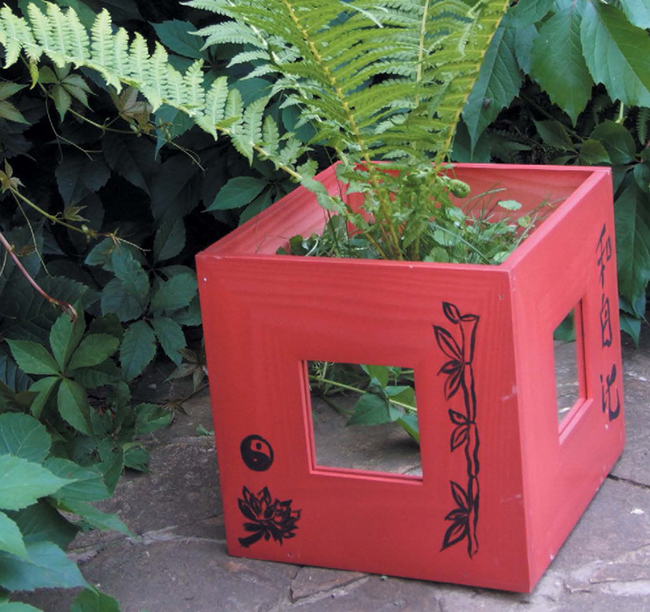
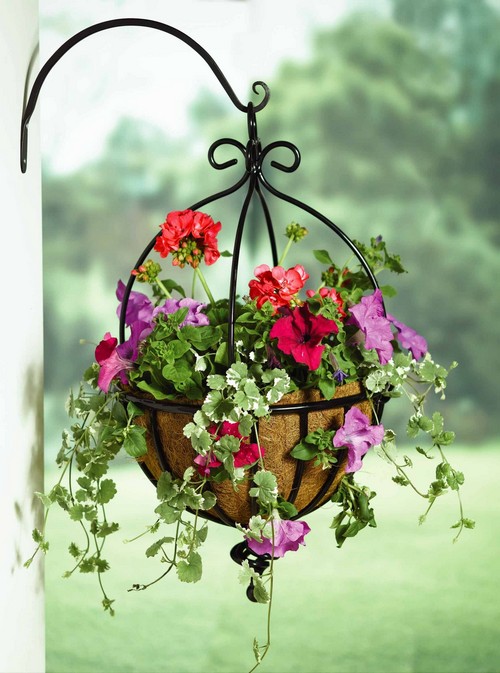
Non-standard solutions for flower boxesIt is quite obvious that it is impossible to stop just two variants of flower containers, and that there are many other solutions. To consider them all, by the way, is quite difficult, but we will pay attention to the most interesting, original and popular answers to the question of how to make a box for flowers. After all, for most people a simple box may not fit the concept of a courtyard, or because they live not in a private house, but in a small city apartment. Pendant box for flowersFor lovers of the total flower design of summer cottages and private land plots, the decision to stop on ordinary flowers planted in the ground seems inappropriate. That is why such gardeners want to have flowers everywhere, even suspended on the walls of additional structures, outbuildings, etc. Here also it is necessary very convenient and actual flower box of pendant type. Someone might think that it is very difficult to make such a device, but this is not so. Do not run to the market and buy pendant boxes for a lot of money, because there is an excellent solution. Here is a little secret, a solution that is on the surface, but not everyone thinks of it. As a suspended container, it is always possible to use any container from paint, water or an unowned box. You may think that nothing good will come of it, but believe me, after seeing the photos, you change your mind.
Prepare the necessary materials:
Having collected everything you need, you can safely take up work:
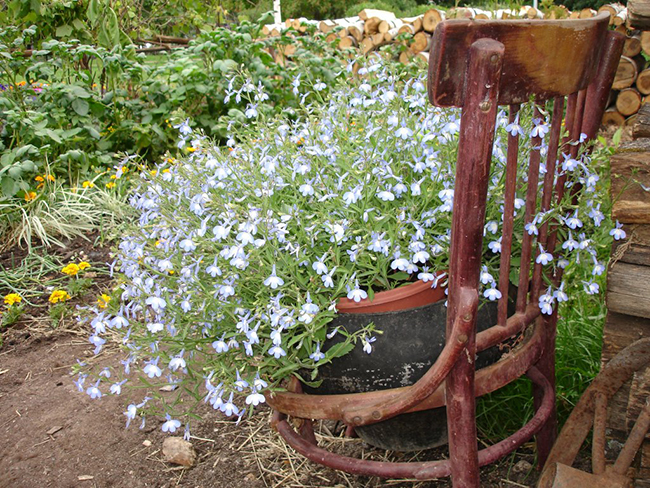
Box of an old chairAnother good option, ideally suited for a summer patio. Surely we all have old chairs in the dacha. Those same Soviet chairs, which we have not used for a long time, are always creaking and looking very shabby. They hardly need us much, but they can not be doubted that they look rather vintage. So here's to you a great solution:
So you get a very original and unique in its way a box for flowers.
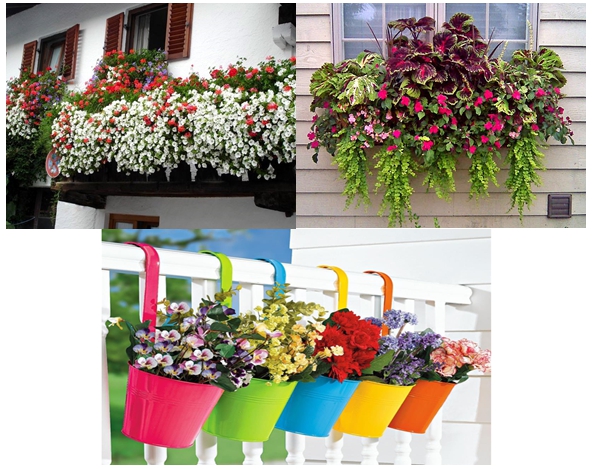
Balcony boxes for flowersMany people prefer to install boxes of flowers on balconies and loggias of their apartments, so for them we also took their place in the article.
Types of boxes for flowersFirst you need to understand the types of boxes for flowers on the balcony. They are as follows:
Besides, by itself, such boxes can be made of different materials and have different coloring, design, size. Requirements for the flower boxIt is necessary to know that the boxes installed on the balconies have certain requirements that must be observed. Here are the most important of them:
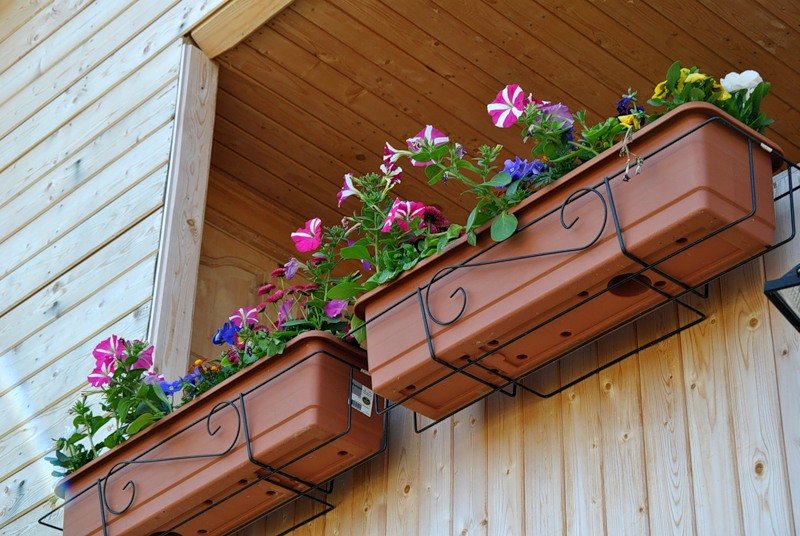
Installation of a box for flowers with a holderIf ordinary boxes can simply be placed on the floor of a balcony or suspended against a wall, then boxes with a holder - this is a more serious design. First of all, it is because it can be dangerous for people in case of unreliable attachment. You can imagine what the consequences may be from a few floors fallen from a height, a 1-2 kilogram, or even a heavier box. Therefore, we do not recommend making the holders themselves. Such products are abundantly sold in specialized stores and are, by the way, quite inexpensive. Therefore, you can always go and choose an excellent forged holder, which will eventually be installed on your balcony.
Here's how to proceed with the installation:
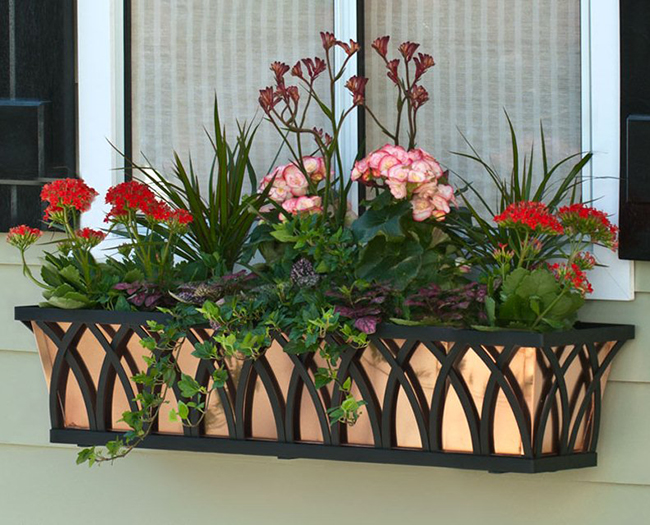
Boxes for flowers outside the windowIt just so happens that some people do not have a balcony, and there is also no possibility to install flower pots on the windowsills. This is not a problem, since boxes can always be secured outside the window. To do this, you need to slightly improve the ready-made flower boxes, fixing on them special metal devices that allow you to hang the box by the hook, and in our case - for the dowel head. Such fasteners you can easily find in any construction shop.
As for the installation of boxes, it will be performed as follows:
Done. So quickly you can create window sills with flowers, even if you do not have a balcony.
Boxes for flowersWe have considered many options, but if you have not found the ideal for yourself, and want to see more fresh ideas, we have prepared for you an excellent video. Look at it and get to work. |

Flower boxes are an ornament of any exterior, whether it is a kitchen or living room window in a multi-storey house, or a loggia or a window in a dacha in a private house. In order to flowers blossomed and delighted their owners, and care for them is not difficult, it is important to choose the optimal capacity for plants.
But that's not all: it's important to secure these boxes securely and securely behind the window using brackets, supports or other fasteners.
Boxes for growing flowers outside the window
The first thing you need to pay attention to if you decide to decorate a window or a place behind a balcony with flowers is the shape and material of the containers in which the plants will be grown.
Some cultures require a certain depth, while others - on the contrary, actively expand in breadth. That is why I plan to plan which flowers will be planted in advance.

What are the boxes for flowers:
- Plastic. The most popular option today for placing flowers outside the window are plastic models. They can be of different sizes, colors, shapes, and you can buy them in almost any flower shop. The most attractive plus of plastic solutions is the price.

| Benefits | disadvantages |
| Light weight, so they can be safely placed outside the window of a private or multi-storey building and on metal and plastic brackets. | Low strength. Containers made of plastic do not withstand heavy loads, and there is also the risk of deformation in the sun. |
| Profitable price. For beginners, as well as those who need to buy several boxes at one time, for example, to ennoble a large loggia, this fact will become a tangible plus. | Due to the fact that the plastic is easily heated, a greenhouse effect can form inside the pot, which will negatively affect the plants. |
| Abundance of models. Do you need shallow containers for violets or models of a certain color for the plants that you have chosen? In the case of plastic models, you can not only buy a box of the right color, but also paint or paint it. | Plastic does not emphasize the exterior of houses made in classical or antique styles. |
- 2222Wooden. Containers for flowers from wood are more durable, they are universal and reliable, and their appearance can decorate the exterior, made in any. The tree can be painted under the color of the finish of the house, it is suitable for balconies or windows of high-rise buildings, and for private houses, cottages, cottages.

| Benefits | disadvantages |
| Wooden models are very durable and reliable, so they will last more than one year. | The cost of wooden solutions is high, so if you need to buy a few pieces, this purchase will cost a round sum. |
| This material is environmentally friendly, and, therefore, is more useful for flowers. | Models from wood are heavy, they need to be additionally fixed with L-shaped elements and choose very strong brackets. |
| Thanks to the versatility of wooden models, forged brackets for flower boxes under windows, and various supports made of plastic, wood and other materials are also suitable for them. | The tree is affected by rainfall - snow, rain, and, if insufficient treatment, can be damaged. |

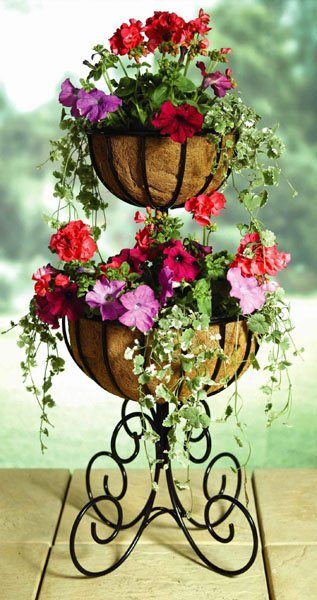
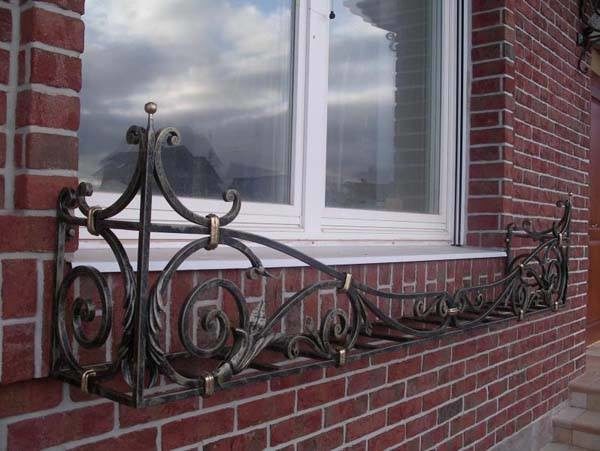
TOP-5 types of stands and holders for boxes with flowers
There are not only different types that are used to grow flowers outside the window, but also different types of supports, brackets and other holders that these pots hold. The types of fastening systems differ by material, form and method of installation, and I will tell you about the 5 most common.
Stationary holders: 1 species
Holders can be either stationary or removable. Stationary fixed once - and for many years, to the balcony or directly to the wall under the window. For such models it is important to choose the width and height of the stand right away so that it is convenient to water the flowers, pull out and put pots back.

Stationary holders are immediately selected for a certain type of pots, and as for different colors you need capacities of different widths and depths, you need to immediately determine which plants you plan to grow.
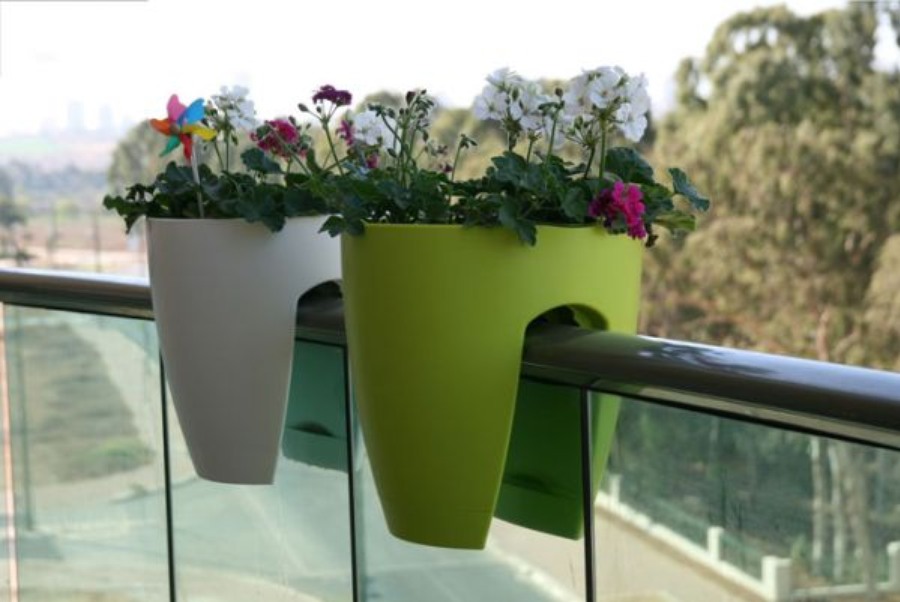
Detachable holders: 2 kinds
Removable supports are not as stable as stationary, but I would advise using them for those who often rearrange pots and change the range of grown plants. Another plus of removable options is the ease of installation.
Thanks to special hooks, these supports are easily mounted on the loggia or balcony railing with their own hands. And if you decide to grow more flowers or use pots wider or deeper, you can simply change the fasteners for the flower boxes outside the window.

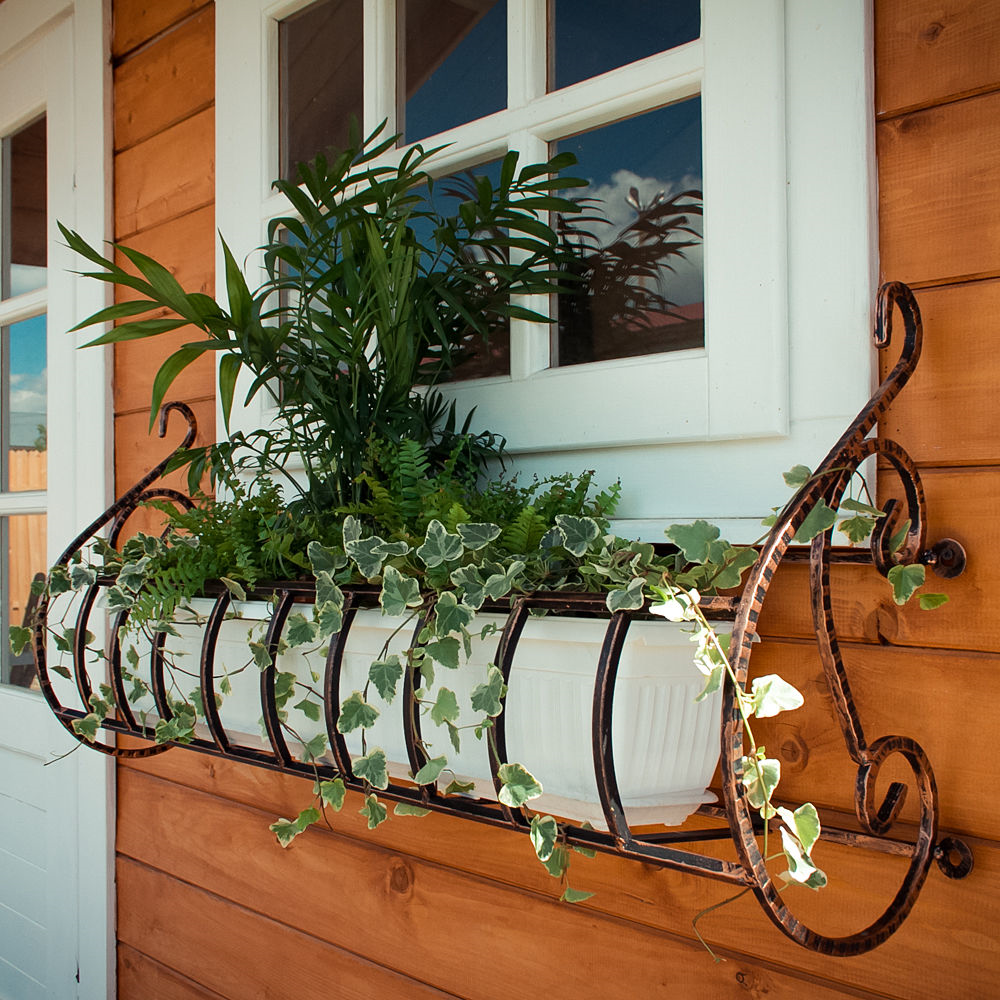
Brackets for pendant pots: 3 view
No less popular today are metal brackets for suspended flower pots. They allow you to decorate the balcony, loggia and the space outside the boxes with flowers, which are hung on the wall. It looks beautiful and is suitable for windows and balconies of all sizes, since such fastenings will not occupy much space.
If the area of the loggia allows, on the floor, you can also place floor stands, made in the same style as the holders for suspended flowerpots. It will look harmonious and allow you to grow your beautiful mini-garden on the balcony or veranda.
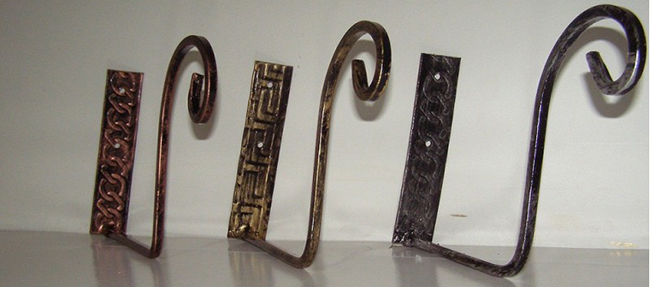
Metal holders: 4 kinds
Today, forged brackets for boxes for flowers outside the window, as well as metal stands, are very popular. Forging can be made in the form of grapevines, currant leaves and even flowers, such as roses. But even simple forging options with smooth lines, or, conversely, sharp corners, will decorate the facade of the house or the outer part of the balcony.

Plastic holders: 5 kinds
Recently, plastic pot holders have become popular as well. They are cheaper than metal ones, they are easier to install (this is especially true for residents of high-rise buildings), and the abundance of options presented on the market is very rich.
But such brackets are suitable only for light pots with flowers. And they are very important to fix very firmly, as they can not withstand weather conditions (snow, rain, wind).
Installation of pots outside the window of houses and apartments
As residents of houses, and apartment owners in high-rise buildings, wishing to beautifully arrange their home, are interested in how to fix a box for flowers outside the window. Fastening elements of holders for containers with colors can be placed both under the cornice and attached directly to the frame.

On the finished flower boxes of wood or plastic, you need to install dowels, for the hat of which, and will be mounted. In their own home to fix boxes for flowers or brackets for them is easier than, for example, on high-rise buildings.
But if you decide to perform the installation yourself, you will need a simple instruction:
- Outside the window, drill two holes at a distance, on which the dowels will be fixed.
- Install the dowels there, and fill the excess space inside the holes with cement mortar.
- Try on the flower box, mark where its bottom will be.
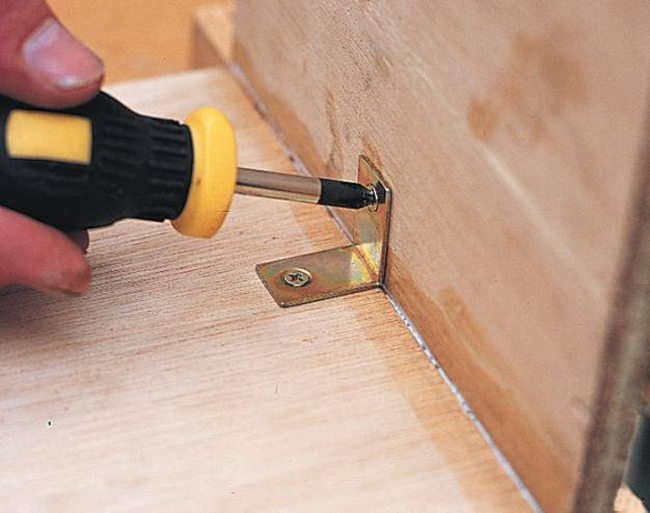
- At the bottom of the box, drill two more holes, focusing on the width of the box, and install the L-shaped elements in them.
- Install a box of flowers on the dowels. L-shaped elements under it reliably protect it from falling.
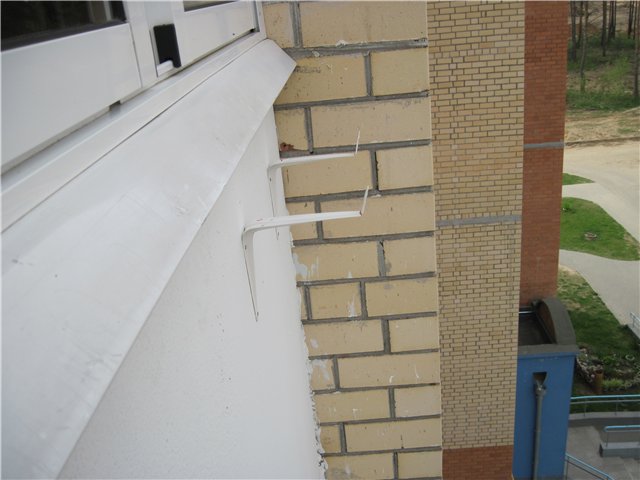
This manual is suitable for those who want to install a box with a fastener. But also you can install the brackets and holders for the flowers, which I described in the previous section, and only then put pots in there. Such supports are also installed by drilling holes.
conclusions
Boxes for growing flowers outside the window and stands for them will become a real decoration of the house, window or loggia, and an independent decorative element. Tell us which boxes and brackets you use, growing flowers outside the windows? And more useful advice on the topic you will find in the video in this article.
Initially, care must be taken to ensure that all the necessary materials and tools are available. As a suitable solution, of course, wood acts. Size and shape you can choose yourself, these parameters will depend not only on your preferences, but also on the location of the structure.
Preparation of materials and tools
In order to make a box for flowers with your own hands, you will need a plane, a grinder, a hammer, a square, a screwdriver, a tape measure, and also tongs. For lack of jigsaw, you can use a saw. However, the work in this case will produce somewhat more complicated, and the process itself will be longer. The design is selected depending on the availability of appropriate equipment, if you want to work manually, it is easiest to make a simple rectangular or square box. Whereas if there is an electric tool available, it allows you to make any designs. A flower box can be made from the pieces of OSB, plywood sheet, as well as various racks and boards. The thickness of the latter should be 10 millimeters or more. In order to treat the surface and protect the material from the negative influence of insects and microorganisms, it is necessary to prepare an antiseptic composition. Wood will look more attractive if it is treated with stain, but any other coloring composition will do. Fastening of details can be made with the help of self-tapping screws, nails or glue. Quite often, masters use two methods of fastening at once.
Technology of making a box for flowers
If you decide to make a box for flowers with your own hands, then at the first stage you need to use boards, the width of which is 20 cm. From them you will need to cut the workpieces, these will be three long elements that will go on the board and bottom. While the other two will be used for the ends. The latter should be made somewhat wider than the bottom. The difference will be in the thickness of the sidewalls. Details must be treated with a planer, and then with large sandpaper. At the edges must be drilled holes, 4 need to be located in the end blanks, while the other three - in the side.
Features of assembly of a structure

When making balcony boxes for flowers with your own hands, then when assembling the sides and the bottom you need to use wood screws, the length of which is 50 millimeters. Only then you can proceed with the installation of the end parts. After the floral container is assembled, its surface can be ground using a fine sandpaper for carrying out these manipulations. The wooden box must be impregnated at the last stage with the help of antiseptic composition, do not forget about one side, whereas outside the product can be covered with stain, the enamel or lacquer is also ideal for these purposes.
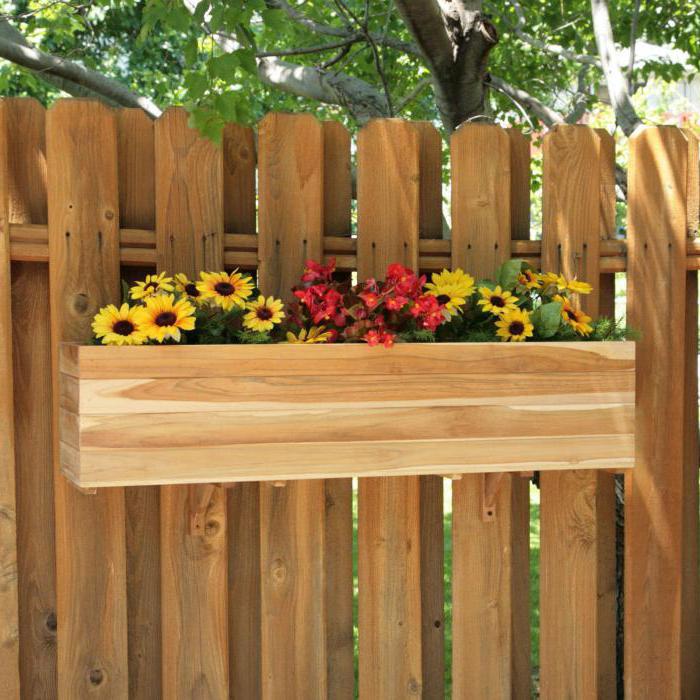
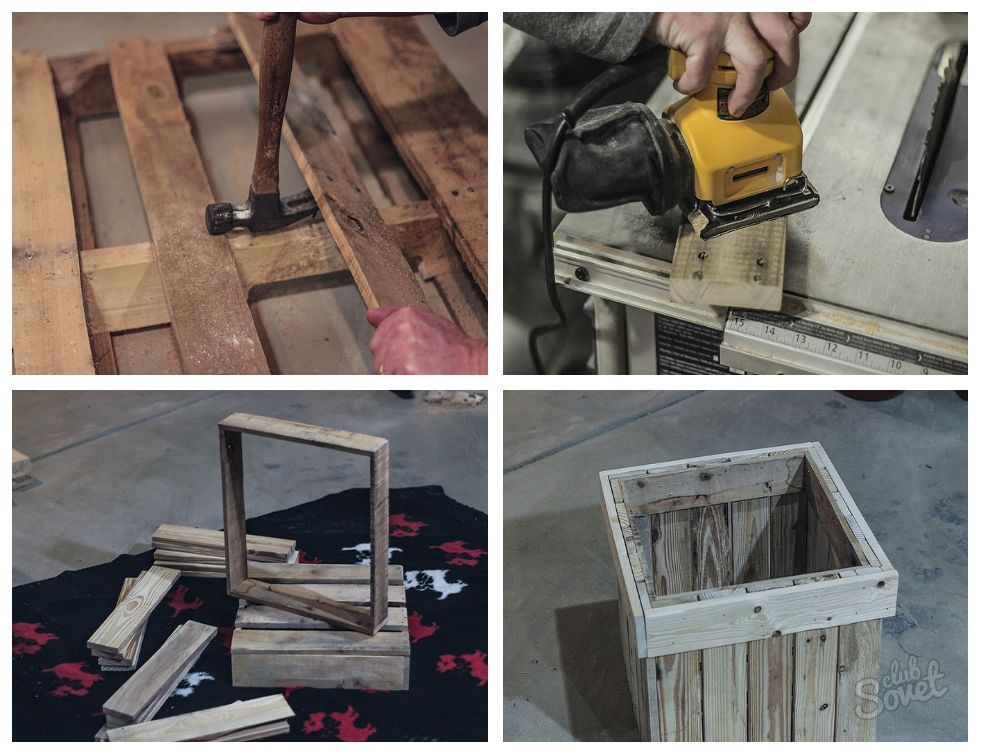
Making a flower box from pallets

Balcony boxes for flowers with their own hands can be made from pallets. To do this, the old stand must be disassembled into separate parts, the straps should be gently pinched with a nail. As for the fastening elements, they need to be extracted with forceps. If there are damaged and rotten slats, they need to be removed. Typically, of these products there are about ten suitable boards. The wood will need to be cut to the required size, then cleaned with an abrasive skin. The next step is to assemble the upper frame and the bottom base. Two parts should be fastened with side panels, use nails for this. Decorative strips will allow to mask the joints. Now the master can start finishing work with paint and varnish materials.

If you decide to make such a wooden box for flowers with your own hands, then the outer surface can be decorated with wood chips. It can be thick branches or planks, which have the appearance of a fence. In the lower part you need to strengthen the legs, which must be made of bars. This will ensure the ventilation and preservation of wood in good condition.
Flowers inside should be placed in plastic pots, but as an alternative solution planting plants directly into the box itself can be used. Beforehand, you need to lay the film on the bottom, having made drainage holes in it.
Alternative version of the box
Before you make a flower box with your own hands, the master must carefully approach the issue of material selection. It can be used as the width of which is 10 cm. To carry out the work, the same set of materials will be needed. Choosing the height of the container, you can prefer a parameter equal to 40 centimeters. After the boards are connected to each other, you can install bars in the corners. If you intend to plant climbing plants in such boxes, then support should be provided for them. To do this from the narrow bars should be cut, and then knock down the grate, which must be fixed to the finished drawer on the inside.
Conclusion
Those masters who want to make boxes for flowers with their own hands made of wood, it is necessary to think over every nuance, in particular, it concerns the durability of the structure. If poor quality wood is used, then after some time the construction will change its original linear dimensions. That is why it is important not only to observe the technology of work, but also to choose good material. For the sample, you can use as material whatever you can find in your garage or shed. From old products of life, too, something very interesting can turn out. However, it is necessary to take care of the comfort of plants.
A suitable material for flower boxes is wood. Processing it is not difficult, and the sizes and forms of self-made containers depend only on your imagination.
Tools used:- Saw or electric jigsaw;
- Plane;
- Sander;
- Screwdriver;
- Corner, roulette;
- Hammer, forceps.
The structure of the drawer for plants is selected depending on the availability of equipment - it is easier to make a simple box by hand, and using an electric tool makes it possible to implement any ideas.
Materials used:- Various boards and slats with a thickness of 10 mm;
- Plywood scraps;
- Pieces of OSB.
For decorative treatment of surfaces will require antiseptic, or coloring compositions. Fastening of details is carried out with the help of waterproof glue, nails or self-tapping screws.
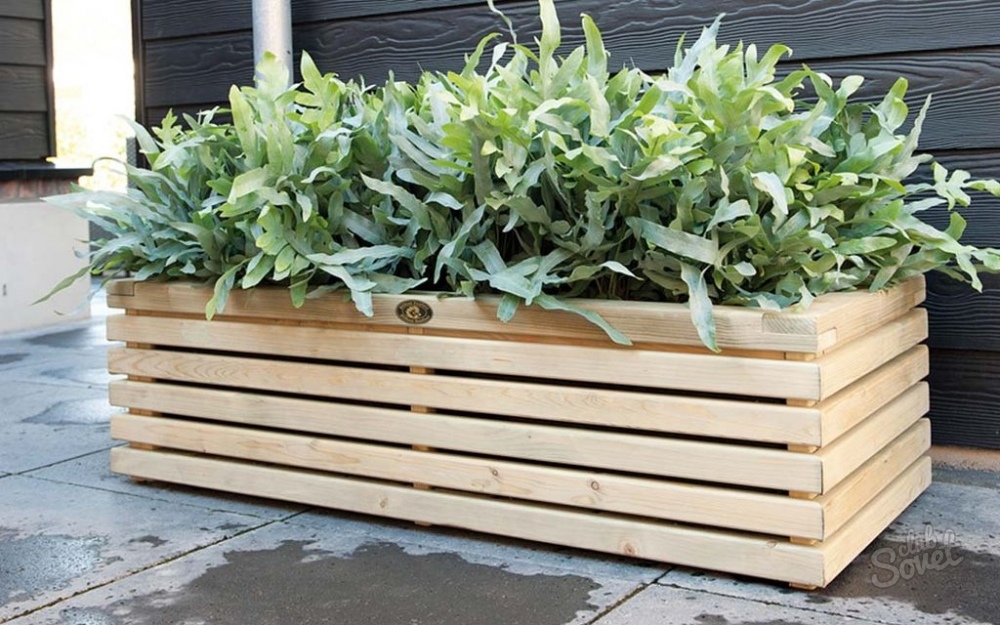
- Of the boards with a width of 15-20 cm cut billets: three long for the bottom and sides, two short for the ends - are marked wider than the bottom by an amount equal to the thickness of the sidewalls.
- Details are plotted by a plane, large sections of sandpaper are processed.
- At the edges are drilled thin holes: four in the end blanks and three in the side.
- Screws 40-50 mm long first fix the bottom and sides, then screw the end pieces.
- The collected floral container is ground with a fine sandpaper.
- The wooden box is impregnated with antiseptic from all sides, and outside is covered with stain, varnish or enamel.

- The old stand is dismantled on the part - the slats are neatly tucked up by the nailer, the fastening elements are pulled out by the forceps.
- Severely damaged and rotten slats are rejected, usually 10-14 suitable planks are left.
- A sketch is drawn up indicating the dimensions of the future product.
- cut to the required dimensions and sanded with an abrasive skin.
- The upper frame and the bottom base of the container are assembled.
- Two parts of the box are fastened with side panels on nails.
- Masked joints with decorative laths.
- They begin finishing with paint and varnish materials.

Hand-made flower boxes become exclusive details of your garden or balcony. And material for homemade products can be anything: plastic bottles, wicker baskets, old utensils or unnecessary furniture.
To plant ornamental plants, it is customary to use pots and flower pots. And to decorate balconies with lush greenery, use balcony boxes for flowers. These containers not only provide plants with favorable growth conditions, but also have high aesthetic qualities.
Decoration of outdoor plants
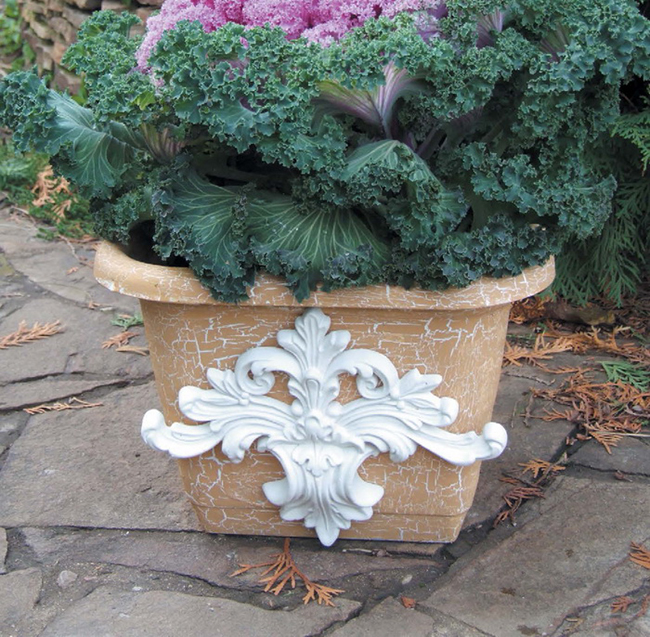
In landscape design, it is almost impossible to do without such decorative elements as flower vases. They can be of very different shapes and made of a wide variety of materials:
- plastic
- concrete
- tree
- metal
- rubber
The most popular street vases of concrete, as they are durable, and decorative is achieved due to the original forms and the color of the container. Wooden vases are perfect for landscape design in country style. They can take the form of a stump, trolley, wheelbarrow or sleigh.
Balcony plants, planted for one season, can also be considered a street plant. For this purpose it is convenient to use balcony boxes for flowers. Dark boxes are suitable for balconies that are poorly lit by the sun, and light ones for balconies that are exposed to sunlight for much of the day. This is necessary to protect the soil from overheating.
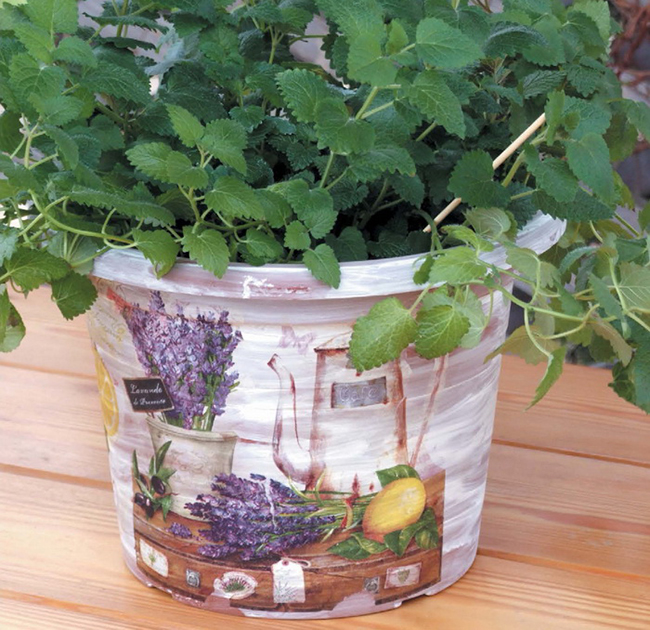
Cottons for domestic plants
Kashpo - these are decorative containers and pendants, in which plastic pots are inserted, which do not have external appeal. Flowerpots for flowers are hanging, tabletop and floor. Thanks to a wide range of products, it is easy to choose decorative elements that harmonize with the overall style of the interior. Therefore, when placing a plant, it is not necessary to transplant it into another pot. In stores "Leroy Merlin" you can buy flower pots, which will harmoniously fit into the already existing interior of the room.


