You have a smartphone with the Android system. You installed it on your computer cloud service from Yandex. You often work on the computer, and so you can easily charge the battery of your device simply by connecting it to a PC. You work on the computer, and the smartphone is always at hand. And suddenly, one day you find an icon on the phone screen. It's simple: there was a synchronization of Yandex.Disk with Android.
To install Yandex.Disk on a smartphone with an Android system, it's enough to connect a gadget to a PC with the Yandex cloud installed, as a result of the synchronization, the Yandex.Disk icon will appear on the smartphone.
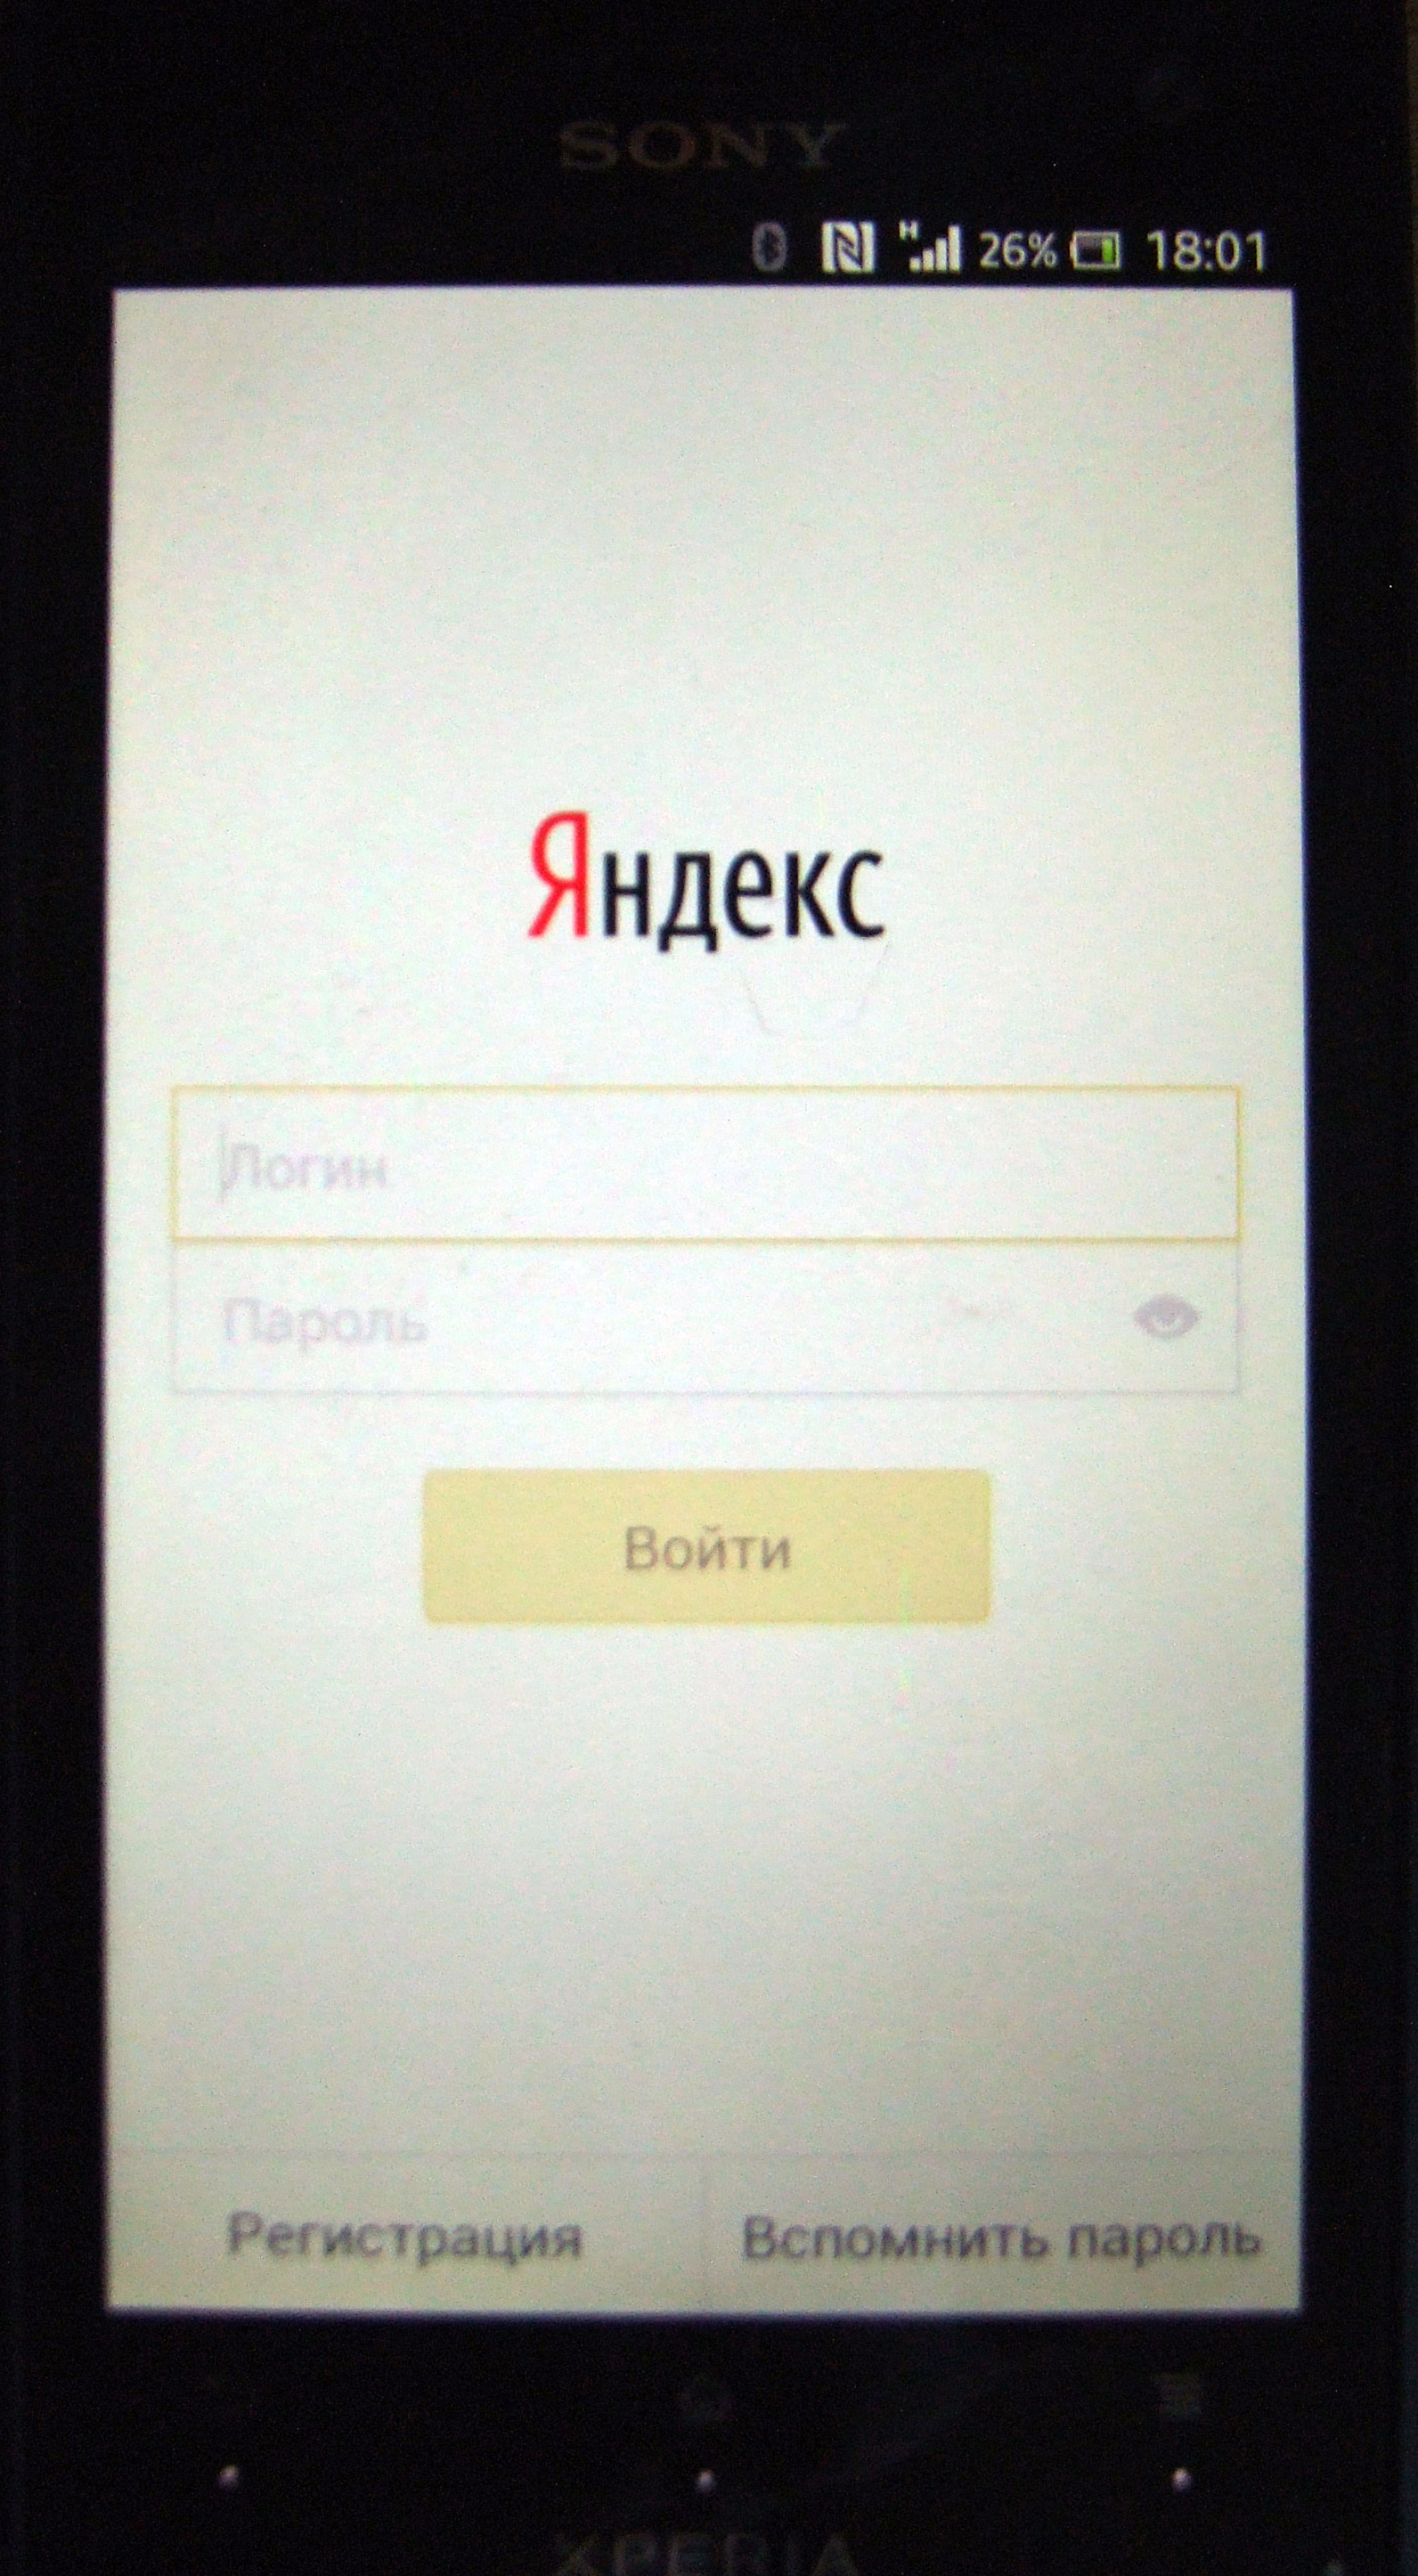
entrance
How to enter Yandex.Disk from Android:
Using
Actions that can be performed in the application:
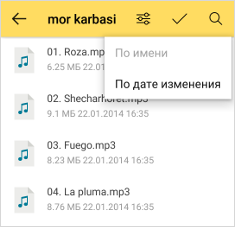
- sorting documents either by name or by date of change;
- selection of the document;
- search by documents.
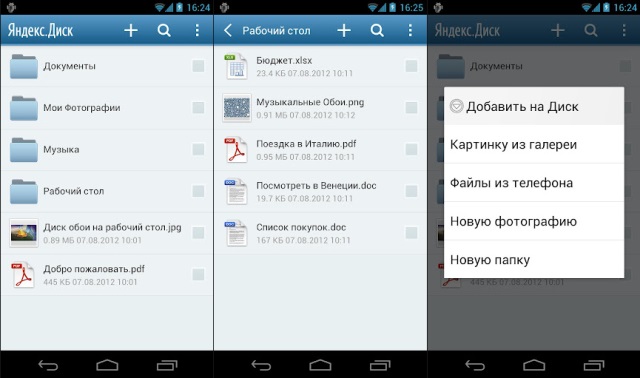
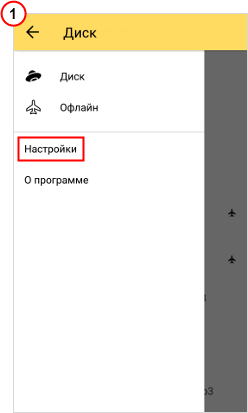
Touching the "hamburger menu" icon will make it possible to go to the disk settings. There are sub-items:
- Drive (move to our store).
- Offline (will move to the window in which the Internet is available, both individual documents and their folders).
- Recycle bin (the window with the removed documents will open).
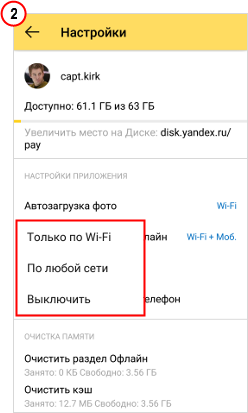
Touching the "Settings" icon will allow you to familiarize yourself with the settings on your phone:
- increase the size of the disk;
- clear the category "Offline" or cache;
- option that allows you to "move from phone to phone."
Touching the "About" icon will allow you to find the version and build number of the client installed on the smartphone. The assembly number is specified with a specific build date.
Here, perhaps, that's all. You have learned how to enter the cloud service Yandex.Disk on a smartphone with an android system. Successfully mastering your gadget! Have a nice day!
Initially, the new Yandex.Disk is provided with 10 GB free of charge, and if you register with my link, then another 1 GB is given. From 3 April to 3 July 2017 (3 months) is the action "Mobile startup": you need to install the Yandex.Disk application on your smartphone (based on Android, iOS or Windows Phone), enable Auto Backup, download at least 1 photo and as a gift forever get 32 GB on Yandex.Disk for free.
Such an action is conducted to encourage users to use the mobile Yandex.Disk application on their smartphones.
As a result, you will have 10 + 32 = 42 GB on Yandex.Disk.
What do you think is worth using? If your answer is positive, let's go further.
How to install the application Yandeks.Disk on Android
You will need Yandeks.Pochta - the old one, which you already use, or you can.
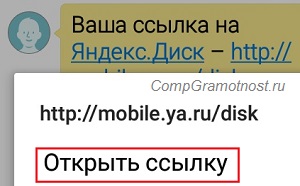
On your computer (not on your mobile phone!) Click on the link
The window opens.

- specify number mobile phone (1 in Fig. 2),
- enter the code from the picture (the so-called captcha, which is needed to confirm that you are a person, not a machine bot) - 2 in Fig. 2,
- click "Get" (3 in Figure 2).
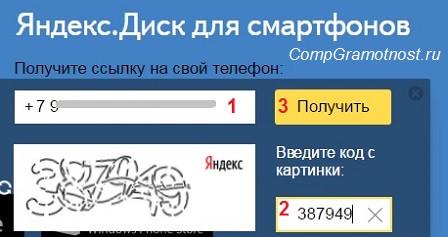
Fig. 2. Enter the phone number, the code from the picture, click "Get"
After entering the phone number and captcha (code from the picture), the message will appear:
«SMS sent
At the specified number, you sent an SMS with a link to the application or mobile site. "
Please note that sometimes SMS comes with some delay (up to 5 minutes). "
Take the phone and open the "Messages":
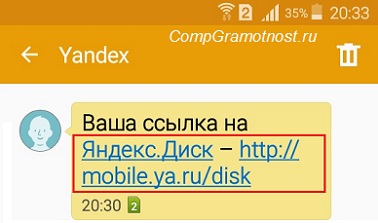

It is possible that a window will appear asking how to open the link:

You will be prompted to install Yandex.Disk:
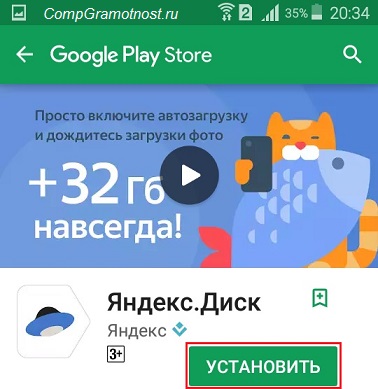
Fig. 7. It is proposed to install the Yandex.Disk application on the smartphone
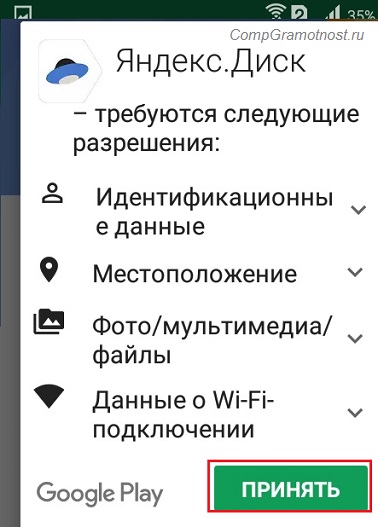
Fig. 8. Permissions for installing the Yandex.Disk application on your smartphone
Here you can only tapknut on "Accept", because the information listed in Fig. 8, is provided to us only for reference. If you do not agree with this, then there is only one option - to refuse installing the Yandex.Disk application on the smartphone and, accordingly, to give up the gift of 32 GB.
Click "Accept", then on the phone starts downloading the application:
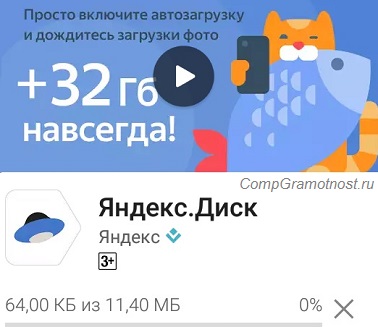
Fig. 9. The Yandex.Disk application is being installed on the smartphone
The screen shows that the application Yandeks.Disk on the smartphone will take 11.4 MB.
1-2 minutes is the installation, and the message "Installation ..." flashes on the screen at this time. When the application is installed, you will see:
How to get a gift of 32 GB on Yandex.Disk
Yandex.Disk is inextricably linked with Yandex.Mail, so it is further suggested to enter your Yandex.account. For this, your login and password from Yandex.Mail:
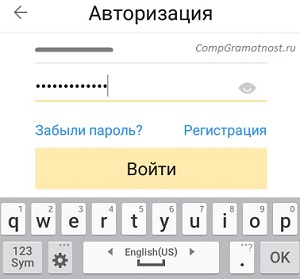
Fig. 11. We enter login and password to enter Yandex.Mail
Then several messages appear on the screen that will advertise the mobile Yandex.Disk features:
- "Photos from all devices", click "Continue"
- "Convenient to share", click on "Continue"
- "All documents with you", click "Continue".
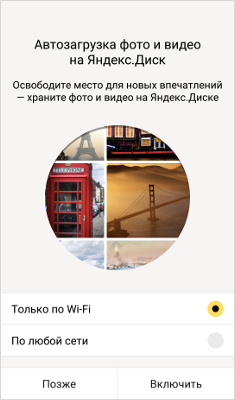
Finally, the "Enable Instant Upload" window will appear:
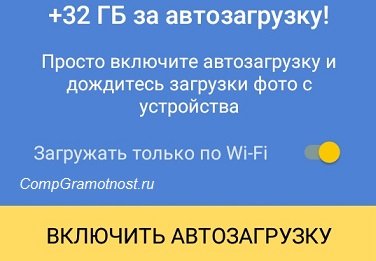
Fig. 12. Enable autoloading to get 32 GB of Yandex.Disk
- Autoload must be included (this is a condition of the action!),
- upload at least one photo,
- get "for good behavior" 32 GB on Yandex.Disk,
and only then you can "clever": disable startup, delete Yandex.Disk from your smartphone, etc.
You can upload photos to Yandex.Disk both on a smartphone and on a computer - in general, where, it is more convenient for you. Download the photo and get the promised gift:
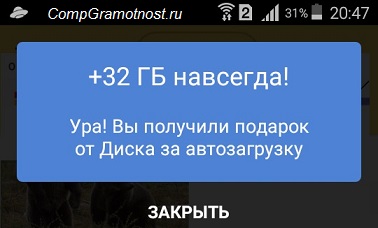
A similar message will also come to Yandex.Mail message, you can read it on your computer:
"Hello, Hope!
Congratulations, you received an additional 32 GB on Yandex.Disk on the "Mobile Startup" campaign.
Use additional space:
- for uploading photos and video archives;
- preservation backups important documents;
- creation public folders with friends and colleagues. "
How to disable autostart Yandex.Disk on Android
It was necessary to enable autoloading in order to download at least one photo and get 32 GB. After that, you can turn off Auto Backup in the settings of Yandex.Disk.
And you know, whence such a requirement - to enable the startup and upload at least one photo, and only then get 32 GB as a gift? Yes, everything is very simple and based, basically, on the psychology of the behavior of the vast majority of users on the Internet. People receive a gift and do nothing more with happiness. On the one hand, it's true - "that's working, and do not touch!".
On the other hand, there are users who want everything or everything that can be kept under control. Autoloading is not for everyone and not suitable for everyone, so I recommend you look into the "Settings" of Yandex.Disk on your smartphone and check that there is configured "".
To do this, open the Yandex.Disk application.
- In the upper left corner, click on the icon from the three small horizontal bars,
- a menu will open in which you want to tap Settings:
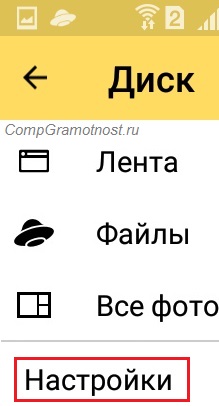
Fig. 14. Settings Yandex.Disk
Tapping "Settings", we can edit the behavior of Yandex.Disk on the smartphone:
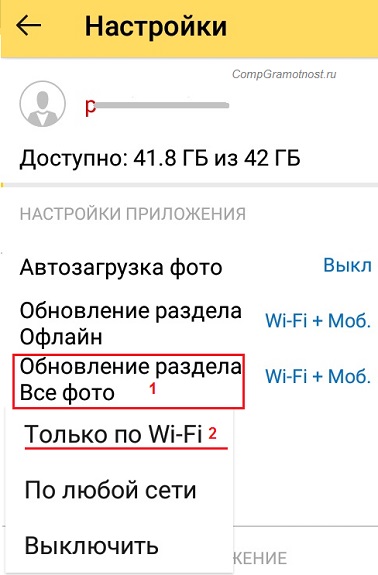
Fig. 15. Turn off Auto Backup and change settings from Wi-Fi + Mobile. only on Wi-Fi
In Fig. 15 "Auto Backup Photo" is turned off. It remains to deal with mobile traffic and Wi-Fi.
Attention. The Yandex.Disk application is supported by the Android platform not lower than version 4.0.3.
The Yandex.Disk app for Android allows you to manage files in Drive. You can install the application from a page on Google Play.
Attention. If you use two-factor authentication, Yandex.Disk needs to be authored in the application, generated by the mobile application "Yandex.Klyuch."
To refresh the list of files and folders, drag it down. While the application is requesting new data, "Update" is displayed at the top of the screen.
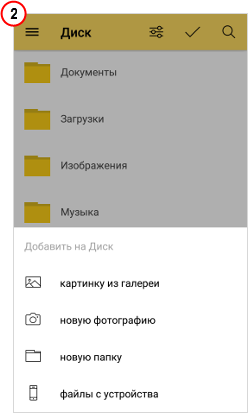
Open the folder where you want to upload the file, and click the icon.
The application will prompt you to select an existing file, make a new photo using the camera phone or create a new folder.
Open the file in other applications
Download file to phone
Find Files
To find the file or subdirectory in the current folder, click the icon and enter the part of the name in the search bar. The drive will select the files and folders whose names contain the text you typed.
Note. Search is only in the folder that is open at the moment. Files in subdirectories will not be found.

Sort files and folders
You can sort the list of files and folders: click the icon to see all available options.
Set up Auto Backup for photos and videos
You can automatically upload photos and video files to Drive from the standard Gallery application and store them in the Camera folder or in any other folder in the Drive. The window for configuring startup will appear the first time you start the application.
The following methods of autoload are available in the application:
- Only over Wi-Fi. Photos and videos will be downloaded only if you have a Wi-Fi connection.
- By any network. Photos and videos will be downloaded if there is any Internet connection (Wi-Fi, mobile Internet).
Attention. Using mobile internet Your mobile account may be charged for this service. The fee depends on the tariff of your mobile operator.
Select the appropriate option and click Finish. Auto Backup will start automatically. If you want to configure automatic startup later, click Skip.
On your mobile device, by default, they will be downloaded to the automatically created "Camera" folder. All files in the folder will be renamed according to the date and time of their creation (shooting). Manage your photos you can on your mobile device or on the service page in the image view mode.
Change the way you back up photos and videos, or disable it
|
In the block, select the desired option. |
||
 |
 |
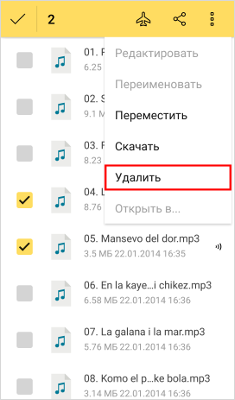
Delete a file
To delete unnecessary files or a folder from the Drive, select them and click the Delete button. Confirm the deletion, and all selected files will move to the Recycle Bin. Deleted files are stored in the Recycle Bin for 30 days, after which they are automatically deleted from the server. You can not restore files deleted from the server.
Attention. The files moved to the Trash continue to take up space in your Drive. If you do not have enough space, empty the Trash.
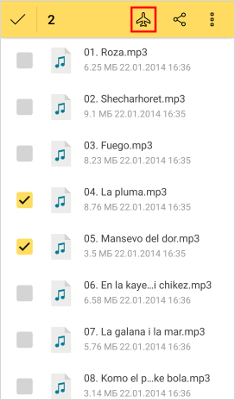
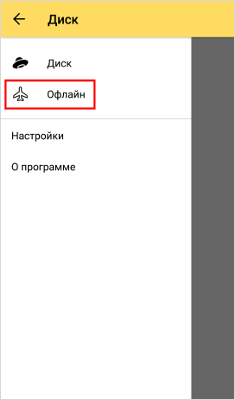
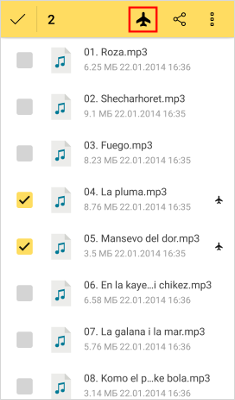
Working with files offline
To have access to files without an Internet connection, add them to the Offline section - the files will be downloaded to your mobile device. If these files are changed, they will automatically update in Offline when an Internet connection appears.
|
Add files to Offline |
Viewing files in the section Offline |
Delete files from Offline |
|
Select the desired files or folders and click the icon. Files added to Offline will be marked with an icon. |
Slide the screen to the right and select Offline. |
Mark the files you want and click the icon. |
 |
 |
 |
Clear section Offline
When you clear the Offline section, the files are deleted only from the mobile device. On Disk servers, they will be saved.
|
Open the application settings. |
Select Clear offline. |
Confirm the cleaning. |