Articles in the same category
Short and easy-to-understand installation of OpenServer. Here we will configure the Database properly and install WordPress on the local Open Server.
This local server free, for which many thanks to the developers. These modest guys, however, do not intrusively offer to make a donation in any amount for the development of the project. I consider this very noble in relation to us and I think this donation should be done.
Downloading the Open Server program
You can download Open Server at. The downloaded archive is self-extracting. At startup, you will be prompted to select a location to unpack. You can specify any place, even an external medium in the form of a flash drive or a portable hard drive.Also, during installation, there will be no shortcut on the desktop and in the start menu. The program is portable.
Choose any of the three distributions, I described them in.
Fill in the captcha and download.
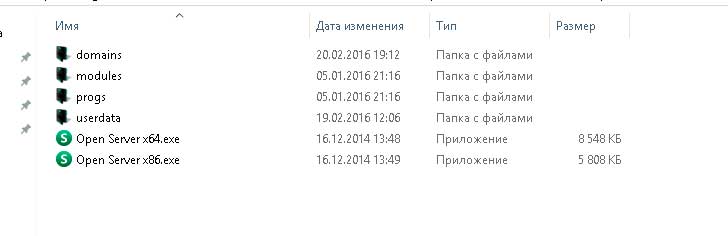
After installation, the folder will be like this
I advise you to install a shortcut to the taskbar. It will be convenient to run the program.

Don't look for the program in Program Files, you won't find it there. It is, as I said, portable, and runs only from the folder where you installed it. Therefore, the label should be looked for only there.
Click the meme on the shortcut in the Taskbar and wait a while. The program will not show any signs of its work when loading its required files... A minute later, a yellow flag will quietly appear in the tray (at the bottom right, near the date and time).
If it does not appear, click the arrow next to it, find the checkbox, after which the server will boot, and now by clicking the green checkbox in the tray, start Open Server. 
A small but obligatory step. If you use Skype, you need to go into it, and go to the settings, Tools - Advanced - Connection, and uncheck the checkbox, as in the screenshot 
This will allow the Open Server to run without problems occupying its ports.
And further. The server will create a virtual disk for itself, so don't be surprised what you see in the explorer additional disk... It will disappear when you log out of the local server.
Website creation in Open Server
Now you need to go to the folder where you determined the location for the Open Server. Open the domians folder, you will have one localhost folder there.Create a new one, let's say test.ru .
And now we will install the engine on this domain WopdPress.
First of all, download WordPress from the official site.
The archive will be downloaded, which you unpack in the same folder Downloads and open the unpacked folder.
Select all folders and files and copy to clipboard. Then open your new site folder test.ru
and paste all these folders there. 
Then open the file from this folder under the name wp-config-sample.php text editor Notepad ++ or just a notepad and edit the code. 
Now, in order, we are correct.
But first, we will create the Database. To do this, we will digress from editing, we will then return to this step. It is important to create the Base, because we will enter the Base name into this batch file.
Installing the Database
Go to the Open Server menu by clicking on the checkbox in the tray and open PhpMyAdmin in the server menu itself.
A login window will open, where in the User window we enter root, the password is left blank, OK.
We entered the program, where we will create a database for our, while a virtual site 
We assign a name to the base, in our case mywordpress, and set the format of the base utf8_general_ci... Create.
We have created a Database for our site.
Now we return to editing the file, from where we were distracted to create the Base.
Fill in as the red squares are highlighted. Except for the big one.
This is our unique arbitrary code. It can be created by following the link indicated by the arrow. Just copy the URL and open it in a new window, you will be offered a unique code, which you copy and replace the one that you had by default. All.
Save your changes and close notepad, or whatever editor you're editing the code in.
Now change the filename from wp-config-sample.php on wp-config.php.
That's all.
Go to the tray, restart (yellow flag) the server IT IS NECESSARY!
Then go to the server again, all in the same tray and go to My Sites. There you will find your test.ru.
Click and you are on the site. The installation of the WordPress engine will start. Give a name to the site, let's say My blog
... Come up with a login, just admin5... And the password. Keep it simple, this is a test site after all and we are not afraid of hacking. 

After that, we can dial test.ru/wp-admin, enter our username and password 
And we get to the admin panel 
And if we type in the address bar test.ru
then we will get to the site 
Our local server with the new test site is ready. Let's get to work and further training.
And all the best!
Work hard! The world will not be paradise For those who want to live as a lazy person. Sachs Hans
Every owner of a site or blog, sooner or later, has an irresistible desire to somehow "finish" or "tighten" it. After reading cheerful articles in the style of "Hatemeel - the price is even simpler", they, without hesitation, begin to straighten the delicate code with the help of a sledgehammer, a chisel and some kind of mother. The result, most often, is the pulling out of hair on the bottom of the head of hair and panicky letters to tech support: "Help, my site is dead!"
Those who are smarter, more careful, understand that before getting into a living organism with unwashed paws, you need to practice on some kind of simulator. Professional website developers have been using them for a long time and successfully. For a long time, the most popular was Denver, a full-featured remote server simulator in your own computer. But for about three years the project has not been renewed, the Internet has gone far ahead, in modern computers and the old Denver system is getting crooked, or not at all.
The new favorite is the open source OpenServer package. Type this word in Google and you will be taken to the project page, where you can download the source archive. Place it on a disk with at least 1 gigabyte free space, and unzip. Go to the OpenServer folder and run the file with the same name.
First of all, you will be required to open Internet access. If you do not use Skype, then more problems shouldn't be. If you do, then first go to its settings and uncheck the box "Use ports 80 and 443 as incoming alternatives." Then restart Skype. Check your Skype settings - they should look like this.
After the start of the program in command line a red flag appears. ![]() Click on it and you will see the server menu. Click on the green flag next to which it says "Start Server". The program will create a virtual disk W: by itself. Congratulations, you have a full-fledged server in your hands with all the features that a real high-quality hosting provides.
Click on it and you will see the server menu. Click on the green flag next to which it says "Start Server". The program will create a virtual disk W: by itself. Congratulations, you have a full-fledged server in your hands with all the features that a real high-quality hosting provides.
 What I am going to write next may cause the outrage of professional webmasters. But I will venture to describe the easiest way to start my own experiments with the code, more complex options let's leave it for later. According to the rules, working with a site begins with creating a user and a database. Of course, if we are doing a real project, this is what we should do. For us, experimenters with playful hands, OpenServer already has a user named mysql, a database named mysql and a password mysql. We just have to create a new domain. To do this, click on the "Settings" menu and select the "Domains" tab. In the "Domain name" field, enter any name (it is undesirable to repeat the name of this site), in the "Domain folder" field, write "localhost / www" and click on "Add".
Further actions are standard. Load WordPress into the OpenServer \\ domains \\ localhost \\ www folder, open the wp-config file and enter the usernames and passwords of the user and database there.

We save, then in the browser we type the name that we entered as a new domain, and we get to the regular WordPress installation page. Don't forget to write the correct address here email and don't allow indexing. After that, the new site is at your complete disposal. You can do whatever you want with it. For example, I test all new topics on it. Better yet, install a production site theme on it and test plugins, widgets and scripts. You can remove unwanted links from your template code before you install it on a production site. You can use OpenServer as a testing ground for learning HTML, CSS and PHP. You can practice migrating sites, coming up with new pages, and so on and so forth. You can test themes own developmentand see them in any browser. And most importantly - there is absolutely no risk of ditching an already working site.
In fact, OpenServer is immeasurably richer in features. There, in the menu, there is documentation, where everything is described in detail. I just wanted to show you a simple way to self-improvement and gaining practical work skills. After all, a copywriter who does not dream of becoming a webmaster is bad!
Includes: Apache, nginx, PHP, MySQL, phpMyAdmin, FileZilla FTP server.
Russian version: yes.
OpenServer takes up almost 50 MB, which is three times larger than the volume of other packages, while also containing a fairly impressive set of components. For example, there are two web servers at once: Apache and nginx, also two different versions PHP and MySQL.
Installation
Although the downloaded file is executable, in fact it is a 7-Zip archive, at startup you specify the folder where the files should be unpacked, this completes the entire installation before it can start. In fact, the kit is not installed as a separate program, but is portable, so it can be unpacked anywhere, including a flash drive.
Running the web server
After unpacking the files, you should run Open Server.exe, the download of the kit is signaled by the icon with a flag that appears on the taskbar. Clicking on the checkbox opens a convenient menu (Fig. 1).

Figure: 1. OpenServer Menu
- Start - start the web server.
- Restart - restart the web server.
- Stop - stop the web server.
- Site List - a list of local sites.
- Additionally - launch PhpMyAdmin, fast access to the web server config files, PHP and MySQL.
- HTML Folder - open the folder containing the local site files.
- View logs - open the panel to view HTTP, PHP and MySQL errors.
- Settings - a window for configuring programs.
- About the program - a window with the version of the kit, copyright and a link to the site.
- Exit - complete running processes and exit the program.
After starting the web server, the http: // openserver page should be available, which lists the parameters for connecting to the database, FTP server and other helpful information (fig. 2). If this page opens, then the kit is installed correctly and is working.

Figure: 2. Openserver home page
However, OpenServer is quite picky about system settings... For correct operation, you need administrator rights, access to the file c: \\ windows \\ system32 \\ drivers \\ etc \\ hosts, free port 80. It is quite possible that the kit will not work in conjunction with Skype, which also uses the 80th port for operation, and with a firewall or antivirus. Many Windows web servers face these problems, so they are fairly well known and solutions have been found long ago. In the OpenServer Help (http://open-server.ru/help.html) all common questions are considered and answered, so if the web server does not load, you should look at the server logs and look into the help.
Local sites
To create a local site, just create a folder with the domain name inside the html folder, and the www folder in it. To avoid conflicts with existing sites, the first-level domain can be replaced with ..lc \\ www. After creating the necessary folders, you should restart the web server or start it if you have not already done so.
After closing the program and restarting it, the list of sites is displayed in a special menu (Fig. 3), through which you can quickly open the site in the browser.

Figure: 3. List of local sites
Kit settings
The main settings for managing the program are located in the "Settings" menu, where you can set the letter virtual disk, autorun, PHP version, MySQL, etc. (Fig. 4).

Figure: 4. General settings
- Server autostart - allows you not to load the web server manually, but to do it automatically at startup open programs Server.exe.
- Clear logs at server startup - information about requests and errors will not accumulate, but will be deleted every time the web server is started again. You can view this information in the "View logs" menu.
- Quick start - the correctness of the start of services is not checked. It is not recommended to enable this option, it is needed only when conflicts between ports occur.
- Virtual disk letter - you can specify the letter that will be automatically used when starting the kit. The default is W.
- Server IP-address - the local address at which sites are accessed.
In the "Module settings" tab (Fig. 5) you can select which web server to use (Apache or nginx), PHP and MySQL version.

Figure: 5. Module settings
Other tabs - " Email Settings"And" Encoding settings "are rarely used.
Note that when the web server is running, the settings cannot be saved, so you must first stop it and only then configure.
Summary
OpenServer is perhaps the best suite out there for building and testing local Windows sites. Convenient menu, launch system, simple creation of virtual hosts, attention to detail make it easy for novice web developers to work, and the included components will suit professional programmers. It's nice that all this can work on a flash drive and does not require installation, which allows you to quickly transfer your entire projects from one computer to another. Of course, not everyone will need this opportunity, but it's good that it exists.
Despite the practicality and comfort of work, the kit also has some drawbacks. It only runs under Windows XP SP3, Windows Vista or Windows 7 with administrative rights. Incompatibility with others may also occur. installed programswhich will require separate debugging. I also did not really like the redundancy of the kit, two versions of PHP and MySQL are definitely useless, and you cannot indicate your preferences at the download stage. I hope that someday a light version of the kit will appear, but if not, then the extra components can always be removed manually.
If you have Windows installed, you have administrative rights, which on home computer As usual, it is imperative to install and use OpenServer. For the development and testing of local sites it is the most.
Hello dear readers of the blog site. What is a local server? Well, for starters, it's worth understanding. Do you already know? Well, then it will be clear to you that a local server is a set of components that allows you to work with a website right on your computer (without using hosting).
Why is this needed? Well, for example, when developing a site to speed up and improve the convenience of this process, or when it is significantly updated, when you do not want to customize the template directly on the site that users visit (copy files to a computer, make changes, test, set up and only then upload for hosting).
Previously, I always used for this purpose. True, it has not been updated for many years, although it is quite workable. However, in the comments to the article about I was advised to turn my attention to OpenServer, which I did not fail to do.
What can I say about Open Server? Indeed, it is convenient, more modern and quite efficient. In addition, OpenServer does not require installation, which means (along with all the sites that you create and test in it), while Denver is tied to the computer on which it is installed. There is also an extended package, which includes dozens of useful web-developer programs that, again, do not require installation. But first things first.
What is Open Server and which package to download
Open Server is the so-called WAMP complex, the essence of which can be understood from the decoding of this abbreviation:
- Windows - operating system, for which this local server is intended
- Apache is a web server that "rises" when the Open Server program starts
- MySQL is a very popular database management system, which is a prerequisite for the work of many site engines, including such popular ones as Joomla and WordPress
- PHP is an interpreter for the server-side programming language that most CMS is written in and many other web applications are built
In addition to this "gentleman's set", the Open Server has in its zagashnik (a popular web server often installed with Apache) and something else, shown in the screenshot below. In addition, this local server allows you to select one of several options for Apache, PHP, MySQL and other components in the settings.

As a non-expert in web development, it is rather difficult for me to grasp the grandeur of this project called OpenServer, but judging by the reviews, the development of the complex is carried out taking into account the wishes of users and great attention to detail (if you compare with Denver, you will get a Volvo instead of "Lada", although it drives). There is a convenient interface for managing the local server, sites and applications created on it, as well as those tools and utilities that are included in its kit.
Well, even a noob like me understands that a simple set of words "Does not require installation" means a lot. You can unpack the archive with the Open Server distribution onto a USB flash drive, portable hard disc and even on CD / DVD (albeit with limitations). After that, it will be possible to work with your sites and web applications on any computer at home, at work, in an internet cafe or anywhere else where there is a suitable operating system (Windows 8 / Windows 7 / Windows Server 2008 / Windows Vista / Windows XP SP3).
However, simply a portable local Open Server may not be enough for web developers. Yes, on the main computer they, of course, have all the software necessary for their work and even more. But after inserting a USB flash drive with OpenServer into someone else's computer, you will not find much of what you are used to and what is simply necessary in your work.
Interestingly, the authors took care of this too, offering three packages at once on the download page. Download Open Server you can follow the link provided by choosing from the drop-down list required package and after passing the captcha:

Which distribution should you choose? Let's see:

By the way, downloading the mentioned packages from the local server is possible at two speeds: very slow and as fast as possible. Which one do you prefer? Well, then you have to pay 100 rubles to the fund of the creators of the complex. Otherwise, even the Open Server Mini package will download for a couple of hours.

Installing OpenServer on a computer and configuring it
The downloaded distribution kit is a self-extracting archive embedded in an executable file. When you launch it, after a while you will be prompted where it will be unpacked. By default, "C drive" is traditionally offered, but you are free to choose another location (including external media, such as a flash drive or portable drive).

No shortcuts are created on the desktop or in the Start button menu, because the program is portable. So to start the server, go to the OpenServer folder on the disk that you specified during installation and run the file Open Server.exe (you can drag its shortcut to the desktop). I installed the Mini version, so my case looks like this:

Next, select the language (I was also offered to install the C ++ library) and at the end of the installation you see the appeared in the tray new icon as a red flag indicating that the local server has not yet started.

When you click on it with any mouse button, you will see a context menu, which serves as the main management tool for OpenServer. From there it will be possible to start the web server, stop it or restart it, and also get access to the websites and web applications created on its basis (now only localhost is available there). By the way, select the item "Run" and after repainting the checkbox green, paste into the browser address bar:
Http: // localhost /
If you see a welcome page, it means:

Let's first take a look at it customization using the item of the same name context menu:

In some releases of Windows, you may need to check the box "Require account Administrator "for the successful operation of this local server (file access). On the "Modules" tab, you can select the versions of Apache, PHP, MySQL you need (if you are improving the site, it makes sense to choose them the same as on your hosting, in order to avoid troubles during the transfer).
You can also on the tab "Menu" put a tick in the box "Show sites in the main menu" so that you do not need to catch them in the dropdown. Well, you can immediately assign a browser where these very sites of yours will open after clicking on their name from the context menu of the flag icon in the tray.

So, in order to get started with your site on this local server (or install the site engine), first you need to go from the context menu to the "Sites folder" item, or open, for example, in the Total Commander the "d: \\ OpenServer \\ domains \\" folder. Inside there will be a "localhost" folder. Next to her we create new folder for our site with any name in which the following characters can be used (note that you cannot use underscores).
Actually, that's all. From the context menu of the Open Server icon in the tray, select the item, after which a new name will appear in the list of sites, clicking on which will open the page of the browser specified in the settings, displaying your site.

If there is nothing in the folder created inside "d: \\ OpenServer \\ domains \\", then the page will be corresponding. To be honest, at this stage I had a serious gag with the work of this local server. The reason was that mine hosts file was write protected, so OpenServer constantly cursed about this at startup and did not show the new folder I created among the sites.
Unpack the archive and copy all its contents (what is inside the wordpress folder) into the site folder we just created in "d: \\ OpenServer \\ domains \\":

Now we need to think about the database for our future blog. Naturally, this local server comes with various utilities, among which there is a well-known one, which can be accessed from the context menu of the server icon in the tray (Menu\u003e Extras\u003e PHPMyAdmin). To login use:

In the PHPMyAdmin window that opens, go to top menu on the "Users" tab and click on the button located in the window that opens "Add user":

In the window that opens, enter the desired name of the database user using symbols. Generate and save "on paper" complex password, then put a tick in the box "Create a database with a username in the name and grant full privileges to it", click on the "OK" button located at the bottom right.

Now in your site folder in the OpenServer folder find the wp-config-sample.php file and rename it to wp-config.php, then open it for editing, for example, in Notepad ++. Enter in the fields shown in the screenshot the name of the database, username and password that we just set when creating this very database (do not accidentally erase the single quotes in which these values \u200b\u200bshould be placed):

Just below in the wp-config.php file, you can follow the link https://api.wordpress.org/secret-key/1.1/salt/ and copy the generated security keys. Insert them into place located just below the blank blanks:

Well, just below you can change the prefixes for the pages created by WordPress in your database. This can also slightly improve the security of the site.

Save the changes made in the wp-config.php file and go to the site by selecting its name from the context menu of the OpenServer icon in the tray:

On the page that opens, give the site a name (then you can change it, if anything), come up with a login (Latin and some other characters can be used), a complex password, enter your Email and press the button "Install WordPress".

After that, you will be congratulated on your success and offered by entering your just-invented username and password:

The admin address will look like "http: //robapera.loc/wp-admin/" - add it to your browser bookmarks so as not to type it manually. How to work with this engine further, you can learn from the headings: and. Just start reading from the end (at the bottom go to last page) to go from simple to complex.
Good luck to you! See you soon on the blog site pages
you can watch more videos by going to");">

You might be interested
 Install WordPress in details and pictures, login to WP admin and change password Gone left menu in WordPress admin area after update Where to download WordPress - only from the official site wordpress.org
  Reducing WordPress memory consumption when creating pages - WPLANG Lite plugin to replace the localization file
  High load on the server created by a WordPress blog and an extremely awkward solution to this problem