When reading articles about Photoshop, I am often amazed at how many authors make it difficult to solve essentially simple processing tasks. Many "monumental" writers suffer from this, for example Dan Margulis. But this is forgivable to him - his task is to write about all the intricacies and nuances of the processing process, to consider it from all angles and sides. Although it is precisely this feature of the presentation of material in his books that repels many readers.
In fact, the roots similar ways "Sharpen in 40 actions" grows out of a very simple thing - the people who write these tutorials have never worked with a large volume of photographs. That is, as a rule, they have a couple of photos and they are ready to kill an evening or two in the process of processing them. But when you have constant orders, and with each photo session you need to seriously process several dozen frames, you start to think about simpler and convenient ways processing.
We will talk about them today. I will tell you about five simple but very effective photoshop toolswhich I constantly use in my work.
Before editing photos in Photoshop, I always work with the frames in the RAW converter first. It is there that I do the main color correction and primary processing of photos. Basically, I create a "skeleton" of processing, and in Photoshop I work with the details of the photo.
So, we have worked with the photo in the RAW converter and open it in Photoshop. Photoshop meets us with a huge number of processing tools for all occasions. But we will talk about the simplest and most effective ones.

The main function of the Dodge Tool / Burn Tool is to lighten / darken individual areas of the image. Basically, you can "paint" the darkening, or vice versa - lighten the picture. It's very simple, give it a try: I am sure you will appreciate this tool. The Dodge / Burn Tool has only two, but very important settings.
Range - Select a field of application
You can use this tool on dark (Shadows), light (Highlights) or neutral (Midtones) areas of the photo. For example, you want to lighten the dark areas of the chin (when processing a portrait), and leave the light ones untouched. In this case, we set the Shadows mode to the Dodge Tool, and it will only lighten the dark areas of the places where we apply it.
Exposure - force of impact
It is very important to correctly set the impact strength Many people experimenting with Photoshop try 100% Dodge / Burn. And, darkening the image, they get black "holes", and brightening - solid overexposures. Of course, when they get such a result, they no longer come back to this tool. But Dodge / Burn is a subtle tool. If you are working on shadows or highlights, try the application strength of 7-10%, if with neutral areas - 10-20%. For each case, the strength of the impact is selected separately, but after working a little with this tool, you will begin to feel what kind of power is needed in each specific case.
Using
Dodge / Burn has a ton of uses:
- Lighten the iris
Just apply the Dodge Tool on the iris - this is the easiest way to lighten it. Thus, you focus the viewer's attention on the model's eyes.
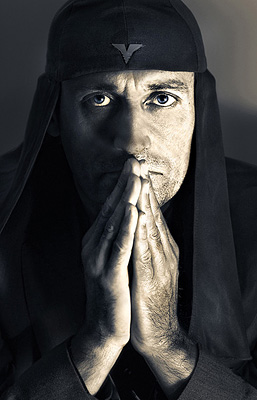
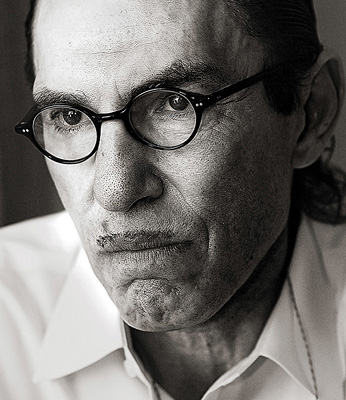
In all these portraits, I brightened the iris of the eyes precisely in order to draw the viewer's attention to the eyes and add psychology to the frame.

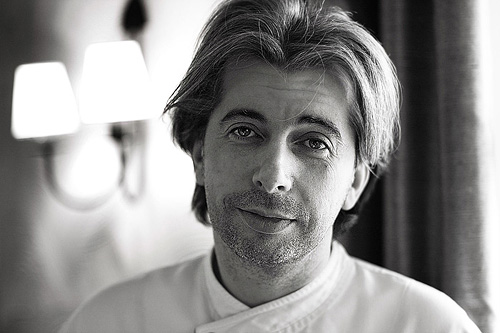
- Darken the lines of the face in a male portrait
Cheekbones, jawline, nose line, eyebrows - any facial lines, if darkened a little, will acquire greater volume and contrast. The man in the photo will look more tough and strong-willed.
I use this technique when processing almost all male B / W portraits. For color, this technique is not always suitable, as it “destroys” colors, but it works just fine in B / W picture.
In a woman's portrait, this technique must be used very carefully, since a woman will be decorated only by accentuating those facial lines that give her femininity. Otherwise, you will receive a portrait of a masculine creature.
- Brighten backlight areas
Backlight is a wonderful thing in itself. But if you use the Dodge Tool to enhance its effect, the picture will become even better. It looks especially great in concert photographs, when the musicians are illuminated by good backlighting.

- Whiten teeth for your models
It is using the Dodge Tool that it is easiest and most effective to whiten teeth in a photograph. A little later, I will definitely write a separate lesson on correct teeth whitening with the Dogde Tool.
2. Clone Stamp
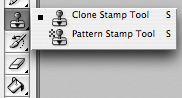
There are several tools for retouching images in Photoshop, and each of them is good in its own way. But "Stamp" is the most versatile tool to use.
Its function is to take a certain area of \u200b\u200bthe image and copy it. Thus, we can, for example, retouch wrinkles - simply "replacing" them with areas of smooth skin. To do this, press Alt and select the area from which the picture will be taken, and then, simply by clicking on the necessary areas of the image, we will copy it to them.
It is important to pay attention to two parameters in the stamp settings:
Mode
These are the modes in which the stamp will work. For example, in Darken mode, the stamp will only “replace” areas that are lighter than the selected area. In fact, you can darken the light areas of the image, which is why the name of the mode is Darken. And, accordingly, in the Lighten mode, the stamp will work only on the darker areas of the image, lightening them.
Clone Stamp has many modes of operation - experiment with them, I'm sure you will get interesting results.
In my opinion, it makes no sense to describe the operation of each mode - in Photoshop for all tools, essentially the same principles of operation of the modes operate, only slightly changing for the specifics of a particular tool.
Opacity stands for opacity. Simply put, the lower you put the percentage in this setting, the more transparent the stamp will be. For example, at 100% the stamp will completely replace the selected area, and at 50% it will be semi-transparent. For face retouching, as a rule, 10-30% is used, otherwise the stamp mark will be too clearly visible.
Using the Clone Stamp
- Retouch
Retouching in all its forms is the main purpose of the stamp. First of all, the stamp is used for skin retouching - to remove wrinkles, bruises under the eyes, swelling and other beautiful creations of Mother Nature.

You can also retouch, for example, an unwanted subject in the frame. Unless, of course, it takes up half of the photo.
It is very convenient to use a stamp to eliminate small overexposures. For example, your model has a small speck of overexposure on the tip of her nose. We take a stamp, set the Darken mode and darken this speck in a couple of clicks.
3. History Brush

History Brush is a time machine for photo processing. You can take any stage of processing and paint with a brush from it according to your image.
The History Brush is fraught with tremendous possibilities. I have already written in detail about the operation of this tool in a separate article. In it, you will find a detailed tutorial on the use of history brushes and learn how to sharpen only the areas of the image you need.
Sharpening is certainly not the only area of \u200b\u200bapplication. In future articles, I will tell you how to work with color in a photo using the History Brush.
4. Black & White
The Black & White tool is located in the Image-\u003e Adjustments tab. Or you can just create an Adjustment layer on your photo.

The main function of the Black & White tool is the "correct" translation of a color image into b / w. Correct because you can change the black and white display of each color. Thus, you can get a beautiful and "tasty" b / w picture.
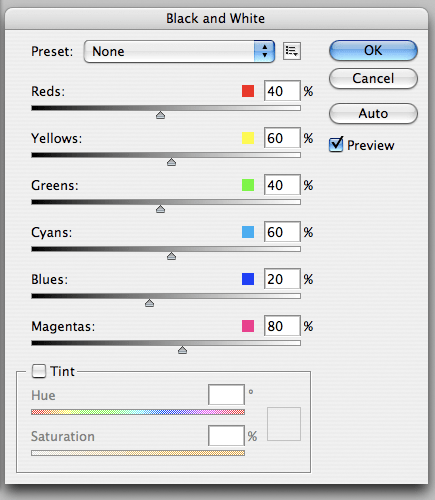
But the functionality of B&W is not limited to this.
With this tool, you can get a very interesting and color picture... Apply B&W to our picture and then turn on the Overlay layer mode.
Now, by manipulating the B&W controls and layer transparency, we can get a very interesting picture. For better clarity, I set the Opacity of the B&W layer to a fairly high 62% and turned the Greens, Cyans, Blues and Magentas controls to the maximum.
As we can see, the picture immediately became richer and more contrasting (click on the picture to enlarge).

Now let's pay attention to the check mark Tint... By enabling it, we can tint the image in the color we need.

Using
The options for using B&W in both color and B / W are a lot.
In one of the following articles, I, using the example of processing several photos, will tell you about all the main nuances of working with Black & White.
5. Shadow / Highlights

Shadow / Highlights is also located in the Image-\u003e Adjustments tab (by the way, there are many interesting tools there, I advise you to experiment with all of them)
This tool is designed to darken overexposed areas and draw highlights from shadows. Apart from the most obvious application of eliminating overexposures and under-highlights, S / H also works great for creating a sense of greater depth in a picture. We can add dark tones to the light areas, and light ones to the dark ones. Thus, the picture will become more voluminous and deep.
For example, in this photo using S / H I added volume to the puppy's coat and the picture immediately became more interesting.

In fact, Shadow / Highlights are an absolutely indispensable tool for any serious editing. Almost any photo can be made better with the right S / H.
I would like to talk about all the S / H settings and its functionality, but this is really a topic for a separate article. In the future, I will definitely come back to the Shadow / Highlights theme, but for now, just try experimenting - try different settings and see the result. In my experience, this is the most effective way to learn new things.
As we can see, all these tools are very easy to use, but at the same time they are amazingly effective. Try experimenting with them and you will feel how many possibilities they give when processing.
I think it's worth doing a series of articles on simple yet very effective tools in Photoshop. And in the next article I will talk about the tools for serious work with color in photography.
PhotoScape can do almost anything with photography!
PhotoScape photo editor, which you can download for free on this site, in Russian

For those who like to watch video tutorials on working with the program, I have prepared 3 video tutorials. I myself, sometimes, am too lazy to read some article about a particular program, but I try to find video tutorials.
1 video tutorial Duration: 17 min.
This lesson explores the "Editor" section. Namely, what can be done with an image in subsections such as:
- Home;
- An object;
- Crop;
- Tools.
2 video tutorial on working with PhotoScape photo editor.Duration: 16 min.
This lesson covers the following sections: Batch Editor, Page, Combination, and Gif Animation
3 small video tutorial on working with PhotoScape photo editor.Duration: 7 min.
This lesson covers the following sections: Screen Capture, Color Selection, and Page Templates.
For those who do not want to spend their time watching video tutorials and feel that they can master this program on their own (I mastered it myself), I have created a detailed description of how to work with the PhotoScape photo editor. Hope you find it useful.

PhotoScape is a great program. It is versatile and easy to operate. It has several main sections (they are at the top). Each section has its own functions.

1. Section "Editor" is the largest section in PhotoScape. It has many different functions. Here you can:
- change the size of the photo (make small from large and vice versa);
- you can stretch the picture to the size you need;
- change brightness, color, sharpness;
- use the function "filter", "auto level", "auto contrast";
- choose a frame and shape for the image;
- rotate the image;
Insert text (editable font, size, color, slant, shadow);
- insert a picture, another image, various figures and objects;
- draw lines and outline objects;
- pick up the color with a "colored pipette";
- crop the image;
- crop the image according to the specified parameters;
- remove the "red eye"; - remove the "mole effect".

. 2. Section "Batch Editor" - multifunctional section. Very good for a large number of photos, as it captures and remembers the "overlay" images and text. You can put the desired picture and text (4 options are saved for each) without selecting an image and without typing the text each time. Here you can:
- resize the picture;
- use the function "filter", "autolevel", "autocontrast";
- add image and text;
Select the appropriate frame.

..
3. Section "Page" - a very interesting section. Here you can:
- choose combinations of photos and images;
- change the size and location;
- apply a filter;
- select a frame;
- choose a background.

..
4. Section "Combination" - makes it possible to create combinations of different photos: two, three, four ... horizontally, vertically - as you like. You can also:
-
resize images;
- select a frame;
- choose a background;
- select an interval.
When you start photographing, it seems that professional growth comes very quickly. You will measure your skill by the improvements you see in your artwork and photographs you take. In this article, I will talk about the things I learned in four years of photography and share tips for aspiring photographers for professional growth.
Here are ten things I would like to know before I start shooting:
1. Vision changes
When you get serious about photography, you will never see things the same again. If your experience of critically studying things is the same as mine, you will find yourself staring intently at every photo and video you see. It became almost impossible for me to watch a film without analyzing the cinematography and the way of shooting. Cinema is a unique medium, but I still draw a lot of inspiration from professional photography.
Once you start chasing good pictures, you can count on your lifestyle to change. Waking up early or staying awake late into the night to get unique lighting will become a routine part of life. Personally, I think taking a closer look at good photographs is a great way to improve your work. If you plunge headlong into the world of photography, it will make the right lobe of the brain work more actively.
2. It's an expensive hobby
Photography is not cheap, especially if you plan on actively buying equipment. After purchasing your first DSLR, you signed up to buy a "system" of lenses and flash units that only work with that brand. If after that you want to sell everything and switch to another brand, it can cost a lot of money (I've done this enough times and I know what I'm talking about).
Buying a camera will force you to buy add-ons that are only compatible with it.
There are two approaches to avoiding the costly side of photography: First, don't tie success to the equipment you use. That is, you cannot convince yourself that an additional lens will make your work perfect. When it comes to equipment, there is no magic wand; the best approach is to buy everything you need gradually and thoughtfully.
Second, cut costs through savings. Buying used equipment seemed daunting at first, but over time it became a chance to buy cameras and lenses that were beyond my capabilities. Clever decisions such as buying a quick fix focus (more on that later) can help you cope with equipment collection syndrome. Keep reading and learn how to do right choice.
3. Skip your feet
When I first started studying exposure, my mistake, which I often talk about, is trying to study its mathematical scale. Measuring stops of light and memorizing the f-number scale is a huge waste of time.

Study of allf-numbers and cramming the exposure scale are common for newbies, but they are not the best use of your time.
It is more important to understand how the exposure triangle works, as well as learn how to balance and be creative with the exposure. Don't worry about counting your feet and conveying the light perfectly, there are many other things, like posing models correctly and controlling lighting.
4. Switch to manual mode
The sooner you start to truly control the exposure, the sooner you will cease to be the person who is just clicking buttons. This is not always easy - you need to learn a lot about metering, exposure, focus, and other things.
Going beyond the automatic exposure mode is the most important step to go from beginner to master. Once you begin to take control of the photograph and learn to deal with the nuances of exposure, you turn the work upside down and can predict the result. You will use lighting, create creative exposures, and come up with many scenarios for the camera to handle on its own.

A tricky backlight situation.
A great intermediate step is learning how to control one additional factor at a time. Start by understanding ISO, how it affects the shot, and the light that hits the sensor. Then you can move on to controlling shutter speed and aperture, also examining the visual changes from them. Working on exposure or aperture is an important training step towards full manual exposure control.
5. Shooting takes time
It sounds painfully primitive, but I've often forgotten that the only way to really improve my skills is to hold a camera in my hands every day, constantly taking pictures. The only way I could use it was to set aside time for filming between school and work.

How can you get better if you don't take the time to shoot? It seems so obvious, but like many, I fell victim to this belief. Shooting with friends and the presence of a competitive element - two better way keep yourself busy with filming and improve skills.
A great way to keep taking photos is to challenge yourself. If I have a task, even one assigned by me, the chances of me getting out and taking pictures are much higher. There are tons of photo challenges on the Internet that will not let you relax. If you choose this approach, various challenges and assignments will help keep yourself creative.
6. Prioritize Lenses
The key to avoiding unnecessary spending on equipment is to make smart purchases and use them right away. The first two years of my photography career were spent jumping from one carcass to the next. I was chasing megapixels, more focal points, and anything else that I thought should improve my shots. In the process, I always found a way to avoid buying what really mattered: lenses!
Getting attached to the cheap kit lens that comes with your camera will limit your options. While you can take great pictures with a standard lens, it has its limitations; these are usually 18-55mm lenses with a slow aperture, which forces you to shoot only in well-lit areas. If you cut it down to f / 8 or so, the pictures will be sharp, but not enough.
It might seem like this point contradicts one of the previous ones, constantly demanding more equipment for better shots, but there is a reasonable grain in buying lenses. It is much more important to make the right choice by purchasing a faster (wider aperture) lens that will produce great shots.
7. Don't rush to become a pro
After you've been shooting for a while and have already started exhibiting your work, there will be a chance that you will receive your first orders. Whether it's a friend's graduation portrait, landscape photography for print, or a wedding (the most dangerous thing to do), friends will always be looking for someone (usually cheap) to capture their precious moments.
Of course, the chance to quickly monetize your hobby looks very attractive. This will help you buy new equipment and make ends meet. However, there are some nuances that cannot be predicted. Dealing with difficult clients who terminate a contract at the last moment, risks of legal liability and many other things are all integral parts of the professional process. No matter what your relationship with the client is, you will always be in the position of receiving payment for the services provided. Take your time to get into professional photography and be careful.
8. Always take your camera with you
You will never get good shots if the camera is at home. I told myself that if I left my camera at home just once, that day I would lose my chance to win the photojournalism award I had been waiting for. Therefore, you can rarely see me without a camera. It doesn't matter if you carry your DSLR or iPhone with your favorite app, your photography tool should always be at hand!

It is impossible to take pictures without a camera. Whether it's a DSLR, a soap dish or a smartphone camera, you should always have a shooting tool close at hand to improve your photography skills.
What's more, the 'always carry' philosophy has largely shaped my recent hardware decisions. I will not buy another huge carcass that will lie in the bag, because what difference does it make how high quality it is if it is not used anyway. I don't need this at all.
9. Buy a quick fifty dollars
If your current camera has an interchangeable lens type, I can't think of a better "second" lens than the 50mm. Usually their apertures are f / 2, f / 1.8, f / 1.4, which is great for low-light shooting and allows you to control depth of field in a way that a whale lens can never. If you're using a smaller APS-C format sensor, a 35mm lens will create almost the same field of view as a fifty-kopeck piece on a full-frame camera.

A 50mm f / 1.8 lens is almost always recommended and for a reason. With a wide aperture, you can shoot in low light conditions and work creatively with depth of field.
For me, the main creative opportunity is depth of field control. If you are not familiar with this concept, it is responsible for how much of the frame's content is in focus. Lenses with a wide aperture (such as f / 1.8) allow only a small part of the image to be in focus.
10. Examine the camera in detail
Another way to improve your photography skills is to understand the tools you are working with. When you don't have to think about which buttons to press and what technical decisions to make, you can approach photography from a creative perspective. You're thinking about lighting, not the numbers on the aperture control. If you study every option, every setting, every camera control, it becomes an eye extension.
It may sound silly, but a thoughtful reading of the camera manual is a great way to get started. It's even better to shoot every day, diving more and more into the settings.
conclusions
Looking back over the four years that I have been seriously involved in photography, it’s hard to even say how much photography has influenced my life. From the friends I have met to the commercial experience that has come over time, photography can be a great positive experience for both amateurs and professionals who have been doing it all their lives.
What things would you like to know when you first started filming? What have you learned during your career as a photographer?
“You need to find what you love.
And this is as true for work as it is for relationships.
Your job will fill most of your life and the only one
the way to be completely satisfied is to do what
which in your opinion is a great thing.
And the only way to do great things is to love what you do "
Steve Jobs
What does it take to become a stock photographer (illustrator)?
If you do not know how to sell your photos on the Internet, what you need to start cooperating with photobanks - read this article.
First of all, you need to understand that money is not paid just like that anywhere, including in photo banks.
Collaboration with photo banks is the same job as any other. The only difference is that it allows you to combine a creative component, a decent level of payment and independence from where you live.
It is better to work with several banks at once, because this increases income, and does not require much more effort if you load by 1-2 (if you attribute the photo immediately in Photoshop in the file properties and send files via FTP to all stocks). Another positive point in working with several photobanks - if for some strange reason they did not take a good photo from you in one, then most likely they will take it for sale in another.
Here's what you need to get started first:
For photographers: a high-quality camera, any SLR will do. Basic work in Photoshop. For illustrators: knowledge vector programs and the ability to draw; ...
Computer literacy and a computer with Internet access. Moreover, it is desirable that the access was not through a regular modem (Dial-up connection), but through an ADSL connection or a dedicated line. You will often need to upload large amounts of data to photobanks, so it is best to take care of the convenience of this process. Although, many at the initial stage manage to get by with Dial-up access. Availability ;
Basic knowledge of English. You will need it in order to compose a short description of your work, and select keywords for them. A job description is just one short sentence (about 5 words). And the optimal number of keywords is from 30 to 50. At first, it's convenient to use a free online translator or this one from Google. Shutterstock has a lightweight keyword search feature (more info at).
Sufficiently high-quality work with topics suitable for stock photography (people in different situations, isolated objects on a white background, etc.)
These works will be needed for the exam, which is available when registering in leading photo banks. It is desirable that the resolution of your work is at least 4 megapixels (for example, 2000x2000 pixels). Otherwise, you will not be able to work with all photo stocks. If your photos show faces or other recognizable body parts of people (tattoos, piercings, etc.), then you will have to sign with them. This is a one-page document that must be signed by the photographer, model and one bystander.
After that, proceed to registration in photobanks.
Requirements for work
First, the quality. The work must be at least 4 megapixels (resolution 2000x2000 for example), jpg format maximum quality (minimum compression quality), sRGB color space.
If it is a photograph: the photo is checked at 100% magnification, there should be no noise on it, there should be correct exposure and white balance, there should be no HA (blue or red borders on the edges of objects, easily removed when converting RAW), the frame should be sharp and contain any idea (except in the case of an isolated photo of objects or something like that), the focus should be where the buyer wants to see it.
In more detail, the issue of requirements for the quality of images on microstock is discussed in the article:
If it is 3d: at 100% magnification there should be no noise and polygons of objects (smoothing, smoothing and again smoothing :)), the model or plot should not be very simple, or should contain an idea as in the cases of conceptual works. In addition, the photo or 3d should not contain compression artifacts that are obtained during translation, for example from tiff format in jpg if you set compression, you should save work only with quality level 12 regarding Photoshop.
Requirements for video clips:
- duration - no more than 60 seconds, NTSC 29.97fps or PAL 25fps
- frame size - at least 480 in height, aspect ratio at least 4: 3
- any digital format file including DV, Windows Media and QuickTime
- sound accompaniment missing or you are its copyright holder
- absence of logos, recognizable faces and brands in the frame without a permit release.
Secondly, the topic. This is a very important point, which not all beginner stockers manage to meet.
Topics are in demand: business, people, health, sports, subject photography (mostly on a white background).
Unclaimed: flowers, cats, dogs, view from the plane's window, forest.
Third, the keywords and description of the photos on english language... The most important thing to remember here, in spite of the fact that you can write descriptions of photos immediately after uploading the file to the stock - this is completely inconvenient, since with a large number of photos and stocks, this is a rather laborious work.
But the way out of this situation is simple. After processing the file in Photoshop, just open File - File info, in the window that appears, fill in the three fields of interest to us:
Title (title);
Description (discription);
Keywords (keywords).
We will use the keyword selection system - the Service for the selection of keywords, by entering in the "Key words for search:" one or more keywords in English vividly describing your work (for example, if you photographed a tree, you can enter "nature tree") and from the appeared works, select the ones that are most similar to yours, then you will be taken to a list based on your choice. Shutterstock has a lightweight keyword search feature (more info at).
Next, select the required ones (30-50 pieces) and fill them in keywords in Photoshop. Put your keywords in a specific order - the most important words come first. This determines the location of the image on the search pages. IN keywords should be what is in the photo, and not what is not there. Spam in keywords and descriptions can lead to account blocking.
The title (title) can be described in a few words, and in the description (discription) it is necessary to write what is shown in the picture, and perhaps some nuances, such as isolated on white.
If the photo shows an architectural monument, a building with a special design, then you may need to prop a release (), which can also be found on photo banks. You should not be afraid of this, because, as a rule, many architectural structures are entered in the register of permitted for filming, and if you yourself, for example, painted the picture that you photographed, you can fill out the release for yourself.
In what sequence to master banks of photos:
There are 2 ways here, and it's up to you to decide which one is more suitable for you:
1. The most common way is to start with
Each of us wants to learn how to process photos on our own, without resorting to the help of specialists and photo salons. To remove any defects in the picture and significantly improve it, you should use a Russian-speaking program - for example, the Home Photo Studio program. In this review, we will focus on the main features of the product and figure out how to work with photos at home.
"Home Photo Studio" - powerful and convenient program for working with photos
Endless possibilities for creativity
The program for working with photographs allows you to perform complex processing of images of any format and resolution, including photos in TIFF and RAW. Superficial and deep retouching, conversion from one extension to another, elimination of visible defects, cropping, applying effects and masks - this is not a complete list of available options. In addition, the list of functions is constantly updated.

Photo editing functions catalog - just select the option you want and get started
Use this application can be both an absolute beginner in photo editing and a confident professional. Thanks to a clear interface in Russian, easy navigation and an intuitive online textbook, learning the basics of working with the program will not be difficult even for a student.
Retouching photos without leaving home
The program for working with photos gives all users an excellent opportunity to try themselves in the role of a retoucher, independently improving the image. Due to special filters presented in the "Home Photo Studio" in just five to ten minutes you can make a photo suitable for posting on social networks or on the website.

The stamp allows you to remove minor defects in a portrait picture, as well as "unnecessary" objects in the frame
If there are strangers or objects in the picture, they can be easily removed by cropping. The standard red-eye reduction option is activated by clicking on the blown pupils. And for those who want to get rid of pimples and correct clothing imperfections, the editor offers a very convenient "stamp" tool that masks any imperfections in a few clicks. The program will not leave aside those who are interested in fixing brightness parameters or eliminating noise.
Artistic processing: effects, editing and more
For people with creative inclinations, it will be good news that the "Home Photo Studio" has ample opportunities for artistic editing. So, these include a catalog of effects and masks, a built-in generator of postcards and calendars, as well as convenient functions photomontage, replace and blur the background.

In the editor, you can easily perform a spectacular photomontage and combine photos
For the birthday of relatives, you can stylize antique photographs or a pencil drawing, and give your other half a picture in a beautiful frame for Valentine's Day. If you want to play a prank or surprise a friend, just make a small collage by placing a face or silhouette against an unusual background. In addition, you can generate a bright greeting card or calendar for the New Year.