The first photobooks appeared in Europe and quickly became popular and in demand. With an original design, large-format shots glued together in a special way are an excellent way to decorate.
Photobook is the best place for photos
With the help of a photobook, you can beautifully and originally arrange digital photographs. This will help organize a large number of photos and capture the happy moments of life on colorful pages. There are many reasons for such a creative impulse: a wedding, a trip, the birth of a baby, a prom, an evening of meetings and much more.
You can capture in an interesting way the history of the family, a thematic photo session, the achievements and successes of the child, beautifully arrange various or drawings. A handmade photo book is also a great gift for friends or relatives.
Having decided on the theme, it is worth thinking about the design and design, as well as the size and format. You can order a book from professionals, or you can make it yourself, make this activity an exciting hobby, or even turn it into a profitable business.

Photo album and photo book: which is better?
Probably, there is nothing simpler than a standard album: you just need to print out photos and insert them into transparent pockets. Easy and boring. Another thing is a photo book, which can be arranged in any way, choose colors and backgrounds, frames and interesting patterns, the number and size of pictures. Holding it in your hands is much more pleasant than flipping through an ordinary album or looking at photos on a computer monitor.
It is very easy to make a photo book with your own hands, and it is not only exciting, but also profitable. You can even save on printing services and glue the book yourself, after mounting it on your computer. The layout of the book can be created using special computer programs and editors that make the process more interesting and easier. Standard photo albums are slowly fading away, giving way to more interesting ways of decorating memorable moments of life.

Original album-book: where to start?
How to make a photobook with your own hands? Yes, very simple. First you need to stock up on the electronic version of the photos. In the computer of a modern person, there are at least several thousand of them, or even more - there are plenty to choose from. In another option, the pictures of interest can be scanned or arranged for a new photo session. Interesting options are obtained in any case. The only negative: after scanning, the image quality may deteriorate. But when using modern cameras with the quality of questions should not arise.
This is followed by choosing a topic and searching for a program on the Internet. A do-it-yourself photobook still involves the use of editors. Such programs offer the layout of future pages on which the pictures are superimposed. The user himself chooses the size and number of photos, as well as pictures, frames and backgrounds. It is possible to take notes or print the whole story in different fonts.

Photoshop to help you
How to make a photobook with your own hands? There are a huge number of websites and programs offering assistance in creating and printing. The process of working with the simplest of them is to drag and drop photos into the editor, select the background and design frames. The famous Photoshop is an excellent program for editing digital images, as well as creating all kinds of collages and photo books. However, some knowledge, skills and abilities when working with this editor are worth acquiring. However, any skill comes with experience.

How else is a photo book made with your own hands? Luma Pix Foto Fusion is also useful and easy to use. It allows you to create a book from the proposed photos automatically. The editor contains a huge number of colorful ready-made templates, a lot of ways to decorate and transform pictures. The program is mastered quite simply with the help of video tutorials. Photobooks are really colorful and interesting to look at. However, the program requires activation, otherwise the result of creativity will overlap

There are also programs that do not require activation. Their download is offered by sites that print photo books. These include Myfotobooks, Fotoboo, Imagebook, Printbook. After creating a virtual album, the program itself sends it for printing. Also there you can find a lot of interesting information on the topic "Photobook with your own hands." A master class of this process inspires creativity.

The electronic layout of the photobook is ready. What's next?
When the project is ready, carefully reviewed and checked, it is time to choose further actions. Option number 1 - sending the book for printing and ordering binding with further mailing. Of course, this pleasure is worth a lot, but the result of such work is impressive.
Option number 2 - print the pictures and glue the book yourself, as well as pick up a beautiful soft or hard cover. In this case, it would be best to use self-adhesive paper for printing photos, and buy sets of stickers for decor. Both courses of events are good, but a photo book, created with soul and strength from beginning to end, evokes special feelings, although it involves a laborious process.

If your creative choice was a photo book created with your own hands, then before designing it, you should carefully study the capabilities of the selected editor. Practically all of them have the function of choosing a design, cropping, and so on. To make a beautiful background, you can search for images of a picturesque area, a variety of natural landscapes.
The cover of the photobook deserves special attention. It usually contains the best and favorite photo from the list. Binding options can be very diverse. On the pages of the book you can place notes and comments on the pictures. So even more interesting will be a photo book with your own hands. Album templates are not limited to helping you beautifully arrange moments in your life. Samples can be used to create a portfolio or catalog to advertise any product.

In the modern world, photography has acquired the features of a true art, and thanks to new design methods, various inserts and effects, it can sparkle with new colors. With the development of digital technologies, with which it is much easier to make compositions from photographs, the interest in simply flipping through live pictures does not disappear, and photo books make this process even more enjoyable.
Creating your own photobooks is associated with high costs in the form of time spent, search for materials, etc. But there are, of course, pluses - in this embodiment, you get an original composition of photographs neatly folded together in a beautiful package. In addition, how to make a photobook in the program Adobe Photoshop not everyone knows, and now you have the opportunity not only to create it, but also to execute it in your corporate style, add effects to frames, make a photo collage and put into practice many other functions.
Let's start with the fact that you will still print a photo book in the studio, so the requirements that photo centers make must be taken into account. You can, of course, print the book yourself on a printer, but this type of product will clearly be inferior to professional performance, so we will consider only a qualitative type of product. To do this, you first need to decide where you will print the photos.
There are a huge number of options for photo books and their formats, for example, you can order a classic version in the form of a book cover in horizontal or vertical design, as well as a minibook or a square. All of these books are divided by size - from the standard A4 (a sheet of printer paper) to 30 cm wide and high, and some darkrooms offer a wider range of formats. There is one limitation here - the smaller the volume of pages - the less load on the joints between them, and also more convenient for viewing.
Typically, photo centers provide their own software to organize your photos into albums, or offer an online service to intelligently embed images on various backgrounds, frames, etc. But, you must admit that in this way you can only make standard and boring photo albums, which are not only not interesting to view, but also ashamed to show to your relatives, friends, etc. After all, they will not appreciate the usual approach to a wedding album, for example, so we suggest designing an album in your own style, as well as improving its visual perception through independent work.
If you have already chosen a suitable photo center, then we are looking for useful information on the formats and pricing of photo books on its website.
Note: The layout is the original file with your work.
It is worth paying attention to such points as:
- Resolution in layout
- color model
- Accepted file types
- Layout and numbering of layout files
- Page cropping
- Hard cover fold
- safe area
- Binding
- Seal
- Cover
- Bookend
- Additional data
Let's look at everything in order:
The permission in the layout is necessary so that you know that the resulting files will not be changed, more specifically, their own permission. Those. you see on the monitor a high-quality image with a resolution of 800 by 600 pixels, but you saved the resolution in the file differently and set it not to 300 dots per inch (dpi), as is customary in printing, but, say, to 150 dots per inch. By contacting the photo center, such a file will be automatically transferred to their workspace, and your picture will lose its original quality by enlarging the image to 300 pixels. To prevent this from happening, set the values that are indicated in the technical features when making photobooks.
Everything else also needs to be set in the Photoshop settings, as indicated in the characteristics of the darkroom. These include: color model - usually a profile sRGB, also the files must be saved with the layers already flattened into one and with the extension TIF, PDF, JPEG. I recommend choosing the TIF format, since it is the basis of printing and is used there, which cannot be said about the compressed JPEG image format or a separate PDF format. Moreover, the last format still needs to be known HOW to save, so as not to lose data and image quality!
As for the layout and numbering of the final result, companies may have different requirements here, so look carefully at the technical features of the output files. It depends primarily on the equipment where layouts are printed, so many manufacturers require their own settings.
Hemming, trimming pages, as well as cover, endpaper - all this data is needed to prepare the layout within the program Adobe Photoshop, so study them thoroughly so that later the designer does not correct your files, and also you do not spend extra time processing the material.
The materials and technologies for making books can be radically different from each other, so you first need to decide on their choice when creating a photobook layout.
Vera Mironova, family photographer: opens up the opportunity to express yourself creatively, to tell your photo story. The subject can be anything. This is the story of your baby for a year, and vivid impressions of a summer vacation, and photos with your beloved grandparents, collected specially as a gift. A matter of your imagination. There may be photos of large and small sizes, full-page photos, comments and memorabilia. Photobook is a flight of creativity!
Here are some tips on how to easily and simply make a spectacular concise photo book.
Design
When creating my photobooks, I adhere to the principles of simplicity and contrast.
For example, on one page of the spread, you can place a half-length portrait of a child, and on the second - in full growth. This creates a "big/small" contrast. Another option is to place a color photo on one page and a black and white photo on the other. Or on one page - one large photograph, on the other - a series of pictures of the same subject.
I also love the simplicity of the design. This means that I do not use any patterned frames, additional pictures and background substrates. In my opinion, all this distracts from the essence.

A full-page photo will not leave anyone indifferent. After all, the larger the size of the photo, the greater the effect it produces. A group portrait, a single portrait, a landscape are all great options for spreading a photo book.

When framing, pay attention to the principle of sufficiency: in this case, the child has “left” bangs. If the bangs are “cut off” when cropping, then the photo will look inharmonious. Harmony arises from the fact that we have the opportunity to "think out" the girl's hairstyle. So always be careful if your framing leaves room for "finishing" finish.
Typical mistakes when making a photo book:
- Placement of two identical photographs on one spread. For example, in one photograph, the child looks directly at the viewer, and in another (with similar framing) - to the side. In this case, the photos are placed as follows: on one page one, on the other - the other. The principle of contrast in this case is not observed, and the viewer will not be interested and bored to consider this spread.
- Placement of a large number of photos of the same size on a spread. Again, the principle of contrast disappears. The viewer does not understand what to focus on, and the gaze begins to wander incoherently.
- The use of a large number of various "decorations" - frames, pictures, multi-colored substrates. All this distracts the viewer from contemplating your photos and, most importantly, from the Heroes of your photo book.

A spread option using a photo as a background (with reduced transparency) and a series of shots.
Layout
Nowadays, there are many companies involved in the production of photobooks. As a rule, they all have their own convenient and easy-to-use photobook layout programs. In such programs, there are options for spread templates that allow you to quickly and easily select the desired photo arrangement.
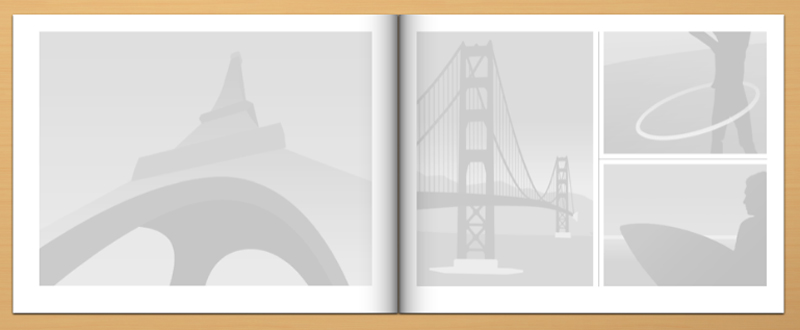
Photobook spread template
You can also prepare spreads for your future photo book using a graphic editor, for example, in Adobe Photoshop, after downloading templates for layout on the publisher's website.
Cover
Most often, manufacturers offer a choice of several cover options: a photo cover, a cover made of artificial and natural leather, a cover made of fabric. It is also possible to insert a photo into a cover made of leather (both artificial and natural) and fabric. I like the imitation leather version with a photo insert, as well as the embossed cloth book, because of its practicality and individuality.
When creating the cover design, I also adhere to the general principle - simplicity.
For the cover photo option, you can fit the photo to the full size of the cover. Most often, the photo cover can be made either matte or glossy. As practice shows, the probability of scratches increases on a glossy cover. The matte cover is more practical, and in turn makes the photo visually “warmer”.
Photobook size
My choice is a book in the form of a square measuring 30x30 centimeters. In this option, it is possible to place photos in full spread (30x60). You can also place both vertical and horizontal photos on one page, as well as several photos on one page. In addition, 30x30 is a fairly large photobook size with the ability to show large-sized photos.
Number of spreads and paper
The number of spreads directly affects the type of paper selected. If it is 25-30 spreads, then it can be matte or silk paper applied on a thick cardboard base. In this case, the sheets will be dense and thick, and the book itself will be quite weighty. With the silk paper option, you will have additional page protection against fingerprints.
Over 30 spreads, it is better to choose thin, dense matte or designer paper. In the version with designer paper, the sheets of your future photo book will be tempting to touch.
Photo selection
The selection of photographs for a future photo book can sometimes lead anyone into a stupor. There are so many photos, and the number of spreads is not infinite ... First of all, call on your initial idea to help. For a photo album for the year, you can group photos by month, and select 10 key ones for each month.
By the way, there are special programs for grouping photos by periods (for example, Adebis Photo Sorter). You collect all the photos in one folder and run the program by setting its parameters:
- where to put the sorted files,
- interval for selecting photos (day, week, month),
- folder naming rules.
As a result, you will get a catalog with photos sorted by periods in folders. For everything about everything - 15 minutes of time.
For a photo book about summer holidays, you can mark key events for yourself and, based on them, make a selection of photos.
When choosing photos, listen to your emotions and feelings. If positive emotions and a sense of harmony arise inside you when contemplating a picture, then this photo is significant for you. Listen to yourself.
Copies of books
The photo book can be ordered in several copies - as a gift to relatives and friends. Available in original size or reduced. It is difficult to come up with a better gift for loving grandparents.
Conclusion
Perhaps the most pleasant and joyful moment in the process of creating a photobook is the final one, when you pick up your brainchild. You physically feel your favorite photos, cover material, pages… All this can only be felt. Photos should be tangible and warm us with their warmth and mood.
Creative success to you!
Photobooks appeared with the development of printing technologies and were luxurious gift copies made on the highest quality glossy paper. Initially, they were positioned as illustrated catalogs, but over time they became available to a wide audience. With the help of a graphic editing program at home, you can make a photo book completely unique in a single copy!
A very personal gift
If you still haven’t figured out what to give your best friend for her birthday or mom and dad for their wedding anniversary, believe me, you can’t think of a better option. Imagine that you can insert any moments captured on film into a photo book, create collages, choose a theme and design, insert quotes from your favorite songs or cartoons into an album.
You can order a photo book in a special salon, or you can do it yourself. To do this, you will have to master the graphic editing program, the first time the work will require patience, but then the skills will definitely come in handy.
How to make a photobook: where to start?
How to start creating a photobook with your own hands? First you have to decide on the theme of your album, what will it be about? The theme will set the direction for the selection of images and design.
Here are a few options to choose from:
- Family vacation, and not necessarily in one year. It can be the history of all family travels, with comments, interesting facts or small funny incidents from the life of the household;
- A wedding album may include not only photographs from the celebration, but also a background: acquaintance, joint holidays, bachelorette party, stag party, etc .;
- For parents, you can choose images that tell about the history of the family, the birth and growing up of children, grandchildren. Don't forget to include photos of your pets in the list;
- A children's album includes the stages of a child's growing up over a certain period, for example, a year or two.
When you decide on a theme, it will become easier for you to make a selection of photographs needed for the book by creating a special folder on your computer desktop. Copy into it all the pictures that may be useful in your work, the main thing is that they match the chosen direction.
Creating a Photobook Layout
This stage seems to many to be the most difficult, but meanwhile it is necessary, just like a drawing of a future house, a sketch of a drawing, preliminary sketches.
By creating a paper layout with your own hands, you will clearly represent:

- how many pages it will have;
- what size will they be?
- on which pages you will place certain pictures and collages;
- where inscriptions, quotes or any other text will be located;
- where to place decor elements, and how you want to see them;
- how you want to decorate the cover of your book.
To create a paper "photo book", you just need to fold several A4 sheets in half and glue or stitch them along the fold line.
When choosing the sheet size of a future book, you should pay attention to the following subtleties:
- What are you going to print your images on? Sometimes the size of a book is immediately limited by the availability of special paper for the printer;
- For graphic editor programs, the spread parameters vary, this will also be one of the determining factors of size;
- What size will be the cover of your book - this is the third detail that determines the format of the work;
- The image that you want to place on the cover of your book is best printed on self-adhesive paper.
The cover can be picked up in special centers, where you will also find paper of the required format, stickers for clipart and other little things that are pleasing to the eye.
Online editor to create a photo book
The next step is to work with a program that will allow you to:

- select the page size and place a photo or part of it on it;
- create a page background on which images will be located;
- process images by removing or bringing contrast, sharpness, eliminating defects, correcting them where necessary;
- place decorative details and decorations in the planned places;
- place notes, quotes, inscriptions on the pages of the book, which can be scanned and edited in a graphic design program.
Photobook layout for printing
The book can be created in a do-it-yourself graphic design program, down to various clipart details, inscriptions, the number of spreads and the fill of the main background on which the photos will be located. But do not print and bind on your own, but do it by sending the layout to the email address of one of the centers that deals with this professionally. Beforehand, you should study the price list of options that this company offers, perhaps discuss various details with employees and pre-order.

In this case, the book from the first to the last page will be created by your hands, but printed in a photo center, and this will not diminish its merits in the least. Professionals, at your request, can make color correction or add missing details that you could not insert yourself.
The most expensive option is a book with a large number of spreads, with sheets of non-standard sizes, in a hard glossy cover.
DIY photobook
This option assumes that you have absolutely no skill in working with graphic editors, and you have no time to learn. To create such an album on your own, you will need ready-made images or copies scanned on thick paper.
Place them by creating a new document in Microsoft Word (on one standard A4 page, you can fit six 8x8 photos, so you should have several pages for an 8x16 book, which will fold in the middle and contain two images). After you print them, you can start assembling. Recall that there can only be an even number of pages, plus an image on the cover.
For work we need:

- stationery knife;
- double-sided paper tape;
- thick cardboard;
- adhesive tape on foam rubber;
- thick cardboard for the cover.
After printing, you should have several sheets of thick paper with images, 8x16 in size, which need to be folded in the middle. As a result, we get several folded pages, with the colored side inward, the outer side of the pages is fastened together with paper tape.
For the cover, we cut thick sheets of cardboard according to the format with a clerical knife, glue them on the outside of the future book. Before decorating the cover, the end should be glued with a piece of beautiful fabric, without pulling it too hard. Be sure to leave a centimeter on each side, so that the fabric overlaps on the cardboard.
How to make a photo book cover?
Here the flight of your imagination can not be limited at all. If it is better not to insert voluminous decorations inside the photo book, as the pages will deform and close loosely, then any shells, pebbles, twigs, even funny figures can be glued onto the cover. It all depends on the theme you choose, in online stores for needlework or scrapbooking you can buy amazing sets and make the cover unique.
When I first encountered the design of my own photo book,I had a lot of questions. Finding answers to these questions took a lot of time. Then I came across an article by one wonderful girl who explained in detail how to create a photo book with your own hands. Thanks to her, this passion appeared in my life. I will try to repeat her feat - to describe the whole process of creating an individual design for your unique photobooks.
It all starts with what you have to think through
1. What type of photo book will you choose. In this article I will talk about the individual design of premium photobooks. In photobooks "Premium" the turns of the indoor unit are revealed by 180 degrees. This allows you to use the entire space without loss and place images at the joints. Features of a photobook of the "Premium" type
2. Select a photo center where you can print premium photobooks. This must be done from the very beginning, because. on the sites of these photo centers you can find out the sizes of the sheets of your future photo book.
3. We proceed to the choice of the size of the sheets of the photobook (we choose from those sizes that the photo center offers). I want to clarify that the sizes of the sheets of a photo book for self-creation in different graphic editors (including Photoshop) are different for all photo centers !!!
4. Now, you must decide on the content (themed). What event or holiday is your photobook dedicated to: vacation at sea, birthday, anniversary, wedding, first bell at school, or maybe just the past summer. In addition, it will be interesting if the book contains not only your photographs, but also text (your memories, poems, notes from diaries, notes from your kids' albums), memorabilia (such as postcards, notes, tickets to the theater or cinema, souvenirs). Such nice little things can always be photographed (scanned) and added to your photo book.
5. After that, you need to choose the style in which your future photo book will be. What I mean? If you are going to make a photo book about a baby, then it is natural to use bright and cheerful colors, and if it is a wedding or an anniversary, then soft colors will be more suitable. But this is your individual choice. There are no rules here. Everything is decided by your preferences and imagination. Examples
6. The next step is to choose a background on which the entire composition of your photobook will be built. It can be a background from a photograph, a nature background, a texture background (wood, paper, fabric), a solid background, a gradient, and much more. The background can be the same on all pages of the photobook or different on each spread. All this can be found on various Internet resources.
7. After choosing a background, we prepare photos that will be used in the design of your photo book. If necessary, we process them (color correction, sharpening, eliminating photo imperfections, etc.), but for the first work, all this can not be done.