After completing all operations on the image (photograph), it must be saved to your hDDby choosing a place, format and giving some name.
Today we'll talk about how to save finished work in Photoshop.
The first thing to decide on before starting the saving procedure is the format.
There are only three common formats. it Jpeg, PNG and GIF.
Let's start with Jpeg... This format is universal and suitable for saving any photos and images that do not have a transparent background.
A feature of the format is that during the subsequent opening and editing, so-called "JPEG artifacts"which are caused by the loss of a certain number of pixels of intermediate shades.
It follows that this format suitable for those images that will be used "as is", that is, they will no longer be edited by you.
Unlike the previous format, PNG when re-editing (used in other works) does not lose quality (almost).
The last representative of the formats for today - GIF... In terms of quality, this is the worst format, as it has a limit on the number of colors.
Let's practice a little.
To call the save function, go to the menu "File" and find the item "Save as", or use the hot keys CTRL + SHIFT + S.


This is a universal procedure for all formats except GIF.

Substrate
We already know the format Jpeg does not support transparency, so when saving objects on a transparent background, Photoshop offers to replace the transparency with some color. By default, this is white.
Image options
The picture quality is set here.
Variety of format
Basic (standard) displays the image on the screen line by line, that is, in the usual way.
Basic optimized uses the Huffman algorithm for compression. I will not explain what it is, look for yourself on the net, this does not apply to the lesson. I will only say that in our case this will slightly reduce the file size, which is not relevant today.
Progressive allows you to improve the image quality step by step as it is loaded on a web page.
In practice, the first and third varieties are most often used. If it's not entirely clear what this whole kitchen is for, choose Basic ("standard").
Save to PNG
When saving to this format, a window with settings is also displayed.

Compression
This setting allows you to significantly compress the final PNG file without loss of quality. In the screenshot, compression is configured.
In the pictures below you can see the degree of compression. The first screen is with a compressed image, the second is with an uncompressed one.


As you can see, the difference is significant, so it makes sense to check the box opposite "Smallest / slowest".
Interlaced
Customization "Remove selection" allows you to display the file on the web page only after it has fully loaded, and "Interlaced" displays the image with a gradual improvement in quality.
I use the settings as in the first screenshot.
Save to GIF
To save a file (animation) in the format GIF necessary in the menu "File" select item "Save for Web".

You don't have to change anything in the settings window that opens, since they are optimal. The only thing is that when saving the animation, you need to set the number of repetitions of the playback.

I hope that after studying this lesson, you have got the most complete understanding of saving images in Photoshop.
Hello. Today we will talk about how to save the result. After all, there are so many formats, and for some reason there are 2 types of saving: Save as and Save for Web & Devices.

Let's start with the file types. I will make a reservation, we will not consider all possible extensions, only the main ones. Consideration will be rather brief, because in detail about each of them you can find a lot of information on the net.
Psd format: Photoshop Document
First we will consider * .psd, because it is a native Photoshop format. It supports everything: layers, adjustment layers, clipping paths, changes in channels, or the channels themselves, no loss of quality occurs with repeated re-saving.
The choice in favor of this format should be if you want to save the original work, or continue editing the file later.
Jpg or jpeg format: Joint Photographic Experts Group
The most common bitmap graphics format. In it, for example, most often images are saved in digital cameras... And, if you pay attention, most of the images stored with you, supplied with Windows, are in * .jpg format.
Recommendations can be given as follows: if you save a picture of photo quality, i.e. it has a lot of different colors, or it is generally a photograph, then choose * .jpg. Please note that * .jpg does not support layers, and if you open the file in the future and re-save it, the quality will deteriorate every time (even if you save it to the maximum possible). Therefore, try to access * .jpg only when saving the final version.
The quality of * .jpg can be adjusted, which affects the size of the file. The primary sign of excessive loss of quality is the appearance of digital noise, especially at the boundaries of objects presented in the image (picture) and in areas of fine lines, for example, developing hair.
Gif format: Graphics Interchange Format
Convenient for saving files with a small number of colors, i.e. supports a maximum of 256 colors.
Recommendations can be given as follows: if there are several monochrome objects in the picture (meaning that the color of the object has the same color, for example, red without gradient transitions, and not that all objects have the same color), then the choice can be made in favor of *. gif. Although in such situations it is worth taking a closer look at the * .png (8 bit) format, but more about it below. Gif can contain transparency, but it does not contain layers.
Absolutely unusable for saving photos. It is also the only format that allows animation to be saved.
PNG format: Portable network graphics
The choice between * .png (8 bit) and * .png (24 bit) is carried out only in File? Save for Web & Devices ...
* .png (8 bit)
Much like * .gif. It also only supports 256 colors, which means it won't work for photos. Using * .png (8 bit) is a priority if there are gradients - the algorithm of this format allows you to compress them more compactly.
Like * .gif can contain transparency. Can't save animation.
* .png (24 bit)
It has one indisputable advantage over * .jpg, * .gif, * .png (8 bit) - it is the only one that can maintain translucency, i.e. if * .gif and * .png (8 bit) keep only 2 values \u200b\u200bof transparency: transparent or opaque, then in * .png translucency has many intermediate values.
Although semi-transparency may be required mostly by people doing web design, they already know about this advantage.
The rest of the multiple formats in everyday life are unlikely to be useful to you. And one more thing: all the described formats, except * .psd, can be opened on any computer, in standard program view images. And also upload to the Internet, where users can see them.
Now a few words about saving methods, the first method:
File? Save As ...
Only this method is suitable for saving * .psd, but you can also save * .gif, * .jpg, * .png (24 bit) in it. But for the last three formats, you should resort to this saving method only if the volume of the resulting image is absolutely not important to you.
File? Save for Web & Devices ...
This method does not allow saving the document in * .psd format, but in all other described formats without problems. The main advantage of this method is very fine tuning picture quality, and therefore full control over the file size.
It is also very important that here you can see the original image and its after optimization.
Another significant plus this method the fact that this is the way you can save * .gif with animation support!
Share your lesson
legal information
06/05/16 26.7KSometimes you need to load an image containing transparent elements through which the original background will show through. In these cases, it would be convenient to load PNG images as they are capable of maintaining transparency.
In this article we will tell you how to make transparency in Photoshop.
File creation
The first step is to create a file. To do this, open Adobe Photoshop and in the File menu ( File) at the top of the page, select "Create" ( New).
Then, in the "New Document" window that appears ( New Document) create the file size you want, and make sure the document resolution is 72 pixels per inch ( since the file is for web use). And also that you have selected the value "Transparent" ( Transparent) in the drop-down list "Background content" ( Background Contents).
* Before making a PNG with transparency in Photoshop, you need to clarify that in this example we are creating an image to upload as a background for the site, so the document size is set as follows: width 3000 pixels, height 1730 pixels, which are the recommended sizes for HD image uploads:
Once you have specified the parameter values, click OK to open a new document.
Then in the Layers panel ( Layers) make sure you are running on transparent layerrather than on the background:

Once you've finished creating and are ready to save the transparent image, depending on the version of Photoshop you are using, go to the File menu ( File) you can use one of the possible options:
Photoshop versions earlier than CC 2015:
Now we will tell how to make a picture transparent in Photoshopwhich came out earlier than CC 2015. These versions use the Save For Web ( Save for Web & Devices) to save and optimize PNG images. for use on the web. To use this method, simply go to the File menu ( File), and then - "Save for Web" ( Save for Web & Devices):

Then in the window that appears, select PNG-24 from the drop-down menu of possible values, and then make sure that the "Transparency" ( Transparency) and " Convert to sRGB» ( Convert to sRGB). This confirms that the image will contain a transparent background and its color mode will be converted to sRGB, the recommended color space for the web.

The fields " Image size» ( Image Size) are automatically populated with the values \u200b\u200byou specified when you created the file. But if you want to resize the file before saving, you can do so now.
Photoshop CC 2015 version:
Before, how to make a photo transparent in Photoshop, you need to know that as of CC 2015 the "Save for Web" ( Save for Web & Devices) in the File menu ( File) is marked as Legacy. And replaced with a new option "Export" ( Export), which offers identical functionality with faster saving in a smaller file and in better quality... To use the Export option, click the File menu ( File), and then - " Export as» ( Export As).
Note: Adobe still offers a Save For Web ( Save for Web & Devices) in Photoshop CC 2015, and it's available through the File\u003e Export ( File\u003e Export) or using the keyboard shortcut Command + Option + Shift + S (for Mac) or Ctrl + Alt + Shift + S (for PC):

Then, in the window that appears, select PNG from the Format drop-down menu ( Format) and make sure Transparency is selected ( Transparency) and " Convert to sRGB» ( Convert to sRGB).
The fields " Image size» ( Image Size) and Canvas Size ( Canvas Size) should automatically populate with the values \u200b\u200bthat you specified when you created the file. But if you wish, you can change these parameters before how to make a transparency effect in Photoshop.
2 votesGood day, dear readers. Ability to make pictures with transparent background incredibly necessary for every novice website developer, designer and even an ordinary person.
This is the most popular feature in photoshop, and therefore I decided to tell you in as much detail as possible not only about the process itself, but also how to save a picture in Photoshop without a background.
It turns out that many have difficulties with this, but there are no publications on the Internet on this topic on the Internet at all. Only a few topics on the forums. But, I take on a mission to correct this injustice ...

So, now I will put on knightly armor and dispel all fears, doubts, misunderstandings and turn the difficulties of Photoshop art into an artless routine. I will also tell you about all the intricacies of the craft. Get ready. I will "know" very simple language, so that it becomes clear to everyone, so I apologize to the readers who are confused by such meticulousness and they themselves know everything very well.
I thank the more patient for your understanding. Let's get started.
What you need to achieve for the photo to be truly transparent
The transparency in the picture is usually displayed with such a checker. If you see it on Google, then the image can be downloaded without any problems and when this object is superimposed on another background, the color will not change.
As you can see, such a checker is not displayed if the image in the search is reflected through a thumbnail. You need to click on the picture and additional Information will open.

Look, I copied this drawing and pasted it onto the field photo. I won't go into exactly how I did it, it doesn't matter now. The most important thing is that you see all parts of the field, the cubes seem to have been cut and superimposed on the picture.

If I had not found a photograph with a checker in the search, then the illustration looked completely different. The background would be white and rectangular.

Why is that? This checker is a generally accepted sign, if you see it, then there is no color at all in this part of the illustration, and when overlaid you will see the lower part of the picture. Similarly, transparency is displayed and. If you need to remove the background from the photo, then you need to ensure that instead of color, you can see this cherished pattern. Checker.

How to store transparent images correctly
We are all accustomed to such a photo format as jpeg. Some people are not even aware of the existence of others. However, he does not understand what transparency is. In order to download and store “correct” photos on your computer, you need to understand and remember the new format - png.
You see, in addition to checkers, in Google, you can almost always see this combination of letters along with the necessary pictures.


Then choose required type file, png and you're done. It is available in any version. If you don't see - look more carefully. You can't do without it. Trust me.

Why was it necessary to come up with a different format? The thing is that the popular jpeg does not understand what transparency is. He changes it to the usual white.
How to get rid of the background: a simple and fairly quick way without unnecessary problems
On my blog, you can find an article in which I show 4 tools and provide a video in which you can find 3 ways to get rid of the background in the picture (). You can read it if you are interested. Now I would like to show you another trick, because I think that without this the article would not be complete. You never know, someone will not want to climb my blog. And here everything is in one place.
So, open the picture.

Find the Background Eraser tool. If you cannot find it, then hold the mouse for a few seconds while holding the left button on the key of a regular eraser. The required tool will open. You can add it by clicking on it.

You can increase the diameter of the eraser to make it easier to wash.
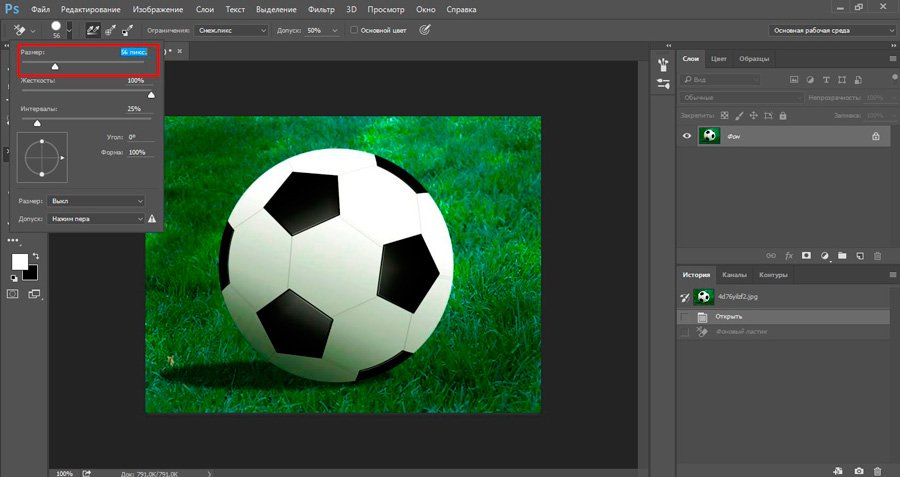
Now tinker over the unnecessary elements in the picture. You will see how the checker begins to appear and the color disappears!

I hope that after you finish, you will not have a question in what format to save the processed drawing. Of course PNG.
This erasing method is neither the best nor the most convenient. Therefore, I recommend that you still pay attention to my previous article completely devoted to this topic.
And if you are interested in working in Photoshop, then I advise you to start making money on it! There is a demand. You can easily try, process pictures, and do a lot of interesting things. Believe me, this is really necessary. You can verify by opening several freelance sites.
Think you can't do it or are you too old for this shit? Not enough time? Believe me, these are all ridiculous excuses. I am a lawyer and I earn enough money, but… do you have a hobby, favorite hobby? Are you living life to the fullest? Are you really not bored?
Whatever you know and whatever you are interested in. The Internet opens up a lot of new possibilities. Bring change into your life. If money doesn't interest you, that's even better. This gives your project a better chance of becoming expensive, cool, and successful. All famous people do not work for profit, they work because they love what they do. Few of them call it “work”.
The time has passed when a person spent most of his time at a computer or TV. Now everyone develops, improves some of their skills and shares with people what they know. In fact, this has always been the case, only the scale has increased.

By the way, not so long ago I read the secrets of longevity of the Caucasian highlanders. One of the principles is that the younger generation constantly comes to them for advice on some important issue. Old people feel needed, and therefore do not experience any negative emotions about old age. In the Caucasus, do not be afraid to become old.
By the way, a positive attitude is another secret. The elders claim that no one wants to communicate with angry, irritated and boring people who have no interesting hobbies, and therefore, such a way of life is extremely unprofitable, especially in old age.
Do something new. If you like photoshop - pay attention to the course of Zinaida Lukyanova - “ Photoshop from scratch And master it perfectly. Very quickly, you will have a profitable hobby. Not so passionate about design? Pay attention to that, and create your projects.

If you liked this article, and I at least a little interested you - subscribe to the newsletter. Let not now, but give yourself a chance to do something new. I will send you my publications on how you can make money on the Internet.
Perhaps one of them will inspire you to something new and still unknown. You will understand that it is interesting and want to try it yourself, and then ... who knows what will happen next?
Will the hobby turn into something more or will you just show the result of your work to your friends in order to get their praise and admiration? Unlike many, you will get off the couch and do something that will take you out of the ordinary. You will try to change your life. This is very commendable.
I sincerely wish you success in your endeavors and hope that this meeting will not be the last.


