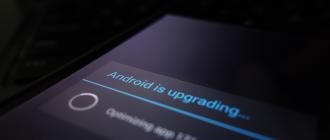
The Android Nougat update for the Galaxy S7 and Galaxy S7 Edge changes the default screen resolution to FHD 1080p, but you can change it to HD, FHD or QHD at any time. You will learn how to do this in this article.
Why Samsung considers 1080p to be the optimal resolution?
It was originally WQHD (2560 * 1440), but after you got the long awaited one, you may notice that it changed to Full HD 1080p (1920 * 1080).
Does this mean Android Nougat cannot handle WQHD? - Of course not. Samsung has deliberately scaled it down to Full HD as users don't need WQHD for most applications and tasks.
You can manually change the screen resolution to HD 720p, 1080p (Full HD) or 1440p (WQHD), and some operating modes can automatically adjust it. But 1080p by default is optimal for most users.
Why did Samsung lower the screen resolution in the Android Nougat update?
The purpose of the reduction is to conserve battery power.
When you have more pixels (i.e. more a high resolution), the battery has to consume more power.
Full HD requires about 2 million pixels, WQHD (1440 * 2560) about 3.7 million pixels.
Thus, a rough estimate shows that upscaling to Full HD can save about 45% on screen battery.
Will Full HD be enough for me?
You may be wondering: does this affect the "performance" of the screen? The truth is, most users haven't noticed any difference.
Human eyes always have a limit. Usually, when you hold the device 12.5 to 25 cm away from your eyes, they cannot tell the difference in pixel density if the pixel density is higher than 300-400 dpi.
The pixel density of the Galaxy S7, based on hardware specs, is 577 dpi, while the Galaxy S7 Edge is 534. Downscaled to 1080p, the Galaxy S7 Edge still has a pixel density of around 400 ppi. That is why many owners did not notice the changes after the update.
But sometimes WQHD 1440p is preferable, for example:
- when do you use glasses virtual reality Gear VR;
- when you are editing photos or videos;
- when you watch 2K video.
In these cases, Full HD may not be enough, and then it makes sense to change to 1440p.
Likewise, you can set it to 720p if you want to conserve battery. But usually not recommended for daily use because you have a great screen and you should use it.
How to change screen resolution in Galaxy S7 and S7 Edge?
Note that it can be changed automatically when you select different operating modes or manually for each mode.
Anyway, you can always change the screen resolution in "Settings" - "Display".
As you can see below - the display settings page shows the current default screen resolution (1080p).
Click "Screen resolution" ("Screen resolution").
Now you have 3 options to choose from: HD, Full HD and WQHD.
To change it, just drag the slider to the appropriate position.
To save changes, click "Apply" ("Apply") (marked with number 2 in the screenshot)

Saving data.
Saving data - convenient functionwhich you can use when working on a limited tariff cellular internet... When enabled, Data Saver will prevent the application from using cellular data in background... This means that Twitter and Facebook will not be able to update information in the background too often, if at all.However, if there are applications (up to 6) that you want to grant permission to continue to use background data download when the data economizer is enabled, then you can do so.
Open the Settings app window, click on "Statistics\u003e Data Saver" to activate new function and choose apps that are allowed to ignore the savings.
Reply to a message from anywhere.
When you receive a new message in apps such as Messages or Facebook Messenger, you will see a new response option at the bottom of the notification. Click on it, enter your message, and continue the interrupted work without leaving the current screen.Better yet, your responses will be added to notifications so you can keep the conversation going.
Related notifications.
Instead of presenting multiple notifications from the same app for each one, Android 7.0 now groups them into one line.You can swipe down on one notification to view more detailed information and interact with each sub-item separately.
Management of notifications.
With a long press on a notification, you can choose to turn off or mute notifications from the corresponding application. Much better than looking desired parameter in the settings menu.New Settings app.
The Settings app has received a redesign. At the top of the page there will be hints and switches for items that you can configure or disable. You can now open the Settings menu on the left side of your screen to switch between different categories with minimal effort.
Fast app switching.
Double tap the multitasking button to fast switching between two latest applicationsthat you used. It is fast and painless.I found this most useful when copying information from one application to another, when I want to see both applications at full size.
Multi-window mode.
Android now supports viewing two applications at the same time; even on phones. A long press on the multitasking button will slide down the application you are currently using and give you the option to select another application that is open in the background. Alternatively, press the home button to select an app from the home screen or from the app list.Adjust the size of each application by dragging the "handle" in the center of the screen.
Quick switch settings.
Open the notification panel (swipe from the top) and you'll see six settings icons at the top of the screen. Click on the icon to toggle the current state of the parameter, or press and hold to open more options.Settings tiles.
A second swipe down the screen when notifications and quick settings are already open will show a series of tiles quick settings... These tiles act similarly to the previous paragraph, with switching the corresponding services or parameters and a long press opens more options.
Click the button in the pencil image at the top of the screen to reorder, remove, or add new tiles. Note that you can view multiple pages of tiles by swiping left or right.
Screen size.
Not only can you customize the font size used by your Android device, but version 7.0 adds a "Screen Size" feature that adjusts everything on the display.Open "Settings\u003e Display\u003e Screen Size" then use the adjustment slider.

GIF to one and all.
Who doesn't love these animated images called GIFs?The Google Keyboard app for Android 7.1.1 includes GIF keyboards by default.
When composing a message in SMS or Facebook Messenger, tap on the emoji icon, then the GIF button. Find and select the perfect image and submit it.
Have you ever faced the fact that the display of your gadget suddenly began to react poorly to touch? Or maybe the screen brightness, contrast and other characteristics do not suit you? Then customizing the Android screen will help.
Customizing the Android screen without third-party programs
You can customize the screen on Android without resorting to a third-party software... Thus, it is easy to adjust such simple characteristics as brightness, contrast and more.
To do this, go to:
- "Settings"
- "Screen / Display" (on some devices this section may be located in the additional sub-item "Phone settings")
This section contains the following items:
- Scenario
- Inversion
- Gamma
- Increased brightness and others

By opening each item, you can adjust the settings the way you like.
If the touch response of the display is not satisfactory, you can try to adjust it. To customize the Android screen, go to the gadget settings and select the "Screen / Display" section.

In this section, select "Calibration".
Android screen setup process without third-party programs takes little time. You only need to click on the circles or crosses. Try to click exactly on the circles / crosses. Android will remember the clicks and adjust to them.

Customizing the Android screen using programs
Some gadgets lack built-in customization. For such devices, we have developed special software that will help you customize the screen on Android.
There are many programs for customizing the screen in the Play Market. Enter in the search bar in Google play Display calibration. Select one application from the suggested options and install it.
If setting up the Android screen was not easy for you, and you have any questions, then feel free to ask them in the comments below.
Developers operating system{!LANG-0acca5e1e02fdb146e24021d4831294a!}
{!LANG-6ff339d83bd0627cb7a496741270b569!}
{!LANG-1cbd58f16ca5d641eeed8f45520cccaa!} {!LANG-1376c0e7f77408ef2ded721d938d5cc6!}{!LANG-29547a096f10478499de59aa08b9c309!}
{!LANG-5692a759bba94fe81bfb4a3e4a85408a!}
{!LANG-3a0fab06af0bc4188c29e97003fde1b9!}
{!LANG-f271e1183c21dec09eacda8e8bceed54!}
{!LANG-764351e7b732e4cae905ab92f94af324!}
{!LANG-9bd528380d8caa0c0f8a321764510cb9!} {!LANG-6832f4255150eb0d34bf2fff94024e08!} . {!LANG-3d68b611cc5e4c8a6d9486446f4579b9!} . {!LANG-5225be47b03a3b6beb464c5d997e467c!} _ {!LANG-d1969e8c266a3f35a172eb58f5062fc5!} {!LANG-02bc0fca44f79776fa0a5d1c5c28ac46!}

{!LANG-01123c1e47a78d78b2cf9ac0de8eaec7!}
{!LANG-e15fb96be99f6f1a4c4a53b8142aaf7b!}
{!LANG-e525696cad4b3ba36866b7384aa39463!}
{!LANG-d97a812b465b77f00b89b612cea7a1d9!}
{!LANG-f607d9b8f0042403382e870617766498!}

![]()
{!LANG-b60ba79d7c9ece689122d20d555eff88!} {!LANG-794b0736a63e60c05df046ed90a03859!}{!LANG-d97cba82ca8cbf1efde10da89553b1ed!}
{!LANG-9ffae70fadb75d2eb9cee18252889376!}
{!LANG-c4a0439dd0aa045a8234787adbb11f37!}
In order to find out with what resolution the tablet screen displays the picture, you need to take a screenshot. This can be done by simultaneously pressing the "power" and "volume -" buttons during operation. The screen image is saved in the tablet gallery, after which the image should be opened. Next, you need to read the information about the image. They will have an item "resolution", which will display the real display performance.
How to change the screen resolution
This action can be performed using the appropriate program, for example SecondScreen, or on your own. Let's consider both methods.
To change the resolution with the installed tablet tools, you need to have Root rights to the tablet and a regular file manager, for example, ES Explorer. If you have rights, through file manager look for the "system" folder in the root directory and the "build.prop" file in it. We open it with any text editor, for example, ES editor and change settings. To do this, press the "operation" button, select "change", and then look for the line "ro.sf.lcd_density \u003d (digital value)".
In it, it is necessary to change the figure downwards, after which the screen picture will take up less space than the entire screen. My device has a number 160, which we change to 130. It is not worth changing the value too much, as legibility will be greatly reduced, but this is a matter of taste. The next step is to save the changes made to the settings file and reboot the tablet. After these steps, the changes will take effect.
Also, to force changing the screen resolution, you can use special program... A pretty good option might be SecondScreen or Resolution Changer Pro. True, you may need root rights to access the software. The programs will help you change the screen resolution, raise the DPI parameter from the existing 720p to 1080p or lower it, it is also possible to change the display mode "smartphone-tablet".
SecondScreen, in addition to the described capabilities, provides a number of pretty good functions. These include an independent connection of the device to the Internet via Wi-Fi or Bluetooth, if necessary, forced shutdown backlight matrix, for Internet surfing on big screen... In the latter case, only the touch panel remains in the device.