Hello admin! My computer has one hard drive divided into two volumes. On the first partition (C :) Windows 8.1 is installed, and on the second partition (D :) I want to install Windows 10, but not just like that, but on a virtual VHD. Please explain how to do it quickly and easily? I read on the Internet that on a simple hard disk you can place a dozen virtual disks and actually install an operating system on each of them!
How to install Windows 10 to a virtual disk using the programWinNTSetup
Hello friends!
First, I'll tell you what a virtual hard disk VHD is and why our reader wants to install Windows 10 on it.
Secondly, I will present another hero of today's article, this is a utility WinNTSetup, capable of creating virtual VHDs and installing operating systems on them.
Virtual Hard Disk (VHD) is a file format that has an identical structure to a hard disk. In simple words, the operating system perceives virtual diskVHD is like a normal hard disk, but the disk VHD has several advantages, the most important of which allows several operating systems to be on the same partition of a regular hard disk at the same time!
For example, we have a hard disk installed in our computer, in order to install five operating systems on this hard drive, it must first be divided into five partitions, but this is not at all necessary when using virtual disks. We just take and create five virtual disks on any partition of the hard disk. VHD and install different Windows on them. We can do all this without leaving the operating system!
I propose to go from theory to practice and create a virtual VHD using the utility WinNTSetup, then the same utility will install Windows 10 directly to the virtual hard disk for us, everything is fast and simple.
- Note: If you like to solve various computer problems, then WinNTSetup will come in handy more than once, I suggest that you familiarize yourself with the descriptions of the program.
- Another article for you on this topic.
Preparation for work
We look at the Disk Management of my computer.
The hard drive is divided into three sections.
one . Hidden System Reserved partition (350 MB) containing Windows 8.1 boot files.
2. Disk (C :) with Windows 8.1 installed (Windows 10 ISO image is on the desktop).
3. The new volume (E :) is a file trash can. On it, we will create a virtual VHD disk, on which Windows 10 will be installed.
Note: Be sure to create aa backup copy of the boot store (BCD), in case, using Windows 10, you decide to delete it, because after removing the system, the choice of operating systems ( Windows 8.1 or Windows 10) will remain at boot.

Editboot storage (BCD) and removing unnecessary entry is very easy, but it's even easier to deploy a backup. In detail, this question, be sure to read it.
Windows 10 ISO image
Before starting the WinNTSetup program, find the ISO image with Windows 10 on the drive (C :) and copy all the distribution files to some folder or double-click on the ISO image by connecting it to the virtual drive (if you are working in Windows 8.1).
I have a Win 10 image right on my desktop.

Windows 10 ISO image connected to virtual drive (D :)

It's WinNTSetup's turn
Download WinNTSetup you can on my Yandex.Disk by the linkhttps://yadi.sk/d/xLGkpAOzhXCPcor on the official website
http://www.winntsetup.com/?page_id\u003d5

Unzip and run the executable file of the WinNTSetup_x64.exe program (if you are running a 64-bit version of Windows).


In the main WinNTSetup window, specify the install.wim file located in the D: \\ sources folder of the Windows 10 distribution.
We press Select.

Select the file with the left mouse install.wim and click Open.

The Windows 10 bootloader is automatically selected by the program - Z: (the first partition, System Reserved, Reserved by the system, 350 MB, hidden and has no letter).
Create a VHD file on which Windows 10 will be installed. Press the VHD button.


If you create a dynamically expandable the size of a virtual disk VHD, then after installing Windows its size will be small (several megabytes), but during operation it can grow to gigantic sizes and when data is deleted from it, the size will not decrease, which is a little inconvenient. It is worth choosing this type in case you do not plan to work for a long time in a system installed on a VHD disk, but just want to experiment.
If you create a fixed size VHD virtual disk and select its size of 50 GB, then a virtual disk of exactly this size of 50 GB will be created, when its space is filled with files, its space will be filled, and when deleted, it will be freed, that is, everything is the same as in the case of a simple hard disk. I will choose this option.
I indicate the size of the created VHD file and click on the View button.

In the explorer window that appears, I indicate the location of the created virtual disk on the (E :) partition, also give it the name Windows 10.vhd and press Save.


The process of creating a virtual hard disk VHD on volume (E :) begins and ends successfully


Disk management


In the WinNTSetup program, click on the Install button.


The process of installing Windows 10 to a virtual disk VHD begins

and ends successfully, click OK.

To proceed with the installation, restart the computer.
After rebooting, a window for selecting operating systems (Windows 8.1 or Windows 10) appears.
Choosing Windows 10

and enter the final stage of installing Windows 10, familiar to you from our previous articles about the WinNTSetup program (I will not repeat myself).

I think you did it and Windows 10 booted successfully.

In Disk Management, you can see that Windows 10 takes our virtual VHD disk for a regular hard disk with one partition under the letter C: (the operating system is installed on it).
However, the virtual disk itself is on partition (E :).


Windows 10.vhd virtual disk properties

Device Manager

In the same way, you can create several more virtual disks on disk (E :) and install operating systems on them. When the computer boots, the boot menu will appear, in which you can select the Windows you need to work with.
Starting with the version of Windows 7, users of the Windows operating system have the opportunity to create virtual hard disks (VHD). VHD (Virtual Hard Drive) is a single file with the ".vhd" extension, which has the same structure and content as a regular hard drive installed on a computer.
When using this file format, it will be possible to install and run multiple operating systems on one computer. If the user wants to try to work in another Windows operating system, then he usually installs the system on a different logical drive of his computer, or installs Windows on a virtual machine.
Since I have my own site dedicated to computer topics, I often have to answer questions from visitors. My work computer is currently running Windows 7, but I often have to answer questions about Windows 8.1, and soon I will have to answer about Windows 10.
Therefore, I use a VMware Workstation virtual machine on which operating systems are installed: Windows 7, Windows 8.1, Mac OS X, Android. I also have a virtual machine running Windows XP Mode on my computer. If necessary, I launch the required operating system in the program window, working in the main operating system.
With all the convenience of this method, it has a big drawback: when actively working on the main system, the operating system on the virtual machine will slow down. This is due to the fact that the resources of one computer are simultaneously consumed for the operation of two operating systems.
Using a virtual hard disk will solve this problem. Another Windows will be installed on a VHD disk, without the need to start the virtual machine. Operating systems will boot on a computer of the user's choice. When Windows is installed on a VHD, all the resources of the computer will be used, so there will be no slowdown.
At the same time, the main system will not be affected in any way, and the system installed on the VHD disk can be easily removed from your computer at any time.
In this article, I will tell you how to create a virtual hard disk for installing Windows as a second, third, etc. system on your computer. You can read about the process of installing Windows on a virtual hard disk in a separate article.
I draw your attention to the fact that you can create virtual hard disks in any version of Windows 7, Windows 8.1, Windows 10, but only users of Windows 7 Ultimate and Enterprise, and Windows 8.1 Pro and Enterprise editions will be able to load another operating system.
How to create a virtual hard disk
You can create a virtual hard disk in different ways: using the Diskpart utility, or using the disk management tool. In this article, we will consider the second option, as it is easier for the average user.
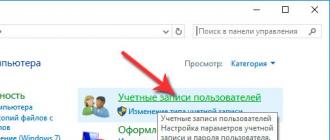
You can enter the Disk Management snap-in through the Control Panel, following several steps. A shorter way: right-click on "Computer" or "This Computer", and in the context menu, select "Control".
After that, the "Computer Management" window will open, in which in the "Storage Devices" section, you will need to click on the "Disk Management" item. The utility window will display all disks currently connected to your computer.
In this image, you can see that my computer has one hard drive, divided into two logical partitions ("C" and "D").
You can enter the Disk Management snap-in more quickly. To do this, first you will need to press the "Win" + "R" buttons on the keyboard, and then enter the following command in the "Run" field:
Diskmgmt.msc
This will open the Disk Management window.

Next, you will need to select the disk on which the virtual hard disk will be created. Since the hard drive is divided into two partitions on my computer, I chose the logical drive "D" based on the following: in case of reinstalling the system, all data and drive "C" will be destroyed, and the data on drive "D" will be saved, therefore, the virtual VHD will not be lost. If your computer has only one disk partition "C", then the choice of disk will be obvious.
Select the required disk, then click on the "Action" menu item, in the context menu, click on the "Create virtual hard disk" item.


In the "Explorer" window, enter a file name and then click on the "Save" button.
The file name must consist of Latin letters and numbers. I named the created VHD disk "win10" (it is not recommended to name the file as Windows). Attentive readers will notice that on the "D" drive of my computer, there is already a previously created virtual hard disk "win8", on which I installed the Windows 8.1 operating system.

You can manually add to the "Location" field, the path to the virtual disk, as shown in this picture.
Then you will need to select the size of the virtual hard disk. You can select the desired size in MB or directly in GB. For normal operation of the system, I chose a size of 32 GB.
After that, you will need to select the format of the virtual hard disk:
- dynamic expansion;
- fixed size (recommended).
With dynamic expansion, the size of the virtual VHD will expand as data is stored on it until it reaches a fixed size.
At a fixed size, the virtual hard disk takes up all of the allocated space, regardless of how much space the data takes up on that disk.
After completing the settings, click on the "OK" button.

This will start the process of creating a virtual hard disk on your computer, which will take some time.

After the creation of the virtual disk is complete, a new disk with unallocated space will appear in the Disk Management window.

There is no need to mount the created virtual disk as a new volume. After that, you can exit disk management.
If you open the Explorer window, you will see the created virtual hard disk “win10” with the extension “.vhd” on the “D” drive. The VHD disk appears in the system as a regular file, but in reality it is a virtual hard disk.

You can now install the Windows operating system on this disk.
Next steps to install Windows
Now I will briefly talk about the next steps to install the system. First, you need to burn the Windows image to an optical DVD, or create a bootable USB flash drive, for example, in the Rufus program.
Next, you will need to boot from a DVD drive, or a bootable USB flash drive, and then install the operating system on a virtual VHD disk. You can read a detailed article about installing Windows on a VHD disk.
How to remove a virtual hard disk (VHD)
If you need to delete a virtual VHD disk that was created in the corresponding section of your computer, then you can easily perform this operation. The reasons for deleting a virtual hard disk can be very different: there is not enough free space on the logical disk, this operating system is no longer needed, etc.
With the simplest method of deleting, you will need to open the logical disk in which the given VHD disk is located in Explorer. Then, you will need to select the virtual hard disk, and then select the "Delete" item in the context menu. Alternatively, you can remove the VHD using the Disk Management snap-in, or using the Diskpart utility.
After that, the virtual hard disk will be removed from your computer.
Conclusions of the article
You can create a virtual hard disk (VHD) on your computer to install the Windows operating system on this disk, which can be used as a second operating system on your computer.
Please note that only users of Windows 7 Ultimate and Enterprise, and Windows 8.1 Pro and Enterprise editions have this option.

A virtual drive can be created very easily. However, there may come a point when division no longer makes sense. Correctly deleting a new section is a less trivial task. But this task can scare off many users with its perceived complexity. How to do this simply and quickly will be discussed in this article.
Methods to uninstall a virtual disk
The drive could have been created by you in two ways: a special Windows utility called "Disk Management" or using the command line. Depending on what was used earlier, you need to choose one of the presented methods. At first glance, the procedures may seem complicated, but in practice everything is much easier.
Method one: disk management
If the partition was created using the specified utility, then you need to stop at this method. It is the easiest to complete and does not require any additional knowledge.
Important! Be sure to transfer all important information from the virtual disk that you want to delete, or make a backup for emergency recovery. All information previously created on it is stored in the image of this drive. After deleting a partition, all data written to it will be lost along with it. Remember this!
If you've heeded the warning, you can start. Below is a detailed action plan:

Second command line method
But an additional section could be created using the command line, which happens much less often. For this case, you need to use the second method. It is also detailed below. Preparation for the procedure also consists in transferring important information to another drive. After that, you can follow the plan, which consists of a small number of steps, and they are quite simple to perform.

Using one of the methods presented in the article, you can delete unnecessary virtual disks without any outside help. These methods are very simple, but they will be sufficient for the task at hand. However, it is important to understand that these solutions cannot remove the physical partitions of the hard drive. Options for solving this problem were described by us earlier in another lesson.
To create a virtual disk in Windows 10, you need to open the Disk Control Panel, and to do this, hover over the button Start and press the right mouse button and in the opened context menu select the item Disk management.
How to create a Windows 10 virtual disk
The Disk Control Panel will open in which all partitions are displayed at the top, and all disks with their partitions at the bottom. First, select the logical disk where you will create the virtual disk. Next, in the top menu, click Action - Create a virtual hard disk.
 When creating a virtual disk in Windows 10, you must specify its parameters
 A window will open in which you need to enter the following parameters.
- Specify the location where the created VHD file will be stored.
- Set the size to at least 3 mb.
- Select VHD or VHDX virtual hard disk format.
- Select fixed or dynamic type of virtual hard disk.
When you have finished making settings, click OK and close the Disk Control Panel.
 Initializing the Windows 10 virtual hard disk
 Now, so that the local disk manager can access the virtual disk, it must be initialized. To do this, start the Disk Control Panel again and a window will immediately open in which you need to select the MBR or GPT partition style. After choosing a style, click OK. 
After that, in the disk control panel, you will see a new disk with unallocated space. Now in this disk you need to create a partition, and to do this, hover over it and press the right mouse button. A menu will open in which select the item Create simple volume... The wizard for creating a simple volume will open in which you need to click Next in all windows. When the last window, Completing the Simple Volume Wizard, opens, you will need to click Finish and wait until the partition becomes Healthy. As a result, if you open this computer in Explorer, you will see that a new disk has appeared, which is actually a virtual one.
Last week we asked you to share your favorite disk image tools, then we rounded up the five most popular responses for a vote. Now we "re back to highlight your favorite. DAEMON Tools led the pack by a comfortable margin with 40% of the vote.
Softpedia.com DAEMON Tools Lite is a software solution that will impress you, especially thanks to its advanced features that can deal with virtually all image formats on the market. Reliable application that creates virtual drives on your computer, providing you with the possiblity to emulate CDs and DVDs for instant access.
PCWorld.com If you spend a lot of time swapping and hence waiting on CDs or DVDs to mount, Daemon Tools Lite is worth its weight in gold. Even if you don "t, it" s a program you should download to keep in your bag of tricks - you "ll find a use for it eventually.
Download.com The advantage is that you can burn the images you "re using with DAEMON Tools Lite right away or just test an image before burning it to see if it was created correctly. DAEMON Tools Lite works with most image formats.
Filecluster.com Pros
- Small and highly stable program.
- Low resource requirements.
- Simple and functional interface ...
Software.Informer.com DAEMON Tools Lite manages to be more comprehensive and feature-rich than many of its competitors. And that "s quite remarkable, especially considering that DAEMON Tools Lite is free while many of its competitors are not.
downloads.tomsguide.com As a disc imaging tool, Daemon Tools Lite "s free nature automatically makes it a lot better than many competing applications simply because it offers most of what they offer at the vastly reduced price of free.
www.techadvisor.co.uk When you have a disc that you know you "ll need to access regularly, then, DAEMON Tools Lite allows you to create an image in just a couple of clicks. This then shows up in its Image Catalog for speedy reloading later, and you can put the real disc away.
techgyd.com Daemon Tools Lite is one of the best software for emulating and organizing your disc images. The software is very easy to use and fulfills all your disc related requirements. The virtual drives support is amazing.
maddownload.com If you are looking for the best software to work with ISO, MDX, MDS, and MDX files? Well, you have come to the right place. DAEMON Tools Lite is an easy and ready to use downloadable software compatible with Windows. It is well known reputable software that gives you the power of having a DVD-ROM emulator right into the comfort of your own home.
GIGA.de Mit dem Daemon Tools Lite Download könnt ihr virtuelle Images erstellen, speichern und einbinden sowie virtuelle Laufwerke emulieren.