The side keyboard is often referred to as digital or optional. This is a group of keys located to the right of the main keyboard. In the standard version, it consists of seventeen keys and includes nine buttons with numbers, as well as signs of four mathematical operations, a dividing point, an input key and a button for activating this keyboard. Most of these keys have dual functionality.
Instruction
It is located, as a rule, just on this most additional numeric keypad and stands on the very first (left) place in the top row. It works as a trigger, that is, when the side section of the keyboard is off, pressing this button turns it on, and when it is on, it turns it off.
You will need
- Linux operating system.
Instruction
Regular keyboards are divided into several sectors. In the extreme right part is a numeric keypad. In laptops, this section is either completely integrated with the main keyboard, or is generally removed by adding the function of entering numbers to other keys on the right of the main unit.
There is a numeric keypad on your laptop or not, it is not always included. A key Num Lock, which is designed to activate it in standard keyboards, may simply be absent. How to turn it on or off?
There are three ways to do this. One of them will definitely suit you.
1. Press the Num Lock key. If it is, it is usually located at the top right of the entire keyboard. More specifically, somewhere on the top left of the numeric keypad. Sometimes during its activation, a special indicator turns on the same as it is for the Caps Lock key. Do not look for him for a long time, he may not be there either.
2. The key combination Fn + F11. Most often, this combination works on those laptops where there is no numeric keypad at all. More precisely - it is combined with the main block of keys. The combination of Fn + F11 changes the functionality of the right keyboard block from digital to normal and vice versa. In rare cases, it activates / deactivates a particular sector. number keys.
By the way, on different laptops, the combination may differ, for example, not Fn + F11, but Fn + F10 or Fn + Fn12. Try it. Just be careful when conducting such an experiment. You can change other settings, such as turn off the sound, lock the keyboard, turn off the screen, and so on. Simply, trying, press the key combination twice to deactivate some function, immediately activate it back.
3. On-screen keyboard. This method is the easiest, original and at the same time effective. I bought a laptop Acer Aspire. There is an additional keyboard, but Num Lock is missing, and combinations with Fn are designed for other tasks. Steamed over the inclusion of the numeric keypad, until I came across this elegantly simple way.
Open the on-screen keyboard. It usually displays the current status of your real keyboard. That is, it also may not display both a numeric keypad and the Num Lock key. In this case, on the on-screen keyboard, click on the "Parameters" button. A window will open where you need to check the box to enable the numeric keypad. Turn on and see that the digital block has appeared. Next, click on the Num Lock. Voila, the keyboard is activated.
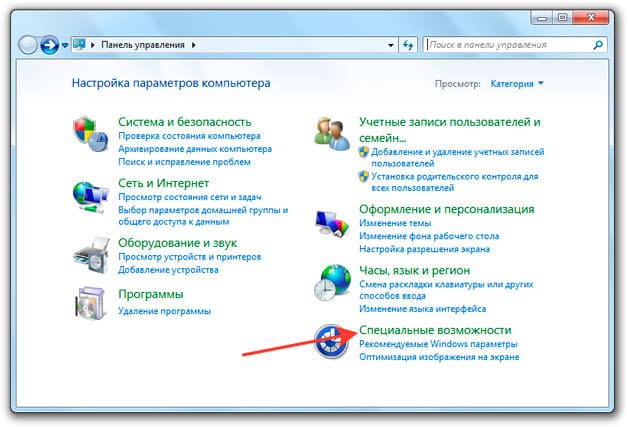
Who does not know, you can find the on-screen keyboard in the Start / Standard / Accessibility / On-Screen Keyboard menu. Or even easier - “Start”; in the search menu, enter “keyboard” or “keyboard”. The system will present the found options, between which you will definitely find the on-screen keyboard.
Then use the NumLock key in the upper right corner to turn on the Num Pad. Usually, when the operating mode is turned on, the corresponding LED lights up, if there is one.
If you need to enable a removable numeric keypad that works via USB, connect it to the appropriate port on the motherboard computer or laptop. Install the device driver, if available. If not, use the hardware installation wizard in the computer management panel.
Search for new computer-connected devices. Find your NumPad keyboard in the list, select driver installation from the Internet, allow the wizard to connect to the network and install software. Please note that not all keyboards require the installation of a driver for correct operation, sometimes simply switching on. Here everything can depend on the computer model and the operating system installed, as well as on the type of input device itself.
Turn on the device by pressing the corresponding button on the case, if any. If not, just hit NumLock.
If you want to enable the Num Pad to work on a short keyboard, make sure that this feature is supported. Usually in this case, the keys on the right next to the letters also contain numbers. This mode is started by simultaneously pressing Fn + NumLk. In this case, the corresponding icon should appear on the monitor screen.
If none of the above helps, contact service centersince it is possible that your keyboard is damaged. Pre-check the proper connection of wires and their safety.
From year to year lEDs are increasingly used, they are beginning to actively use as sources of lighting. If it is necessary to connect the LED yourself, you must follow certain rules when performing this work.
You will need
- - multimeter (tester);
- - power supply;
Instruction
To connect the LED you need to know its characteristics. Usually LEDs are rated for a current of 20 mA, the nominal voltage depends on the color of the glow. For the red and yellow LEDs, this is 2 V (allowable range is 1.8 - 2.4 V). For white, green and blue 3 V (3 - 3.5 V). When connecting the LED, it is important to accurately set the current consumption - 20 mA. In this case, the LED will work properly for many years.
Before connecting the LED, select the power source. So, if two consecutively connected finger batteries of 1.5 V for white, green and blue LEDs give a total of 3 V, then the required supply voltage should not exceed a maximum value of 3.5 V. But if you turn on red or yellow with two batteries LED, it can just burn out. That is why responsibly approach the choice of power source, make sure that the voltage on the LED does not exceed the permissible.
If the voltage exceeds the required voltage, a quenching resistor should be included in the circuit. For example, you want to connect a 2 V LED to a 9 V power supply. You get an extra 7 V. To extinguish them, you can use the formula R = U / I to determine that the desired resistance is 7 V / 0.02 A, or 350 Ohm .
Heat is generated on the quenching resistor, so it must have the necessary power. Calculate it using the formula P = U * I. Substitute the data: 7 V * 0.02 A = 0.14 watts. This means that you need a resistor of about 0.2 W - it is better to take it with some margin.
When using an LED, it is important in practice to pick up a current not higher than 20 mA. To do this, turn on the tester in the open circuit and check the amperage. If it is slightly less than 20 mA - for example, 17-18, then leave it that way. The LED will shine a little less brightly, but it will work for a very long time. If the current is much lower or higher, you should adjust it, changing the resistance of the additional resistor.
Pay attention to the polarity of the LED connection, incorrect connection can damage it. The anode is connected to the power supply plus, the cathode - to the minus. From the side of the cathode on the LED bulb, a flat pad (cut) is made. In addition, the cathode has a shorter output.
If you want to power the LED or a string of LEDs from the AC network, then take care of the rectification voltage. In the simplest case, a diode with a breakdown voltage of at least 400 V can be included in the circuit.
The keys of the additional or numeric keypad are convenient to use for filling with numerical data. spreadsheets, making calculations on a software calculator, etc. In addition, the buttons of this keyboard can be used to navigate - moving the mouse pointer around the screen, the input cursor on the document being edited, etc.
![]()
Instruction
The standard way to enable or disable the numeric keypad is to press the Num Lock key. Find it among the buttons in the upper right corner of the keyboard - the specific placement may vary by different models this input device. On the enabled state of the numeric keys indicates the LED, which should be marked with the same designation Num Lock. If it is not lit, press NumLock and the numeric keypad will turn on.
Most laptops have a full-size keyboard with a digital block on the right. But to use these buttons, you must first turn on the side unit. This can be done using the Num Lock key or a combination with the Fn button, via the on-screen keyboard or in the BIOS settings.
Use hotkeys
To enable the numbers on the right (this block is also called Numpad), find and click the Num Lock button. On the external input device, when you click on this button, the indicator lights up under which the figure is drawn. On the laptop, no indicator will light up, but the digital unit should work.
If the Num Lock key on the laptop is not present, turn on the Numpad using function key Fn. Look at the row of F1-F12 keys: the images should tell you what combination is used to activate the digital block on the right. Often, the Fn + F11 combination allows you to enable the right numeric keypad, but there may be other options. 
Some laptops use a combination of Fn + Alt - for example, this is how Numpad turns on on Sony laptops. In order not to go through all the available combinations with the Fn button, look at the desired combination in the instructions that were in the box with the laptop. If the paper guide has been lost for a long time, download its electronic version on the manufacturer’s website or look at the support forum.
Using on-screen keyboard
If the Num Lock key on the laptop does not exist, and you cannot turn on the Numpad with numbers using the FN and another button combination, then try using the on-screen keyboard to activate the block. This is a special system tool that completely replaces the physical input device in its absence.
A panel with keys will appear on the screen, which completely repeats the appearance of the physical input device. Numpad on the on-screen keyboard should also be; if there is no block with numbers, open the parameters and check the box corresponding to the activation of Numpad.
A virtual Num Lock button should appear next to the numbers, after clicking on which the block on the right will work. You can enter numbers as with onscreen keyboard using the mouse, and from a physical device. To turn off the block with numbers, click again in the virtual keyboard on the Num Lock button.
BIOS setup
In the most difficult cases, including the numbers on the keyboard on the right will not work without changing the BIOS settings. Fortunately, such a requirement is not as common, but it is better to be aware of this possibility.
The hardest part of this procedure is getting into the BIOS. Most modern laptops have a quick start, so you can simply not have time to press the desired key. This can be fixed by temporarily disabling the quick launch.