In order to install the operating system on a computer, you must configure it to boot from a USB flash drive or disk. Therefore, in today's article, we will consider how to install boot from a flash drive in BIOS. This is necessary to start the installation of Windows. Since if you just insert a bootable USB flash drive with the system, then nothing will happen. Your old OS will start loading. If you have not downloaded the latest version of the operating system, then read the article - How. We now proceed directly to the configuration process itself.
After rebooting the computer, it is not always necessary to go into the BIOS of the motherboard to configure. First, try using the Boot Menu (boot menu). To do this, before the system starts to boot, you must press the F8 key, and a special window should appear with a list (boot menu) of connected drives. In this menu, you need to select our flash drive with the OS recorded on it.
After that, it should begin, namely copying the installation files to the hard drive. After the computer restarts itself, the installation of Windows will already start from the hard drive.
If for some reason, you can’t open the boot menu, then we will begin to understand how to install the BIOS from the flash drive in BIOS. But first, I want to briefly tell you what the BIOS is. 
BIOS (basic input / output system)- A special set of embedded software that implements the application programming interface necessary for working with computer components and devices connected to it. 
In order to get into the BIOS settings, you need to have time to press the “Delete” or “F2” button or any other button, depending on when you boot the computer. At this point in time, the monitor will display the logo of the manufacturer of the motherboard or information about the processor, memory and hard drives. At the same time, something similar will be written at the bottom of the screen:
- "Press Del to enter Setup"
- "Press F2 for Settings" or similar.
After clicking on one of the buttons, you will need to get into the BIOS settings. Depending on the board, the software of the basic I / O system may be different. I propose to consider the most popular options, as well as configure them to boot from a flash drive.
If the AMI BIOS is installed on your board, then in order to set the order of disk loading, you and I need to follow these steps:

Note! A flash drive must be connected before entering the BIOS, otherwise you will not be able to determine it.

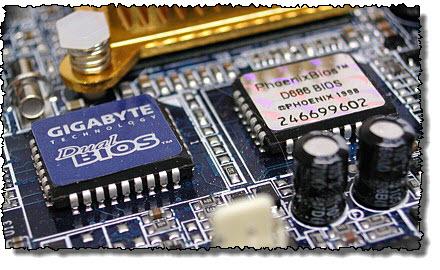
If your motherboard is with AWARD or Phoenix BIOS, then to configure the Windows boot from the USB flash drive, we take the following steps:

On many modern laptops, the InsydeH2O BIOS is installed and many are faced with the problem of setting the order of loading disks. Let's deal with this problem together. We will perform all the points so as not to be mistaken.

Note! If you need to install the boot from a CD or DVD disc, then in the first place you need to put the item “Internal Optic Disc Drive”
- After the settings are made, go to the “Exit” menu section and select the “Save and Exit Setup” item, thereby we will save the changes made and exit the BIOS.
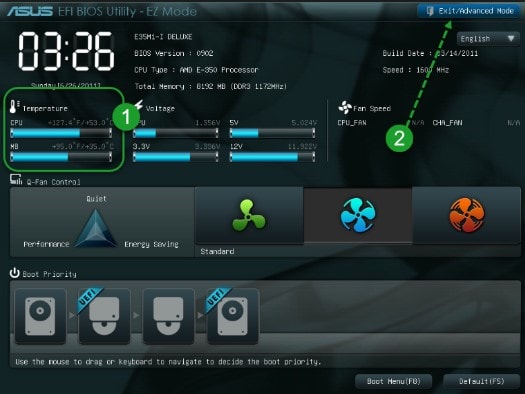
Currently, many motherboard manufacturers are installing instead of the usual BIOS, UEFI software, which has a graphical interface, as well as support for mouse control and the Russian menu. This makes it easier for us to solve the problem of how to install a boot from a flash drive in BIOS.
If you are lucky, and going into the BIOS you see that the graphical interface has loaded before you, then you need to go to additional settings by pressing the F7 key or the corresponding button in the main window. In the menu that appears, you need to go to the “Download” tab and in the item “Priority of loading disks” put our boot flash drive in first place. 
After the changes are made, press the F10 key and select the option “Save settings and restart the computer”.
Microsoft has been developing and improving operating systems for a long time, but so far no distribution has officially appeared that could fully work from an external device on any computer. No matter how you try to protect your computer from breakdowns or virus infection, sometimes critical situations occur when the installed operating system can no longer function normally and stably, and you need your files and information that remains in the working folders along with the OS. For this, emergency boot disks, or Windows PE, were created.
Good to know!
In order to download such an operating system from an external storage medium, you must first perform the following steps:
- Make the device bootable by writing boot sectors to it;
- Pre-download and properly port Windows PE to a removable device;
- If necessary, add drivers to the image (this is especially true for SATA drivers).
It should be remembered that the speed of the operating system, which is loaded from an external device, is much slower. This is due to the fact that the performance depends on the speed of the device itself, as well as the frequency of the bus through which the signal is coming from / to the device. If you run the OS from USB devices, then the speed drops by about ten times (Average speed of loading information from a USB flash drive 10 MB / s, average speed of HDD SATA 100-120 MB / s).
How is the process of loading and starting PE OS?
After pressing the computer’s power button, devices are polled, after which their readiness is checked, and the attempt to boot starts according to the priority list, which is stored in the BIOS settings. The first step is to read the boot sectors, which store the addresses where the boot loader is located to run Windows PE. After that, a pre-installed system image starts loading into the computer’s RAM. It is worth noting that all files and settings that occur during operation with the OS at the next start will be lost.
How to configure the boot process of Windows PE from a flash drive?
There are currently two types of BIOS. The old one is typical and simple, which is similar to MSDOS and contains only menu items that you can navigate only with the keyboard. The new one is UEFI, it differs significantly in both appearance and functionality. In UEFI, you can control and select all the settings using the mouse and keyboard.
Organization of loading in UEFI
If possible, you can simply drag the desired device to the first place with the mouse pointer, thus changing the boot order. The classic boot organization method also works:

- Put in the first place Download from USB or the name of your flash drive.
- Start the computer.
Organization of loading in a typical BIOS
- Connect the USB device before starting the computer.
- Go to the BIOS menu in the “Boot Device Priority” section (Del, F2, F12 buttons).
- Put in the first place Download from USB (sometimes defines as USB HDD, or in the settings of the priority hard drive you need to put a USB flash drive) or the name of your flash drive.
- Save the changes before exiting.
- Start the computer.
Alternative boot method
This method is used if you can go separately to the bootloader menu by explicitly indicating the boot device to it.
Hello! Today I want to tell how to install boot from a flash drive in the BIOS. For what it may be necessary, for example, you made a bootable USB flash drive and want, for example, to install Windows 10. It may also come in handy: when necessary, put the boot from the DVD and CD into the BIOS. Many administrators who are faced with this for the first time, for example, when restoring a system, can lose a lot of time due to ignorance, not realizing what he is doing wrong. I hope that this instruction will be useful to you and you will understand the principle of this action once and for all,
Via the Boot Menu to boot from a flash drive
In most cases, installing a boot from a USB flash drive into a BIOS is required for some one-time task: installing Windows, checking your computer for viruses using LiveCD, resetting your Windows password.
In all these cases, it is not necessary to change the BIOS or UEFI settings, it is enough to call the Boot Menu (boot menu) when you turn on the computer and select the USB flash drive as the boot device once.

For example, when installing Windows, you press the desired key, select the connected USB drive with the system distribution, start the installation - setup, copy files, etc., and after the first reboot occurs, the computer will boot from the hard drive and continue the installation process in the factory mode.
I wrote in great detail about entering this menu on laptops and computers of various brands in the article How to Enter the Boot Menu.
How to get into the BIOS to select boot options

In different cases, in order to get into the BIOS setup utility, you need to perform essentially the same actions: immediately after turning on the computer, when the first black screen appears with information about the installed memory or the logo of the computer or motherboard manufacturer, click the a button on the keyboard - the most common options are Delete and F2. Typically, this information is available at the bottom of the initial screen: “Press Del to enter Setup,” “Press F2 for Settings,” and the like. By pressing the right button at the right time (the sooner the better - this must be done before the operating system starts loading) you will be taken to the BIOS Setup Utility menu. The appearance of this menu may vary, consider a few of the most common options.
I want to throw a summary table of all the buttons for entering the BIOS of different manufacturers.

Change boot order in UEFI BIOS
On modern motherboards, the BIOS interface, or rather, UEFI software, as a rule, is graphical and, perhaps, more understandable in terms of changing the order of boot devices.

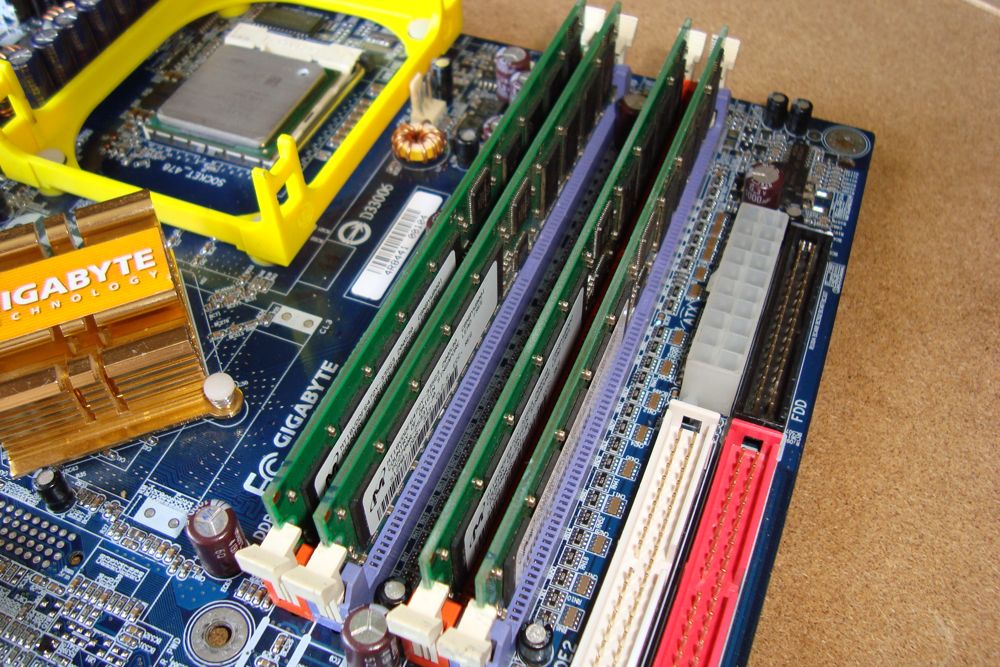
In most options, for example, on Gigabyte (not all) or Asus motherboards, you can change the boot order by simply dragging the disk images with the mouse accordingly.

If this is not possible, look in the BIOS Features section, in the Boot Options item (the last item may be located in another place, but the boot order is set there).
Configuring boot from a flash drive in AMI BIOS

Please note that in order to do all the described actions, the USB flash drive must be connected to the computer in advance, before entering the BIOS. In order to install the boot from the USB flash drive in the AMI BIOS:
- From the top menu, press the right key to select the Boot option.
- After that, select the Hard Disk Drives item and in the menu that appears, press Enter on 1st Drive.
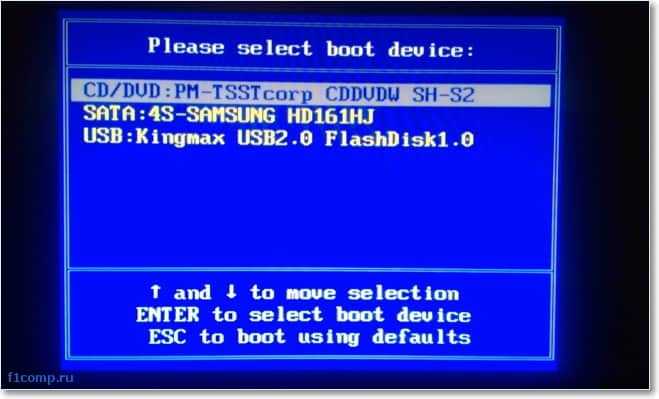
- In the list, select the name of the flash drive - in the second picture, for example, this is Kingmax USB 2.0 Flash Disk. Press Enter, then Esc.

Menu for BIOS boot settings

Next step:
- Select the item “Boot device priority”,
- Select “First boot device”, press Enter,
- Again, indicate the flash drive.

If you need to boot from the CD, then specify the DVD ROM drive. We press Esc, in the menu from the top from the Boot item we move up to the Exit item and select Save changes and exit or “Exit saving changes” - to ask if you are sure that if you want to save your changes, you will need to select Yes or type “Y” from the keyboard, then press Enter. After that, the computer will reboot and start using the USB flash drive, disk, or other device you have selected to boot.
Booting from a flash drive in BIOS AWARD or Phoenix

In order to select the device to boot into the Award BIOS, select Advanced BIOS Features in the main settings menu, then press Enter with the First Boot Device option selected.

A list of devices from which you can boot will appear - HDD-0, HDD-1, etc., CD-ROM, USB-HDD and others. To boot from a USB flash drive, you need to install USB-HDD or USB-Flash. To boot from a DVD or CD-ROM. After that, we go one level up by pressing Esc and select the menu item "Save & Exit Setup" (Save and exit).
Configuring boot from external media in the H2O BIOS

To boot from a flash drive in the InsydeH20 BIOS, which is found on many laptops, in the main menu using the "right" key, you need to go to the "Boot" item. Set External Device Boot to Enabled. Below, in the Boot Priority section, use the F5 and F6 keys to set the External Device to the first position. If you need to boot from a DVD or CD, select Internal Optic Disc Drive.
After that, go to the Exit item in the menu above and select “Save and Exit Setup”. The computer will reboot from the correct media.
Boot from USB without entering BIOS (only for Windows 8, 8.1 and Windows 10 with UEFI)
If one of the latest versions of Windows is installed on your computer, and the motherboard is equipped with UEFI software, then you can boot from a USB flash drive without even entering the BIOS settings.

To do this: go to the settings - change the computer settings (through the panel on the right in Windows 8 and 8.1), then open "Update and recovery" - "Recovery" and click the "Restart" button in the "Special boot options" item.

On the “Select an action” screen that appears, select “Use device. USB device, network connection or DVD. ”

On the next screen you will see a list of devices from which you can boot, among which should be your flash drive. If suddenly it is not, click "View other devices." After selection, the computer will reboot from the USB drive you specified.
So, just select the boot from the USB flash drive in the BIOS. Site Material
Hello! Today I rested all day, but Sunday. But towards evening I thought what I needed, I needed to write something useful on my blog. I began to think that I hadn’t written yet, and that it might be useful to you in the process of solving various computer breakdowns, and then the thought came that I already wrote about it, and how I wrote in it, too, but there’s still a way that when turned on computer can choose a device to boot without having to go into the BIOS. I’ll write about this, I’m sure that this advice is useful to many.
To choose from which device you want to start the computer, you have to often. For example, you want to, or simply boot a computer from a boot disk to scan your computer for viruses. And for this you have to go into the BIOS, look for where to find this item in which the boot order is set, and on different computers it is all done differently, and many at this stage abandon the idea of \u200b\u200bfixing the computer on their own.
If, for example, you need to boot once from a CD / DVD disc or flash drive, then you can do without changing the settings in the BIOS. And now I will tell you how to do it.Choose a boot device when you turn on the computer
We insert the disk into the drive, or connect the USB flash drive. We reboot the computer and as soon as it starts to boot, press the key F11.

A window will appear “Please select boot device:”, in which using the up and down arrows we select the device we need, from which we want to boot, and confirm our choice by pressing “Enter”. As you can see, I have the ability to boot from the drive, flash drive and of course the hard drive.
Which device to choose, this will boot. As you can see, everything is much easier than digging into the BIOS settings. If nothing happens when you press F11, then there are at least two options:
- You have a USB keyboard, and in the BIOS settings support for such keyboards is disabled at startup. You need to connect a regular keyboard, and with it, go into the BIOS and in the Integrated Peripherals item find USB Keybord support and set the value to Enable. After that, your USB keyboard should work.
- And the second case, it’s just that you have another key installed to turn on the boot device selection menu when you turn on the computer, or this function is simply disabled in the same BIOS. For example, in Acer laptops in BIOS, there is the item “F12 select boot device” (or something like that), which you need to enable by setting Enable. After that, the menu will be called up using the F12 key.
It seems to have written everything, there will be questions, ask. Good luck!
Nowadays, manufacturers of laptops, nettops, all-in-ones, and stationary PCs have increasingly begun to produce them as part of systems that do not have an optical drive. This is not surprising, because the digital industry has virtually supplanted the distribution of various content on optical drives.
Due to the fact that the computer does not have an optical drive, users began to have difficulties installing the operating system on it. Often, when installing the OS via a DVD drive, the user did not make any settings in the BIOS, since the first boot device by default is DVD-ROM. The only option for systems that do not have a DVD-ROM is to install from a USB flash drive.
To put the OS from a USB flash drive or from a portable USB HDD, you need set options for bootable USB devices in BIOS. In order for our readers to be able to boot from a USB drive on their own, we prepared a material in which we will describe, by way of example, the BIOS setup process for loading from a USB flash drive for various systems.
Prepare our USB drive
First of all, to boot a USB flash drive using the BIOS, you need to make it bootable. For example, take a licensed disk with Windows 7 and make an iso image from it. The image can be made using DAEMON Tools or Alcohol 120%. Also, the original disk image with the licensed seven can be downloaded from the official Microsoft website, while having a license key.
Having received the image file, we proceed to the second step. This step includes creating a bootable USB flash drive using the utility Rufus. This utility is chosen for a reason. A distinctive feature of the utility Rufus is that it can write bootable USB flash drives, both for the regular BIOS and for UEFI BIOS. Download utility Rufus from its official page and immediately launch it, as it does not require installation.
In the program window that opens, it can be seen that in the first combined list “ Devices»A 16 GB flash drive is displayed. After selecting a USB device, you must specify the program Rufus the path to the iso image of Windows 7. To do this, click the button with the icon of the laser disk and select the image. After that, press the Start button and wait for the completion of the creation of our bootable USB drive.
Boot flash drives are created in the same way for Windows 8, 10 and XP, as well as for other operating systems. Especially convenient to create with Rufus bootable USB flash drive with Windows XP. This is due to the fact that most of the ways to create a bootable flash drive with Windows XP are very difficult for the average PC user. WITH Rufus on the other hand, a Windows XP drive is quick and easy to create.
After the bootable USB flash drive is created, you can proceed to install or reinstall the seven using it. Therefore, in the following example, we will describe the process of loading the flash drive we created on a computer with a UEFI BIOS.
We boot from a USB drive on a computer with a UEFI BIOS
In computers with UEFI BIOS support, you can use the Windows OS, both with support for the new BIOS, and without it. For example, take a computer that does not have an optical drive and is assembled on the basis of the motherboard MSI A58M-E33 with the support UEFI BIOS. Now we need to put the flash drive created earlier in this computer. For fast boot from a specific drive in motherboards running UEFI BIOS there is a special Boot menu. This menu allows you to select a specific drive without loading the BIOS main menu. On different computers Boot menu can be called via F12 and F11 . In our case, on the motherboard MSI A58M-E33 Boot menu called via the F11 key.

From this menu item “ UEFI: KingstonDataTraveler 2.0PMAM"And" KingstonDataTraveler 2.0PMAM". If we select the first item, then the Windows 7 operating system will be installed with support UEFI BIOS, and if the second, then with the support of the usual BIOS. After selecting the first or second item, the download of installation files will begin.
Note that if we created a bootable USB drive using a proprietary program from the Microsoft Windows USB / DVD Download Tool, we would not be able to install an OS that supports the UEFI BIOS, since it creates a bootable USB flash drive that does not have UEFI support.
We move on. Now let's try to configure the boot from USB devices from the BIOS of the motherboard MSI A58M-E33. To do this, when the computer starts, press the Del key. This action will load the BIOS of the motherboard.
In the main BIOS window, go to the “ Settings”, After which the settings menu will open. In this menu we need to select "". After selecting it, the boot settings will open.

In these settings, the hard drive is the first boot device.
 So that our flash drive is loaded at the start of the system, we will set the item “ UEFI USB Hard DiskFirst on the list.

After these steps, you must save the BIOS configuration and restart the computer. Now, when the system starts, the USB drive with UEFI BIOS support will be the first to boot. To select a USB flash drive without OS UEFI BIOS support, you need to set the item “ USB Hard Disk»To the very top of the list in BIOS boot settings.
The example shows how easy it is to set up. Boot menu and boot BIOS configuration of the MSI A58M-E33 motherboard. The BIOS setup on new motherboards from other manufacturers looks similar.
Configuring booting from a USB drive on an old computer with Phoenix BIOS
Phoenix BIOS created by Phoenix Technologies. This BIOS was quite popular on older computers. Via Phoenix BIOS You can also boot from a flash drive. For example, take the SAMSUNG R60 laptop, which has support Phoenix BIOS. As on most computers, press the Del button and go to settings Phoenix BIOS.
For our task, we need to go to the tab " Boot". On this tab, select " Boot device priority", After which we get into the boot device settings menu.
 In these settings, we need to select the flash drive first in the list, as shown below.

Having done these actions, our bootable USB flash drive will be loaded first at system startup. In the same way, you can put and run a flash drive on most PCs running the Phoenix BIOS.
Configuring booting from a USB drive on an old AMIBIOS computer
Consider launching a flash drive on a PC running AMI BIOS. developed by the American company American Megatrends Incorporated, which implies the abbreviation in its name AMI. This BIOS is known to many PC users because of the start logo at system startup.

Turn on the computer and go to the settings using the Del key. In the BIOS window, we need to go to the "" settings item.

 After the steps taken, the settings will open, which allow you to set the priority of the drives when the system starts, including the flash drive.

In the same way, you can put and run a flash drive on most computers running AMIBIOS.
Problems solving the task on AMIBIOS and Phoenix BIOS
Users of very old laptops and desktop computers may run into a problem starting up a bootable USB device.
This problem is due to the fact that on very old computers running AMIBIOS and Phoenix BIOS there is no support for starting USB devices at system startup. Therefore, the only boot device in this case will be an optical drive.
Another nuance in solving our problem may be different versions of AMIBIOS and Phoenix BIOS, which differ from those discussed above. The main difference may be the interface and a different arrangement of settings. In this case, you should not be upset, since the developers do not hide the boot configuration settings and they can always be found and configured by analogy with the examples described above.
Configuring boot from a USB drive to a mini PC
New mini PC Compute stick from Intel quickly gained popularity among users, as it is a computer with Windows OS on board, which in size is only several times larger than a conventional flash drive. Due to such dimensions, it does not have most of the interfaces like stationary PCs and laptops. For example, there is no RJ45 interface and no interface for DisplayPort digital monitors.

Since Intel Compute stick Since it comes preloaded with Windows 8 or 10, most users do not have problems installing the OS on it. But what about the situation when the OS suffered as a result of viruses or the removal of system files.
In this situation, a bootable flash drive will help and Boot menu BIOS. For example, take an analog of Intel Compute stick called Meegopad T02. To reinstall Windows on this computer, you need to download the OS image on the official website of the manufacturer Meegopad T02 www.x86pad.com. After downloading and creating a bootable flash drive, put it in the Meegopad T02. Then turn on the Meegopad T02, pre-boot into Boot menu BIOS using the F10 key.

AT Boot menu You can select a USB flash drive and install Windows using it. To constantly boot the USB flash drive at system startup, you can open the BIOS, and set the boot priority of different USB drives in it.
To summarize
After reading the above examples, an ordinary PC user can easily prioritize bootable flash drives in systems with different versions of BIOS. Learning to put the flash drive first at boot, you will understand how quickly and conveniently you can install various operating systems on your PC.
We hope our article will help you boot from a USB flash drive and install an operating system, and also help you install it on computers that do not have an optical drive.