Laptop owners often face a problem in the hinge shaft area. Over time, it loses its factory appearance and simply collapses. It would seem that the only way out of this situation could be a trip to a service center, but we will look at a video that describes in detail the entire process of restoring a laptop and find out how this can be done at home.
What do we need:
- metal plate 0.7 mm thick;
- cardboard for making a template;
- epoxy adhesive;
- epoxy resin;
- screwdriver;
- dye;
- silicone;
- plasticine;
- acrylic;
- toothpicks.
First of all, we need to disassemble the laptop and remove its lower part.
Next, we take silicone and take a cast from a more or less intact part of the laptop case. To do this, we take plasticine and acrylic, which we use to make molds. Close all holes with toothpicks.

Before pouring silicone, the walls of the mold and the laptop case must be lubricated with medical glycerin so that it is possible to separate the case from the silicone. Silicone is poured in three approaches with an interval of 60 minutes.

When the silicone has cooled, we release the resulting mold.

After taking the impression, we can start preparing the laptop case for gluing. To do this, we grind the side wall of the hinge shaft with a dremel. Instead of this wall, we will have a metal plate, which we will later make from a cast. It will also cover the missing part of the rear wall of the hinge shaft.


Next, cut out the metal plate according to the template and fit it to the shape of the corner. Also, be sure to check the plate and the hinge of the mine for a match. The metal plate must be marked for drilling holes through which the mounting screw will be screwed in the back.

We drill a hole in a metal part.

We insert our silicone mold and see how much plastic is missing on the case. The missing part of the plastic can be filled with a mixture, which is obtained by mixing epoxy resin and fiberglass. The mixture should be thick so that it can be accurately distributed throughout the body.


When the fiberglass is distributed, the metal plate can be inserted.

After all that has been done, fill it with epoxy glue. The case must be placed at such an angle that the epoxy can fill the entire corner.

Remove the form after 24 hours.

With the help of a dremel and a cutting disc, we cut off the excess part of the metal plate.


We level the body with putty and process it with sandpaper.
Repair hinges, laptop (netbook) mounts
A laptop or netbook is more personal than a desktop computer. And it would seem that it should break less. Opened, worked, closed. And in general, everything has been like this for several years. Opened - closed, opened - closed, opened - did not close = (... Yes, unfortunately it happens that one day the fasteners on a laptop or netbook break. Sometimes the word "break" sounds soft, - racks break out of fasteners.
So how do you make do-it-yourself laptop (netbook) hinge repair. Or how to replace hinges (mounts, racks) of a laptop. To be honest, this is not an easy task. So if your nerves are naughty or you are disassembling a laptop for the first time, then it is better to take it to the workshop. By the way, if you are interested, please read and solve your problems. Okay, let's get started.
There are two stages laptop hinge repair. We will talk about them now.
1st stage. Restoration of hinges by melting down the racks of the laptop (netbook) case.
Let's say you have already untwisted the laptop yourself. And detached the cover with fasteners. I hope everything was done properly. As a result, we should see something like this:

It can be seen that after frequent use or careless attitude to the laptop. Were broken laptop stand. AND hinges with bolts and mortise screws are torn out. Hmm... that's sad. Well, let's not get upset. It could be worse. We turn on the soldering iron to warm up, and at this time we unscrew the bolts from the hinges. As you may have guessed, we need to solder the mortise bolts back into the laptop case. But first you need to build up a little plastic. Having done this, we take the broken screw with tweezers and attach it to its place, pressing down with a soldering iron so that there is heat and the plastic succumbs to deformation.
Here's what should happen:

Having beautifully installed it in its place, one should not forget that a bolt will be screwed into it. Therefore, we take this bolt and do a check. It should spin.And so we melt all the other screws. Just do it carefully and set it in its place as clearly as possible. Otherwise, then when assembling the laptop, you will not be able to assemble it.
So, finished with the screws. But there is another problem as well. Namely, when laptop case rack also broken. It looks like this:

How to do laptop stand repair. In principle, it is similar to fusion of screws. We will only melt the nut into the rack. Naturally, the size must be chosen correctly. And the most important thing! Notebook (netbook) chassis mounts should remain the same height as it was. Otherwise, you will have to look for a longer bolt. In the end it should look like this:

Well, I think that you have succeeded. Everything is clear and even. Now you can twist the laptop and use it. That's it, everything seems so simple =) Five minutes and you're done. But in practice, and if for the first time, it is not at all so simple. The first time I suffered all day. It happens that the first method does not help or will no longer help. In this case, to your attention the second method.
2nd stage. Laptop (netbook) hinge repair. Bolt fixing.
This option is, let's say, more reliable. Because the laptop hinges will be fixed to the body with bolts and screws from the garage =)

And in a slightly different way. In the first version of our repair, we made it so that the bolts passed through the hinges and screwed into the upper part of the laptop case (where the keyboard is). Over time, laptop mounts can break again. And this time laptop (netbook) hinges will be fixed to the bottom of the case. But it needs to be prepared. Remember, I wrote above what to do with laptop case mounts? Now, do this for four racks. Selecting the height depending on the bolts that you have selected. It looks the same as picture #4.
After all the necessary steps have been completed. You can try twisting the laptop. This mount will definitely hold better. Because the loops are fixed not only in the body, but also inside.
|
Don't forget to leave |
So, the story is painfully banal, the laptop slipped off the sofa and fell, while the lid broke in the hinge area so that the screen stopped fixing in the desired position, strove to fall, and in order to close the lid or open it with one working loop, one had to resort to very scrupulous , dangerous rituals, which did not add comfort at work.
Using a laptop with a broken case has become simply dangerous, at any moment there was a high probability that the cable would break, the matrix or the remaining loop would break, and the device could be thrown into the trash, tk. its repair at a cost approaching the purchase of a new one.
First of all, I started looking for a new cover for my Sony Vaio laptop, to replace the broken one, and, although the model is quite common, I, for reasonable money, could not find in my city, and even in the region, a good offer either in services for repair, nor on Avito.
After which and it was decided to try to restore the existing cover for a while, while I'm looking for a replacement for it, because the laptop is used quite actively at home for work and I wanted to avoid more serious breakdowns.
Since the decision to repair the hull in the loop area is temporary, it was supposed to spend the minimum amount for its implementation.
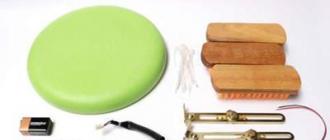
Then I went to the nearest "French supermarket with a bird" and bought the following:
- Epoxy universal adhesive EDP - 106 rubles
- Super glue "Second" - 12 rubles
- White construction bag - made of polypropylene fiber - 8 rubles

By the way, by the way, it was possible to save even more by choosing a smaller volume of epoxy glue and the cheapest superglue, and generally bring the bag from the garage. :)
So how did you figure out I decided to just glue the laptop cover with epoxy glue, reinforcing the connection with polypropylene fiber, looking ahead, I’ll say that it turned out so reliably that the laptop has been working with the case restored in this way for more than 8 months.
First of all cover must be removed to repair, in my model, for this I had to unscrew the fixing screws at the corners of the screen, hidden behind rubber dampers.

We also unscrew some elements, such as a camera and antennas, on the inside of the cover, it is best to photograph all the stages in detail, so as not to forget later what, where and how it was fixed, this is how this report turned out.
After the laptop was disassembled, it became clear that the destruction was quite large, not only the lid was broken, but also the hinge fasteners and even reinforcement - a steel plate running along the entire side wall of the screen.

In the photo you can also see traces of a hasty repair, which I tried to do immediately after the discovery of a breakdown - filling a crack in the case with a two-component adhesive, like the one in the photo below. Such a repair did not last long, it was enough to open and close the laptop a couple of times, and the connection cracked. This once again confirms that it is necessary to approach the restoration more thoroughly.

The lid of the laptop and the missing fragment were carefully cleaned with ordinary sandpaper and I made deep enough notches on them with a clerical knife to more securely fix the glue, after which the surface was degreased with an alcohol solution.
For greater structural rigidity, not only the gluing place itself was prepared, but also a large area around.


Then all the fragments of the cover were glued together with super glue, in the order in which they were located before the breakage, including the mortgage for the screw that fixes the hinge.

Actually, the glue consists of resin and hardener, they must be mixed approximately in the following proportion of 10-12 parts of resin per 1 part of hardener. For mixing accuracy, I used a baby antipyretic graduated syringe, and mixed and applied the adhesive with a baby ice cream yogurt stick.

At the same time, patches, two at once, were prepared, cut with scissors from a construction bag according to the size of the surface to be glued. Then an even layer of epoxy glue is applied to the surface of the broken laptop lid.

Then a polypropylene patch is applied to the adhesive and carefully ironed so that the adhesive under it comes through.

After that, the whole procedure is repeated, another even layer of glue is applied on top and another patch, which is also carefully ironed. Finally, all this is poured with an even layer of epoxy glue.

Next, it is imperative to wait about a day, and if you did everything right - you kept the proportions when preparing the glue, you should get a very strong reinforced adhesive layer. In my case it looked like this:

When the coating hardened, I did the same from the inside of the lid, the only difference was that only one layer of reinforcing material was used. In addition, I had to pre-cut places in the patch for fasteners, latches and other elements.
In the end it turned out like this:

After complete drying, about another day later, all the protruding parts of the patch and glue were cut off with a clerical knife, in addition, the edges were processed with sandpaper.
As a result, the restored, glued laptop cover looks like this:


Yes, of course, aesthetically it is not very elegant, but as a temporary solution, and even more so at an affordable cost for everyone, I think it has the right to life.
The laptop started working with renewed vigor, and most importantly, I am calm about its safety, I can, as before, adjust the tilt of the screen from any side with one hand, keep it on my knees or on the table, I almost forgot that the lid was broken and I had to be extremely careful with contact him.

As I already said, for more than 8 months (since the beginning of 2017) the connection has been holding securely, the place of gluing has not parted, no new cracks have formed. I hope this article will help someone restore their laptop, return it to work, extend its life.
A broken laptop cover, even an old model, is not the end, everyone can restore it.
Moreover, there is a simple, inexpensive way to securely decorate the resulting patch on the lid so that your friends will ask when you managed to buy a new laptop, I will tell you about it in one of the following articles. Be sure to follow the announcements - join our VKontakte group.
And how did you do the repair of the laptop cover with your own hands? - be sure to write if you know a simpler and more reliable way!
Such a problem can appear for any PC user. You can use a computer for several years without any problems, but someday it will break. Everything has a lifespan, which in some cases is very limited. But what to do with mechanical damage. What if, after several years of confident field use, a huge crack appeared on the lid of your computer, as if by chance, which threatens to put it out of working order.
The crack may be located near one of the fasteners, and may increase if there is some load on it when opening and closing the cover. At the service center, you may be charged too much for repairs. In this article, you will find useful information on how to get rid of the problem wisely and without unnecessary expenses.
First, you need to purchase glue. For this business, you can go to a hardware store or supermarket and go to the department of varnishes and paints. The glue we need, unlike the so-called “super glue”, does not leave white marks on the surface and has the ability to dissolve plastic, which will improve gluing at the joints. Glue is relatively inexpensive, it costs 120 rubles.
In any store that has dishes, look at this grid. It also costs a penny.
If everything is very bad, then it is better to glue the joint of the crack first.
The next step is to prepare the mesh. It is usually strong, so you have to work a little. Using scissors, cut the mesh so that it acquires this shape. 
As mentioned above, first you need to glue the joints. Just do it carefully and without much fanaticism, otherwise it can ruin everything. Be careful if the glue remains on the outside of the cover, it is strongly recommended not to touch it until it dries. After all, when the glue dries, it can be cut off.
At the time of gluing, make sure that the joints are as even as possible. To do this, you may need to bend the lid a little. At the beginning, a small amount of glue is better to fix in several places. It should be noted that the glue does not dry instantly, but gives you 20 seconds to fix what did not stick correctly.

Glue the mesh completely, focusing on the edges and bends. It is better to leave it to dry at night. Since the mesh is thin, this should not interfere with the installation of the cover back on the display.
In the end, it will turn out very well, because the crack is almost invisible.