Many users are interested in where the history is in the Yandex browser and how to clear it. This Internet browser is characterized, first of all, by a simple interface. There is nothing superfluous here, only the necessary icons. This is why some users get lost and cannot find the log of visited web pages. Let's take a closer look at how to do this.
How to view history in Yandex Browser
In order to find out where the history of Yandex browser is, we first launch the Internet browser. In the upper right corner there is a gear-shaped icon (in the latest versions it looks like three horizontal stripes). Click on it, after which a context menu will appear. Here you should select the History item, after which a new page will open where you can find the information you are interested in about the sites you visited.
There is another way to view the history of the Yandex browser. To do this, click on the Tableau and go to the Recently Closed tab. If you don’t have it or it has disappeared, then you will find a solution to this problem. If you are interested in the whole story, you will see a link below to go to it. You can also use hotkey combinations. For users with Windows OS who are interested in where the history is in the Yandex browser, you need to press Ctrl and H. If you have Mac OS installed on your computer, then click ⌘ and H at the same time.
How to clear history in Yandex.Browser
In the case when you need to clear the Yandex browser history for a certain period, you need to go to Settings and select Advanced. A menu will open in front of you, where you need to click on Clear history. In the window that appears, select the period for which you want to delete information, as well as its type. For example, if you only need to clear your browsing history, then put a highlight next to this inscription and uncheck all other checkboxes. And if you still want, then leave another tick in the “Cache” field.

Keep in mind that there is no way to restore Yandex browser history using standard tools yet, so be careful. If necessary, you can remove only certain pages from your browsing history. To do this, click on and select History. Here you should highlight the information that you want to get rid of. After the checkboxes are next to all the necessary pages, click on the Delete selected elements button and confirm your action.
In order to clear the history, you can use hotkeys. Microsoft OS users can press Ctrl + Shift + Del for this purpose. Those using an Apple product must click ⌘, Shift and Del at the same time.
I would like to say a few words about where the download history is located in the Yandex browser. To get here, click on Settings and go to Downloads. To remove any information here, put a checkmark next to its name and click on the line Remove from list. In addition, you can access your download history through the Tableau. We click on the corresponding item, and a window opens in front of us in which we can see when and what files were downloaded to the computer. You can also delete information about downloads through the Clear history window. To do this, simply check the box next to the download history option.
As you can see, there is nothing complicated. Managing the history of pages visited and downloads made is quite simple, like all other settings in the Internet browser from Yandex. However, before you carry out the procedure, make sure that you remove what you will not need. To avoid manually clearing your download history every time, you can use it in Yandex Browser.
Important: Firefox must be closed down while copying files between profile folders. Also, Step 1 refers to your "old" profile folder - the profile containing data you want to copy to a new profile. If you can"t open a profile from within Firefox, see.
Repeat steps 3-5 for each file you wish to transfer over to your new profile folder.
While copying your personal data from an old Firefox profile to a new Firefox profile, it is possible that you could copy over the file that is causing the problem you are trying to get rid of! The more files you copy over, the greater the chance of this happening. It is therefore recommended that:
- You copy over only the minimal amount of files that contain your most important data that you simply can't live without.
- You copy over a few files at a time, and then check that the problem you are trying to get rid of hasn't returned.
Your important data and their files
Bookmarks, Downloads and Browsing History
- places.sqlite
This file contains all your Firefox bookmarks and lists of files you have downloaded and of websites you have previously visited. For more information, see Bookmarks in Firefox.
- favicons.sqlite
This file stores website favicon images. It"s best to also include this file when recovering the places.sqlite file.
Passwords
Your passwords are stored in two different files, both of which are required:
- key4.db - This file stores your key database for your passwords. To transfer saved passwords, you must copy this file along with the following file.
- logins.json - Saved passwords.
Site-specific preferences
- permissions.sqlite
This file stores many of your Firefox permissions that are decided on a per-site basis. For example, it stores which sites are allowed to, or blocked from setting cookies, installing extensions, showing images, displaying popups, etc.
Search engines
- search.json.mozlz4
This file stores user-installed search engines. For more information, see Add or remove a search engine in Firefox.
Personal dictionary
- persdict.dat
This file stores any custom words you have added to Firefox's dictionary. If you have never added a custom word to the Firefox dictionary, then you will not have this file. For more information see How do I use the Firefox spell checker? .
Autocomplete history
- formhistory.sqlite
This file remembers what you have searched for in the Firefox search bar and what information you have entered into forms on websites. For more information see Control whether Firefox automatically fills in forms .
Cookies
- cookies.sqlite
Cookies are used by websites for a variety of reasons, some of which include keeping you logged in to a website you have previously logged in to, remembering any preferences a website has allowed you to set, authenticating you as a person who has visited a specific website before, etc.
Security certificate settings
- cert9.db
This file stores all your security certificate settings and any SSL certificates you have imported into Firefox.
File types and download actions
- handlers.json
This file stores your preferences with respect to what Firefox does when it comes across known file types, such as whether you want to save a file or open it with a specific application. For more information see
Hello Dear friends, today I want to tell you how to make it, that is, I will only touch on the basic settings with which you should start working by installing this or that browser.
In this article I will not cover all 25 browsers (today this is the number that can work with the Windows operating system), but I will tell you about the most common ones. Many users mistakenly think that choosing a browser is a simple task and that they are all the same, that they are displayed the same on all website pages. In addition to such obvious differences as the appearance of the user interface and the program management system, there are also hidden differences in security, speed of loading and displaying pages, and the presence of additional auxiliary functions. If we take the totality of the listed factors, the differences can be serious.
“Customize the Google Chrome browser”
Along the way, the browser settings of “Internet Mail.ru”, “Comodo Dragon”, “Yandex”, “Nichrome” also come here. All these browsers run on the Chromium engine. The settings and interfaces of these browsers are almost no different.
Click on the “Settings and Control” button (wrench in the upper right corner).
We see a context menu with which you can view history, downloads, etc., but today we’ll focus on the settings. Click on the "Settings" line.

In the settings window that opens, select “Basic”.

Now in the tab that opens we will see what we are asked to choose - which page we will see when we launch the browser. I checked the "Home Page" checkbox.

In the line of the window that opens, enter the page that we want to see when starting the browser - google, mail.ru, yandex.ru, webalta, etc.. If you mark the “Quick access page” dot, then when you open the browser you will be taken to the page which will display the sites you visit most often.
By clicking on the line "Manage search engines" we can select the search that is suitable for us from the list of proposed ones. If you decide to make Google Chrome your default browser, then click on the “Set Google Chrome as your default browser” button.
By clicking the “Offer to save passwords” button, the browser will prompt you to save the password when filling out the password field on sites; when you re-enter this site, the browser will fill in the password itself.

In additional settings you can configure spell checking and page translation. You can also specify the path to save downloaded files - either by default, or in a folder you created, or on the desktop, etc.. Surely install Google Chrome Before this, you used another browser in which you had bookmarks or favorites. You can import bookmarks and settings from another browser into Google Chrome by clicking the appropriate button in Settings.
“Customize the Internet Explorer browser (at least IE 9, at least IE 10)”
Click on the "Settings" button (gear in the upper right corner).

Click on the line "Internet Options" in IE 9, or "Browser Options" in IE 10.

We see the “Properties” window that opens; on the “General” tab you can enter the address of the page (pages) that you want to designate as your home page.

On the “Security” tab, we configure the security level that will be used when visiting sites – “Medium”, “Above Average”, “High”. Don’t set it to a high level, otherwise it will block everything, set it to “Above Average”.

While internet explorer is running, you can create a shortcut to the site you like and place it on the Windows desktop. To do this, right-click on the site page and select the “Create shortcut” tab.

On the privacy tab, you can also configure the settings that suit you by setting the slider to the desired position. Then “Apply”, “OK”.

In the Programs tab, you can set IE to be your default browser. Install add-ons. Assign programs for working with email.

By going to the "Manage add-ons" tab, you can enable or disable plugins and toolbars that launch with the browser. The more enabled, the longer the browser starts. Therefore, leave only the essentials you need.

In the command line, on the "Security" tab, you can enable the "SmartSreen" filter to safely open Internet pages. You can turn on tracking protection and clear your browser history.

By right-clicking on an empty space at the very top of the browser, you can enable or disable the add-ons you need. I was joking about Webalta! Just the other day I caught it on my computer with one program. I cleaned it out everywhere, read how to remove toolbars in this article. I didn’t even know that I had it until I started taking “screenshots” for the article.

You can drag any sites and search engines from “Favorites” to the “Favorites Panel” with the mouse. I dragged in the search engines I use most often.

By clicking on the triangle in the address bar you will see the addresses of the last sites you visited, the magazine and your favorites. You can go there immediately by clicking on the desired line.

I use Mozilla Firefox 19 and IE 10. When starting up, Firefox takes much longer to load than IE, but once loaded it works reliably, crashes very rarely, while IE does have crashes. I love Firefox for the huge number of add-ons and extensions; no other browser has so many. The settings are very simple. My friends, if you are using Windows OS, then I do not recommend you to set any default browser other than Internet Explorer. And even more so, God forbid, to remove it. I wrote this for those who want to use all the functions of a PC. Too much in Windows is related to IE, you may not use it, but don’t you dare eliminate it! The settings for IE 10 are simple, almost no different from IE 9. Now, in addition to Win 7, I also have Win 8 on my computer; IE 10 was immediately integrated into Windows 8.
“Customize the Mozilla Firefox browser”
Mozilla Firefox 15, 16, (17 I didn’t forget but I haven’t seen the Russian version), 18, 19 are several times faster than previous versions. With faster startup speeds, reduced page load times, improved web app performance, and the inclusion of hardware graphics acceleration, Firefox is optimal for working with complex, interactive websites.

To open the settings, click on this triangle.

The home page is easily customizable, and in the same window you can specify the path to save files. I find it convenient to download to my desktop.

You can always check the download speed of files.

Firefox Sync: Access your history, bookmarks, open tabs, passwords, smart address bar, and form data from multiple computers. Flexibility in customization. The concept of extensions and add-ons deserves special attention in the browser.
The essence of the idea is that the browser itself in its “pure form” provides only the basics - the address bar, tabs, program menu. Nothing special, nothing superfluous. If the user is satisfied with this, he doesn’t have to bother with any additions. But I think this will suit you only until the moment when you try to install the first add-on.
New Add-ons Manager: Choose from over 200,000 add-ons to help you customize Firefox's features, functionality, and appearance. Mozilla Firefox is the most extensible and customizable browser on the planet. You can customize toolbars, install additional extension modules and themes.
Like a telescopic fishing rod, Mozilla Firefox can transform from a small, compact browser into a surprisingly feature-rich tool for surfing the World Wide Web. You can also learn more about the capabilities of Firefox extensions by watching videos. Privacy and security.


Privacy and security in the browser. Do Not Track: Firefox is leading the movement to implement a universal Do Not Track standard, allowing users to tell sites that they do not want sites to track their behavior and use it to serve ads. Firefox puts privacy first by fixing flaws in some web standards, making it impossible for other users to access your browser history.

HTTP Strict Transport Security (HSTS): Automatically establishes a secure connection to prevent man-in-the-middle attacks and interception of sensitive data during the login process. Content Protection Policy (CSP): Prevents cross-site scripting attacks by allowing sites to tell the browser what content is legitimate.
With Firefox, you are free from various spyware, as well as ActiveX controls. You can independently control your privacy and flexibly manage your personal data. The browser allows you to instantly remove traces of your presence on the Internet. The JavaScript engine speeds up page loading and improves the performance of games and web applications.
Firefox includes hardware acceleration, high-definition video (WebM), 3D graphics, offline storage, professional typography, Mozilla's audio API to help you create visuals from audio, and more. Firefox includes a built-in web error reporting console and a web developer console. Additional extensions like Firebug make it easy to develop and debug web pages.
Firefox continues to work even if the Adobe Flash, Apple QuickTime or Microsoft Silverlight plugins fail. If one of these plugins crashes or freezes, the rest of Firefox will not be affected. Simply refresh the page to reload the plugin.

Adding sites to bookmarks, thanks to the asterisk in the address bar, is now possible with one click. Management of the magazine and bookmarks is unified and carried out within a single dialog window. Selecting the necessary links has become more convenient due to the presence of special groups of recently added bookmarks and the most frequently visited sites. Intelligent address input line As soon as you start entering an address, a prompt window immediately appears, where all matches are shown in bold.

Intelligent address input line. The window contains a list of previously visited sites. The line responds not only to site addresses, but also to their titles, which greatly simplifies and speeds up input. They are displayed in a window with a history of previously opened sites. Even if you don’t remember the exact address, the name of the resource will tell you the right way.

Automatic updates You no longer have to manually download new browser versions as they become available. The update system automatically downloads small patches of a few hundred kilobytes in size, saving you time. I started by using Mozilla Firefox 13, but today I’m already using Firefox 19, that is, it itself updated to version 19.
Optimal basic composition A simple, intuitive browser has everything you might need in everyday life. Bookmarks, journal, full screen mode, text scaling and much more - Mozilla Firefox has it all. Pop-up blocker You will no longer be annoyed by pop-ups that open when you visit many sites. You can independently specify which sites to allow pop-up windows to open and which not. Read emails without spam The Mozilla Thunderbird email client is a great add-on for Firefox. With MozBackup, you can backup your Firefox profile data or restore your data from a Firefox profile backup. You can save and restore data such as settings, bookmarks, history, extensions, passwords, cookies, saved forms, download list, certificates and styles.
Applications. Viewing Flash animations, executing Java applets and much more is possible using plugins for Mozilla Firefox. Search plugins from Mozilla.org Using search plugins, you can add search for popular sites to Firefox. Search plugins from the Mozilla Russia website Using search plugins, you can add search for popular Russian sites to Firefox. Dictionaries from Mozilla.org Dictionaries for spell checking in Firefox. Dictionaries from the Mozilla Russia website.

"Customize the Opera browser"
If you don’t like the default browser setting, then I will describe how to set up Opera, but only the basics. In Opera we have three settings options: Customize (Ctrl+F12), Quick Settings (F12) and Appearance (Shift+F12). Remember these keys. Settings are opened by clicking the red “Menu” button in the upper left corner, and then selecting “Settings – General”.

The Forms tab will help you fill out some information about yourself. This can be convenient, namely, it allows you to reduce the time it takes to fill out typical forms on some sites.

On the "Search" tab, you can edit the list of used search engines, which switch in the upper right corner of the browser. Decide according to your taste what you need and what you don’t.

You don't need to change much on the "Web Pages" tab. Unless, if you have a slow connection, you can turn on turbo mode and turn off pictures, or show only cached ones.

Let's move on to advanced settings. In the “Tabs” subsection we customize everything to your taste. Personally, I simply turned off sketches that were unnecessary, in my opinion.

In the “Notifications” subsection, it’s probably worth turning off the sound; personally, I unchecked the “Show Opera Unite application notifications” box, because I don’t use this service.

In the “Navigation” subsection, set page redrawing to “Continuous” and check the “Show full web address in the address field” option. The rest, I think, is up to your discretion.

Next is the “History” subsection. Here it is important to determine the size of the cache, both in memory and on disk. It is needed to quickly display a page that you have already visited (that is, without reloading it from the Internet, by using a copy saved on disk or in memory). The larger the cache, the more pages it will store. If fast loading of already visited sites is not important for you, then you can safely set zeros for both parameters (Memory Cache and Disk Cache, respectively). If this is important to you, then I recommend setting the maximum allowable value (400 Mb) both here and there (if the RAM is running out, you can rely on the disk cache by disabling the RAM cache). I set the time for checking updates on the server to “Every hour,” although this value could have been set higher.

In the "Security" subsection, check the "Enable fraud and malware protection" checkbox, and on the "Security Protocols" tab, check all available boxes.

On the “Network” tab, in the “Number of connections to the server” and “Total number of connections” items, set 32 and 128, respectively. Owners of weak Internet connections may have to return to the recommended settings (16 and 64).

Useful extensions for the Opera browser. Blocking ads and scripts. With Opera11, as in FF and Google Chrome, a list of extensions has appeared that can be installed, giving the browser new capabilities. Today I will touch on two extensions that everyone needs (they are responsible for the safety and comfort of being on the Internet) - NotScripts (analogous to Noscript for Firefox) and Opera Adblock (analogous to Adblocks Plus).
NotScripts.
It is engaged in preventing the execution of scripts on the page, if you have not allowed this yourself with your own hands. The fact is that JavaScript is one of the sources of various infections from the Internet, therefore blocking and monitoring its execution is one of the key security elements. A little more about this on the plugin page.
You can install the plugin by going to the page with it and clicking the "Install" button. After installation, a plugin triangle will appear in the upper right corner. We click on it with the mouse and see a small message that we need to do this and that for the plugin to work. Now we click on it and see a page with settings that opens in front of us.
That is, if you are now on sonikelf.ru, then if something doesn’t work, then you allow the sonikelf.ru script, not mail.ru. After that, you look carefully to see if what you needed worked? If the answer is yes and everything works as desired, then you don’t touch anything else. If not, then you carefully look at what other scripts there are and select one more from them, allowing it. And so on until what you need is fully operational. Try to avoid allowing scripts that bear the names of sites other than this one. Googlecode, Yandex, etc. are usually safe scripts.
Adblock.
It is installed in the same way (Install button). After installation, go to “Menu – Extensions – Manage extensions” and in the Adblock line, click on the gear image and, from the drop-down menu, select “Settings”.
In the settings, on the “Subscriptions” tab, we need to check two “Russian” checkboxes in the FanBoy and EasyList lists. On the "Button" tab, check the "Display the button in Opera address bar" checkbox.
This will enable the display of the plugin button near the address bar. To customize Opera personalization, you should start with the design, this is where the necessary buttons are located. Press Shift+F12, immediately go to the Toolbars tab and at the bottom check the box Show hidden panels when setting up. Now we see all the panels at once.
We proceed as follows: click on the desired panel, and then set the parameters in the sliding fields (bottom, top, hide, show, icon location, etc.) Next, we set up the navigation - it’s much simpler here: the Buttons panel, the menu on the left - Browser. Take any button and drag it to the control panel. The most necessary buttons are back, forward, home, update, start, create, passwords (if necessary).
You can also configure Opera by pressing Ctrl+F12. Here you can configure your home page and manage passwords. You can also drag the search form of any system onto the desired panel. Here other parameters are more finely tuned: managing cookies, java script, content, blocking sites (see parental controls), and even voice control. How to disable torrenting in Opera.
Or maybe you won't turn it off? I don't use Opera now; BitTorrent had to be installed as a separate program. Don't know how to use Torrent? The administrator of this site told me in confidence that he would soon publish an article about Torrent settings. Well, if you don’t want to download opera from a torrent? Instructions for disabling a torrent in Opera, although... We go into the configurator: write opera:config in the address bar and press enter.
Torrent in Opera is used by default. In the Bit Torrent parameter, uncheck Enable and click “Save” below. Now Opera 9 will be silent about the torrent, and Opera 10 and 11 will offer you to choose yourself or use your program, but will no longer download without asking. But it’s better to first, just in case, save the settings file C:\Documents and Settings\admin\Application Data\Opera\Opera\profile\opera6.ini If you make a mistake, you can easily return everything to its place.
That seems to be all, I didn’t describe the settings in detail, but I tried to cover those that will be needed immediately after installing the browser. Good luck to all! See you on the pages of the site.
), as in others, you can see the entire history, provided that you have not specifically cleared it.
The function to view the entire history, for a specific day or by date, undoubtedly brings great convenience to users.
It is almost impossible to remember many website addresses. Although Chrome has the ability to make bookmarks, if you add all the sites you visit there, then Google Chrome will turn into a trash can.
Also, sometimes there is a need to find out what, for example, children have watched - whether they are allowing themselves too much.
How to view the log in google chrome
It is very easy to see the Google Chrome browser history. You just need to make two clicks.
In older versions of Chrome, you need to click on the “key” icon, in new versions “three stripes”. They are located in the same places - at the very top on the right side.
After this, a tab will open in which simply click on the “history” line. Immediately after this you will see all, for a specific day or scroll by date.
How to view download history in Chrome
Google Chrome, like all other browsers, has its own file downloader and saves their history.
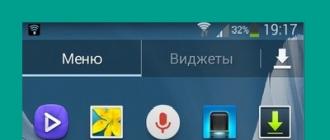
You can see your download history in the same way as website views, but instead of history you need to click “downloads”, as in the figure below.

If you download files from the Internet, purely using the Google Chrome downloader, then you may not know that special file download managers can be integrated into it, for example
It's much more convenient. If the Internet goes out, you can always resume the download, and you can view the download log directly in it, which is much more convenient.
Download Master is free and has a Russian interface. There are others - paid ones, but they are no better. Good luck.
Have you ever wondered what happens to the operating system at the moment when it draws its logo and says “Starting Windows”? And in general, why does it take so long to load? After all, when the system starts, no problems that are complex from a computational point of view are solved!
What then does loading the operating system mean? For the most part, this involves mapping executable modules into memory and initializing service data structures. Data structures live in memory, so operations with them should, in theory, be fast. Everything suggests that time is consumed precisely by the process of loading executable modules into memory.
For fun, let’s figure out which modules, in what quantity and in what order are loaded when the OS starts. To find out, you can, for example, get the system boot log. The test OS in my case is Windows 7 Enterprise x64. We will log the boot process using the kernel debugger. There are several options for kernel debuggers, personally I prefer WinDbg. We'll also need some tools to magically transform the log into something more pleasing to the eye.
Mining and crafting
Setting up debugging is easy to Google, so I won’t describe this process in detail. Since we are interested in everything that happens from the moment the system starts, we need to check the “Cycle Initial Break” item, with the help of which the debugger will stop as soon as the kernel debugging subsystem is loaded in the system being debugged. Duplicating the output to a file can be done using the ".logopen" and ".logclose" commands, it's simple. Another useful command is ".cls". It clears the command screen, and yes, only the command screen.The function we are interested in is “MiCreateImageFileMap”. This is an internal function of the memory manager that maps the executable file into memory. Memory mapping occurs when a section is created, for example, when an executable file is launched. However, please note that just because an executable file is mapped into memory does not guarantee that its code will be executed! This function simply creates a projection, most often “in reserve,” so that if someone decides to run the module for execution, it can save loading time. Let's set a logging breakpoint on this function.
If you have enough mana, enter the following command:
bu nt!MiCreateImageFileMap "dt nt!_EPROCESS -d ImageFileName @$proc; dt nt!_FILE_OBJECT -d FileName @rcx; g"
The magic line literally means the following:
- bu (Set Unresolved Breakpoint) - set an unresolved breakpoint. It’s not that someone or something doesn’t allow it, it’s just that to install it you need to decide at what address to put it. The fact is that it is not known in advance at what address it should be located. When loading any module, the presence of the required function is checked, and if such a function is found, a breakpoint is set automatically. This installation method is indispensable when ASLR is enabled - address space randomization, since modules will be loaded at different addresses each time, and a breakpoint set at a fixed address will most likely be out of work.
- nt!MiCreateImageFileMap is the symbol to stop at. WinDbg accepts an entry in the form "module_name!function_name". In this case, nt is a predefined alias for ntoskrnl.exe.
- What follows is part of the WinDbg script, which will be executed every time this function is stopped. “dt nt!_EPROCESS -d ImageFileName @$proc” in Russian means “display the ImageFileName field of the _EPROCESS structure from the nt module, provided that it is displayed at the address defined in the “current process” pseudo-register.” Next after the separator ";" the command means approximately the same thing, only the address of the structure is taken from the rcx register, in which the first parameter of the function is passed to the Microsoft x64 ABI. "g" means "go", i.e. continue execution.
A quick tip for using logging breakpoints: try not to use debugger extensions (commands starting with "!"), as this will make logging an order of magnitude slower.
Go! Release the breakpoint brake and wait. I waited until the desktop loaded, i.e. I'm logged in. The resulting “harvest” is slightly edited, all unnecessary is cut off for the convenience of further processing and fed to the python. Let's not focus on parsing the log. Let us only note that the graph fit into the shape of an Archimedes spiral with further manual correction, since the nodes overlapped each other. The resulting graph takes into account the order in which the libraries are loaded. Unfortunately, we had to sacrifice taking into account the loading order of executable files relative to libraries for the sake of readability of the graph.
Star map

Let's tentatively select several loading groups.
The OS starts working in the ntoskrnl.exe module, which is the core of the OS. And to be even more specific - from the KiSystemStartup() function. Together with downloadable system components, it forms the foundation of the OS: separation of operating modes, basic services for user applications, etc. This group also includes drivers marked for loading during system startup. In a nutshell, Windows OS is born in this shell.

The next node is the session manager. It is represented by the first post-system process that starts in Windows - smss.exe. The process is notable because it is a native Windows process, meaning it does not use the Win32 subsystem, which is generally not yet loaded. This process uses only native operating system services through ntdll.dll, which is the user mode interface to OS services. This process is also a trusted component of the operating system and has exclusive rights, for example, it can create security tokens. But its main purpose is to create sessions and initialize subsystems, both graphical and various executable ones (Windows, POSIX). This shell meets everyone's needs.

A logon group consists of several processes. In general, they are responsible for initializing sessions. This includes displaying the welcome screen, creating desktops, starting startup processes and initializing the security subsystem, etc. This broom sweeps away all strangers.

The group of services turned out to be the most massive. It owes much of its volume to the SuperFetch service. This is the one about whom they say that on weekends she pre-loads the office suite, and at the beginning of the work week - Steam with toys. Superfetch loads a huge number of modules when the system starts, so that later “everything works faster.” And besides it, the system has enough service applications and auto-starting drivers. I think everyone has seen the Services and Applications snap-in. This star of life brings into the system everything that is needed and not so much.

The last one I’ll mention is everyone’s favorite explorer.exe. It is noteworthy that by the time it starts, all the modules it uses are already loaded into memory. The screenshot also included a certain vcredist_x64.exe - the poor fellow was lying on the desktop of the experimental virtual machine and was loaded into memory by the conductor.

In general, there are many ways for a module to be loaded into memory. For example, it is enough to request information from the resources of the executable file, including its icon. Specifically in this example, the explorer checked whether this program requires elevated privileges, i.e. Is it worth adding a corresponding picture with a yellow-blue shield to the icon? Let me note once again that loading a module into memory does not mean executing its code!
Personally, I keep the resulting picture close by. It clearly shows dependencies, for example, of drivers. Also, paired with the Sysinternals Autoruns utility, you can see at what stage of loading certain modules are pulled up.
The load graph was built for Windows 7 Enterprise x64 installed on a VMware virtual machine. Below is a vector image of the graph and the file itself in gml format, which you can play with in any graph editor.