You can force the indexing service to work successfully, however, you will not be able to start it using the explorer. Your first task is to create a custom search directory to suit your needs. The preparatory steps are listed below.
- Open the Computer Management - Administration panel in the console.
- First open the Services and Applications folder, then the Indexing service folder. In the right pane, you will see a list of current directories.
- Stop the indexing service by right-clicking the Indexing Service folder and selecting Stop from the context menu. After the service stops, all entries about the current directories will disappear (calm!).
- Right-click on the Indexing Service folder and select Create - Catalog from the context menu. You will see the Add Directory dialog box in which you must specify the name and location of the new directory. In order not to enter the location manually, you can use the Browse button. In this example, we will use the folder created in the “Inappropriate search results” section of this chapter. It will allow you to visually verify that Explorer and the service search for files in different ways.
- Enter a name (for example, Special_Directory) and a location (for example, D: \\ Temporary_Folder) for the new directory. Click on OK. You will see a message stating that the directory will remain inaccessible until the service is restarted.
- Click on OK. The service will include the new directory in the list. Before the new directory starts working, you need to specify one or more folders for indexing.
- Open a new directory and select the Folders folder in it.
- Right-click and select New - Folder from the context menu. The Add Folder dialog box appears. With it, you can add local or remote.
- Click the Browse button and select the folder you want to index. Click on OK. Indexing Service will add the folder to the list.
Now everything is ready. Restart the indexing service by right-clicking on the Indexing Services folder and selecting Start from the context menu. After that, the fun may begin. A service does not necessarily create an index immediately, because it usually runs in the background. Before attempting to use the indexing service, take a look at the Documents to Index column and make sure its contents are zero. You can create index queries, however, in any case, you will have to wait for the indexing to finish.
Almost everything is ready
So, the directory is ready to use. Click on the Poll Directory entry. You will see the index service request form. Enter the query in the input field and click on the Search button. The indexing service will find all three files in the folder, as shown in the screenshot.
Please note that your options are not limited to a simple search. Using the advanced query, you can specify special conditions for matching. However, it is important to evaluate the costs associated with this method. At your disposal is a convenient graphical interface, but located unsuccessfully - the Computer Management console, which you have to get to through the Control Panel Administration. To search for data, you must start the indexing service and create a directory. The actual size of the directory is about 9 MB, despite the fact that the size of 1 MB is declared in the Computer Management console. To make sure of this, take a look at the catalog.wci folder created during the formation of your catalog and placed in its target folder. From the point of view of search results, the service works better than Explorer, but it requires more significant resources.
Hello, friends! Before writing this article, I practically did not use search in Windows. Why, if everything is clear already, what and where lies. It was enough to look at 2-3 places. It took about 5 minutes. Moreover, on the computer, as unnecessary, the search service was disabled, which gives great opportunities in Windows 7. And the search service also automatically turns off indexing and it was not possible to find any files quickly through a search. That is, out of ignorance, I turned off this universal thing. But this is not the slow search in Windows XP. It has evolved greatly in Windows Vista and has taken a huge step forward in Windows 7. Here we consider the main search capabilities in Windows 7so that we can more effectively find the right information.
First you need to show the main search box. It is called using the keys. Win + f or F3 on the desktop.

The window is not age-old and there is almost nothing to talk about here. The question immediately arises of the need for it in Windows 7. Most likely it was left for those who recently switched from previous versions of Windows. So as not to get lost.
The most affordable and easy to find search in Windows 7 is from the Start menu. (How to make the familiar Start button in Windows 8 can be read). It is enough to open the main menu and the cursor is immediately set in the search field. Start typing part of the file name and the results are already appearing. Surprising is the speed of the results and its further sorting. We’ll talk about this again.

Results are presented as groups of files from various categories. In the figure, these are Programs, Control Panel, Documents, Video and Music. If you know in which category your file may be, go directly to it and look further. Below we will also analyze it.
From the Start menu it is convenient to search for programs or control panel elements. Now there is no need to go the long way Start\u003e All programs\u003e Accessories for calculator selection. It is enough to open Start, write “Ka” and the good old Calculator is already at hand.

For convenience, the width of the search field can be changed by dragging the border between the address bar and the search field to the desired location.
It is possible and necessary to combine various filters. For example, you sorted files by date modified, now you can sort by size. Click on the search field and select the Size filter. You will see the below window with a range selection

If you need files with sizes up to 50 MB and from 100 to 200 MB, then search operators will come back to help.
the size:<50мб + размер:>100mb<200мб — вот такой вот получился запрос.
Of course, typing it is inconvenient so everything slows down due to the search. Therefore, it is recommended to generate a query from notepad and copy it into the search bar.
As I wrote the article and tried out different filters and sorting options, I managed to find such files in such places that you wonder. Search in Windows 7 + indexing by efficiency as Google for the Internet.
In addition, you can search not only by the date of change and by size, but also by other file properties. For example, by extension, frame width and others. If the search did not give the desired result, then below you are invited to search the Libraries (see in the next section) in the Home group on your entire computer, select another place to search, search the Internet and the contents of the files.

When you select Other search location, a window opens where, using the checkmarks, you select the places where the necessary files can be. It can be external hard drives, flash drives and other drives

Then click OK and the search will automatically start in the selected places.
If you choose a place that is not in the index, the system will immediately warn you and warn you that it might be a slow search. It is also proposed to add the selected location to the index

If you often search from this place, then you need to add. If this is an isolated case, then most likely you can skip it. There will be a smaller index and faster search on it.
Search Libraries
The library is the place where a lot of useful information is stored. The computer is the same, only there the library is divided into four categories for easy search: Music, Video, Images and Documents. You can add up to 50 folders to each of these libraries. + you can create your own libraries. To create a new library, right-click on “Libraries”\u003e Create\u003e Library. Name the new library

It turns out the Library is a virtual folder in which you can connect your real folders from various places on your hard drive. The library will be searched in all folders connected to it.
How to connect a folder to the library
Go to the library to which you want to connect the folder. In the section "Includes" click on the link. In my case - 2 places

In the window that opens, click the Add ... button and select the desired folder

Libraries are indexed by default and when the process ends you can instantly find the information you need.
Libraries have an extended set of filters, which adds convenience to the search

When you set the cursor in the search box, in addition to filters, your search queries that you entered in the past are also shown. If they suddenly started to bother you, you can easily remove them by hovering over the desired mouse cursor and pressing Del on the keyboard.
In Explorer, you can search in the folder in which you are located and in all subfolders. In the library you can search immediately in all connected folders and since they are in the index it will be fast. Another advantage of using libraries is advanced filters for easy search. I don’t know how to get around using the Library in Windows 7.
Since Libraries are something virtual, nothing happens when deleting your files.
Conclusion
Friends! In this article, we touched on a small part, the tip of the iceberg, called - search in windows 7. We also figured out indexing files on the hard drive and how this can help find information faster. In more detail we stopped at the search in the conductor. Thanks to convenient filters, you can search and find information much more efficiently.
I would also like to add that the search terms can be saved. To do this, click on the button of the same name on the toolbar

All saved searches are located in the same folder (Searches) in your profile.

To display the results for one of the searches, just go to the Explorer folder (in the left part) in the Search folder and select the one you need. The results will appear immediately.
You can read more detailed information about searching in the Windows 7 operating system at http://www.oszone.net/11299/Search
Setting Indexing Options for Quick Search in Windows 7
The operating system uses an index to quickly search for the most commonly used files. By default, all the most common files on the computer are indexed. Indexing includes all folders in libraries (for example, everything that appears in the Documents library), email messages, and offline files. Program files and system files are not indexed, since searching for these files is very rare. If the system does not specify which folders to index, then all disks will be indexed, which will negatively affect computer performance.
To adjust the indexing options to your needs, open. Start - Control Panel -.
This window shows that the disk is indexed D. To change the parameters, press the button Edit.

Now we leave the jackdaws on the folders that we most often access. You can also select subfolders for indexing in this folder.

We pass to the final stage of configuration. We return to the main window, and press the button Additionally

In this window, select the tab File typesto configure what type of files will be indexed and to add your own file extension for indexing

Here you remove the daws from those extensions that you do not need. In field Add new extension to list, register your file extension. Click Addand OK. Go back to the window Additionally-and press the button Rebuild

Windows 7 uses an index to quickly find the most commonly used files. By default, all the most common files on the computer are indexed. Indexing includes all folders in libraries (for example, everything that appears in the Documents library), email messages, and offline files. Program files and system files are not indexed, since searching for these files is very rare. If the system does not specify which folders to index, then all disks will be indexed, which will negatively affect computer performance.
To adjust the indexing options to your needs, open. Start - Control Panel -.
This window shows that the disk is indexed D. To change the parameters, press the button Edit.

Now we leave the jackdaws on the folders that we most often access. You can also select subfolders for indexing in this folder.

We pass to the final stage of configuration. We return to the main window, and press the button Additionally

In this window, select the tab File types to configure what type of files will be indexed and to add your own file extension for indexing

Here you remove the daws from those extensions that you do not need. In field Add new extension to list, register your file extension. Click Add and OK. Go back to the window Additionally - and press the button Rebuild
Click OK and wait for the end of the restructuring of the index. If you do not want to use indexing, just uncheck the box from the disks Indexable Locations
Starting from Windows Vista, in modern Windows, the search algorithm has been significantly expanded, thereby the search process has not only become faster, but users can also easily find almost all kinds of files, documents, photos, videos, emails and contacts in Microsoft Outlook and even commands or the use of executable programs. To achieve fast search speed, the indexing service plays a key role. OS Windows 7, Windows 8 and Windows 8.1, Windows 10 and so on begins to crawl and search for index files on hard drives after installing in the background with a low priority of the process.
If you notice that your hard disk activity - the LED is constantly flashing, even if the computer is in standby mode, this is probably due to the operation of the indexer. This is a matter of indexing the downtime in the system in order to minimize the performance degradation that affects normal use. But, this cannot be a case for the entire system; during the search, the corresponding processes are indexed, such as SearchProtocolHost, problems and when SearchIndexer is actively working, even if the computer is processing other, more important tasks or launching important applications, they can effectively slow down overall computer performance by spoofing important processes in the processor, memory, and other system resources.
Therefore, to speed up the Windows system, users may want to disable the search indexer and indexing service. You can and should also turn off file indexing if you use other desktop search utilities, such as Google desktop search, etc. But if you don't mind, and if the search speed is slow when performing a search, indexing will not too helpful for you. There are several ways to do this, as indicated in the instructions below.
Disable Windows Search
This method can effectively stop and disable all search indexing processes, and it is recommended.
Click on the Start button, then select Control Panel -\u003e System and Security -\u003e Administration and double-click on the service applet.
Alternatively, you can simply enter the type Indexing in the search field.
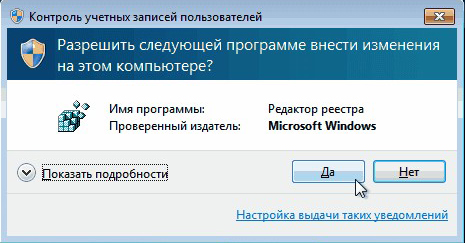
Give the User account Control permission to continue, if prompted.
Right-click on the search box, and then select properties from the context menu.
Press the stop button to stop the indexing service immediately.
In the pop-up window, find the startup type, select disabled.
Click on the “OK” button.
To re-enable Windows search, simply change back to “Startup Type” in its original value, that is, Automatic or Automatic (delayed start).
Disable indexing on disks
This method allows you to selectively disable indexing on specific drives that are rarely used or searched. However, it can take a long time to apply the new attributes to all files, folders, and subfolders, which should be excluded from indexing. 
Open Windows Explorer or Explorer (usually with the Windows accessories nodes or the Windows system folder from the Start menu).
Right-click on the drive (or drive) on which you want to disable indexing.
Select properties in the context menu.
Deselect (uncheck) index this disk for faster searching or allow files on this disk so that the content is indexed in addition to the file property option.
Click the apply button or the OK button.
Re-enable indexing, just select the option again.
Remove or exclude indexing options from indexed places through the control panel
This method does not disable the indexing service. Instead, it simply excludes the removed folders from the search index, or deselect the folders from the list. Indexer processes can be executed after deletion or exception all.
Click the Start button, and then select Control Panel -\u003e System and Maintenance, and click the indexing options.
In Windows 10 or the OS equivalent that you cannot find an option, look for indexing options.
To delete included locations, simply click on the Modify button, and then uncheck the corresponding folder under the “change selected places” field.
To remove indexing on a folder in the Start and / or Users menu, click or tap once in the “summary of selected locations” window, which will lead you directly to the selection or selection location.
Click OK when done.
To turn it back on, simply select the folders.