Exchange plans in 1C 8.3 are a configuration metadata object used to implement data synchronization in the 1C 8 system.
An exchange plan can be compared to a directory, where elements are information base nodes. However, there are many nuances in working with exchange plans, which we will discuss below.
Typically, exchange in 1C is built using special exchange rules, which are formed using configuration.
As previously noted, the exchange plan is very similar to the regular one, and therefore we will only look at the main differences between the exchange.
How to work with the exchange plan
The exchange plan can store information and changes to elements from the exchange plan, and also stores information about the number of the current message. In general, the scheme of work is as follows:
- We change the data (directories, documents, etc.) in the database - the exchange plan remembers the changes. Either by auto-registration or by program code (for example, the Exchange Plans.RegisterChanges method).
- When the time comes, we get a list of changed elements - the ReadChanges() method, and upload this data.
- When uploading/downloading, to avoid collisions, we check the message numbers against the exchange plan. If they do not match, we cancel the data exchange; if they match, we unregister the changes and increase the message number.
Get 267 video lessons on 1C for free:

Distributed information base
If this flag is set in the settings, then this exchange plan is a distributed information base (RIB).
— a geographically distributed system based on the same 1C 8.3 configuration. In addition to data changes, RIB can also transmit configuration changes, which is very convenient, for example, when updating a configuration release.
Composition of the exchange plan
The setting with which the developer manages the set of objects for exchange:

An exchange plan can have 3 object states:
- Not included in exchange plan- accordingly, for such an object you will not be able to configure data exchange according to this exchange plan in any way.
- Auto-registration Deny- this means that it is necessary to register changes for a given node only using program code according to some condition, as a rule, . The Exchange Plans.RegisterChanges() method is used.
- Auto-registration Allow— if this checkbox is checked, then any changes to the element will automatically appear in the list of changes to the exchange plan.
Exchange plans and 1C performance
Due to the systemic features of the implementation of exchange plans, it is not recommended to abuse the uploading of changes according to exchange plans. The fact is that when reading changes, all change tables are locked. Those. When unloading, the exchange plan does not allow new changes to be recorded, and therefore blocks the elements themselves - directories, documents, etc.
If your organization employs more than 5 people, then most likely you use 1C products. Almost always, organizations install several 1C databases, because each of them solves a certain range of problems. For example, a company is engaged in retail sales and maintains accounting; in such a situation, the client usually installs UT (Trade Management) and BP (Enterprise Accounting). Even a simple individual entrepreneur with several employees may well act as such a company!
Why should I set up data exchange?
Let's continue to consider the situation with UT and BP. Let's imagine that right now our exchange is not configured, what actions do we need to perform to reflect accounting transactions in both databases? That's right, first we will fill out the data in the UT, and then we will have to enter the same data into the BP, because we cannot, for example, enter the receipt of goods in the UT, but we cannot do this in the BP.
Even if you decide to use standard data exchange (setting up standard data exchange (1C synchronization)), this does not mean that it can be configured in your database. Problems arise if, for example, you have not updated the database for a long time (in order to maintain a standard exchange, your databases must be up-to-date) or the objects that you are going to transfer from one database to another are modified (in this case, the standard exchange will not work correctly), except all this even if the database platform versions differ (7.7 – 8.3), then data exchange will most likely also have to be modified or developed from scratch.
Who needs to use data exchange between 1C databases?
If the statements below are relevant for you, then you need to configure the exchange between your configurations:
- You have more than one 1C database
- Requires quick transfer of information from one database to another and vice versa
- Need auto-exchange or real-time exchange
Development and configuration of data exchange between 1C configurations
Properly designed data exchange will allow you to:
- Unload and load objects from one database to another
- Exchange between different versions of 1C
- Exchange data in real time
- Significantly reduce the cost of salaries to employees, because now they will have more free time
- Save your time and budget
Development of data exchange rules using the example of modified UT and BP databases
We have two databases in which the document “Receipt of goods and services” has been modified, in particular, new details have been added to the documents and tabular parts, some standard details have been deleted, as a result of which standard data exchange does not work. We developed a new exchange rule and wrote it to a file.
Automated control systems in most cases consist of separate databases and often have a geographically distributed structure. At the same time, correctly implemented data exchange is a necessary condition for the effective operation of such systems.
The initial setup of the exchange may require a number of actions, not only in terms of programming, but also consulting, even if we are dealing with homogeneous sources, as is the case with products on the 1C:Enterprise platform. Why setting up 1C exchange (or, as it is also called, data synchronization in 1C 8.3) can become the most time-consuming and expensive task of an integration project, we will look at in this article.
Data exchange in the 1C environment allows you to:
- Eliminate double entry of documents;
- Automate related business processes;
- Optimize interaction between distributed departments;
- Promptly update data for the work of specialists from different departments;
- “Differentiate” between different types of accounting.*
*In cases where the data of one type of accounting differ significantly from another, it is necessary to ensure the confidentiality of information and “delimit” information flows. For example, data exchange between 1C UT and 1C Accounting does not require uploading management data into the regulatory accounting database, i.e. synchronization in 1C will be incomplete here.
If we imagine the standard process for implementing primary data exchange, when at least one of its objects is a 1C product, then we can distinguish the following stages:
- Coordination of the composition of the exchange;
- Definition of transport (exchange protocols);
- Setting rules;
- Scheduling.
Identification of the composition of 1C exchange
Objects of exchange can be divided into “source” and “receiver”. At the same time, they can perform two roles at the same time, which will be called a two-way exchange. The source and destination are determined logically depending on the need or the functionality of the system.*
*For example, when integrating “WA: Financier” - a solution for maintaining financial accounting and managing treasury processes, developed on the basis of “1C:Enterprise”, WiseAdvice experts recommend it as a master system. This is due to the availability of control tools to comply with the rules of the application policy, and, accordingly, to ensure the effectiveness of the solution.
Next, based on the received and recorded requirements from users, a list of data for exchange is created, its volume, requirements for the frequency of exchange are determined, and the process of working with errors and handling exceptional situations (collisions) is prescribed.
At the same stage, depending on the fleet of existing systems and the structure of the enterprise, the exchange format is determined:
Distributed information base
- RIB implies exchange between identical 1C database configurations, with a clear “master-slave” control structure for each exchange pair. As an element of a technology platform, RIB, in addition to data, can transmit configuration changes and administrative information of the database (but only from master to slave).
Universal data exchange in 1C
- A mechanism that allows you to configure the exchange of 1C databases, both with configurations on the 1C:Enterprise platform and with third-party systems. The exchange is carried out by transferring data into a universal xml format in accordance with the “Exchange Plans”.
EnterpriseData
- The latest development of 1C, designed to implement data exchange in xml format between products created on the 1C:Enterprise platform with any automation systems. The use of EnterpriseData simplifies the modifications associated with the exchange. Previously, when a new configuration was included in a system, it was necessary to implement a mechanism for importing and exporting data, both for it and for existing systems. Now systems that support EnterpriseData do not need any modifications, having only one entry-exit point.
Definition of transport (exchange protocols)
For the system on the 1C:Enterprise 8 platform, a wide range of possibilities is provided for organizing exchange with any information resources using generally accepted universal standards (xml, text files, Excel, ADO connection, etc.). Therefore, when determining the transport for exchange data, you should rely on the database capabilities of the third-party system.
Synchronization of directories
The basic principle of effective synchronization of directories is the presence of a single entry point. But if we are talking about working with directories that have historically been filled out according to different rules, it is necessary to clearly define synchronization fields to bring the exchange to a “common denominator.”*
*At this stage, it may be necessary to carry out work to normalize the reference data on the side of the data source. Depending on the state of the directories and their volume, the process of comparing elements, recognizing, identifying errors and duplicates, as well as filling in missing fields and assigning synchronization fields, may require the work of a whole group of experts, both on the part of the integrator (the owner of the master data normalization technique) and from the customer's side.
Setting rules
The ability to display data from source systems in receivers depends on correctly defined exchange rules. The rules, presented in xml format, regulate the correspondence of key details of source-receiver objects. The 1C:Data Conversion solution is designed to automate the creation of rules for implementing both one-time and permanent exchanges.
Guarantees no data loss during exchange Exchange Plan. This is an integral part of any configuration on the 1C:Enterprise platform, which fully describes the 1C exchange procedure: data composition (documents with “identifying” details) and nodes (receiver-transmitter information bases), as well as activation of RIB for selected exchange directions.
Any change in the data entered into the Exchange Plan is recorded and receives the “changed” sign. Until the changed data matches each other in the receiver-transmitter nodes, the sign will not be reset, and the system will send control messages to both nodes. After uploading the data and confirming their full compliance in both systems, the sign is reset.
Exchange schedule in 1C
To automate regular exchange, the frequency of data uploading is set. The frequency of exchange depends on the need and technical capabilities. Also, configurations on the 1C:Enterprise platform allow you to configure data exchange when an event occurs.
Having considered the standard process of implementing an exchange, let’s pay attention to factors that will require improvements at different stages:
- Non-standard, highly modified database configurations;
- Different versions of the 1C:Enterprise platform;
- Configuration versions that have not been updated for a long time;
- Objects of exchange that have previously undergone modifications;
- The need for non-standard exchange rules;
- A very different set and composition of details in existing reference books.
Since even standard actions to implement primary data exchange require expert knowledge, they are recommended to be carried out with the participation of 1C specialists. Only after completing all the steps described above should you proceed to setting up the exchange in the configuration. Let's look at the integration of databases using the example of 1C:UPP and 1C:Retail (exchange with 1C:UT is set up using the same scheme). Also included in standard synchronization is the SCP - SCP exchange, which is typical for large-scale automation systems at the largest industrial enterprises.
In the “Service” submenu, select “Data exchange with products on the platform...” (selecting direct exchange with “Retail” often results in errors at the level of COM objects). Please note the service message “This feature is not available.”
 To resolve this issue, you need to select "Configure Communications"
 ...and check the box. Next, ignore the error message.
 In the data synchronization settings, select “Create an exchange with “Retail”...

 Before configuring connection settings through a local or network directory, you should make sure that there is space on the disk for the directory. Although, as a rule, it does not take up more than 30-50 MB, in exceptional cases it may require up to 600 MB. You can create the required directory directly from the configurator.

 When connecting via a network directory, we ignore the offer to configure the connection via an FTP address and by email by clicking “Next”.
 In the settings, we manually enter prefixes - symbols of the databases (usually BP, UPP, RO), set the rules and the start date for data upload. The prefix will be indicated in the name of the documents to indicate the database in which they were created. If the upload rules are not edited, the data will be uploaded by default according to all available parameters.

 We create an exchange settings file for “Retail” so as not to repeat our actions. If you need to immediately send data immediately after setting up synchronization, check the box.
 To automate the exchange process, you need to set up a schedule.
 Menu "Retail".
 Check the box and select “Synchronization”.
 We perform the “reverse” setup by selecting Production Enterprise Management.


Load the settings file created in UPP.
 We put a tick, the system picks up the address automatically.


We act in the same way as in UPP.


Verification data comparison (Manual data comparison is recommended to be done at the preparatory stage, since this work can become the most labor-intensive in the process of implementing the exchange). The comparison window opens by double clicking the mouse.

 In case of an error in synchronization, “Details...” will be replaced with “Never...”.
 “Details...” opens the log with updated information on the exchange.
 Ready.
Keywords: distributed, URDB, XML, registration, node, node, auto-registration, initial, image, POP3, SMTP, MailMessage, peripheral, central, replication, exchange
Disclaimer and terms of use
All trademarks accidentally mentioned in this article belong to their respective owners.This article is published under a Creative Commons Attribution-Share Alike 3.0 Unported License.
http://creativecommons.org/licenses/by-sa/3.0/
Let me immediately note that all of the following applies to the release of platform 8.0.7.36 and higher.
Step 1: Create an exchange plan
We create an exchange plan in the configuration. Let's call it, for example, "DistributedBase". Required in
In the properties of the exchange plan, check the "Distributed infobase" checkbox.
On the “Other” tab, click the “Composition” button to determine which objects will be included in the exchange. By
By default, you can enable all objects ("Actions" - "Enable All"). An important point is the parameter
"Auto-registration". In general, it should be enabled for all objects.

Note: when adding new objects to the configuration, they are not included in the exchange plan. Those. after
To add an object, it must be added to the exchange plan.
If you want some objects not to participate in the exchange, simply exclude them from the list
exchange plan. But then the control of referential integrity remains entirely on your conscience. If, to
for example, a certain document is not included in the exchange plan, but the register on which it makes movements is included,
then in the receiving database it is quite possible to receive register movements without a recorder document, which
Agree, it’s not good.
In principle, these actions are enough for the RDB to work in “manual” mode. To do this we launch
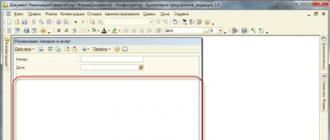
Enterprise, open our exchange plan through the "Operations" menu. In terms of exchange, it is always present
predefined node "with a dot". This is a description of the current node. It needs to be opened and filled. In our
In this case, the “Code” and “Name” fields will be available. Let's assign the code "AA" to our node and call it
"Central". Let's add one node to the exchange plan. Let's assign it the code "BB" and call it "Peripheral".

Now we can create an image of the peripheral base. This is done by clicking the "Create initial" button
image". The peripheral base must be selected in the list of nodes. The database image is created in the form of a ready-made information security
in the catalog or on the 1C:Enterprise server. (unlike 7.7, where the information security image was created as a file
unloading). Next, the created database can be moved to the desired location by simply copying the file 1CV8.1CD
(for the file version), or through the Configurator through uploading and downloading data.
If you open the exchange plan in the peripheral information security system, you will see that the node is “with a dot”, i.e. current
the “Peripheral” node became a node, and the icon of the “Central” node became red, i.e. node
"Central" is the main node in relation to the current one.

Exchange in “manual” mode can be done using the “Write changes” and “Read” buttons
changes". In the first case, you will be asked to select a file where the changes will be written, in the second
- the file from which changes will be read. The exchange is carried out in xml format. Changes are recorded for
selected node.
Step 2: Upload changes to an XML file and send via email
So we created an exchange plan, created a peripheral information security system, and even learned how to transfer data between
bases. Now our task is to teach the databases to exchange via e-mail.
We add two details to the exchange plan: Email Address of the "string" type and "Execute Exchange" type
"boolean". In the E-mail address we will store the node’s email address, i.e. the address to which we will be
send exchange messages. Props ExecuteExchange is needed to quickly disable automatic
sending-sending messages.
Let's make the procedure for working with email universal, i.e. let's make it possible
use of both MAPI (send-receive via an email client, for example, MS Outlook) and
direct access to SMTP/POP3 servers.
Let's add several constants to the configuration:
Somewhere in a general form we provide editing of the values of these constants.

Let's add a common module, call it "rbDistributedBase". We write in it:
Procedure rbSendExchangeMessages() Export UseSMTP = Constants.UseSMTPExchange.Receive(); //First we create a Mail object, which, depending on the settings, will be of the InternetMail type, //if direct access to servers is used, or Mail if MAPI is used. If Use SMTP Then //For an object of the InternetMail type, create and fill out a mail profile. MailProfile = New InternetMailProfile; MailProfile.SMTPServerAddress = Constants.SMTPExchangeServerAddress.Get(); MailProfile.SMTPPort = Constants.SMTPExchangeServerPort.Receive(); MailProfile.SMTPUser = Constants.SMTPExchangeServerUser.Receive(); MailProfile.SMTP Password = Constants.SMTPExchangeUserPassword.Receive(); MailProfile.WaitTime = Constants.ServerWaitTime.Get(); Mail = New InternetMail(); Attempt Mail.Connect(MailProfile); Exception Report(" EXCHANGE: Error connecting to mail profile! Exchange failed!" + ErrorDescription(), MessageStatus.VeryImportant); Return; EndAttempt; Otherwise Mail = New Mail(); Attempt Mail.Connect(); Exception Report("" + ErrorDescription(), MessageStatus.VeryImportant); Return; EndAttempt; EndIf ; //Next, select all nodes from the exchange plan, except for the current one, //which have the Perform Exchange attribute set. SelectionNodes = ExchangePlans.DistributedBase.Select(); While SelectNodes.Next() Loop If Not SelectNodes.PerformExchange Then Continue; endIf; If SelectionNodes.Link = ExchangePlans.DistributedBase.ThisNode() Then Continue; endIf; ElectronicAddress = AbbrLP(SelectionNodes.ElectronicAddress); If EmailAddress = "" Then Continue; endIf; //Using the XML Record and Message Record objects, we record changes //for the selected node in the xml file. Node = SelectionNodes.Link; XMLRecord = NewXMLRecord(); MessageFileName = TemporaryFileDirectory() + "Message_" + AbbreviatedLP(ExchangePlans.DistributedBase.ThisNode().Code) + "_ " + AbbreviatedLP(Node.Code) + ".xml "; EntryXML.OpenFile(MessageFileName); MessageRecord = ExchangePlans.CreateMessageRecord(); MessageRecord.StartRecord(XMLRecord, Node); ExchangePlans.WriteChanges(WriteMessage); WriteMessage.FinishRecord(); WriteXML.Close(); //Then we create a new letter, attach the resulting xml file to it and //send to the address specified in the Node Email Address. File = New File(MessageFileName); Message Subject = "1C:Exchange" + Abbr.LP(ExchangePlans.DistributedBase.ThisNode().Code) + "_" + Abbr.LP(Node.Code); If UseSMTP Then MailMessage = New InternetMailMessage; MailMessage.Subject = MessageSubject; MailMessage.Attachments.Add(MessageFileName, File.Name); MailMessage.Recipients.Add(EmailAddress); Mail.Send(MailMessage); Else MailMessage = new MailMessage; MailMessage.Subject = MessageSubject; MailMessage.Attachments.Add(MessageFileName); MailMessage.Recipients.Add(EmailAddress); Mail.Send(MailMessage, False); endIf; If Constants.OutputExchangeMessages.Get() Then Report(" EXCHANGE: Exchange message for the node" + Node.Name + " sent! ", MessageStatus.Information); EndIf; DeleteFiles(MessageFileName); EndCycle; Mail.Disconnect(); EndProcedure
I recommend adding an additional panel to the interface, on one of the buttons of which you can place a call to this
procedures. Now all that remains is to launch the Enterprise, configure the email address of the peripheral information security,
check the "Exchange" box, click on the procedure button on the panel and run to receive mail for
specified email addresses. You should receive a letter with the subject "1C:Exchange AA_BB" and an attached file
"Message_AA_BB.xml".
So, half the job is done: we taught the G8 to send RDB exchange messages via email
mail.
Step 3. Receive updates by email and record them in information security
Now let's do the reverse procedure: receiving updates by email and recording them in information security.
To the session parameters, add the parameter “Distributed Database Exchange in Progress” of the Boolean type. I will explain it below
appointment.
Let's add the following procedure to the common module rbDistributedBase:
Procedure rbGetExchangeMessages() Export UseSMTP = Constants.UseSMTPExchange.Receive(); //just as in the procedure rbSendExchangeMessages(), first create an object Mail If Use SMTP Then MailProfile = New InternetMailProfile; MailProfile.POP3ServerAddress = Constants.POP3ExchangeServerAddress.Get(); MailProfile.POP3Port = Constants.POP3ExchangeServerPort.Get(); MailProfile.User = Constants.POP3ExchangeServerUser.Get(); MailProfile.Password = Constants.UserPasswordPOP3Exchange.Receive(); MailProfile.WaitTime = Constants.ServerWaitTime.Get(); Mail = New InternetMail(); Attempt Mail.Connect(MailProfile); Exception Report(" EXCHANGE: Error connecting to mail profile! |Exchange failed!", MessageStatus.VeryImportant); Return; EndAttempt; Otherwise Mail = New Mail(); Attempt Mail.Connect(); Exception Report(" EXCHANGE: Error connecting to the user's email profile! |Exchange failed!", MessageStatus.VeryImportant); Return; EndAttempt; EndIf; MessageArray = New Array; If UseSMTP Then AllMessages = Mail.Select(False); Else AllMessages = Mail.Select(False, False); EndIf; //Select among all letters those that have the subject “1C:Exchange”. //Small but important note: //we believe that all received letters with the subject "1C:Exchange" are intended //exactly for the current node, //those. that different nodes in terms of exchange have DIFFERENT email addresses. For Each Message From All Messages Cycle If Leo (Message. Subject, 8 )<>"1C:Exchange" Then Continue; endIf; TryMessageArray.Add(Message); //Save the email attachment to disk. //We'll leave careful checking of the attachment behind the scenes for now. Attachment = Message.Attachments; MessageFileName = TemporaryFileDirectory() + Attachment.Name; ExchangeData = Attachment.Data; ExchangeData.Write(MessageFileName); //Using the XMLReader and MessageReader objects we read the data //updates from the saved file. Before recording updates in information security //set the session parameter Distributed Database Exchange in Progress to True. //Then we read the changes in the information security: Exchange Plans.ReadChanges(ReadMessage). //At the same time, we save the messages in an array so that later we can delete them all at once. ReadXML = new ReadXML(); ReadXML.OpenFile(MessageFileName); MessageReader = ExchangePlans.CreateMessageReader(); ReadMessage.StartReading(ReadingXML); SessionParameters.DistributedBaseExchange in progress = True; ExchangePlans.ReadChanges(ReadMessage); ReadMessage.FinishReading(); ReadXML.Close(); If Constants.OutputExchangeMessages.Get() Then Report(" EXCHANGE: Exchange data accepted",MessageStatus.Information); EndIf; Exception Report(" EXCHANGE: Error while receiving exchange data:" + ErrorDescription(), MessageStatus.VeryImportant); EndAttempt; //After reading the exchange data is finished, return //the session parameter DistributedBase Exchange is in progress is set to False. SessionParameters.DistributedBaseExchange in progress = False; Attempt to DeleteFiles(MessageFileName); Exception //if it doesn’t work out, oh well EndAttempt; EndCycle; If You Use SMTP Then Mail.DeleteMessages(MessageArray); endIf; Mail.Disconnect(); End of Procedure
Now about what the Distributed Database Exchange In Progress session parameter is needed for.
The fact is that when reading data using the ExchangePlans.ReadChanges() method, a call is made
handler procedures for the BeforeWrite() event of modified/added objects. And if when recording
of any object in the handler procedure, the Rejection parameter will be set to True, then
when executing ExchangePlans.ReadChanges() an exception will occur, and, accordingly, the exchange
will not be executed. The value of the DistributedBase Exchange In Progress session parameter can be
analyzed in handler procedures in order to avoid such a situation.
With the release of edition 12 (although I may be wrong about the versions), the relevance of this method is somewhat
deprecatedA, since objects now have the property Exchange Options, from whom, in his own. This property is set to True when
saving data via sharing plan.
Now in the interface on our panel we add another button on which we hang a call to this
procedures. Let's launch the Enterprise and enjoy.
Almost everything is done, only a little remains: to make our procedures run automatically.
Step 4. Setting up automatic exchange
So, we are almost close to the goal of our story. There's only one step left: launch
performing exchange procedures automatically. Let's get started.
Let's add a constant, DistributedBase Autoexchange Interval, of type Number(5,0).
Let's add the Perform Distributed Database Exchange parameter to the user settings. For configuration
"Trade management" is done like this:
* In the plan of characteristics types "User Settings" we will add a predefined
characteristic Perform Exchange of Distributed Databases of type Boolean.
* In the form of the directory item "Users" we set up a change in this parameter (like this
can be done in the form module, by analogy with other parameters).
Add the procedure to the rbDistributedBase module:
Procedure rbPerformExchange(user) Export If npGetDefaultValue(user, "") Then rbGetExchangeMessages(); rbSendExchangeMessages(); endIf; End of Procedure
to the application module:
Procedure CheckConnectionAutoExchange() Export If npGetDefaultValue(chCurrentUser, " Execute Exchange of Distributed Databases") And Constants.DistributedBaseAutoExchangeInterval.Get() > 0 Then ConnectWaitHandler(" Execute Autoexchange", Constants.DistributedBaseAutoExchangeInterval.Get()); Otherwise, DisableWaitHandler(" Execute Autoexchange"); EndIf; EndProcedure Procedure ExecuteAutoExchange() Export rbExchange(glCurrentUser); DisableWaitHandler(" Execute Autoexchange"); If npGetDefaultValue(chCurrentUser, " Execute Exchange of Distributed Databases") And Constants.DistributedBaseAutoExchangeInterval.Get() > 0 Then ConnectWaitHandler(" Execute Autoexchange", Constants.DistributedBaseAutoExchangeInterval.Get()); EndIf; EndProcedure Procedure DisableAutoExchange() Export DisableWaitHandler(" Execute Autoexchange"); EndProcedure
Add the following lines to the WhenSystemStart() procedure of the application module:
(after connecting commercial equipment)
...
SessionParameters.DistributedBaseExchange in progress = False; CheckAutoExchangeConnection();
Let's add a couple more buttons to our panel to control the process: add a procedure to one
CheckConnectAutoExchange(), on the other - DisableAutoExchange()
We launch the enterprise, configure user properties and auto-exchange interval and that’s it!
Now, when entering the database under this most-configured user, the handler will be launched
waiting ExecuteAutoExchange(). Naturally, you also need to configure a user in the peripheral database
for exchange.
One more small but important note:
In all the beauty we have created, there is one problem: a change in configuration. At
When the peripheral base receives a message containing configuration changes, it
will be accepted, but an exception will occur. In this case, the changed configuration will be
loaded. To update the database configuration, you need to kick out all users, go to
configurator and update the database configuration (it’s a good idea to upload the data before doing this). TO
Unfortunately, this is a necessary evil. You can make your life a little easier by writing a short bat file
something like this:
1cv8.exe CONFIG /F<путь к ИБ>/N<Пользователь>/P<Пароль>/UpdateIBCfg
And one more note:
Unfortunately, xml files are not compact, but, fortunately, they are perfectly compressed. Possible in
procedures for sending and receiving messages, add packing and unpacking of files. COLOR="#666666">This can be done either with an external archiver, or using VK, for example Wheel.AddIn
(http://1c.proclub.ru/modules/mydownloads/personal.php?cid=81&lid=2714) .
With the release of the 10th (it seems) edition, the previous proposal is somewhat outdated, since the platform
There were built-in file compression tools using the ZIP algorithm. Those. it is now possible to compress files
without using VK.