Dear experts, please explain why my new laptop with Windows 8.1 installed cannot be booted from any bootable flash drive?
I prepare a flash drive with various licensed programs(ESET NOD32 , Kaspersky Lab, Acronis True Image 2013, Paragon, and others)having their own tools for creating bootable flash drives. I'll say more, Even if I create an installation flash drive with the Windows 7 or Windows 8.1 operating system, the laptop does not boot from it either.
They say on the Internet that now you need to create bootable UEFI flash drives, but how?
How to create a bootable UEFI flash drive
Hello friends! If you need to boot a new laptop from a bootable USB flash drive or a disk with some software, then you probably won’t succeed, you will have to go into the BIOS and switch the UEFI interface to the “Legacy” advanced boot mode, then disable the Secure Boot protocol , otherwise the laptop simply will not see your USB flash drive among the boot devices.
Without disabling the UEFI interface and Secure Boot, you can boot a modern laptop only from a Windows 8.1 installation flash drive (prepared by a special utility) and Windows 10.
As for creating a bootable flash drive with some software, I’ll say that only the most famous software manufacturers, for example, Acronis, Paragon, AOMEI, Lazesoft and some others, allow you to create a bootable flash drive in your program from which you can boot a laptop with a UEFI interface.
Why is everything so difficult? Friends, it has already been written about BIOS UEFI, including on our website, in a nutshell I will say that the UEFI interface is designed to replace the outdated BIOS and protect the latest Microsoft operating systems (Windows 8.1, 10) from a special type of malicious software - bootkits (a virus that affects MBR boot sector). The main defender is the Secure Boot protocol. This protocol can be passed by a program or an operating system that has special certificates of compliance with the Unified Extensible Firmware Interface (UEFI) standard, at the moment only Win 8.1 and Win 10 have such certificates.
I will say more, operating systems from Microsoft will now be sold only on devices with a UEFI interface, and if you are a manufacturer of computer devices and want to sell your product with Windows 8.1 installed, you must, under the terms of the agreement with Microsoft, enable the Secure Boot option by default, here and that's it.
In today's article, we will learn how to create a bootable UEFI flash drive with the Windows 8.1, Windows 7 operating system in three ways, as for Windows 10, this topic is written. Next, I will give you links to my articles, in which I explain step by step the process of creating bootable UEFI flash drives in various programs. I'll also show you how to create your own LiveCD based on Win 8.1.
1 way
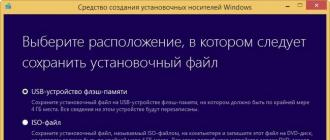
First, create UEFI flash drive with Windows 8.1 You can use the utility. Download, run, select the Language, Edition and Architecture of the Win 8.1 you need, then check the USB flash drive item, click Next and the process of creating a UEFI flash drive begins, you don’t even need a system distribution kit.

2 way
1. In the main window of the program, in the "Device" item, select your USB flash drive.
2. Partition scheme and system interface type. GPT for UEFI computers.
3. File system select "FAT32""
4. Click on the explorer launch button and select the Windows 8.1 ISO image.
Press Start and in a few minutes the flash drive is ready.

3 way
If you want, create a UEFI flash drive in
Good day.
On new computers and laptops, many users are faced with the inability to boot from an installation flash drive with Windows 7, 8. The reason for this is simple - the appearance of UEFI.
UEFI is a new interface designed to replace the outdated BIOS (and protect the OS from malicious boot viruses in the meantime). To boot from the "old installation" flash drive, you need to go into the BIOS: then switch UEFI to Legacy and turn off Security Boot mode. In the same article, I want to consider creating a "new" bootable UEFI flash drive ...
How to create a bootable UEFI flash drive step by step
What do you need:
- the flash drive itself (at least 4 GB);
- Windows 7 or 8 ISO installation image (image required original and 64 bits);
- free utility Rufus (Official site: http://rufus.akeo.ie/ If anything, then Rufus is one of the simplest, most convenient and fastest programs for creating any bootable flash drives.);
- if the Rufus utility does not suit you, I recommend WinSetupFromUSB (Official site: http://www.winsetupfromusb.com/downloads/)
Consider creating a UEFI flash drive in both programs.
RUFUS
1) After you download Rufus - just run it (no installation required). Important point: you need to run Rufus under administrator. To do this, in Explorer, simply right-click on the executable file and select this option from the context menu.
- device: specify the flash drive you want to make bootable;
- partition scheme and system interface type: here you need to select "GPT for computers with an UEFI interface";
- file system: select FAT32 (NTFS is not supported!);
- then select the ISO image that you want to burn to a USB flash drive (I remind you if it's Windows 7/8 for 64 bits);
- tick three boxes: Quick format, create a bootable disk, create an advanced label and icon.
After the settings have been made, click the "Start" button and wait until all files are copied to the USB flash drive (on average, the operation takes 5-10 minutes).
Important! All files on the flash drive will be deleted during such an operation! Be sure to save all important documents from it in advance.
Rice. 2. Setting up Rufus
WinSetupFromUSB
1) First run the utility WinSetupFromUSB With administrator rights.
2) Then set the following settings (see Fig. 3):
- select the flash drive to which you will burn the ISO image;
- check the box "Auto format it with FBinst", then check a few more checkboxes with the following settings: FAT32, align, Copy BPB ;
- Windows Vista, 7, 8…: specify the Windows ISO installation image (64 bits);
- and lastly, press the GO button.
The program will then warn you that all data on the flash drive will be deleted and ask you to agree again.
Rice. 4. Continue uninstalling..?
After a few minutes (if there are no problems with the flash drive or ISO image) - you will see a window with a message about the completion of the work (see Fig. 5).
Rice. 5. Flash drive written / job done
By the way, WinSetupFromUSB sometimes it behaves “strangely”: it seems that it is frozen, because there are no changes at the bottom of the window (where the information bar is located). It actually works - don't close it! On average, the time to create a bootable flash drive is 5-10 minutes. Better at work WinSetupFromUSB do not run other programs, especially all kinds of games, video editors, etc.
That, in fact, is all - the flash drive is ready and you can proceed to the next operation: installing Windows (with UEFI support), but this topic ...
Designed over 30 years ago, the BIOS's basic input/output system is outdated by today's standards. It is being replaced by the UEFI specification, which significantly changes the established and familiar boot procedure. This article is for those who are interested in installing windows 7 on a computer with UEFI.
Replacing an outdated BIOS
The Extensible Firmware Interface was developed by Intel in 1998. The current version of the specification is called the Unified Extensible Firmware Interface. Computers released after 2010 are highly likely to work with the UEFI system. Unlike BIOS, new specification codes can be stored both on the motherboard chip and in a special HDD section.
UEFI works with the new GPD layout, which is capable of supporting HDDs larger than 2TB and an unlimited number of partitions. In addition, the UEFI architecture is modular, hence supporting custom applications and drivers. 
And, the most important part for this article: the new specification has a built-in download manager. Thanks to this, installing Windows 7 from a USB or external HDD does not require third-party bootloaders.
Create a bootable flash drive
To create a bootable flash drive, the Rufus 1.4.3 utility is considered. The program is notable for the fact that it does not require installation, has a very small size and is distributed completely free of charge. Of course, Rufus supports GPT HDD partitioning and work with the UEFI specification. The current version of the utility is available for download from the official website of the manufacturer.

After starting the utility, you must specify the name of the flash drive that will be bootable ( Attention! All data will be permanently deleted from it!), file system (choose FAT32), partition scheme, and system interface (choose GPT and UEFI). Opposite "create a boot disk" you need to specify the path to the ISO image of Windows 7.
When all the parameters are correct, you can click on the "Start" button, and the process of preparing a bootable flash drive will begin. This will take some time, depending on the speed of your computer and the USB generation.
In addition to Rufus, you can use the WinSetupFromUSB program. It can also be downloaded from the manufacturer's website. The interface of these two programs is almost the same, so it makes no sense to consider the process of creating a bootable USB flash drive separately.
Preparing for installation
In order to start the installation from a flash drive, you must first configure UEFI. To do this, you need to restart your computer and press F2 or Delete (depending on your motherboard, press both keys to be sure). After these steps, as in the case of the BIOS, you will be taken to the main control menu.
Press F7 or select the "Advanced" section. Next, go to the "boot" menu, select the "USB support" option and install Full Initialization. In the "Secure Boot" menu, set "Windows uefi mode".
Now open the Compatibility Support Module (or CSM) menu and in the "launch CSM" item, select "enabled". Open additional options and in the item "boot device options" select "only uefi". This item will allow you to filter flash drives and HDDs that cannot work with your specification. In the "boot from storage devices" column, select "both, uefi first".
Now you just have to specify the boot priority (boot priority). In the first place, place the bootable USB flash drive, in the second - your HDD. The settings are completed, save them with the F10 key, confirm the decision, and the computer will restart. 
Windows installation
If the previous points were followed correctly, after the computer is restarted, the standard installation of the operating system from the USB flash drive will begin. Click "next", "install", accept the user agreement, select full installation.

Now you need to call the command line with the combination Shift + F10. Next, enter the following sequence of commands:
diskpart (press enter after each command)
sel dis 0
clean
convert gpt
exit
exit

This place is more detailed. With these commands, you will delete all data from the HDD, mark it as GPD and format it for the subsequent installation of the system. Click "update" and "next".
The installation of Windows 7 on the HDD of your personal computer will begin. During the installation process, the PC will be rebooted several times, after which you will have to specify its name and password, time zone and set a list of users. Once the installation is complete, Microsoft Update will download and install all the necessary patches and drivers, and you will be ready to use your computer.
Hello.
No matter what anyone says, the popularity of optical discs is rapidly declining: not even all computers and laptops have a drive for them anymore. And, probably, this is not surprising: after all, an ordinary flash drive that fits in any pocket can easily replace them.
It is also more convenient to use a USB flash drive to install Windows (any computer has a USB port!). But for this it must be correctly recorded / prepared.
In this article, I will consider all the typical issues related to creating installation flash drives: programs for this operation, step-by-step settings before burning, the process of creating flash drives with multiple operating systems (multi-boot), UEFI flash drives. But first things first...
Note!
You might find the article on how to download an ISO image from Windows 10 OS [official and legal] useful -
There are quite a few programs of this kind. To cover all of them in one article is a thankless task, and not necessary. I will give below those programs that I used (and use) myself repeatedly when burning my bootable media.
Note. : how to use this or that program will be described in the second part of this article.
Table No. 1 (basic)
| Program name / website address | Description | Screenshots |
|---|---|---|
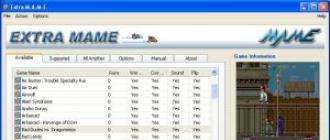
| UltraISO
|
One of the best programs for working with ISO disk images. Allows you to edit them, extract files from them (or add them), burn images to a USB flash drive / disk, etc. In general, an indispensable program for working with the ISO format, and I have repeatedly recommended it in my articles (and in this format, by the way, almost all Windows operating systems are distributed). |
(main program window) |
| Rufus
|
A small free utility that can create almost any bootable flash drives, memory cards, etc. Allows you to prepare, among other things, flash drives for UEFI. Another advantage of the utility: it works somewhat faster than other analogues. Note: There is both a portable version (no installation required) or a classic version. Works in all Windows OS: XP, 7, 8, 10. |
(Rufus settings for writing a bootable flash drive) |
| One of the most famous programs for burning bootable media. Allows you to create bootable media with OS: Windows 2000, XP, 7, 8, 10, etc. The program also allows you to create multi-boot flash drives (that is, on which there are 2-3 or more Windows OS and you can choose which one to install when loading). All in all, an indispensable piece of software if you have to create installation media from time to time. |
(setting before writing a flash drive) | |
| WintoFlash | A simple and convenient program for creating bootable media. In the process of creating and configuring you will be accompanied by a wizard: the whole process goes step by step, which is very convenient if you have never used such programs before. Possibilities:
|
(WintoFlash main window) |
| windows 7 usb dvd download tool | A simple and convenient utility for burning bootable flash drives from Microsoft itself (therefore, it could not be included in this review). You can burn a bootable USB flash drive with the following Windows OS: 7, 8, 10. The whole recording process is divided into several steps: choosing a flash drive, choosing an image, confirming, burning ... By the way, there is nothing superfluous in the program: a minimalist design. In general, I recommend! Among the disadvantages: it is not always possible to write an ISO image from Windows to a 4 GB flash drive (the program asks for 8, although other similar utilities write this image to the same flash drive ...). |
(the first step is choosing an ISO image) |
Auxiliary programs
A small free* program for working with images (supports a huge number of different formats: ISO, MDS/MDF, CCD, etc.). After installing this program, you will have a virtual drive in "my computer" (their number can be increased) in which you can open any of the images. For a computer, it will all look like you opened a real CD / DVD disc in the drive.
In addition to opening images, you can also create them from various disks. In general, an indispensable program on a PC (especially with the development and popularization of disk images).
*Note: in addition to the free version, you can find a paid version (with extended functionality) on the developer's website.
An analogue of Daemon Tools, it has the same functions: creating and opening images, supporting protected disks, etc. Alcohol 120% is a paid version of the program, there is a free version - Alcohol 52%.
In principle, you can work with both Daemon Tools and Alcohol. The choice is a matter of taste!
How to create a bootable USB flash drive step by step
Windows XP
Once one of the most popular operating systems from Microsoft. Now, of course, its popularity is falling, and yet a fairly large number of PCs run on this particular OS. Therefore, I decided to include it in this article ...
WinToFlash
In my opinion, the easiest way to burn a bootable USB flash drive with Windows XP is to use the WinToFlash utility. The fact is that a wizard is built into it, which will guide you through all the thorns ... (by the way, the Lite version is enough for work).
After starting the utility, click on the green checkmark (screen below) - " Windows Installer to USB Transfer Wizard".

WintoFlash - Getting Started with the Wizard

The next step: you need to specify the path to the image file with Windows XP and select the USB flash drive on which this image will be written.

Actually, in the next step, the program will warn you that all information will be deleted from the disk and prompt you to continue. Agree and wait until all files are copied to the flash drive.

To help! I have a more detailed instruction for working with WinSetupFromUSB -
This program is somewhat different from the previous one. Firstly, there is no wizard to guide you through the steps (all settings must be entered by yourself), and secondly, there is no support for the Russian language...
First, insert the USB flash drive into the USB port and run WinSetupFromUSB and the administrator name.
- select the inserted flash drive;
- check the box "Auto format it with FBinst", the file system is NTFS;
- specify the path to the folder with the Windows XP distribution kit (the ISO image can be unzipped using the WinRar program, or opened in Daemon Tools (links to the programs are presented above));
- the final touch - press the "GO" button.

In the next step, the program will warn you that all data on the flash drive in the process of writing data to it will be deleted. Just confirm it.

If the flash drive was successfully registered, you will see the "Job Done" window.

Windows 7, 8, 10
In principle, you can use the same utilities to write these OSes - the whole process is identical. I will show the whole process step by step using the example of several utilities.
windows 7 usb/dvd tool
Despite the fact that this utility is designed for Windows 7, you can also use it to burn a USB flash drive with Windows 8/10. Because this program is the simplest (there is no place easier) of everything and the whole process of recording an image in it consists of only 4 steps, I recommend it first of all.
Step 1: specify an ISO image with Windows OS ("Browse" button, when the image is specified, click "Next").

Specify ISO file
Step 2: Select the device to record to. In this case, you need to select either a USB device or a DVD. We choose the first.

Step 3: select the drive letter to which the recording will be made (i.e. specify the required flash drive, because there can be several of them connected to the PC ...).

Step 4: recording in progress. When a message is displayed about the successful completion of the operation (Bootable USB device created successfully), you can restart the PC and check the USB flash drive ...

As you can see above, the whole process is extremely simple and does not abound with anything superfluous.
UltraISO

Rufus
Article update dated 01/24/2019: Added screenshots of version 3.4. Also on my blog there was an instruction for working with Rufus 3.4 -

UEFI flash drive
UEFI is a new standard, a new interface (so to speak). It is designed to replace the "old" BIOS. One of the main tasks of UEFI is to protect the computer from boot viruses that are loaded along with (or before) loading the Windows OS (sorry for the tautology).
Therefore, in new computers / laptops, if you connect a USB flash drive created in the classical way to their USB port, then the PC will not see it! In order for this flash drive to become visible: you need to switch UEFI to Legacy (the spelling may differ slightly, depending on the BIOS / UEFI version) and turn off Secure Boot.
In the same part of the article, I will consider a couple of ways to create a bootable UEFI flash drive (so that you do not have to turn off Secure Boot protection in the BIOS). So...
Method number 1 - using the WinSetupFromUSB utility
First, run the utility as an administrator (how to do it: right-click on the executable file, then select the desired function in the context menu).

- We select a flash drive (be careful, when writing, all data on the flash drive will be deleted!);
- Click the checkbox "Auto format it with FBinst" and select the FAT 32 file system (do not touch the rest of the checkboxes);
- Next, select the ISO image file with Windows OS (in the example below, I chose Windows 8);
- Press the GO button and wait for the process to complete.

Configuring WinSetupFromUSB to write a UEFI flash drive.
Method number 2 - using the Rufus utility
Rufus is a great utility for burning different types of bootable media. All settings are performed in one window, everything is simple and fast.
You also need to run the utility as an administrator (screenshot below).


Rufus 3.4 - creating a flash drive under UEFI (GPT)
Multiboot flash drive (several OS on 1 flash drive!)
On a USB flash drive, you can write not only one version of Windows, but several at once! For example, imagine that on one flash drive you can have an OS: Windows XP 32 bit, Windows 7 64 bit, Windows 8 64 bit and Windows 10 64bit. In which case, you don’t need to carry a bunch of flash drives with different OSes with you - you can immediately install the one you need with just one. Below I will consider in detail how and what is done ...
To create such a flash drive, you need the following:
- several ISO images with the desired systems (for example, Windows XP and Windows 7). By the way, it is better to take a Windows XP image with integrated SATA drivers, otherwise you will get a "blue" screen during installation on new motherboards;
- Daemon Tools or Alcohol (if you want to add Windows 2000, XP to the flash drive): programs that can open an ISO image (i.e. you will see a virtual drive in "my computer", since it will not be an ISO image, but a regular disk inserted into a CD-Rom. Presented in the first part of the article, ) ;
- flash drive 8-16 GB (the more OS you are going to burn, the more capacious the flash drive should be);
- program (presented at the top of the article,).
Step-by-step instructions for creating a multiboot flash drive
- We start the program WinSetupFromUSB as administrator. To do this, simply go to the folder with the program, select the executable file and right-click on it, then select "Run as administrator" from the context menu.
- Next, open the image with Windows 2000/2003/XP in Daemon Tools (those who will not write these OSes to a flash drive can skip this step).

The Windows XP ISO image is open in Daemon Tools.
- Insert the flash drive into the USB port;
- Next, you need to set the following parameters: 1)
specify the inserted flash drive (in my case, the drive "E:\"); 2)
Check the box "Auto Format it with Fbinst", select the NTFS file system (if you plan to create a flash drive for UEFI - choose FAT 32); other checkboxes by default; 3)
specify the virtual drive in which the ISO image with Windows XP/2000 is open; 4)
specify the ISO image with Windows 10 (in my case, this particular OS was chosen for a multiboot flash drive); 5)
press the "GO" button - start recording the flash drive. All figures are illustrated in the screenshot below.

- Next, the program will ask again whether it is accurate to start recording. By the way, it is important that all data on the flash drive will be deleted!
- Then the program will ask again - the answer is yes.

Warning 2 - click "Yes".
- Further, if everything went well, at the bottom of the window you will see a "green bar" - the program has started working. The recording time depends on the flash drive, the selected images, the speed of your USB port, PC loading, etc. On average, 5-20 minutes. to record multiple OS. At this time, it is better not to touch the computer and not run resource-intensive tasks on it: games, video / graphics editors, etc.

- When the flash drive is written, you will see the inscription "Job Done". In principle, the flash drive can already be used, it now has 2 Windows XP and 10 operating systems! Screen below.
- To add another OS, for example, Windows 7 - just insert the flash drive into the USB port again, run WinSetupFromUSB (as administrator). Then: 1)
select the desired flash drive (note: on which we previously recorded 2 OS)
; 2)
specify the ISO image with the added Windows OS; 3)
press the "GO" button. Note: Please note that you do not need to check the box next to "Auto format it with FBinst", as we did before!

- When another OS is added, you will see the usual window - the job is done. Now there are 3 operating systems on the flash drive: Windows XP (32 bit), 7 and 10 (64 bit).
- If you want to add another OS, such as Windows 8, you need to do step 9 again (see above). In principle, this way you can add a lot of OS to your flash drive (so to speak, provide for all options) ...
Checking a multiboot flash drive
To check the created flash drive in operation, you need to do the following:
- Enter the BIOS and put a USB flash drive in the boot queue (you can use the BOOT Menu). More details about which buttons to go to Bios and call the Boot Menu are described here:
- Insert the flash drive into the USB port and restart the computer;
- A window should appear as in the screenshot below: for example, I selected the Windows NT 6 line (this is for choosing to install Windows 7, 8, 10).

After that, if you have 2 or more "new" OSes, you will see a list with all of them. Choose the option you want and continue with the installation. The screen is shown below, the flash drive works!

On this major note, I conclude the article, for additions, as always, I will be grateful.
CD/DVD discs are obsolete today. They were replaced by USB drives.
The need to boot from a USB flash drive may arise when solving many problems:
- installing a new operating system;
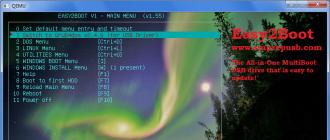
- launch in Live CD mode;
- to treat your computer from viruses and malware;
- to correct errors that occur when loading the operating system;
- pre-installation of additional drivers;
- scanning the hard drive for bad sectors;
- launching the operating system installed on the USB flash drive.
On many systems, USB booting is disabled by default. Because of this, a user who wants to use a bootable flash drive may have problems changing the settings.
Features of booting from a USB flash drive
The order in which devices to launch is determined by the Bios settings, a built-in firmware designed to provide the operating system with access to the device APIs.
To boot the system from a flash drive, you need to go into Bios and change the startup order, or use a special boot menu. But this is not always easy to do, since firmware versions and types may differ on different motherboards.
If you need to boot from USB or any other storage device, you need to follow these steps:
- insert a disk or flash drive;
- turn on the computer or restart it;
- enter Bios or Boot menu and select USB device;
- if there are several connected devices, the system will automatically offer you a list to select the one you need.
Most modern motherboards work through a technology called UEFI. This is not just a more convenient graphical shell for the Bios firmware, but a new software that has more features and flexible settings.
Motherboards that work with uefi have received many new features, for example:
- to control the temperature of different devices and, in this regard, increase or decrease the speed of the fans;
- adjust the overclocking frequency of the central and graphic processor on those motherboards, where it is provided by the developer;
- work with many Bios settings from special software running the Windows operating system.
Video: select boot device in BIOS
Motherboard Asrock H77M-ITX
The easiest way to boot the system from a USB flash drive is to use the Boot Menu (boot menu). For every modern motherboard there is such an opportunity. To find out which combination or key you can do this, most often it is enough to read the system messages. In extreme cases, you need to refer to the documentation of the board.
Asrock H77M-ITX allows you to select the startup option using the "F11" button. On the first try, you may not be able to get into the menu, so you need to press the key several times. If unsuccessful, just restart your computer and try again.
As a result, you should see a blue background with the words Asrock UEFI setup utility. In the "Please select boot device" menu, you need to select the device you need to boot.

To configure the startup order of devices in the BIOS of the Asrock H77M-ITX motherboard, you must perform the following steps:

After restarting the computer, you should see the start of the launch from the USB flash drive.
Motherboard ASUS P8H77-I
You can get into the BIOS on computers with an ASUS P8H77-I motherboard in the same way as described in the previous section, using the keys Del or F2. The menu for selecting devices to boot can be accessed using the "F8" button.
The firmware interface is very different from the previous version. But the names of the various settings menus are almost identical.
To simplify operations, there is a primary setup mode and an additional one. In the primary settings function, that is, in the main window that you enter when loading Bios, you can select the startup priority. In the USB picture, it is labeled as with uefi.

If, after restarting the system, the boot from the USB flash drive did not start, you need to switch to the "Advanced Mode". This can be done using the "Advanced" button or by pressing the "F7" key.

Photo: advanced UEFI Bios setup mode on ASUS P8H77-I
To set the priority, do the following:

Photo: enabling full initialization support for USB devices


Photo: HDD boot order menu

Photo: rechecking priority after changes in hard drive boot lists
The computer will reboot, after which it should start from USB. If this does not happen, try changing the port and repeat the operation.
How to boot from a bootable USB flash drive in Award Bios
New motherboards that work with uefi are much easier to set up. However, the need to boot from a flash drive may also arise on older systems. The settings for using a bootable USB drive may differ slightly, although the principle of operation discussed earlier is the same.
One of the most famous versions of Bios is Award. There is no way to call the menu to select the launch priority. Therefore, we immediately proceed to setting up the BIOS.
In order to boot the system from a USB flash drive on a computer with a motherboard running Award, you need to perform the following steps:

If you did not start from the required drive, you need to check one more parameter: the USB controller must be enabled in the "Integrated Peripherals" menu.

Photo: checking the activation of the controller
AMI BIOS
This firmware management system is more modern, so there is already a menu for selecting the launch order. It is activated with the "F11" button. You can get into the BIOS settings using the "Del" or "F2" buttons.
To select a download priority, you must:

Phoenix Award Bios
Phoenix-Award Bios is quite rare, and its firmware is a little unusual. There is support for displaying the menu for quick selection of the boot drive, it is called by pressing the "F11" key.
Interestingly, you will not find a USB-HDD in the Phoenix-Award menu. But other gadgets connected in this way are provided for selection, for example Zip, CDROM and Floppy. To start from a flash drive, you need to select Hard Disk, and then the required USB-HDD will appear in the list.

As for priority management through Bios, this is done almost identically to AMI.
The difference is that in the "Boot" menu, you must select the following options:
- use the "+" and "-" keys to change the order. Removable Device should be the first one;
- by activating the Removable Device and pressing the "Enter" button, select the flash drive from the drop-down list.

Photo: We make Removable Device the first in the launch sequence list
The ability to boot the system from a USB flash drive is provided by almost any Bios microsystems. Knowing the key combinations and the necessary menu items, you can quickly change the launch priorities.
More modern motherboards with uefi give you a lot more control over your system. If necessary, you can run different operating systems from different flash drives to manage any software.