This documentation has been archived and is no longer maintained.
Working with product keys and activation
To enter your product key during an unattended Windows® installation, include it in your answer file.
Product keys can also be used to select which image to install during an unattended Windows installation.
In this section
Choosing which edition of Windows to install
To select which edition of Windows to install, do one of the following:
Install Windows manually without an answer file. Windows Setup installs the default edition from the Windows DVD.
Install Windows with an answer file and specify the product key in the Microsoft-Windows-Setup\UserData\ProductKey\ Key setting. The product key depends on the edition of Windows. Entering a product key in this setting does not activate Windows.
Install Windows with an answer file, and then manually enter your product key during Windows setup. The product key selects which edition of Windows to install.
Warning
If multiple Windows images for the same edition of Windows are stored in the same Windows image (.wim) file, you can use the Microsoft-Windows-Setup\ImageInstall\OSImage\InstallFrom\ MetaData setting to distinguish them. You must provide a product key using one of the above methods.
For information about managing Windows product keys when upgrading a Windows image to a higher edition, see .
Windows Activation
To automatically activate Windows with a product key, do one of the following:
Use the unattend setting Microsoft-Windows-Shell-Setup\ ProductKey . You can use a one-time product key or a Volume Licensing Multiple Activation Key. For more information, see Volume License Activation Planning Guide.
The product key used to activate Windows must match the edition being installed. When using a key to select an edition of Windows, it is recommended that you use the same key to activate the system so that the version being installed is the same as the version being activated.
Original Equipment Manufacturers (OEMs) may use their own specific activation tools.
If a product key was not provided prior to the first startup of the computer, it will be requested from the end user during such a startup. If the end user skips this step during the first time the computer is started up, they will later be prompted to enter a valid product key.
Warning
In most Windows 8 deployment scenarios, it is no longer necessary to use the SkipRearm answer file option to reset the Windows activation clock when you run the command Sysprep on the computer several times. In Windows 8, the SkipRearm parameter is used to indicate the licensing status of Windows. If you provide a retail product key or a volume installation key, Windows will automatically activate. team Sysprep can be run up to 8 times with a single Windows image. After running Sysprep 8 times on a Windows 8 image, you must reimage Windows. For more information about Windows features and settings that can be added to an answer file, see
I have HP with Windows 7 installed. I want to do a clean install of Windows 8 from a bootable DVD.
I bought a 32 bit windows 8 kernel from the microsoft store and i got a product key. I then burned the .ISO file to a blank DVD using imgburn. When I reboot and change the BIOS to boot from the internal CD/DVD and then boot from my internal DVD, I start the install process.
After I pass the screen where I select the language and location and click " Install", he'll be there for a minute and then he'll say:
The product key you entered does not match any of the Windows images
I did my research and found out that I need to add a PID.txt file to a source file containing a Windows 8 .ISO, but the thing is, I don't know how to add files to the .ISO. The guide I've researched is for a bootable USB stick and I'm using a DVD.
2 Solutions collect form web for “The product key you entered does not match any of the Windows images”
Do the following:
If its usb
1.Open Notepad
2.Create a text file named PID.Text
3. Paste the following in the file:
Value=XXXXX-XXXXX-XXXXX-XXXXX-XXXXX
4. Replace XXX with your product Key
5. Place in your /sources file your iso
6. ISO return
For DVD from Windows valley, create an unlock disc
Use 7-zip to extract this ISO to a specific folder and navigate to the Source folder and find the ei.cfg file.
EI.cfg is a Windows Setup-specific configuration file used to determine what edition and license will be used during installation. This file replaces PID.txt and is located on the product media under the Sources folder in Windows Vista DVD
To get the desired edition,
3. Use Notepad to edit and save this file, changing the option you want. Valid version identifiers:
Edit the ei.cfg file
Ulimate Professional HomePremium HomeBasic Starter
To get all editions -
4. Just delete the file and finally create a bootable ISO and burn your unlocked drive.
Hello, if the solution with PID.txt doesn't work - try to create
And write in it:
[Channel] Retail
Placed in the "sources" folder.
Keep in mind to delete the PID.TXT file if you have one.
Sincerely!
Hello. Today we will consider the situation, reinstalling Windows 8 Single Language on Windows 8 Professional on a laptop. Until recently, Windows 7 and XP were mainly installed on laptops and computers, and everything was quite simple and easy. The main thing for Windows XP is to find the latest drivers for your laptop. But with the release of the new operating system Windows 8, everything has become more complicated. After all, if in the case of the “seven” and XP you always had the license key at hand, or rather on the back cover of the laptop, then with a laptop on which Windows 8 is installed, you just can’t reinstall the operating system, you don’t have any sticker with a key on the laptop find. The license number is embedded in Bios UEFI, and you can only install the operating system for which this key actually exists. Typically, this is the Single Language version. To install Windows 8 Professional on a laptop that originally had Windows 8 Single Language installed, you will have to make some effort.
An acquaintance somehow came with a problem, bought a new laptop a year ago, on Widows 8 Single Language, a year has passed, and the system began to “bug out”, so I decided to reinstall it. But since there was no installation disk included with the laptop, and my honest friend, he simply bought a disk with Windows 8 Professional OEM in the store. But during installation, an error popped up "The product key entered does not match any of the Windows images." Realizing that he would not be able to do it on his own, his friend decided to call a master from a computer and laptop repair company. The specialist came, fussed with the installation of Windows 8, and ... ..he could not install it either, but he took the money for the call. Arriving at the store where the laptop was bought, they said that they would do it, ...... but for money. And my friend already spent money on Windows 8 Professional OEM. By the way, the Windows 8 disc in the store was also not accepted back from him, since the box was opened, and the license could be activated .... And then a friend came to me.
I had to spend a little time looking for Windows 8 Single Language (it can be either a disk or a virtual image), since this version was originally installed on the laptop. If you install the "native" version of Windows 8, then there will be no errors during installation, and you won't even have to enter the license key. Upon successful installation, in the lower right corner you will see the inscription "Windows 8 Single Language Build 9200"

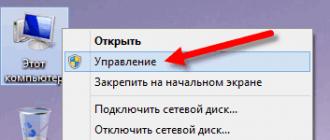
To activate Windows 8, you need to install a driver on the network controller and go online. Go to Computer Properties and select "Learn more about activating Windows."

Click "Activate"


Bottom line: the Windows 8 Single Language operating system is installed without errors, and activated.
An option to reinstall Windows 8 to a different version than the one that was originally installed at the time of sale. We will install Windows 8 Professional OEM.
The question arises, why, when installing another version of Windows 8, does the error “The product key entered does not match any of the Windows images?” This is because the UEFI BIOS contains information about Windows 8 Single Language, and you are trying to install a different version of Windows 8.
But professional craftsmen know the file (EI.cfg) and the product identifier file (PID.txt). These are additional configuration files that you can use during the Windows 8 setup process to specify your Windows 8 product key and edition.
When installing Windows 8, the installer first accesses the EI.cfg file (which contains information about the version of Windows 8). If these files are missing, Windows 8 takes the Windows 8 version and license information from your laptop's UEFI BIOS. And since the key in the BIOS is registered from Windows 8 Single Language (for one language), this is why the error comes out.
And so, we create two files (EI.cfg) and (PID.txt) and indicate in them information about the Windows Professional (OEM) we are installing, then we place them in the sources folder of the Windows 8 distribution, that's all. Note: sometimes it will even be enough to add just one pid.txt file with the Windows key to the sources folder.
Attention! If you reinstall Windows 8 with the UEFI BIOS enabled and the "Secure Boot" option enabled, then the Windows 8 bootable flash drive must be UEFI accordingly.
Create a plain text file and save it with the same name and extension ei.cfg
The contents of the ei.cfg file:
professional
OEM
0
What do these symbols mean?
EditionID - edition of the system, there is Core or Professional,
Channel - distribution channel, sometimes OEM or Retail,
VL - corporate version, sometimes 0 or 1.
For example, for a system that I want to install on a Windows 8 Professional 64-bit Rus (OEM) laptop, the ei.cfg file will look like this
professional
OEM


Create pid.txt file

We write in it
Value=XXXXX-XXXXX-XXXXX-XXXXX-XXXXX

Copy both files to the sources folder of our bootable USB flash drive with Windows 8
How to reinstall Windows 8 on a laptop. Hello admin, my problem is the following. A laptop was bought with Windows 8 installed for one language (Windows 8 Single Language), which I safely demolished and installed Windows 7. I used your article for instructions. Now I’ve changed my mind and I want to install Windows 8 again, but I don’t want to install the version that was preinstalled on the Windows 8 Single Language laptop. I have a licensed disk in a Windows 8 Professional 64-bit Rus (OEM) box with a key, I bought it in a store, that is, everything is as it should be. But, when trying to install this version of Windows 8 Professional 64-bit Rus (OEM) on a laptop, the message “The product key entered does not match any of the Windows images” appears.
The second option to reinstall Windows 8 on a laptop
Let's install a different edition of Windows 8 on our laptop, namely, we will use the existing Windows 8 Professional 64-bit Rus (OEM) disk.
Why do I get the error "The product key you entered does not match any of the Windows images" when installing a different edition of Windows 8 on a laptop? ? Because information about the Windows 8 Single Language installed by the laptop manufacturer and its key is stored in the UEFI BIOS.
But all professionals know that there is such a file (EI.cfg ) and a product ID file ( PID.txt ) - these are additional configuration files that can be used during the Windows installation process to specify the product key and edition of Windows!
Attention friends! In simple words, during installation, the Windows 8 installer program first of all accesses the EI.cfg configuration file (it indicates the edition of the Windows 8 being installed) and the PID.txt file (it contains the key of the Windows 8 being installed). If these files are not present, Windows 8 reads information about the system version and its key in the UEFI BIOS of your laptop, and this key is from the Windows 8 Single Language (for one language) installed by the manufacturer, and the error comes out. So friends, we will independently create these two files (EI.cfg) and the product identifier (PID.txt) and indicate in them information about the Windows 8 Professional 64-bit Rus (OEM) we are installing, then place them in the sources folder distribution of Windows 8, that's all.
How to do it?
1) For example, I have a licensed disk with Windows 8 Professional 64-bit Rus (OEM) or its image in ISO format. So it's easiest for me to create a bootable Windows 8 USB flash drive.
- Attention! If you reinstall Windows 8 with UEFI BIOS enabled, then the Windows 8 bootable USB flash drive must be UEFI, respectively, how to create it and how to configure the UEFI BIOS itself to reinstall Windows 8, we read in our article, this method involves creating a bootable USB flash drive using command line. Know that with the help of such a flash drive you can reinstall Windows 8 on a laptop with a simple BIOS. So, we created a flash drive, now we create two system installation configuration files (EI.cfg) and (PID.txt) and add them to the "sources" folder of the Windows 8 distribution.
- Note: Windows 8, 8.1 can also be installed using a simple ISO image, but then you need to add the above files (EI.cfg) and (PID.txt) to it, sometimes it will even be enough to add just one pid.txt file to the sources folder with Windows key. You can learn exactly how you can add files to the installation disk or image of Windows 8, 8.1 from our article.
Anyone who has ever tried to install Windows 8 probably remembers that during the installation process, the system asks for a product key. And if in Windows 7 this step could be skipped, in Windows 8 further installation of the system without entering a valid key is impossible. This step by Microsoft developers looks strange (although expected), depriving users of the opportunity to test the new OS before purchasing a license key.
Note: this trick, which allows you to install Windows 8 without entering a key, does not mean that the operating system itself can be used. After installation, do not forget to enter and activate the system.
To disable the prompt for entering a product key at the stage of installing the original assembly of Windows 8, you must on the installation disk of the operating system in the directory \sources\ create a file named ei.cfg.
Before proceeding to describe the structure of the EI.cfg file, let's figure out what kind of file it is and why it is needed.
EI.cfg(release configuration file) and PID.txt(Product ID file) - Additional configuration files that can be used during the installation of Windows 8. These files are stored on the installation disk in the directory \Sources. In the EI.cfg file, it is possible to set the OS release version, and in PID.txt, respectively, the product key (it is used only for installing Windows, but not for activation). These files can be used instead answer file (AutoUnattend.xml) to partially automate the installation of Win 8.
In the event that an answer file is used during the installation of Windows 8, then the information in additional configuration files is ignored, because. the AutoUnattend answer file for the Windows Installer takes precedence over the EI.cfg and PID.txt files.
EI.cfg File Format
3 parameters are set in the EI.cfg file:
- EditionID- release id
- Channel— type of supply channel
- VL— Type of license
Valid values for EI.cfg file parameters:
- professional
- Enterprise
- Volume
- 1 - corporate license
- 0 - in all other cases
Modifying a Windows 8 distribution to be able to install without entering a product key

Let's assume that the unpacked Windows 8 image is located in the D:\Windows8ISO directory.
To create a bootable iso image with Windows 8, with administrator rights, run the command:
Oscdimg -lWin8 -m -u2 -bD:\Windows8ISO\boot\etfsboot.com D:\Windows8ISO D:\Win8_without_key.iso
- -l - sets the disk label
- -m - says that a DVD image is being created (which is larger than the CD image)
- -u2 - creates a UDF filesystem
- -b - specifies the path to the boot image

As a result of executing the command, a file with a setup image should appear on the D:\ drive - Win8_without_key.iso.
It remains to burn the resulting image to DVD or USB and start installing Windows 8.
An additional button will appear in the window in which you are prompted to enter the Windows 8 key Skip to skip entering a product key. 
After finishing installing Windows 8 , you can enter the product key in the properties of the computer.