The most expensive coffee is coffee spilled on a laptop. But not always the liquid on the laptop means its death, sometimes it is enough to remove, wash and dry the keyboard. If, however, the keyboard is completely damaged, then you need to replace it. Replace not working keyboard on a new one can do it yourself. Also, a keyboard malfunction may be caused by a software error or problems with the loop.
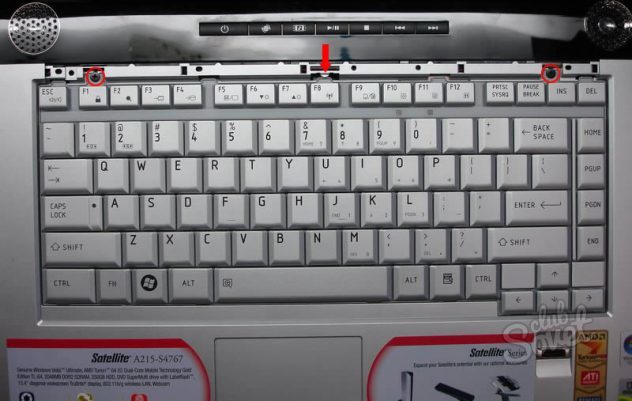
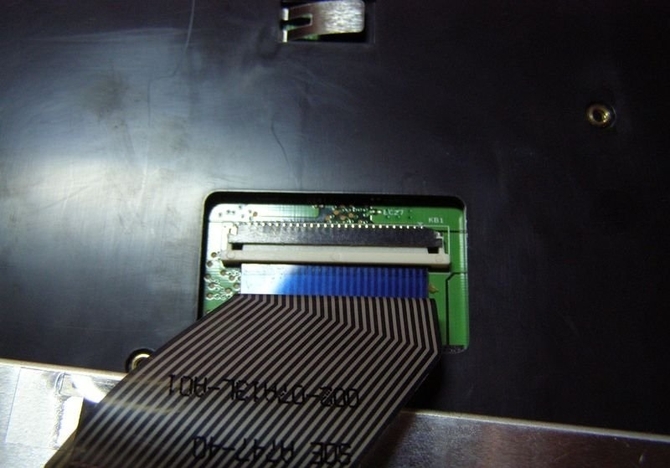
Before replacing the old keyboard with a new one, examine the question of how to remove it. The method of mounting the keyboard does not even depend on the manufacturer, but on the model. Unplug the laptop completely. Check out the documentation for your laptop. Find the section where it is written how your model understands. Such instructions can be found on the manufacturer's website. It details with illustrations describes the procedure for disassembling a laptop. Most often on modern laptops to fasten the keyboard used latches included in the case. Carefully, using a screwdriver, push in the upper left latch, pry slightly the edge of the keyboard with a needle. Lift the edge of the keyboard and slide the second latch. Now move the needle to the second latch and continue to slightly raise the edge of the keyboard. Then press in the third latch and lift the keyboard with your hand. After the fourth and last latch is pushed in from the top, it remains only to completely get the keyboard.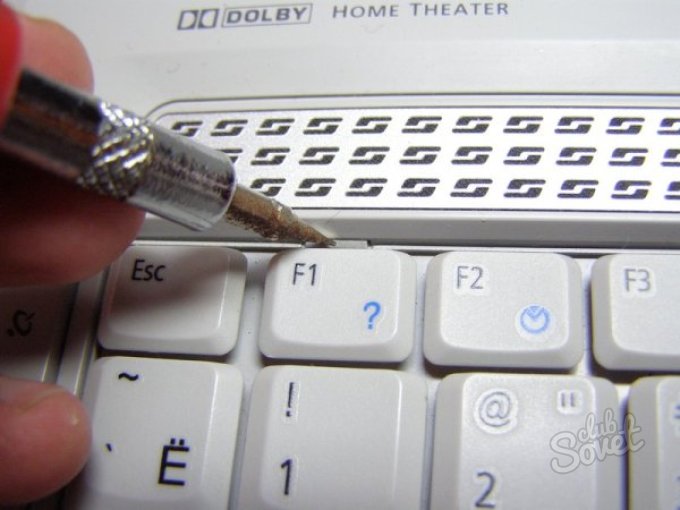
![]()

Some expensive models have their own special mounting system. Before starting the repair yourself, think carefully about whether you can perform it, whether you have enough experience in performing a similar operation. If you have doubts in your abilities, then it is better not to risk, but to entrust repairs to specialists in service center. In addition, opening a laptop, you automatically lose the right to its warranty repair.
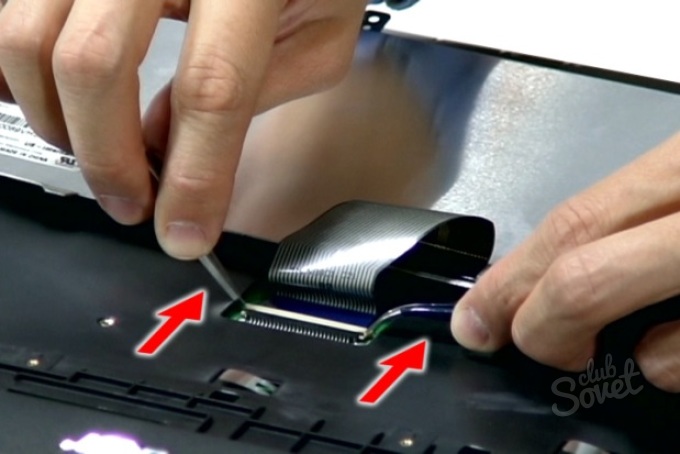
Unlike ordinary personal computers, disconnecting the keyboard from the laptop is somewhat more difficult. Firstly, it sits quite tightly in the device. Secondly, mounts and connectors may vary depending on the model of the device.
Removing the keyboard from the case may be necessary in several cases: for cleaning from the accumulated debris for her replacements, as well as to gain access to the insides of a laptop.
In the first case, everything is clear, you can not clean the buttons from dirt and other debris if they are not removed. When breakdowns the keypad is also all clear, it will have to be changed, and for this you need to know exactly how to perform the replacement correctly. Otherwise, you can to harm device case To gain access to internal components, it is not always necessary to remove the keyboard, although in the overwhelming majority of cases. This applies especially to the newest devices.
What are the attachment
Laptops can vary greatly mounts keys, because of which there will be a big difference in the method and complexity of removing the buttons, as well as in the convenience of printing on specific models of devices.
The most common type of attachment not only for laptops, but also for conventional keyboards, is an membrane. The reason for this is simple - the membrane type of keys is very cheap, thanks to which it is used literally everywhere.
More expensive and quality are the keyboard with mechanical switches. They differ significantly improved reliability, smoother keystroke, the characteristic " mechanical"Noise during printing and huge cost. Because of this, they are rarely found in laptops (only in premium models). 
Keyboard with capacitive Sensors are often used in laptops (approximately at the level of membrane ones). Printing is performed using contact closure, the reliability of such anchoring is far from ideal, with the result that the device can quickly fail. 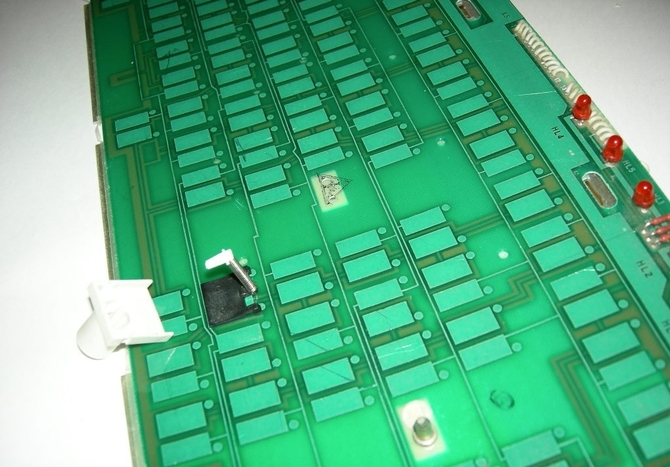
Separate class stand touch keypadswhich, although rare, are found in laptops of all price categories. To remove the touch panel and the screen will have to disassemble the entire device, that for regular user is an overwhelming task. In addition, devices with an optional touch screen cost much more. expensive similar in characteristics of laptops that do not have such a panel. 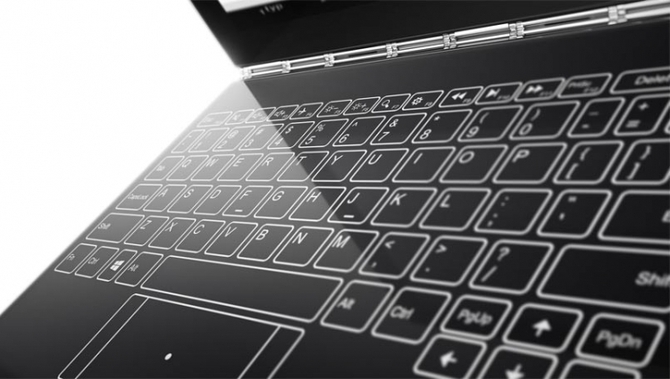
Before removing it is necessary turn off device and remove the battery, otherwise there is a chance to damage the laptop or even completely break the device.
How to remove the keys:
Remove the keys
This procedure is almost identical to different models laptops or netbooks. For this would need:
How to set the buttons in place
Installing keys is much easier than removing them, but even here you can make a bunch of mistakes that can lead to breakdown grooves or keyboards in general. At installation it is necessary place a key above the corresponding groove in the keyboard, then lightly (lightly) press down on her. If the mount was also removed, it will need to be put in place. 
In cases where more than one key is shot on a laptop, there may be a problem with their correctness. locationThis is especially true for users who rarely type on a computer. If you put the button in the wrong place, it will lead to strong inconvenience when using the laptop (for example, instead of the letter "m" you will enter "g"). Therefore it is worth resorting to a special pattern during assembly. An example of one of these schemes: 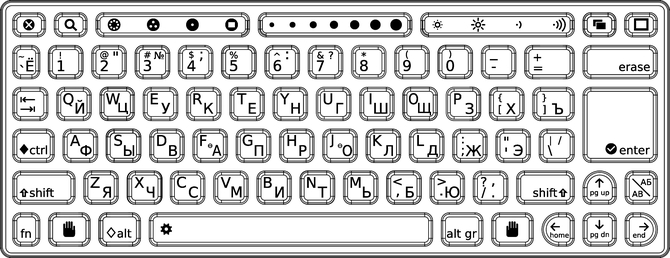
The rest of the assembly should not cause any problems, although you should not relax, any careless action can lead to irreparable damage to the device.
Instruction
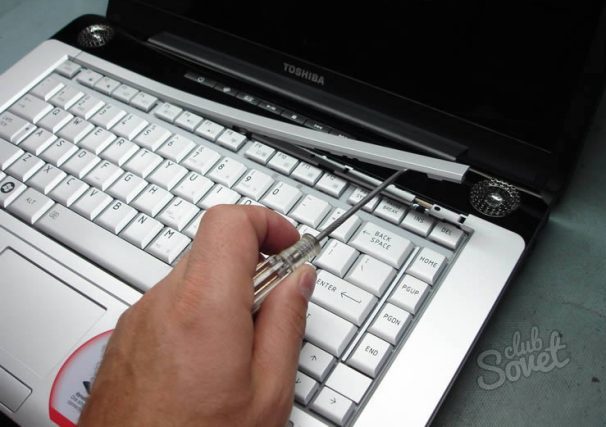
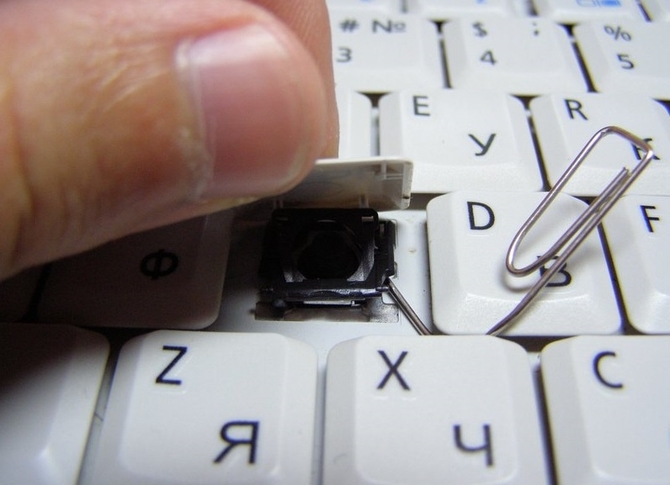
Removing keys. If on a standard keyboard personal computer this operation takes place without complications (the key is simply wrapped around on both sides and removed with intensive movements to the sides), then when you remove the key from laptop , the user should be more careful. Here it is likely that you will damage one of the button mounts. In the future, this defect will badly ruin your mood when working with a laptop.
To remove the key from the base, you need to do the following. Find a paper clip and straighten it. Insert the clip under the bottom of the key, then pull it towards you. This should be done very carefully. In most cases, the key is easy and removed from the base. If you need to remove a few keys, do the same operation with each of them. It should be noted that before removing the buttons, you should write down their location on sheet paper. This will help you to further assemble the keyboard in the right way.
Setting the key to a laptop does not require from the user the care that was appropriate when removing the buttons. However, you should be extremely attentive. To set the button on a laptop , give it the correct location. As soon as the key takes its place, lightly press it with your finger on the platform. The button will be fixed with plastic fasteners.
Any keyboard is a fairly gentle and sensitive device. And it is with her that all sorts of troubles occur most often - trapped particles of dirt and dust, crumbs, pet hair, cigarette ash and spilled liquid - all of these factors often lead to keyboard failure. Its relatively fragile keys Often do not stand "meetings" with young children, pets or very powerful vacuum cleaners and simply fall off. But to fix this trouble is not so difficult.
You will need
- - needle
Instruction
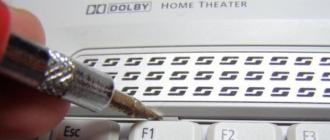
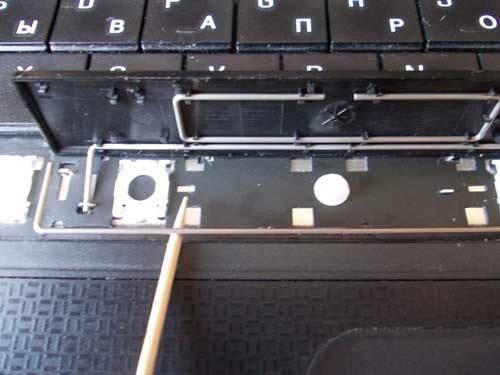
Examine the key and determine the position of the latch. On the reverse side. keys There are two types of mounts. These are two latches and two grooves under the "ears" of the lock. With this latch cover keys is attached to keyboard. The latch consists of two parts connected by a hinge in the middle. If the latch remains in the key, you need to remove it from there. Only after that it will be possible to set the key in place. To remove the lock, hold the key; unfasten the latch on one side keys and output the “antennae” of the retainer from the slots on the other side.
Consider keyboard On keyboard there are three pin contacts used for attaching keys. Make sure they are not bent. If you see that the pins are deformed, gently fold them into the correct position. Do not put too much effort on. pins are made of aluminum and may break.
Put the latch back onto the keyboard. For this, put the holder under the large pin contact and, with gentle pressure, pull the latch onto the two small contacts.
Take the key and insert the tabs of the retainer into the slots of the cover keys. Make sure the retainer is seated in the grooves, and press the cover slightly. keys to keyboard. When you hear a light click, make sure that the key snaps into place.