Today the mobile gadget is no longer a luxury or a toy boom, the purpose of which is known only to him, but the same usual thing as a TV or microwave. Most of us own not only a smartphone, but also a tablet, laptop, portable game console, and many have smart HDMI-sticks running Android. The problem with all this diversity is that there are no means for synchronizing and remotely communicating multiple devices in mobile OS.
To synchronize with special software, you do not need to press any buttons. There is a huge amount of cloud services. They are used by both private and business users. As a rule, mass services combine free and paid versions. However, we need to know that paid versions are available even according to our national standards.
Most services support different operating systems and transfer data between them. We started with the fact that there are ways to keep your manual copying of paper and, thus, time and irritation. But the matter is not limited to this. The benefits of using such synchronization services also have other aspects.
Instead of introducing
Google and Apple have done a lot to ensure that their devices are used as conveniently as possible. A single account for accessing services, transparent data synchronization, cloud storage for settings is only a part of the functions implemented by software giants that make gadgets extremely convenient to use and save a lot of time.
- There are many advantages, and the system works quickly and relentlessly.
- Learn how data replication works.
Enable sync settings
And you can bypass your favorite colors - synchronized devices can share your chosen theme. Check which version of software you have, and find out if the update is available. You can select sync items at any time. In the section "Removing the personal cloud settings". Do you like all the same?
However, when it comes to synchronizing multiple devices with each other, serious problems arise. There is simply no such functionality in any OS. Of course, we can bind all devices to a single Google and Apple account, which will allow us to install the latest software versions, receive letters, messages and other notifications at once to all devices. However, there is no synchronization of settings, lists of installed applications and data on the memory card, each device is a "thing-in-itself", which can have access to one cloud-storage, but nothing more.
Synchronize application settings
Fix progress in games, high scores and purchases for the next new phone, laptop or tablet purchased by enabling application settings synchronization. You do not need to lose preference on the Internet when switching from your computer to your phone.
Synchronizing passwords requires a two-step verification process to ensure the security of your information. If you do not complete the two-step verification process when setting up your phone for the first time, you will be prompted to do so when you enable password synchronization. And it's not about the availability of its applications and services for these systems.
We will not understand why this situation developed, but instead we will discuss ways of solving the problem, that is, we will try to find tools and modifications that would help us to adjust the synchronization and interaction of various devices. Android-devices of different purposes in our latitudes are much more widespread than iOS, so we are talking about a green robot.
Manufacturers of hardware and software for many years were tempted by "combined proposals". While we stick to one IT ecosystem, everything works, at least theoretically. Today was the first step in this direction. First, a tiny one, starting a long road to the goal. Once you select it, we have two options: Continue now or Continue later.
If it's not, then the computer will pull out a notification that will be waiting in the Action Center until we respond. While he works in one direction, so you can not send it to the phone over the phone. Or on the timeline - a preview of the history of the actions performed in the application on one device from an application running on completely different hardware with any operating system? Most of the novelty concerns the inaccessible Cortana in our country, which will now become even more intelligent.
What is what
When we say "synchronization of several devices," we mostly mean a smartphone and a tablet, these two devices are most popular. However, besides them, there are a lot of other Android devices on the market, including smart TVs, popular Chinese HDMI-dongles, as well as more exotic things such as the OUYA game console and the NVIDIA Shield pocket console.
The problem is that this function does not work when you are outside the cellular range, and many times the carriers themselves have technical difficulties that can cause your phone's hours to be considered minutes or even hours from synchronization.
Set automatic sync options
However, in any case, start by pressing the menu button with three dots at the top of the screen, then select the "Settings" option. Here you can change the time service with the first parameter, if you want, but the first thing you need to do is mark the "Enable" field under the "Automatic synchronization" category. There are additional options for configuring the synchronization process to your liking, but most users should be satisfied that these settings correspond to the default values.
Personally, I have a total of six different Android devices, of which I use three and one more every day at least several times a week. This is a smartphone, tablet, game console and HDMI-dongle. Devices, as you can see, vary greatly in purpose, functionality, and also installed versions of Android. Therefore, the task of their synchronization and interaction was rather nontrivial, it was required to provide general access of all devices to the file storage, synchronization of applications between the necessary devices, make a universal remote control from the smartphone, and also raise DLNA-server from which all devices could pull multimedia files.
Application data
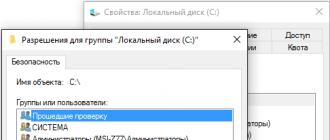
The first thing to do is to synchronize the settings and application data between devices. In fact, this is the main problem, which contains the greatest number of pitfalls. The fact is that in Android to make synchronization of settings and application data is not so easy as in classic desktop OS. If in the same Windows or Linux it's enough just to copy the files and application settings directories to another machine, here, firstly, we will face the problem of rights delineation, which does not allow one application to access the data of another, and secondly, we can to receive a problem of incompatibility of devices among themselves.
Due to the first limitation, the synchronization of application settings is possible only if you have root rights on both devices, because of the second, you can not do without specialized tools that can fix problems in case they arise. In total, there are two types of tools that will suit us, these are applications for backups such as Titanium Backup and Helium, as well as specialized synchronization applications like DataSync and AppSync. The advantage of the first in asynchronous work: copied the settings today, restored to another device tomorrow. The advantage of the second is the possibility of setting up synchronization in time, for example, every night.
Fortunately, there is an instrument that combines the merits of both approaches. DataSync not only knows how to copy application settings and files on a memory card to any device on the same local network, but also allows you to backup to Dropbox or Box.com, and as an add-on it has Bluetooth and NFC support, which is useful on the road.
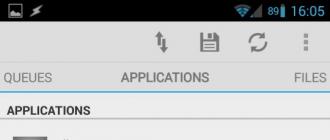
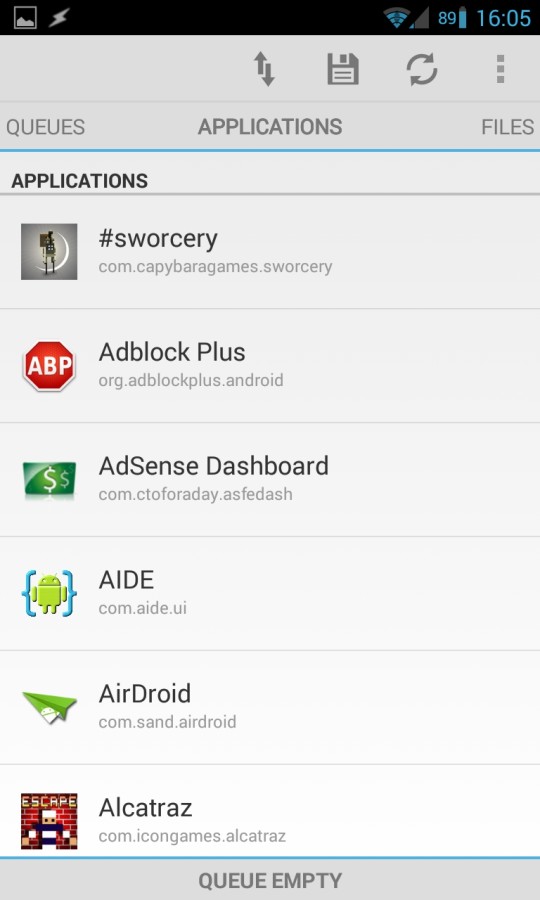
The algorithm for using DataSync is as follows. Install the application on all devices that must participate in the synchronization, run it. Next on the device that must accept or transfer their settings to another, select the desired applications and files. All of them will be added to the queue (Queue), which can be accessed by pushing the panel from the bottom. After that, click on the synchronization icon from the top (two arrows) and select the desired device from the list. Tap on the device will open a dialog for selecting the type of synchronization: in both directions (the option is available only in the paid version), there or here. After the selection, the synchronization process will begin.
It goes without saying that every time you run the application and enable synchronization is not the most interesting lesson, so DataSync has the ability to configure synchronization on a schedule. To do this, it's enough to save the queue with the floppy disk icon at the top of the screen, then long hold the finger on its name in the list and select Schedule Schedule from the menu. So you get the opportunity to configure selective synchronization of the desired applications on different devices.
By the principle of its work, DataSync is a typical backup. He takes the package with the application, then copies all its settings and files and sends it to the remote device. Therefore, it can also be used for: a) the actual backup of the applications, b) the installation of the desired applications along with the settings for a new / flashed device from another device, and c) for asynchronous synchronization: one device stores in Dropbox, the other (restores).
Files
In addition to synchronizing applications, DataSync can be used to exchange files between devices. In the case of rare copies of small amounts of data (books, for example), its capabilities will be quite enough, but if it is a matter of constant file synchronization in both directions, as well as access to large data stores (home media archive), DataSync will not work.
After a lot of experiments with different synchronization utilities, I came to the conclusion that CifsManager is most convenient, which allows connecting SMB disks to any directory on the memory card (see all applications), SSHFSAndroid, connecting balls via the SSH protocol, and DropSync, which automatically synchronizes the specified directory with the Dropbox.
Mounting SMB-ball
To connect a Windows share folder manually, you need to execute the following command sequence:
$ insmod /sdcard/ko/dns_resolver.ko $ insmod /sdcard/ko/md4.ko $ insmod /sdcard/ko/cifs.ko $ insmod /sdcard/ko/nls_utf8.ko $ mount -t cifs -o iocharset = utf8 , username = user, password = password, file_mode = 0777, dir_mode = 0777 // IP / share / sdcard / cifs
INFO
In addition to UPnP / DLNA, XBMC also supports Apple AirPlay streaming technology: "Settings -\u003e Services -\u003e AirPlay -\u003e Allow XBMC to receive AirPlay content".Unlike many other SMBs, SSHs and Dropbox clients that can be found in the market, these three applications do not restrict access to the balls only through themselves, but instead mount them to public directories, so that data can be operated from any program. CifsManager and SSHFSAndroid is convenient for using to access home file-cleaner; we connect a network drive and work with files, both with local (though, the media server will not index them).
DropSync is ideal for synchronizing small amounts of data between different devices and PCs: for example, to distribute an e-book to all devices, just download it on a laptop and put it somewhere in ~ / Dropbox / Books, in a few seconds it will appear at all Devices with installed and configured DropSync. And no dependence on the local network and Internet connection as such (the synchronization will occur as soon as the access to the network appears).
Now how to set it up. Let's start with CifsManager. Here everything is very simple and difficult at the same time. On the one hand, it's enough to launch the application, click the "Add New Share ..." button and enter the server's IP address / name-balloons in the opened window, specify the user's name: password and mount point, for example / sdcard / cifs, by creating a catalog in advance. Then click on the configured ball, and it is mounted.
But this is only a theory, in practice everything is somewhat more complicated. In fact, CifsManager is just a shell for running about such a command:
$ mount -t cifs -o username = user, password = password, file_mode = 0777, dir_mode = 0777 // IP / ball-name / sdcard / cifs
However, it will only work if the cifs.ko module is embedded in the kernel, or it can be found at /system/lib/cifs.ko. If it is not, the file system will not be connected, and "not so" is on very many smartphones. What if there is no module? There are two options: either to flash the kernel with cifs support, or to find / compile a module suitable for its kernel.
We already had a whole article on how to select and flash the cores, so we'll stop on the second option. In total, in addition to the module cifs.ko, for newer versions of Android we will also need modules md4.ko, dns resolver.ko, as well as optional nlsutf8.ko, if there are files with Russian names in the balloon. In this case, all modules must be compiled for the version of the Linux kernel that is stitched into the device. Find them will not work for every device, but it's worth trying, using search queries like galaxy s3 cifs.ko. Usually all the necessary modules are packed into one zip-archive, which is enough to deploy and copy onto a memory card. Next, go to the CifsManager settings, check the Load vid insmod option, and in the Path to cifs.ko field, list the paths to all modules via a colon, for example: "/sdcard/md4.ko:/sdcard/dns resolver.ko: / sdcard / nlsutf8.ko: /sdcard/cifs.ko ». After that, the program should start to properly mount the balls.
If such perversions for the sake of access to the balloon do not please you at all, then I would like to draw attention to SSHFSAndroid, which allows you to mount remote FS via the SSH protocol. In fact, it's just a wrapper around the well-known sshfs user space file system, using the Linux kernel module FUSE, which is included in all run-in kernels starting with Android version 2.2 (using FUSE on Android to mount applications and virtual memory cards installed on the memory card).
Using SSHFSAndroid is pretty simple. After launch, the main application window will be empty, except for the "+" and "Settings" buttons at the top of the window. To connect a new FS, press the "+" button and successively fill in all the fields of the displayed menu: Name - any name, Host - IP or host name (for example, 192.168.0.100), Remote path - path to the directory on the remote side (for example , / home / vasya), Mount point - mount point (/ sdcard / share), Username - user name and Password - password respectively. Then press the "Save" button (the icon in the form of a floppy disk) and, after returning to the main screen, simply click on the item with the connection name. After requesting root privileges, the file system will be mounted to the specified directory, which can be accessed using any file manager.
Now about DropSync. In fact, this application performs the same task as the desktop version of Dropbox: it allows you to store files on a USB flash drive, periodically synchronizing them with the cloud storage. Synchronization occurs only with respect to the changed files, and you can select the directories for synchronization individually, sending and receiving from the cloud only what is really needed on the smartphone, without having to download a few gigabytes.
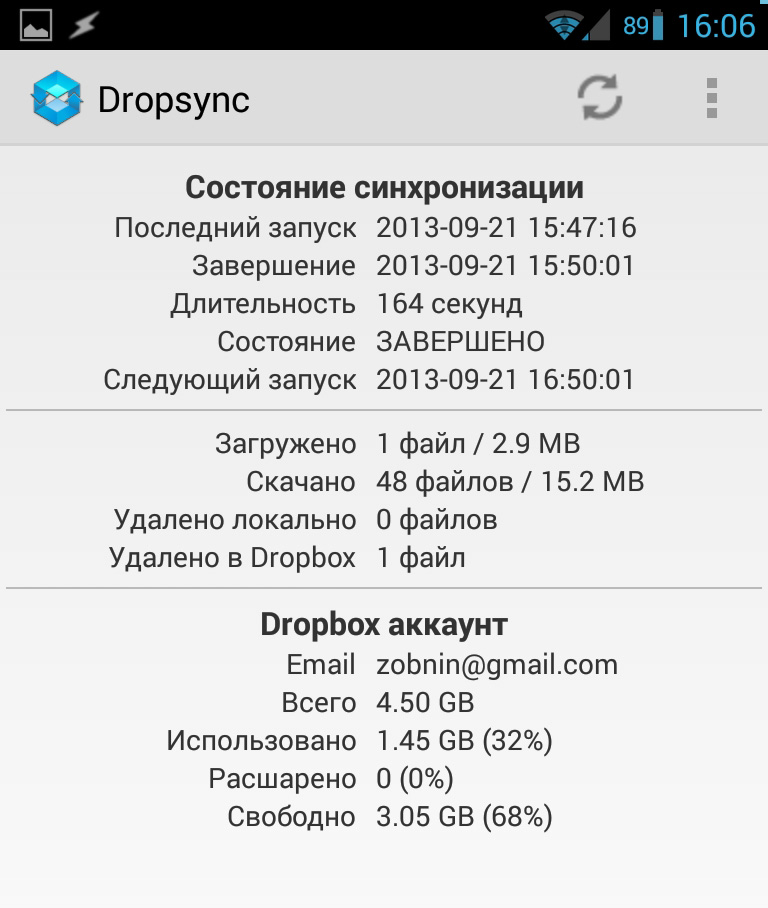
DropSync is very easy to use, you just need to choose a directory for synchronization, a directory in Dropbox and a synchronization method: one way or both. After that, the software will hang in the background and will periodically copy the changes to the files to and from the Dropbox. Immediately recommend to buy a Pro-version, it supports the Linux-technology inotify for instant synchronization immediately after changing the files, and removed the limit on the file size of 5 MB and one synchronized directory.
UPnP / DLNA
The main problem with all these ways of sharing files is the need to get root, configure and even install different modules. In the XXI century, when smartphones almost brew you coffee, it looks somewhat archaic. Some time ago, UPnP (Universal Plug and Play) technology was invented, which allows to connect all available "smart" devices to a common network with the ability to access various functions. Unfortunately, the developers of software and operating systems underestimated the possibility of UPnP, and today the technology is mainly used only for the exchange and remote playback of multimedia files as part of DLNA technology, which became the ideological successor and extension of UPnP. These two technologies (often referred to as a single stack of technologies) are now used everywhere, including different media players and TVs. There is no support for UPnP / DLNA in Android, but it can be found in a large number of multimedia applications, as well as specialized software, such as BubbleUPnP and torrent clients.
At its core, the UPnP / DLNA stack is based on the classic client-server interaction model, in which the server acts as a distributor of multimedia content, and the client receives it and loses. The only difference from other technologies is that each device here is often universal, acting as a server and client, and can also be a controller that controls the rest of the devices and allows you to determine what, where and from where will be played (although it all depends on the implementation, of course).
This architecture in combination with automatic device integration into the network allows implementing a variety of device interaction schemes. In our case, we can literally make several tapas so that the film stored in the memory of the tablet starts playing on the HDMI-dongle, using a smartphone as a control panel. And in a few more steps - to make music from the dongle play on the smartphone.

There are three major Android applications that support UPnP / DLNA. This is VPlayer (via VPlayer uPnP DLNA Plugin), XBMC and BubbleUPnP. The first one allows you to play content from the DLNA server, the second is to distribute and play, and the third is an all-in-one machine that plays, distributes and manages other clients and servers. Built-in support for client DLNA is also available in HDMI dongles based on Rockchip 3066 chips and Rockchip 3166 chips (it's almost any modern dongle).
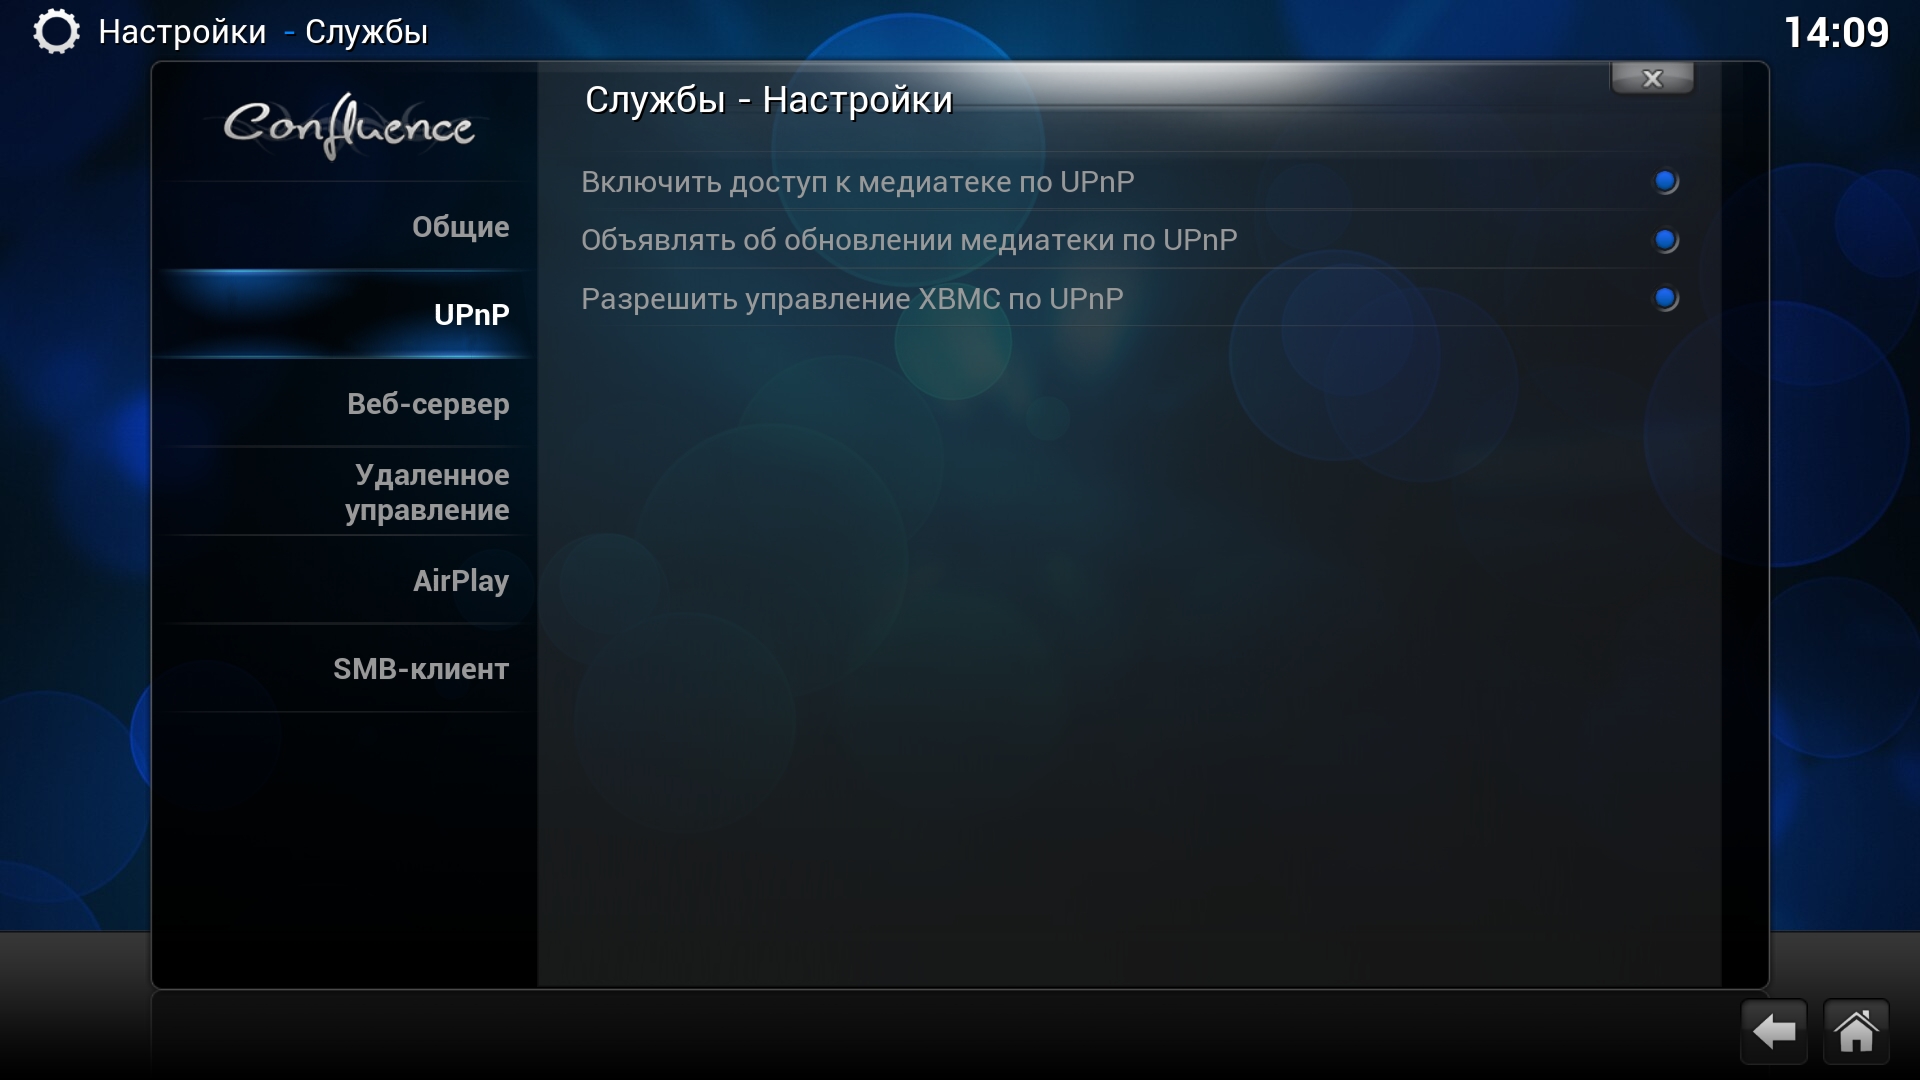
In my home configuration, which includes the OUYA TV-set with the hard drive connected, as well as the HDMI dongle, phone and tablet, the following applications are used: on OUYA, which, in addition to playing media content on the TV, is also responsible for storing all multimedia data, installed XBMC, in the settings of which all DLNA operation modes are enabled (Services -\u003e UPnP -\u003e All options). The phone and tablet are installed BubbleUPnP, HDMI-stick comes with a built-in DLNA client.
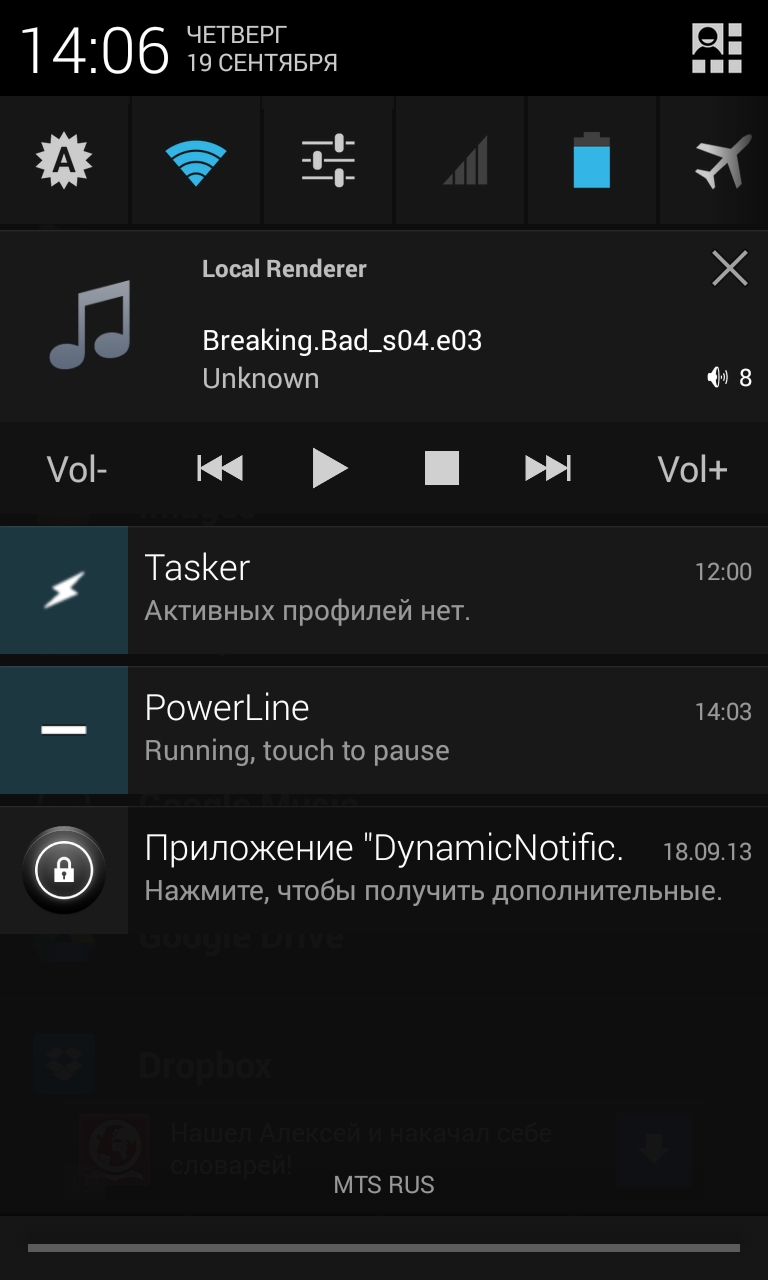
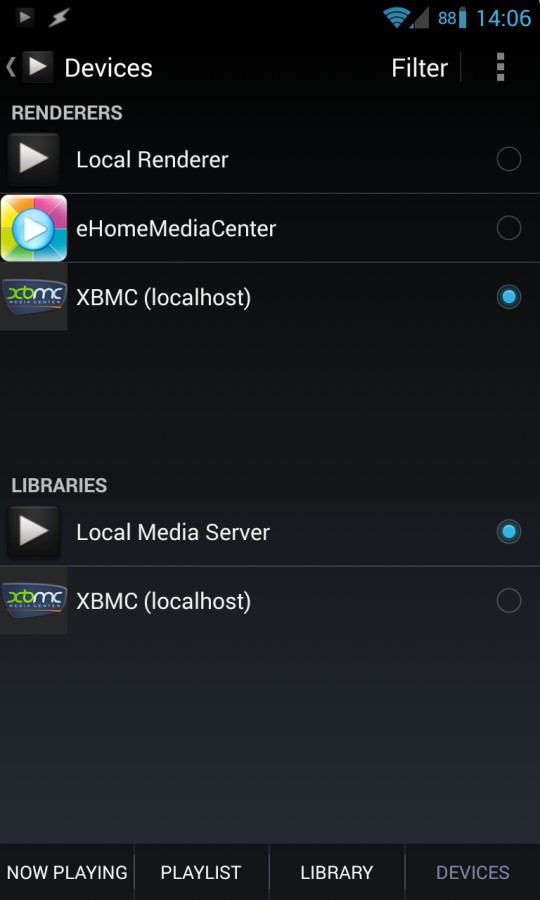
In order to play one or another media file on any device, it's now enough to start BubbleUPnP, select the device for displaying content (RENDERERS) on the Devices tab, select XBMC as the content distributor and that's it. Next, you find the desired file in the library (the "LIBRARY" tab) and tap on it. At any time, I can change the device to display or distribute content, and playback will continue on it. No settings, no IP addresses and port numbers.
Chromecast
DLNA is an excellent technology, but it is not designed to stream streams from the Internet. In other words, if we want to watch a video on YouTube, we'll have to launch the site client on the device itself, although it would be much more convenient to select the desired video on the smartphone and then automatically launch it on the TV.
INFO
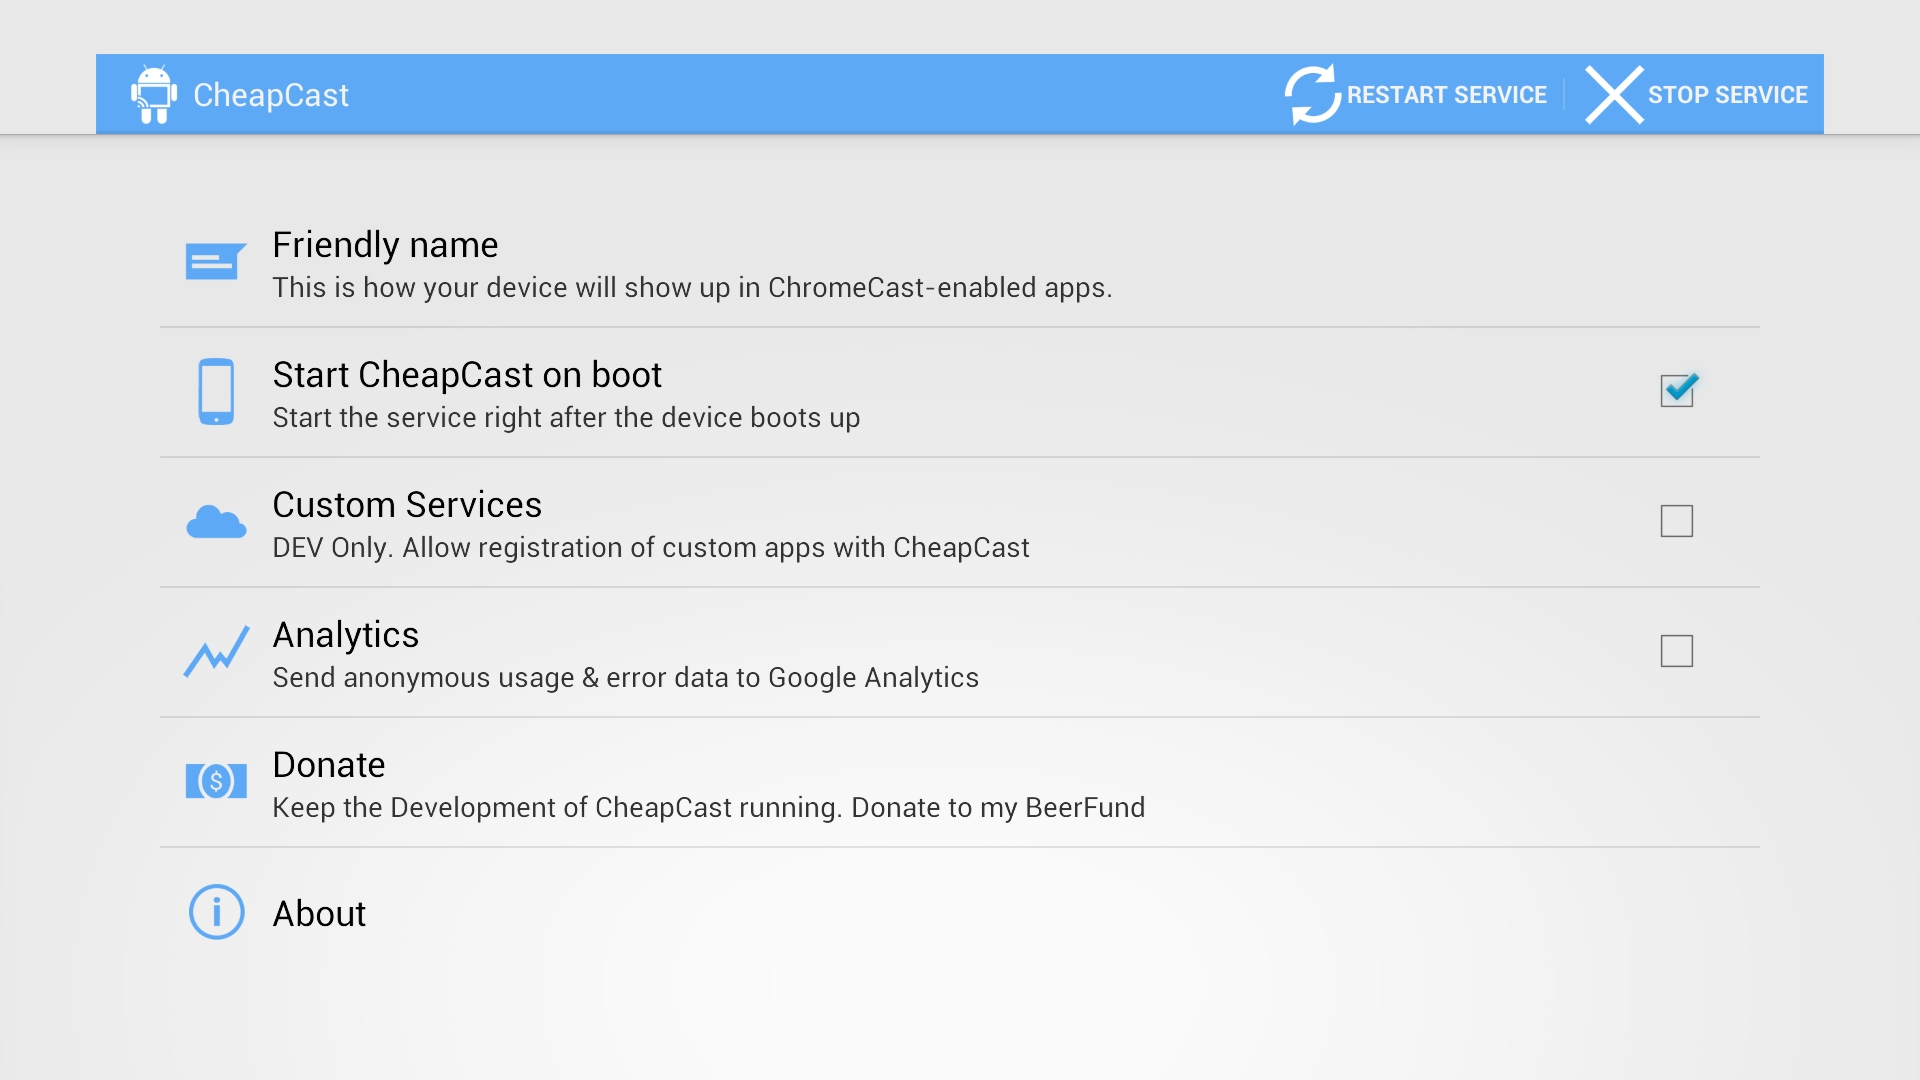
Support for streaming using the Chromecast protocol is available in the YouTube for Google TV application. To activate, select the menu item Pair with mobile device and follow the instructions.Especially for such purposes, Google invented an analog Apple AirPlay, called Chromecast. Officially, this technology is supported only by the same HDMI-dongle produced by Google itself, but the protocol was so simple that very soon enthusiasts dismantled it and created an alternative implementation within the CheapCast application.
Now, to turn any Android device into a Chromecast, it's enough to install the CheapCast application from the market, run it and press the start button at the top of the screen. After that, in all supporting Chromecast applications automatically appears a button in the form of a rectangle with a Wi-Fi logo in the corner. Push the button, select the device, and the video is played on it.
The only problem is that at the moment Chromecast-streaming supports only YouTube and built-in media player, but Google promised to add support to PLay Movies, Netflix and several others. Over the possibility of streaming from any applications worked Kush from the team CyanogenMod, but Google quickly wrapped up this development, disabling the possibility of streaming to any third-party applications.
Remote / joystick
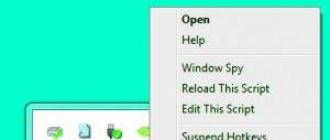
To control different TV-sets, HDMI-sticks and in some cases the tablet will need a "remote" console. I do not suggest buying special Bluetooth consoles or equipping devaysy with infrared receivers, instead we'll turn the smartphone into a console. Of all the variety of applications-consoles that can be found on Google Play, the only worthy option is the DroidMote. The client is free, but for the server for the Android-device will have to pay 80 rubles.
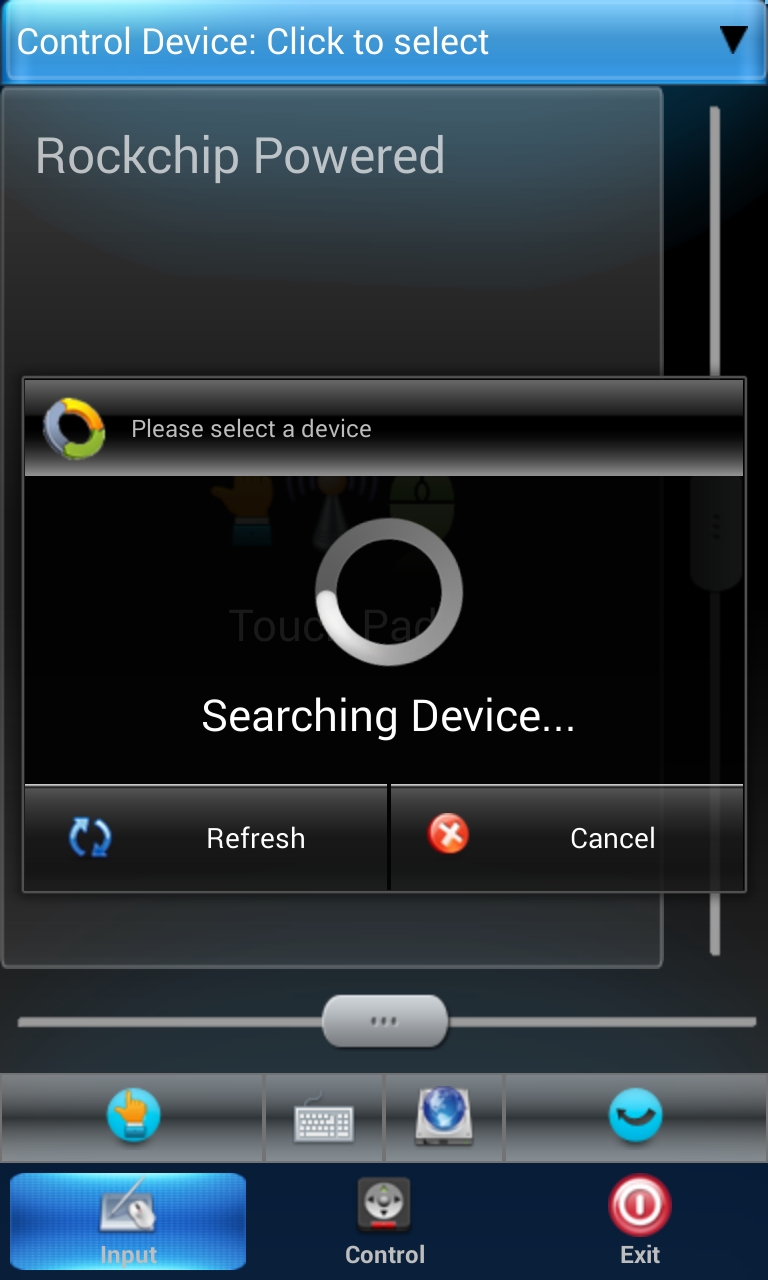
The client and the server find each other and connect in automatic mode, so you do not have to configure anything. From management tools available: touchpad, keyboard, multimedia and joystick joystick. The latter, by the way, is especially interesting in that it allows you to create keys mapping to the points on the device's controlled screen, so you can play absolutely any games with it, even if they do not support the joystick.
INFO
SSHFSAndroid does not work in Android 4.2, but the author promises to fix the problem in the near future.The functionality of the server is available only in the paid version of BubbleUPnP, costing 140 rubles.
To share the memory card of any gadget, you can use the SambaDroid application. It does not require configuration and starts the Samba server automatically after the application starts.
conclusions
Integrating gadgets into one consistently working network is not an easy task, and the techniques described in this article are not perfect and will not work for everyone. However, so far we have no other tools, and we just have to wait for Google itself or the developers of CyanogenMod to add such features to Android. I am 100% sure that this will happen, the only question is when.
What is contact synchronization and why is it needed? How to save contacts with "Android" on the computer: step by step instructions.
The gadgets that work on the base of the Android operating system have a built-in function that allows you to synchronize contacts. However, not many are aware of this, and therefore smartphone owners often face the problem of how to keep contacts with Android on a computer or another phone. It is no secret that in recent years theft of smartphones has become more frequent. Also, many may simply lose the gadget. Sometimes in the course of unforeseen situations, the phone can seriously suffer. In such cases, it is difficult to restore all contacts, since almost no one uses a notebook. In order to avoid such problems, it is necessary to prepare in advance and learn how to save contacts with Android on a computer. Due to the fact that the Android operating system was developed by Google, it’s pretty easy to synchronize contacts. All data is uploaded to the cloud storage, where the user can view and edit it. In addition, data access can be obtained from any device: smartphone, tablet, computer. This function is useful when changing the gadget, just connect your Google account to your smartphone, and all contacts will be automatically restored.
Synchronization of contacts in the smartphone is quite simple. Further information is provided on how to save contacts with the "Android" on a computer, step by step.
In order for data synchronization to succeed, you must be registered with Google. Then: - Open the “Settings” menu in the smartphone. - Go to the tab "Accounts and sync." - Click on the item "Add account". - From the list, select "Add a new account" if you need to register with Google. Or “Link already existing” if the mailbox is already registered. - Enter account information. - Exit the “Settings” menu and go to “Contacts”. - Open the setup menu and select "Import / Export". - From the drop-down list, select the place from which the data will be copied: a SIM card, phone memory or memory card. - After selecting the location of contacts, you need to mark the account with which the data will be synchronized. - Select the desired contacts and click "Copy."
Contact sync completed. It remains to learn how to keep contacts with the "Android" on the computer. Now you can view all contacts transferred to the cloud storage from a computer. To do this, you must log in to Google through any browser. You can view the data in the Google Contacts tab, which is located on the e-mail page. Thus, you can not just view all contacts, but also perform several actions. Data can be edited, copied and deleted. The service allows the user to combine identical contacts.
It remains to understand how to keep contacts with the "Android" on the computer and back. In the case of a smartphone, simply enter the account information and it will appear in the phone book. It's easy to copy data to a computer. Necessary: - Go to the tab "Contacts". Select the "Advanced" item. In the menu that appears, click on "Export". - Choose the format in which the data will be saved (vCard, CSV for Outlook and Google CSV). - Click "Export". Further data will be saved on a personal computer.