You have probably heard of such a useful utility as sfc. As part of Windows, it allows you to check system files for inconsistencies with the original version, which is very useful when the original system files have been replaced by a crooked installer, an evil virus, or a careless user. Of course, Windows Vista and Windows 7 have taken system security and file protection to a new level and reduced the likelihood of system file spoofing. Reduced, but not excluded, and it is very difficult to protect yourself from the inquisitive mind and curiosity of the user.
Therefore, if, as a result of certain actions, your system refuses to boot, and you suspect (or even firmly believe) that the matter is in replacing an important system file with a corrupted instance, you can execute checking the integrity of system files using WinRE (Windows Recovery Environment), right on the "fallen" system.
Running the sfc.exe utility from the Windows 7 Recovery Environment
1. Insert your Windows 7 installation disc into your DVD drive and boot from the DVD. Wait for this window to appear:
Set the keyboard layout to "US" and click "Next".
2. In the next window, click System Restore. 
3. Now select the damaged instance of Windows 7 from the list and click Next. I have one.
4. Launch Command Prompt 
To check and restore one specific file, type
sfc /scanfile=X:\windows\explorer.exe /offbootdir=X:\ /offwindir=X:\windows
Replace X: with the letter of the partition where your system is located.
To check all operating system files completely, run the command
sfc /scannow /offbootdir=X:\ /offwindir=X:\windows 
You are not being deceived, the check can really take some time, in my case it lasted about 7 minutes. Upon completion, the utility will display the path to the log of its work, and tell you what it did with system files.
Not all errors are expressed in windows that appear on the desktop and the inability to perform any action. Much more often, they imperceptibly accumulate on your computer and gradually slow down its work. Periodically it is worth checking the device for possible errors, and not only the system, but also the hard drive and the registry. All the methods described below include the automatic correction of the faults found.
How to check the system for integrity and errors
As a result of incorrect shutdown of the computer, exposure to viruses and other problematic situations, system files may be damaged or changed. The consequences of this, as a rule, are expressed in problems when starting individual programs or turning on the computer, but sometimes they can be invisible to the user. Scanning the system for integrity is the first thing we recommend doing when you encounter problems with Windows 10.
Through the sfc command
This is the main way to check the integrity of the operating system. It is intended for cases with problems with the performance of the computer. Through the sfc command, only a superficial analysis is carried out, with the help of which it will not be possible to find and fix all possible errors. However, this method is quite fast and is ideal for preventive computer scans. A deeper analysis is possible through the DISM utility, which is described below.
The sfc command cannot fix errors in files that are currently in use by the system. If you receive a notification about such failures, be sure to run the DISM utility.
Through the DISM utility
The DISM utility performs a full system scan for errors and integrity violations. The analysis launched by it lasts quite a long time, but it allows you to identify and correct all violations in the system. Internet is required for verification.
Before starting the utility, disable the antivirus and all running programs, and try not to use the computer during the analysis.
Open command prompt as administrator and type dism /Online /Cleanup-Image /RestoreHealth.
 For a complete analysis of the integrity of the system, enter the command dism /Online /Cleanup-Image /RestoreHealth at the command line
 There are a few more commands of this utility that you may find useful:
- dism /Online /Cleanup-Image /CheckHealth for information about the status and presence of damage to Windows components;
- dism /Online /Cleanup-Image /ScanHealth to check the integrity and corruption of the component store.
How to check hard drive for errors
All data written to the computer is divided into small fragments, which are placed on sectors of the hard disk. During the operation of the computer, these sectors can be damaged. Bad sectors are hard disk "errors". When the hard drive tries to read information from a bad sector, the reading process "stops". The result of this is unnecessarily long turning on the computer and launching some programs.
You cannot fix bad sectors, but you can prevent the hard drive from working with them. The process of finding and eliminating these sectors is called defragmentation. Even if no errors are found, as a result of defragmentation, the space on the hard disk will become more ordered, which will also speed up the process of reading information.
Through the "Explorer"
This is the main way to check the hard drive. Windows 10 should do it automatically, without the knowledge of the user, in order to keep the hard drive in order. Defragmentation will take you about an hour, so it's best to leave it overnight.

Through the "Control Panel" (storage diagnostics)
Many mistakenly believe that through the storage diagnostic utility, you can analyze the hard drive. Actually it is not. The storage diagnostic utility is indeed present on the hard drive, but it starts automatically, and you won't be able to do an analysis through it. In this way, you can only find out the results of the last hard disk status check.
If you just want to analyze, use the previous method, but instead of "Optimize" click "Analyze".

Through the command line
This method eliminates the restoration of order on the hard disk, which is performed during normal defragmentation. This makes the process much faster. Correcting errors in this way is recommended if you need to quickly recover information from bad sectors.

To check without using the Internet, use the chkdsk C: / F / R / offlinescanandfix command.
Via PowerShell
Windows PowerShell is a powerful new shell for the command line. She does the same as her predecessor, but has much more powers. PowerShell allows you to quickly and easily perform those actions that are difficult or impossible for a regular command line. In our case, this will help to avoid the need to restart the computer to check the sectors in use.

To check without using the Internet, use the Repair-Volume -DriveLetter C -OfflineScanAndFix command.
Video: how to check a hard drive for errors
How to check the registry for errors
The Windows registry is a complex operating system database that stores all settings, changes, information about the computer and installed programs. In the event of a registry error, the consequences can be very different: from a blue screen when you turn it on and the system is completely inoperative, to an unremovable shortcut and other trifles.
The most annoying feature of registry errors is their layering. One minor error in the registry can lead to several others, which will ultimately lead to sad consequences. This is why regularly scanning your registry for errors and fixing them early is extremely important to keep your computer running at top speed.
Via built-in
Windows 10 has a built-in utility for checking the integrity of the registry, but it is rather weak and does not find most errors. Your best bet is to use one of the third party programs that are described below.
Only critical errors can be fixed in this way: many registry malfunctions will remain untouched.
Open a command prompt as an administrator, type scanreg /fix and press Enter.
 Enter the scanreg /fix command to check the registry through the built-in Windows 10 utility
 Via CCleaner
CCleaner is the most popular and reliable computer cleaning program. It is designed to clean debris from hard-to-reach places that the system itself cannot reach. However, CCleaner deserved its popularity precisely for its registry cleaning function, which allows you to quickly find and overwrite registry errors without affecting anything important.

Via Glary Utilities
Glary Utilities is a very functional program that will run in the tray and keep your computer clean and tidy. Cleaning the registry is just one of the available features to improve your computer. Glary Utilities may seem intrusive to many, but for inexperienced users, it will be a very useful assistant.

Via Wise Registry Cleaner
Wise Registry Cleaner is a program designed not only to treat the registry, but to completely clean it from stale and unclaimed parameters. Cleaning the registry with Wise Registry Cleaner is quite serious and can affect important files that the program seems superfluous. The first time you run Wise Registry Cleaner, you'll be prompted to back up your registry, which you'd better agree to. If important files are affected, you can always roll back.
Wise Registry Cleaner is available only on the English version of the official website: when you change the page language to Russian, you will be offered another Wise Care 365 program.

Even if you don't see any errors on your computer, it's best to scan it periodically. This will keep your system running smoothly and help resolve most issues before they become noticeable.
Not many people know that Windows system files can be checked using a special sfc /scannow commands. Let's try to figure out in which cases the use of this command can be useful.
If you suspect that system files are corrupted, modified or missing in Winodws 7 and Windows 8 you can check system files using the built-in tool of the operating system.
So, in order to Check the integrity of operating system files you need to run the scan utility. For this.
1. Launch a command prompt. Press the key combination Win + R, in the window that opens, type cmd. A command line window will open. If you have Windows 8.1, then press the Win + X keys and launch "Command Prompt (Admin)" from the menu that appears.
2. At the command line, type sfc/scannow. The Windows System Checker utility will launch. This utility will check Windows files and fix oshiyuki if possible.
There is also a very important note! If the system found corrupted files during the scan take on the command line: dism /online /cleanup-image /restorehealth and wait for the missing files to download and install!

Advanced use of the SFC /SCANNOW utility
Full list of options, with which you can run this command is as follows:
SFC
What is it for?
You can only run System File Checker without fixing them with sfc /verifyonly
-It is possible to check and fix only one system file by running the command sfc /scanfile=path_to_file (or verifyfile if you don't need to fix it).
-To check system files not on current Windows(and, for example, on another hard drive) you can use sfc /scannow /offwindir=path_to_windows_folder
These features will be useful, for example, if you know in which particular file the problem lies, or if you need to check the system on another drive.
When using the System File Checker utility, you may encounter some problems and mistakes.
For example, when you run sfc /scannow, you will see a message that "Windows Resource Protection cannot start the repair service", check that the "Windows Modules Installer" service is enabled and the startup type is set to "Manual".
If you have modified files in your system, for example, you changed the icons in Explorer or something else, then performing an auto-correct check will return the files to their original form. Also, the fix can return the modified assembly of Windows to its original form.
It may turn out that sfc /scannow will fail to fix errors in system files, in which case you can type on the command line:
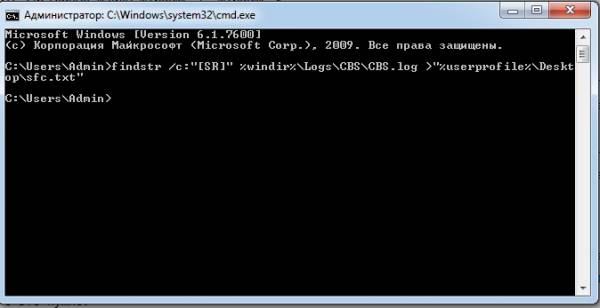
findstr /c:"" %windir%\Logs\CBS\CBS.log >"%userprofile%\Desktop\sfc.txt"
Create a system file check log
This command will create a text file sfc.txt on the desktop with a list of files that failed to repair.
If you need, you can copy the necessary files from another computer with the same version of Windows or from an OS distribution. (which is more preferable).
The problem of unstable operation of Windows 7 is often associated with damage or deletion of system files, for example, after reinstalling or installing an infected program. This is not the most difficult problem - there are many ways to restore data using standard OS tools or manually. We will consider the simplest and most effective options below.
Rollback to last stable state
By default, protection is active in all Windows for system partitions. It is responsible for creating special checkpoints containing information about the configuration and system files of the environment before modifying it - installing applications, drivers, and updates. Moreover, restore points are created without such a reason by the system at regular intervals or by the user himself.
If problems began to appear relatively recently, and you remember the approximate date of their appearance, then the best solution is to roll back the OS to the moment when no failures were observed during the operation of the OS.
In a working environment, this is very easy to do:
All that remains is to reboot, after which the damaged system files will be replaced with the previous working versions.
If Windows won't boot
Even if the damage to system data is so serious that the OS cannot boot on its own, there is an opportunity to use restore points:

The corresponding checkpoint selection utility will start, which you need to work with in the way described earlier.
If pressing F8 does not open the boot options window, then you can get into the recovery environment only when using the boot / installation disk.
Using the Standard SFC Utility
This application checks and repairs the main OS system files. It can also be run on the command line from a boot disk, from the boot options window after pressing F8, and from a running system. The last option is the easiest:

Upon completion of the operation, SFC will notify you of the results - corrupted data should be detected and corrected.
Restoring data manually
Sometimes the methods described above cannot fix the problem. For example, when updating DirectX from distributions that come with various applications, DLLs are often lost. Therefore, always try to update DirectX from the office. Microsoft site, and if the trouble has already happened, then if a new version is available, all DLLs will be updated automatically after installing a fresh component package from the site http://www.microsoft.com/en-us/download/confirmation.aspx?id=35.
If there is no new version on the specified page, then any DLL from another source can be transferred to your system yourself. Libraries are stored in the following directories:
- for Windows 7×32 - in the C:\Windows\System32 folder;
- for Windows 7×64 - in the C:\Windows\SysWOW64 directory.
If, when you launch an application, a window appears informing you that a DLL is missing, and the installer from the Microsoft website reports that your system has the latest version of libraries and does not update components, then you can simply use the search engine. Search the Internet for DLLs and transfer them to the specified folders.
Not only DLLs, but also any corrupted system files can be extracted from the Windows 7 installation distribution. To do this, you just need to know which files are damaged. Often, the OS itself informs the user about the absence of any DLL or about an application error, for example, Explorer.exe. You can get information yourself.
Find out what system information is faulty
To do this, you will again need a command line, we have already described how to open it. Write the following command here:
indstr /N:"" %windir%\Logs\CBS\CBS.log >"%userprofile%\Desktop\sfcdetails.txt", where N is the drive letter.
Press Enter, after which sfcdetails.txt will be created on the desktop, which you need to open and carefully review. Its content will be something like the image below.
Here we see that the damaged library is Accessibility.dll. It is she who will need to be found on the Web or independently extracted from the existing distribution of Windows 7 for recovery.
Extract OS components from the distribution
In addition to the installation disk, you will need a small free 7-zip application. With it, we will work with the install.wim image located in the sources directory. The order is as follows:

It remains only to copy them to the desired folder or to a USB flash drive. You can replace corrupted data with them using the installation / boot media or LiveCD.
Whenever something goes wrong with a computer or laptop, there are a number of troubleshooting tools that you can follow to try and fix the problem. Windows 10/8/7 has several built-in commands that you can use to check for and repair corrupted system files that cause problems when modified over time. One way to troubleshoot Windows related issues is to check the system and restore system files. It can help with all types of issues like slow system, blue screen of death, sudden power failures and system crashes.
Let's see how to run the System File Checker in Windows using command line cmd And PowerShell, such commands as sfc /scannow and tool DISM. I want to note that to update the Anniversary Update Windows 10, it will be better to use the methods with PowerShell.
Checking and Restoring System Files via CMD
System File Checker scans your PC for any corruption or changes in system files that might otherwise interfere with your PC's normal operation. From there, it replaces the file with the correct version to keep things running smoothly. Using the command line, you can try to scan and restore the system files of late operating systems like Windows 10/8/7/Vista. Let's take two teams sfc /scannow and DISM using cmd.
1.
- Run Command Prompt (CMD) as administrator. Click "search" and just write "cmd" or "command prompt", then right click on it and run as administrator.
- Set a command sfc /scannow and wait for the process to finish.

Note: After scanning your system, one of three results will be returned:
- There will be no system file errors.
- There will be system file errors and Windows will repair them automatically.
- Windows has found errors but cannot repair some of them.
If option 3 shows that an error has been detected and the system cannot recover, then repeat the procedure. I advise you to turn off encryption and, if they are available at the time of the check. Nothing succeeded? We move below.

2. (DISM)
If the above does not work in safe mode, there is one last way to check for corruption in system files and fix them. We use the Deployment Image and Service Management (DISM) tool. The team works with Windows 8/8.1/10 systems. Open back and use the following command:
The process can take a long time with the percentage bar freezing. When you're done, restart your computer and restart sfc /scannow to make sure there are no errors or the error is gone.

Checking and Restoring System Files viaPowerShell
We'll use Windows PowerShell to show you how to use the Maintenance and Management Service. DISM to scan and repair corrupted system files in Windows 10. This method will be more effective for Anniversary windows 10 update than command line.
1. Using the System File Checker (SFC) Tool
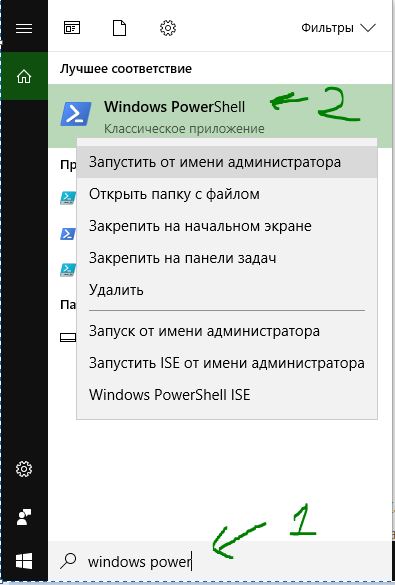
- Run PowerShell on behalf of the administrator. Click "search" and type windows powershell, then right click and select as admin.
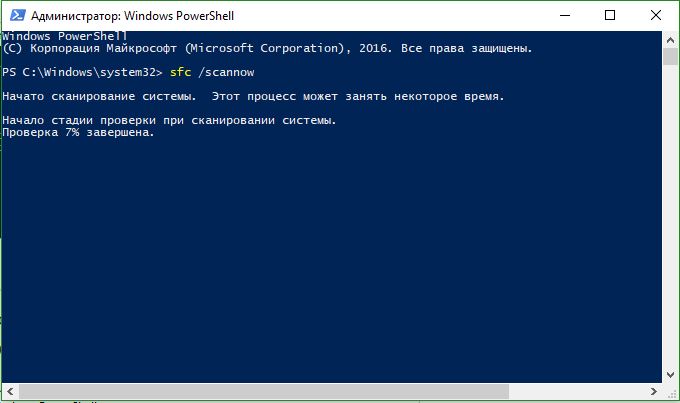
- Type in the PowerShell window the command sfc /scannow. If the scan finds any problems, Windows will try to fix them. If Windows is unable to fix them, it will warn you that further research and action is needed. Scroll down if you find any errors.
2. Using the Deployment Image and Service Management tool (DISM)
The DISM scan finds corrupted system files and Windows will try to fix them and give you a progress report at the end. If Windows cannot find the files needed to repair corrupted system files, you will also be provided with information on what to do next, with a link to the Microsoft website and troubleshooting options. Run the below command in the PowerShell window.
DISM /ONLINE /CLEANUP-IMAGE /RESTOREHEALTH
If DISM fixed everything or did not reveal any errors, then restart the laptop, computer and run it back to check sfc /scannow.