Subsystem in 1C 8.3- an object of the metadata tree, which is responsible for building the configuration command interface.
Below in the article we will talk about subsystems starting from version 8.2.
The fact is that in version 8.1 (as well as for a regular application 8.2) there were also subsystems, but they served completely different purposes, rather for the developer than for the user. With the help of subsystems in 8.1, different functionality was usually separated. The subsystems also helped when combining different 1C configurations - it was possible to specify which system to transfer.
1C subsystems and interface for a programmer
In versions 8.3 and 8.2, subsystems are the main tool for building a command user interface. Metadata objects "Subsystems" have a hierarchical structure, in order to set up a "submenu" in the interface, you need to add a subsystem subsystem:

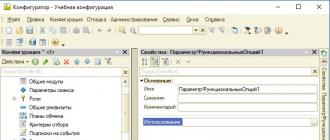
Properties and settings
Consider the settings and properties of subsystems in the configurator:

Get 267 1C video lessons for free:
Include in command interface— if you forgot to set this flag, subsystem will not be shown in the interface.
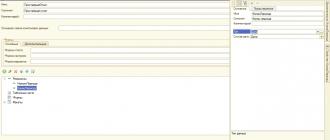
The button opens the interface settings panel, where you can configure interfaces depending on the role of the current user:

Picture- the picture assigned to the subsystem is displayed in the enterprise mode. You can choose a standard image, or you can add your own by first creating it as a configuration object Picture:

On the tab Functional Options a list of functional options in which this subsystem is used is indicated.
Tab Compound defines a set of metadata objects participating in a given subsystem.
On the tab Other you can describe the help to the subsystem and specify the setting Include in help content- whether to include this help topic in the general configuration reference.
If a report or processing is not displayed in the managed interface
This problem very often arises for novice developers - it seems that a report or processing has been added to the subsystem, but it is not visible.
The first reason for this may be that the object does not have a managed form.
The second reason is that the “Use standard commands” checkbox is set on the Commands tab of the object. This is due to the fact that to open processing, both its own procedure can be described, and the standard one can be used:
25.06.2014
How to disable / enable the TAXI interface in 1C: Accounting 8.
Get access to the 1C: Fresh cloud for free for 30 days!In new releases of the standard configuration "Enterprise Accounting" edition 3.0 (starting from 3.0.33.15), the new "Taxi" interface is supported.
The user has the opportunity to choose a new interface or a more familiar option, depending on which one is more convenient for him to work with at the moment.
Important!!!
Please note that starting from release 3.0.52.32, you can no longer select the old version of the interface "As in previous versions of 1C: Accounting 8"!
Only two interface options remained in the new releases: "TAXI" and "Similar to 1C: Accounting 7.7".
For details, see "On the exclusion of the old version of the interface" As in previous versions of "1C: Accounting 8" in the new releases of the standard configuration "Enterprise Accounting" edition 3.0 ".
How to disable the TAXI interface in 1C: Accounting 8?
In order to enable the normal interface, select the "Administration" tab (the last lower item), then find the "Program Settings" item (in the upper right corner), see Fig.1.
In the window that opens, go to the "Interface" tab, select "Interface of previous versions of 1C: Accounting 8", and click the "Save and close" button, see Fig.2.

To change the interface, the program will ask you to restart the 1C:Enterprise session, see Figure 3.

Click "Yes"...
Congratulations, you have an old familiar interface!
Electronic supplies 1C - 100% license! Buy as quickly as possible!
How to enable the TAXI interface in 1C: Accounting 8?
In order to enable the new fashionable Taxi interface, select the "Administration" tab (in the upper right corner), then find the "Program settings" item, see Figure 4.

In the window that opens, go to the "Interface" tab, select "Taxi interface (recommended)", and click the "Save and close" button, see Fig.5.

To change the interface, the program will ask you to restart the 1C:Enterprise session, see Figure 6.

Click "Yes"...
Congratulations, you have a new fancy interface!
Promotion! 1C: Accounting + 1C-Reporting for 3000 rubles.
What was it for?
As usual, the new interface is designed to improve the usability of the program.
Differences between the interface "Taxi" 1C: Accounting compared to the usual:
- larger font;
- optimization of the workspace on monitors with different resolutions;
- modern ergonomic interface design;
- buttons "Tools", "Favorites", "History" are collected in one panel;
- fast input by line;
- the ability to add new elements of directories directly in the selection list;
and etc.
Keywords: taxi interface 1s, taxi 1s 8.3, taxi interface in 1s 8.3, 1s accounting taxi, taxi mode in 1s, 1s how to disable the taxi interface, taxi interface, how to disable the taxi interface, How to disable the TAXI interface in 1C Accounting 8, 1s accounting 8.3 taxi interface, 1s enterprise 8.3 taxi interface, 1s 8 taxi interface, taxi interface 1s, interface 8.3 taxi, setting up a taxi interface, taxi interface how to enable, accounting 3.0 taxi interface, new taxi interface, 1s accounting 8.3 taxi interface, 1s enterprise 8.3 taxi interface, 1s 8 taxi interface, how to turn off the taxi interface, how to remove the taxi interface, taxi interface option
Tags: taxi interface 1s, taxi 1s 8.3, taxi interface in 1s 8.3, 1s accounting taxi, taxi mode in 1s, 1s how to disable the taxi interface, taxi interface, how to disable the taxi interface, How to disable the TAXI interface in 1C Accounting 8, 1s accounting 8.3 dachshunds
Interface Taxi 1C Accounting 8.3 How to switch the interface to bookmarks, to interface1C accounting 7.7
The screen presents a modern interface "Taxi" program 1C Accounting 8.
At the top is the title of the main window. On the left side of it, the main menu is available to us, in which we see the commands we are used to: File, Edit, View, Service, Windows and Help.
Some service functions are available in the right part of the window. Their composition can be changed according to your needs. To do this, open the drop-down list "Add or remove buttons" and check the functions that we need to work. After that, they are added or removed in this window of the program 1C Accounting 8.3
On the left is the Partitions panel. In the version of the Taxi interface, all the main functions of the 1C Accounting 3.0 program are grouped into sections: Sales, Purchases, Bank and cash desk and other sections.
In the central part of the working window of the 1C Accounting 8 program there is a navigation bar.
The initial page of the 1C Accounting 8.3 program can be customized to the needs of the user. To do this, go to Main Menu -> View -> Start Page. We have 2 columns available: left and right. From the list of forms available to us, we can place the required form in the left or right column on the home page. For example, we can select the "Bank statements" form and add it to the left column. By clicking the "OK" button, the "Bank statements" form appears on our home page.
Section panels can be customized in the same way. Go to Main Menu -> View -> Customize Section Bar. If we do not use some sections in our work, we can remove them from the list of sections displayed on the screen. At the same time, the list of available sections is determined by the settings of rights and roles that the system administrator has set for us.
On the left side is the Function Menu.
There is also a Favorites Bar. For example, if we often use some reports or document journals, we can put them in the "favorites" menu by marking with an "asterisk" to the left of this command. Now the balance sheet will be available in favorites and you can quickly go to this element of the program 1C Accounting 8.3.
History team. This command displays a list of the last 200 actions performed by the user in the 1C Accounting 3.0 program. Through this list, you can also quickly jump to the latest objects.
Using the Search section. The 1C Accounting 8.3 program uses a global search for all objects of the infobase. For example, we can enter the name of the counterparty. In the final list, a link directly to the counterparty will be available, as well as sales documents, contracts, invoices, documents related to payment and mutual settlements with this counterparty. Those. all objects of the 1C Accounting 8.3 program in which these names are found will be displayed in the search results field.
How to switch the interface 1C Accounting 8.3 to the interface 1C Accounting 8.2 (Bookmarks)
For the convenience of users who worked in the 1C Accounting 8.2 program of the previous version of the interface, it is possible to switch the interface to additional modes. Such a switch is performed in the Administration section, the "Interface" command. It is possible to switch to the "Bookmarks" interface view, which was used in previous versions of the 1C Accounting 8.2 program
How to switch the interface 1C Accounting 8.3 to the interface 1C Accounting 7.7
You can also switch to an interface similar to the 1C Accounting 7.7 program. After changing the interface mode, the 1C Accounting 8.3 program prompts us to restart the program for the changes to take effect. We agree with this.
After the restart, we already see the interface that was used in previous versions of the 1C Accounting 8 program.
For users switching to version 1C Accounting 8.3 from the version of 1C Accounting 7.7, it is possible to switch to an interface similar to 1C Accounting 7.7. The system also prompts you to restart the program. After the reboot, we see that in the section panel, the program objects are no longer grouped according to their functional purpose (Sales, Purchases, Warehouse, etc.), but according to the types of objects in the system (Operations, Directories, Documents, Document journals, Reports, Tax accounting and service functions).
In this interface mode, you can also display the navigation bar, which will be located on the left side. For a more comfortable transition for accountants who are used to the interface used in 1C Accounting 7.7, this setting will greatly facilitate the transition to a new program.
Firm 1C strongly recommend that everyone switch to the Taxi interface, since this interface is most adapted to monitors and tablets with different screen resolutions. Further, in working with the 1C Accounting 8.3 program, we will use only the Taxi interface, adhering to the recommendations of 1C Firm.
In this article, I will tell you how to customize the interface of the Taxi program for comfortable work, so that all the necessary buttons and the most necessary reports are always at hand.
1) Let's start with the most common question of my beloved clients, related to the lack of the "Operations" menu. Many accountants used it to search for reports, processing, documents that were sometimes very difficult to find in other sections of the program.
As such, there is no “Operations” menu in Accounting 3.0. Its analogue is called "All functions" and by default the display of this section in the program is not set. To enable it, you need to enter the menu, which opens with the orange button with a triangle in the upper left corner of the program. In the list that appears, select the "Service" section and open the "Options" section.
In the window that opens, check the box “Display the command“ All functions ”and fix the result by clicking the“ Apply ”button.

Now in the same Main Menu (orange button with a triangle) we see the section "All functions"

In which everything that we are so used to seeing in Accounting 2.0 in the "Operations" section:

2) Now let's consider the program's capabilities in terms of setting up the TAXI interface. For example, now my program looks like this:

Those. sections above. Open windows in the tabs at the bottom. Let's see how to change the location of all elements of the working window of the program. Again we open the main menu and find the section "Panel settings" there.


Then everything is simple. With the left mouse button, grab the section whose position we want to change and drag it to where we want to see this panel. For example, like this: I will raise the “Open Panel” to the top, and drag the “Partition Panel” to the left side of the window.

Click the "Apply" or "OK" button and voila, this is how our program began to look:

Perhaps it will be more convenient for someone to work this way.
3) Another tip for setting up the program. As a rule, each accountant has some sections or reports that he uses daily. Well, for example, OSV or OSV on the account. And it would be very convenient if they were always there, always at hand. This can be achieved in a very simple way, by placing the necessary reports in the "Favorites" section. We will find the balance sheet in the "Reports" section. Pointing the mouse at it, we see a gray star next to it.

By clicking on it, we will mark the selected report as "Favorites"

Section "Favorites"using the panel editor already known to us, we will place, for example, at the bottom of the working window of the program.


4) And one more "secret" for setting up the program interface. In various sections of the program there are documents that some never use. Well, simply because of the specifics of the organization. For example, in the "Purchases" section, documents related to EGAIS.

We do not need these documents and we can remove them from the desktop. To do this, in the editable section in the upper right corner, click on the gear and in the menu that appears, select the item "Navigation settings"

In the window that appears, we see two columns. On the left are the commands that can be added to our desktop. And on the right, those commands that are on our desktop. We find the EGAIS section on the right column and click on the "Delete" button

Accordingly, documents that are in the right column can be added to the desktop by clicking the "Add" button
5) And finally, for those who do not want to get used to the Taxi interface. You can change the interface to the one that was in the first versions of Accounting 3.0.
In the "Administration" section we find the item "Interface"

Here, the developers offered us a choice of changing the program interface to the same as in previous versions 8.3 and similar to Accounting 7.7. Having chosen the appearance of the program that interests us, it will have to be restarted.

This is how the program with the previous interface will look like.

For interest, let's see what is the interface, similar to Accounting 7.7.

Well, I don't know, I don't know. I'll probably go back to my usual "Taxi".
Well, that's all I wanted to tell you today. I hope that some information will be useful to you in working with the program.
Working in one configuration or another on the 1C:Enterprise 8.1 platform, accountants daily use basically the same menu items and submenus, buttons on toolbars. However, not every user is comfortable with the standard program interface. How to customize the interface for yourself, says V.V. Fishing, firm "1C".
There are situations when a frequently used menu item is hidden quite "deep", or the desired button does not fit on the screen, and an important action does not have a hot key combination.
The simplest solution that comes to mind is to go to the configurator and configure the interface the way you need it. But not always nearby there are specialists with the appropriate level of qualification. In addition, not all users have the same criteria for user experience.
Is it really necessary to adjust the current one or create a new interface in the configurator for each user of the database (and there may be more than a dozen of them)? No! Thanks to the ability to fine-tune the interface of the 8.1 platform, there is no need to call a qualified specialist or go into the configurator*.
Note:
* To be completely accurate, there may be prerequisites for creating an individual interface for the user in the configurator mode, but these issues are beyond the scope of this article.
Customization tasks are solved quite elegantly - with the help of personal toolbars. For example, we will use the accounting interface of the standard configuration "Enterprise Accounting" (rev. 1.6) with demo data.
But before proceeding to the description of the interface customization mechanism, let's outline some general features that the 8.1 platform provides to its users. In particular, you cannot immediately see all the standard menu items and all the toolbars that are built into the platform by default (regardless of the configuration). And this is not a mistake. The fact is that some features are context-sensitive, and therefore they are available only when they make sense.
It's easy to get them - on any empty space next to the available toolbars, just press the right mouse button. In the list that opens, you will immediately see all available panels, and enabled (visible) ones will be marked with checkmarks.
A good example is working with a spreadsheet document. Compare the composition of the menu and panels in the absence of an active spreadsheet document - see fig. 1 and if present - see fig. 2.

Rice. 1

Rice. 2
In most cases, it is enough to use the menu items that appear or enable the desired toolbars.
Keep in mind: context-sensitive interface elements will disappear if there are no active windows with which they are associated, and appear when such windows are activated.
So, let's start studying the individual interface settings.
First, let's decide which menu items or important buttons you need to always have at hand. For example, let's choose the following:
- "Operations" -> "Regular operations" -> "Reference-calculations" -> "Calculation";
- "Sale" -> "Sales book keeping" -> "Sales book";
- "Reports" -> "Other" -> "Universal report";
- "Service" -> "Data search";
- "Enterprise" -> "Production calendar";
- "Table" -> "View" (note that this is a submenu).
- "Tips", which are located on the "Support" toolbar (a panel created when developing our configuration);
- "Lock Table" of the standard toolbar "Spreadsheet Document" (for example, when working with tables, you often need to fix the header).
We have decided on the necessary functions.
Their composition, although somewhat chaotic, is indicative.
For example, the "Calculation" menu item is hidden quite deeply, and the "View" submenu is not always immediately available to us.
In order to always have this entire set at our fingertips, we will use the 8.1 platform's ability to create personal toolbars.
To do this, you need to enter the settings mode, call up the list of toolbars (similar to the method of turning on / off standard toolbars described above - see Fig. 1) and select "Settings ...". The interface settings window will open, in which on the "Toolbars" tab you will see all currently available toolbars (Fig. 3).

Rice. 3
Let's create our own toolbar and call it, for example, "My Menu". To do this, click the "Create ..." button and write a name.
After clicking on "OK" in the list of available panels, we will see our panel (Fig. 4).

Rice. 4
In addition, our new empty (without a single element) panel will appear in the center of the screen (Fig. 5). The most important thing has already been done.

Rice. 5
It remains to fill our menu with the necessary elements.
Remaining in the configuration mode, we will sequentially fill the panel with the previously selected elements.
The general principle is as follows - select the desired element in the places where we usually find it in the interface presented to us, press and hold the Ctrl key and "drag" this element with the mouse (left button) to our panel (drag and copy).
What if the drop-down menu blocked the visibility of our panel (Fig. 6)?

Rice. 6
It is enough to take it with the mouse by the left edge of the header and drag it to a convenient place.
The first item on our list is the "Calculation" element - drag and drop (Fig. 7).

Rice. 7
Note that the Ctrl key must be held down until the end of the drag.
This is easy to control: at the end of dragging an element to our panel, there should be a plus sign ("+") next to the mouse cursor. If everything is done correctly, you will see a result similar to Fig. 8.

Rice. 8
Similarly, we drag the second item of our personal menu - "Sales Book". The result is something similar to Fig. 9. Why is only the icon visible? Because the configuration developers have assigned an image to this menu item, and the 8.1 platform by default only displays images in the panels if they are set. If you want to see an inscription or a picture and an inscription (as in the original menu), just click on the element you need with the right mouse button and select the desired display mode. Let's select for the "Sales Book" the display of both pictures and text (Fig. 10).

Rice. 9

Rice. 10
Next, we fill our panel with the selected elements. For "Data Search" we will also enable the display of images and text. Having reached the "Table/View" item in our list, we already have a panel in the form shown in Fig. eleven.

Rice. eleven
Here we may encounter the fact that the "Table" menu is currently unavailable (the reasons are described above). Solving this problem, at the same time we will try out the possibilities of adding items to an existing menu. All this time we have been working in the interface configuration mode. Now it will temporarily have to be closed - in the "Settings" window, click the "Close" button. Please note that all our developments have been preserved and are already available for work on our panel. To access the "Table" menu, open any spreadsheet document, or create a new one. After that, we call the setup mode again. Now we have access to the desired menu and can drag, similarly to the previous rules, the "View" submenu from it (Fig. 12).

Rice. 12
There are two more buttons that are available through the toolbars of our interface. Their dragging is completely similar to dragging menu items: just take the button we need with the left mouse button, press Ctrl and drag this button to our panel.
The "Lock Table" button can be found in the "Table" menu that we made available earlier. But for the purity of the experiment, try to enable the "Spreadsheet Document" panel, which is also available (Fig. 13).

Rice. 13
That's all - we have completely filled the "My Menu" toolbar with the elements we need. All you have to do is close the docker again with the Close button and you can get to work with your own set of features always at hand.
In conclusion, we note several important points.