A selection of May brushes is united by one theme - it contains various brushes with images of hair, curls and hairstyles. The first in line is a selection of the Hair Brush Set with brushes for drawing individual strands and hairs. In the set of Hair Brushes By Lugubrum Stock collected honeycomb strands of hair. Wavy Hair Strands Brushes are also curls and curls. But Photoshop Hair Brushes - this is ready-made hairstyles, with which you can simulate the appearance. In the set of Hair Photoshop Brushes you can find pigtails, and in Lineart Hair Brushes 3 - pencil hairstyles. Also there are useful brushes with emo hairstyles and anime hairstyles for creating an image.
In order to download your favorite brushes, click on the corresponding picture. A new window will open for downloading. There, at the bottom right of the picture, we are looking for the "Download File" button with a green arrow, click and save the brush on your computer. Attention! In some cases, the download link is not to the right of the thumbnail preview, but under the picture itself as a link or Download here text.
1. Hair Brush Set 
2. Hair Brushes By Lugubrum Stock
3. Wavy Hair Strands Brushes 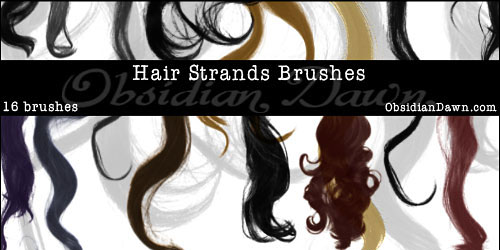
4. Photoshop Hair Brushes 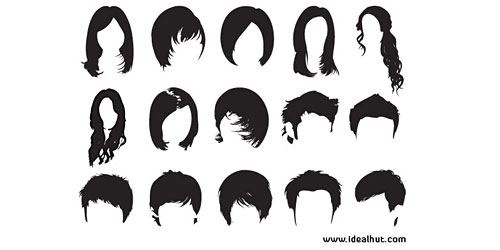
5. Hair Photoshop Brushes 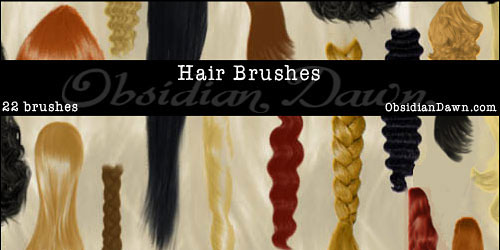
6. Lineart Hair Brushes 3 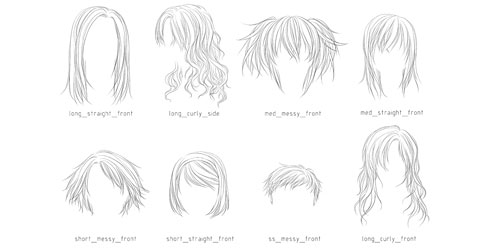
7. Stock Photoshop Brushes Hair
8. Hair Brushes Ii 
9. Anime Hairs Brushes 2 
10. Painted Hair Brushes 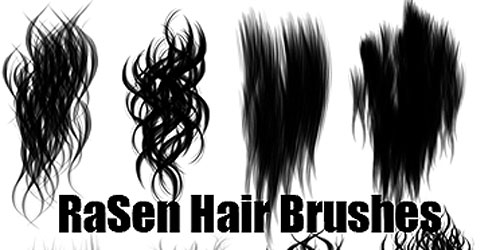
11. Hair Brushes Set 1 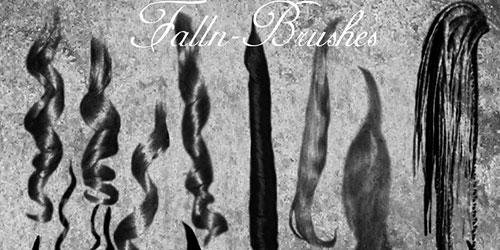
12. Hair Brushes Ii
Paint Tool SAI - a graphic editor designed to create vector and raster graphics. A great advantage is its compatibility with all versions of Windows and small size that allows you to download the full version of Paint Tool SAI quickly.
Features of paint tool sai 1.2.0.
- Simple interface. It does not require long training, it is possible to understand it intuitively.
- Presence of hot keys. Those who have worked with Adobe Photoshop before will be fairly simple, keyboard shortcuts are similar. In addition, there are also additions.
- High performance. Graphics editor does not require large PC resources.
- Support for the main formats, including .psd, and its own format.sai.
- Compatibility with the graphic tablet.
- The ability to draw both raster and vector graphics.
- Customize the workspace. The user can choose the windows that are necessary for him in the process of work and distribute them on the surface.
Someone may think that the Paint Tool SAI is an obsolete design, but this is its advantage. Because of its simplicity, it will quickly become irreplaceable. In addition, you can download it for free.
Fine-tuning PaintTool-SAI
PaintTool-SAI is easily configurable through configuration files that can be opened and edited in a normal Windows notebook (but only in it, no Word and others like it, they can add additional codes to the file that will spoil it).
I will configure Portable (portable) version 1.0.2d (you can find the version number by opening the file sysinfo.txt, the topmost line), but this description is suitable for version 1.1.0. and most likely for other versions.
For portable version all the files that we need are in the folder App, which lies in the main program folder. For version 1.1.0, everything lies in the main program folder.
Before any corrections I advise you to backup all the folder with the program, just in case. That is, save somewhere a copy of it.
All changes will take effect only after restarting PaintTool-SAI.
How to create your own preset
To begin with, let's try the simplest thing: add your preset with the preset resolution of the file. These presets are convenient during the creation of a new file, we simply select the item with the required parameters from the list, and do not set them each time manually.
To do this, we need to open the file presetcvsize.conf. In the screenshot, I added a translation of the values for each item. The most recent is the name of the preset, it can be any, but must be in quotation marks. For example, I have added a new preset:
1920, 1080, 72, 0, 0, "1920 x 1080 (Full HD)"
Here's how it looks in SAI
How to add your texture to the layer properties
papertex papertex.conf, and add a line:
1, papertex \\ FileName.bmp
FileName.bmp
Here's how it looks in SAI
How to create your own texture brush
To do this, you need to add a file with the finished texture (bmp file format, grayscale color mode, size 512x512 pixels) to the folder brushtex. Then open the file brushtex.conf in the notebook, and add the line:
1, brushtex \\ FileName.bmp
it consists of a special code (one unit) and a path to the texture, FileName.bmp is the name of your file. It is desirable that the texture is seamless.
This is how it looks in the program
How to create your brush shape
(only two types of brush forms)
Type 1
To do this, you need to add a file with the finished texture (bmp file format, grayscale color mode, size 512x512 pixels) to the folder blotmap. Then open the file in Notepad brushform.conf, and add a line:
1, blotmap \\ FileName.bmp
it consists of a special code (one unit) and a path to the texture, FileName.bmp is the name of your file. It is desirable that the texture is seamless.
Type 2
To do this, open the folder elemap. It contains graphic files of the bmp format with a size of 63x63 pixels, which can be edited in their own way, using only two colors - white and black. The path to the newly created graphic file must be added to the configuration file brushform.conf, adding a line to it:
2, elemap \\ FileName.bmp
it consists of a special code (two) and the path to the file, FileName.bmp is the name of your file.
The pale-violet coordinate system does not have to remain visible, it is needed for easy editing. As I understand it, the tool works in such a way that it rotates the shape in accordance with the direction of movement of the brush. After experimenting, you can achieve their own unusual effects.
I made my brush shape by simply painting this box 63x63 in black. I called this form Square_Max. Then I picked up such settings as in the screenshot. It turned out a tool with interesting subtle features. The main disadvantage is that it slows down (does not have time for the hand), the stronger, the larger the size of the edited image and the radius of the instrument.
How to fix incorrect display of two names of color transition modes in the layer settings
1 - open the file language.conf
2 - find a string of characters:
"help.chm"
3 - immediately after it, press the input a couple of times, move the cursor up on the formed blank lines and paste the following text:
BlendMode_Sub = "Subtraction"
BlendMode_AddSub = "Slozhn-Vychit"
4 - save yourself
How to change Russian into English
I'm used to using the English version of SAI. So I changed my Russian back to English.
To change the language, you need to take a file language.conf from the English version and replace it with a similar one from Russian. I took it from version 1.1.0 and it came up for portable version 1.0.2d, but not quite, you need to add something.
1 - open the file language.conf
2 - look for a string of characters (with quotes):
"Status Bar"
3 - right after it we press input, there will be a new blank line.
4 - insert the following text into a new blank line:
WindowFunc_HSLMode = "HSL-Mode"
5 - looking for a string of characters (together with quotes):
"Status Bar (& U)"
6 - right after it we press input, there will be a new blank line.
7 - insert the following text into a new blank line:
WindowMenu_HSLMode = "HSL-Mode (& p)"
8 - look for the line containing DlgJpgSave_Title
9 - Change DlgJpgSave_Title on DlgJpegSave_Title (added the Latin letter " e")
10 - doing the same for the next 10 rows
11 - find a string containing a string of characters:
12 - delete this entire line (together with the semicolon at the beginning of the line) and all the lines below, exactly up to the line containing the string of characters (the whole string is already left entirely):
13 - remain
The English version has not been tested by me completely, errors and incorrect work are possible, so this version replacement at your own risk and risk, if anything, change back to Russian.
Well, perhaps, and the whole tutorial. There is more to set up there especially and there is nothing.
Pleasant drawing.
Good evening, friends!
Hyde was created for the sake of interest in Paint tool Sai or simply Sai.
Here I will tell you about the possibilities in this program. The first thing I want to tell you about brushes. Brushes in Sai can be customized for any subject of drawing. In this guide I'll tell you about a pencil. Many people like art pencil-drawn art, but in Sai it's like once available.

Paint tool Sai. Just click

So how do you set up your brush for an ordinary pencil? Everything is very simple, the settings of a normal Pen brush or another. If you catch it and take a pen to draw!
The brush settings under the pencil. Russian and Russian versions 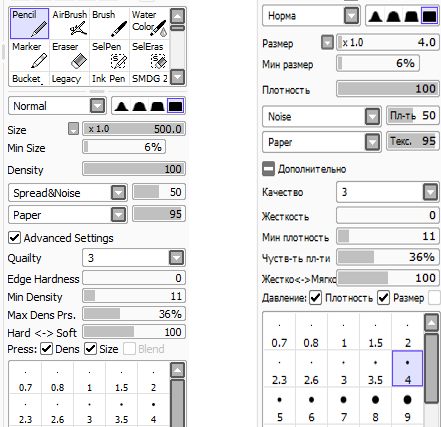
More interesting things I'll talk about later.
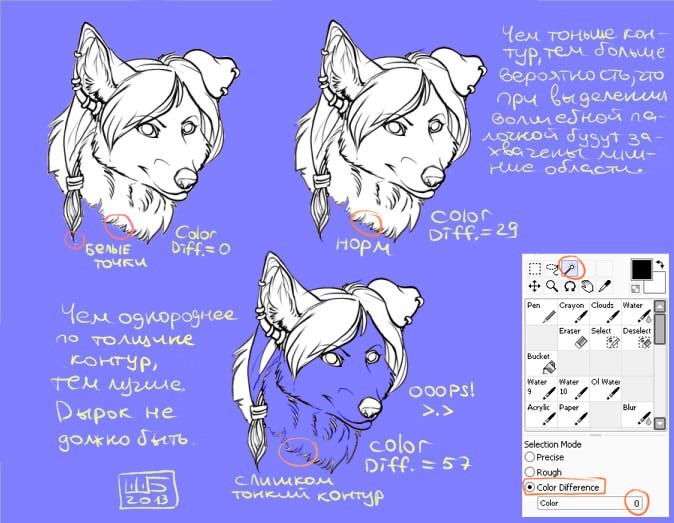
I will tell you about the "Outline selection" today.
Of course, for quick selection of the circuit and in saving time. For this I will give you an interesting explanation and settings.
First of all, let's select the outline itself, and after that we'll remove our "details" that were formed when selecting, using the SelPen tool. However, if you went behind the line this is fixable. You can just take the SelEras tool and remove everything.